Showing posts with label christmas ornaments. Show all posts

Wednesday, November 22, 2017

Stamped Clip Art Christmas Ornaments

Stamped-Snowflake-Santa-Clip-Art-Christmas-Ornament-by-Dana-Tatar-for-Paper-Wings-Productions

Hi friends! Dana here today sharing a fun Christmas ornament tutorial featuring Clip Art Sheets. All the Clip Art Sheets from the Paper Wings Productions Store are laser printed on high quality paper, which makes them great for image transfer techniques. I used pieces from the Itty Bitty Christmas Clip Art Sheet more simply for this project. I cut them out and sealed them with a layer of glaze for a festive focal point on some stamped snowflake ornaments.

How-to-Prime-Masonite-Snowflake-Ornaments-by-Dana-Tatar-for-Paper-Wings-Productions

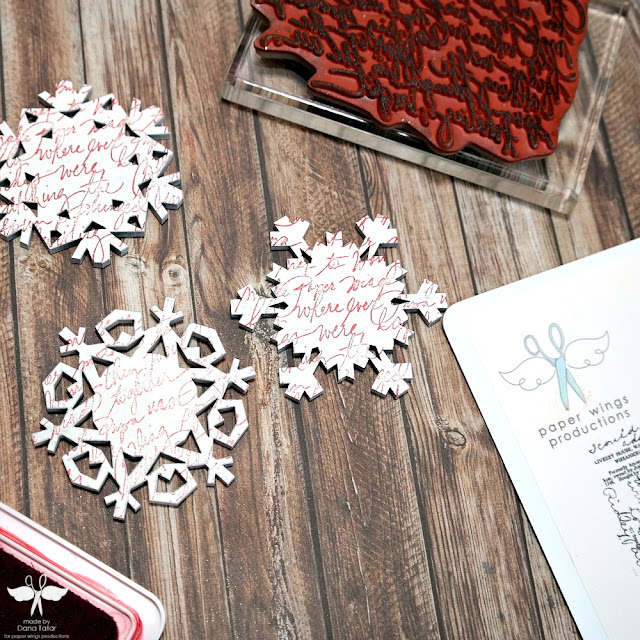
Step One: Prepare Masonite snowflake ornament blanks for stamping by applying a layer of white spray primer. Note: I chose a spray primer to quickly color the inside of the detailed cutouts on my snowflake ornaments. Gesso, acrylic paint, or embossing powder would also work for this step.

How-to-Stamp-on-Masonite-Snowflakes-by-Dana-Tatar-for-Paper-Wings-Productions

Step Two: Use the Writing Backgrounds Cling Stamp Set with red archival ink to add a script print to the snowflake ornaments bases.

Christmas-Clip-Art-Ornament-Assembly-by-Dana-Tatar-for-Paper-Wings-Productions

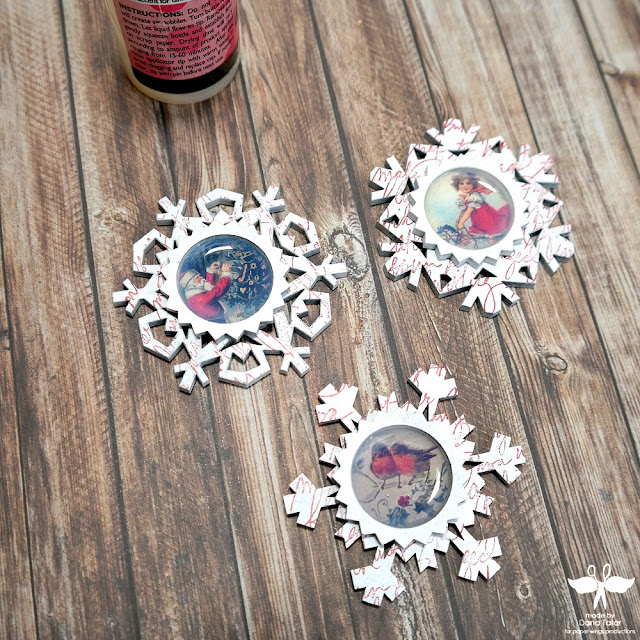
Step Three: Select several images from the clip art sheet and cut them down to size. Glue the clip art into the top layer of the ornaments.

How-to-Glaze-Clip-Art-for-Christmas-Ornaments-by-Dana-Tatar-for-Paper-Wings-Productions

Step Four: Cover the clip art images with a layer of glaze. Glue the clip art rounds onto the center of the snowflake bases.

How-to-Cut-Wire-Hangers-for-Christmas-Ornaments-by-Dana-Tatar-for-Paper-Wings-Productions

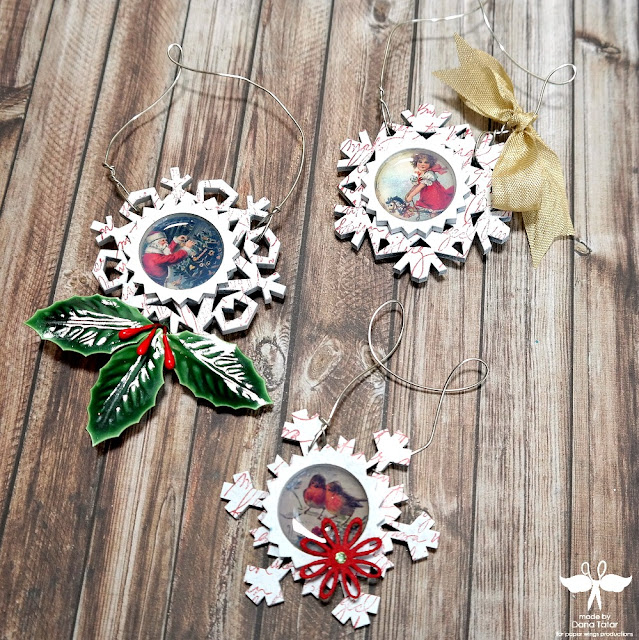
Step Five: Cut several lengths of wire. Bend and twist the wire into hangers and attach to the ornaments.

Stamped-Snowflake-Clip-Art-Christmas-Ornaments-by-Dana-Tatar-for-Paper-Wings-Productions

Step Six: Embellish the ornaments.

These ornaments look great on the tree, but they would also look fantastic as gift toppers. Be sure to visit the Paper Wings Productions Store to see the wonderful range of Christmas, Holiday, and Seasonal stamp sets.

Pin It!

Stamped-Snowflake-Christmas-Ornament-Tutorial-by-Dana-Tatar-for-Paper-Wings-Productions
Thanks for stopping by today and let your creativity take flight!

Wednesday, December 4, 2013

Joy to the World Ornament

Hello PWP Fans, Norma here with you today!!


I hope ya'll are doing well and enjoying all of the beautiful projects that my DT sistas have been sharing.  The days are going by so quickly and Christmas will be here before you know it so I'm trying my best to get the tree done and the rest of the house decorated.  Since I have a house full of guys, most of the decorating is left to me. Any who, with the holidays in full swing, I thought it would be fun to make a new ornament for our tree.


I altered a gift card tin to create this beautiful vintage inspired ornament.


I started out by stamping this beautiful fairy from the Fairy Friends stamp set.  She looks like an angel to me and the dove makes me think of peace, perfect for Christmas.  Next I created a mask to cover my fairy and then stamped/embossed the Starburst Pattern.


I colored her in with Prismacolor pencils then added Stickles to the dove and the flowers in her hair.  I also added small pearls to the center of the flowers.


I built the layers and then attached it my tin.  To create a woodsy scene, I used the pine tree from the Pines Cling Stamp set and the Acorns Elements stamp set.  I simply fussy cut each then used foam dots to add depth.


Once I was happy with all the layers, I glued her in the tin and added gold tinsel all around the inside edge.  I also added "Joy to the World" from the Wise Men stamp set.


To add the ribbon, I punched holes with my Cropadile.  I left the rest of the tin unfinished because really liked the look of the old rusty metal mixed with the tinsel, glitter and velvet ribbon.  I think she is gonna look beautiful on my tree (if I ever get it done, lol).  I'll add a pic of it on my tree to the PWP FB once my tree is done ;D


Don't forget to pick up one of the Dec Nesting Components kit, it's another beauty!!  Click HERE for all the details and to purchase your kit :D

Thank you so much for joining me today, have a wonderful day!!


Related Posts Plugin for WordPress, Blogger...