

We hope everyone had a great Fourth of July celebration. As it is the first Friday of the month it is time for a new Flight Plan mission, but first we'd like to announce that Andrea's card "Oh Happy Day!" was chosen as the Flight Plan: Mission 003 winner.

Not only did Andrea use the Flight Plan, with a few great modifications, but it also looks like her color palette is similar to our May Color Combo. Things I love about this card: dictionary paper inked and distressed as a backdrop to the heart and wings, the three gems on the yellow banner ribbon, and the sentiment turned on it's side. Very clever ideas! Stamps used in this project were from the Milagros and Happy Day sets.
Andrea, please contact Shay at shay@paperwingsproductions.com with the name of your choice of stamp set. Congratulations!
I like this month's flight plan and I'm looking forward to seeing what you come up with. The new release stamps are so fun and although you can use any Paper Wings stamps, I'm hoping to see some of the newly released stamps on your designs. Here is your mission - will you accept the challenge? We hope you join in!
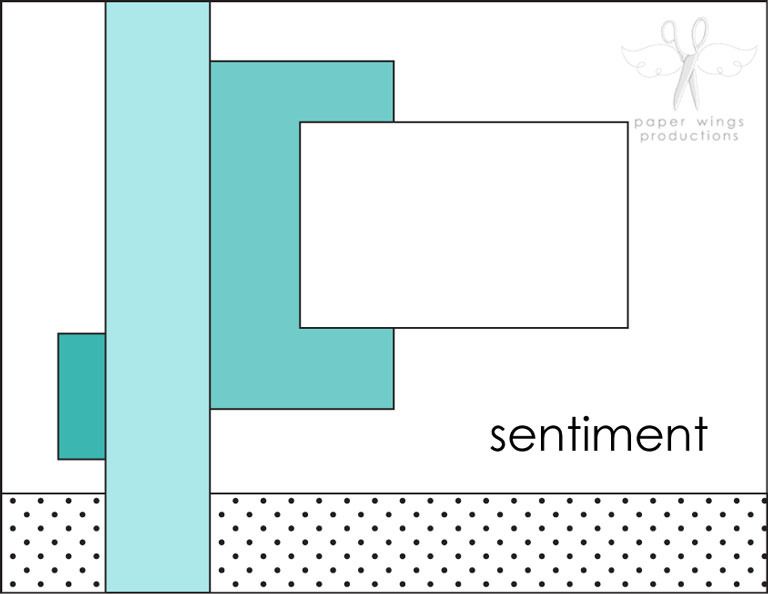
What is a Flight Plan?
It is a guide of sorts to get your project started by giving you some guidelines to follow, but in our case, we hope your creativity will interpret these plans into amazing and clever new creations. We’d love to see your finished pieces, so we have set up a Flickr gallery where you can share your submissions with us. So, put on those paper wings and get ready to take flight!
Your Mission:
Create a project (card, ATC, tag, scrapbook layout, multi-media piece, etc.) using paper wings productions stamps with the Flight Plan as your guide.
-
Share a picture of
your project on our Flickr group and/or pin your a picture of your entry on Pinterest. Make sure to tag it using this
code: #FP004 (make sure to include the #). If your picture is not tagged we will not know it
has been entered into the challenge and will be unable to find it.
-
You have until
Tuesday, July 31, 2012 at 11:59 p.m. central time to post your
entries.
-
Enter as many times
as you wish before the deadline.
- We will choose a winner to receive their wings and a stamp set of their choice.
We do have some samples using the Flight Plan: Mission 004.
Shay:

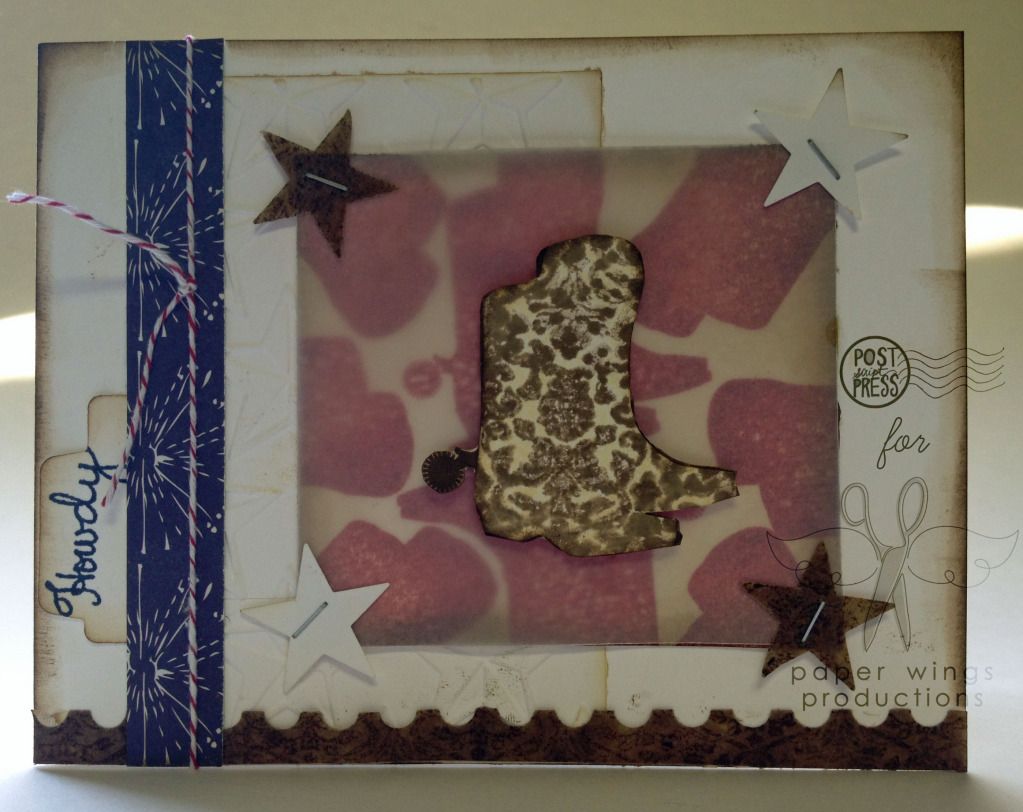
I did a little ode to Texas this time around. Starting with an A2 white cardstock base (4.25 inches x 5.5 inches or half of a 8.5 inches x 11 inches sheet of paper), I wanted to play around with the boots from Lyrics so I stamped them in a spiral sort of pattern in red ink on a piece of watercolor paper. I distressed the edges with my handy dandy Tim Holtz distressing tool using some brown ink.
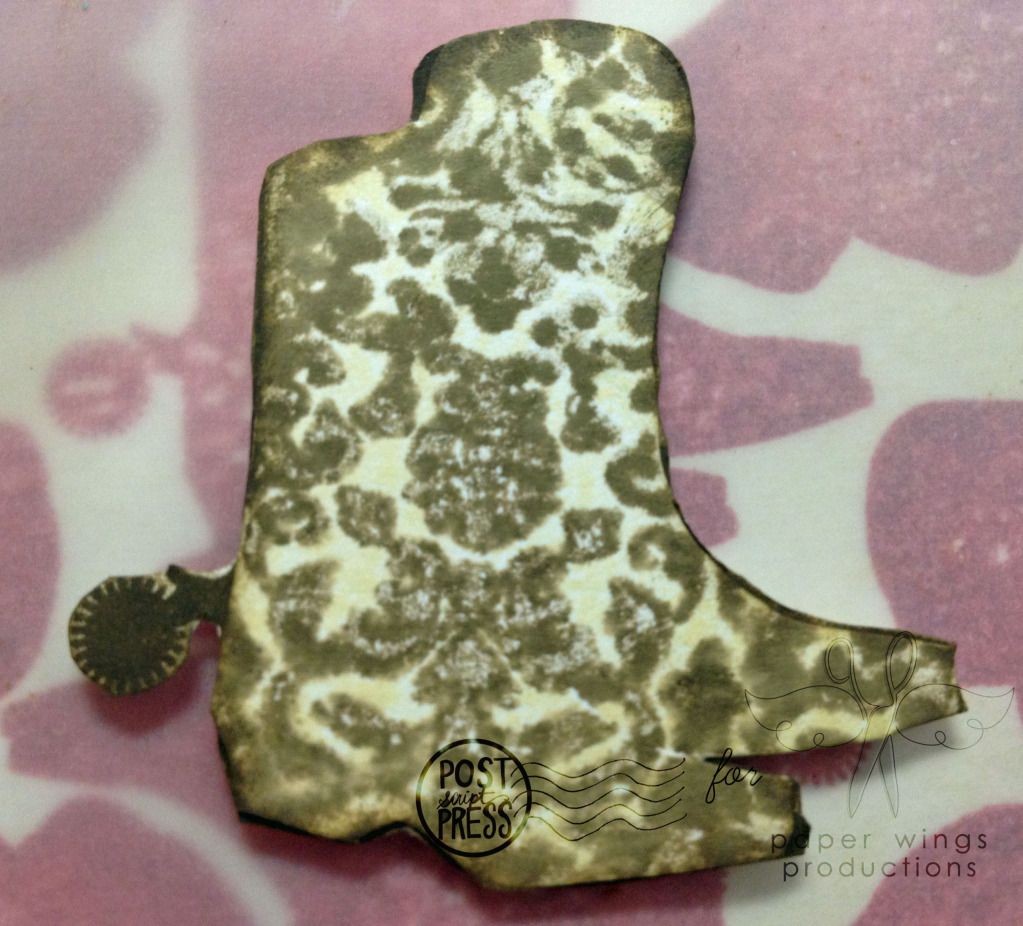
Next I inked up the boot in light brown. I then inked up the damask design from the Backgrounds stamp set in a dark brown ink and stamped the damask onto the actual boot stamp and then I stamped the boot stamp onto the paper. The final image turned out really cool I think. You can do this kissing technique with any solid stamp. I attached the damasked boots (cutting off the spur) onto a layer of boots I already stamped in dark brown so I could get a solid brown spur.

Because I wanted the brown boot to show up on the red boot background I chose to place a piece of vellum over the red to mute it a bit. To attach the vellum to the red boot panel I punched out two stars from white cardstock and two stars from kraft glassine from Tim Holtz which I stamped in dark brown with the damask onto each corner using my Tiny Attacher (love that thing to bits). I adhered the damask boots to the red boot and vellum panel using some dimensional adhesive to let it pop even more.
I embossed the stars on white cardstock using my Cuttlebug using a Cuttlebug embossing folder which I adhered under the boot panel onto the card.

Next I inked up the boot in light brown. I then inked up the damask design from the Backgrounds stamp set in a dark brown ink and stamped the damask onto the actual boot stamp and then I stamped the boot stamp onto the paper. The final image turned out really cool I think. You can do this kissing technique with any solid stamp. I attached the damasked boots (cutting off the spur) onto a layer of boots I already stamped in dark brown so I could get a solid brown spur.
Because I wanted the brown boot to show up on the red boot background I chose to place a piece of vellum over the red to mute it a bit. To attach the vellum to the red boot panel I punched out two stars from white cardstock and two stars from kraft glassine from Tim Holtz which I stamped in dark brown with the damask onto each corner using my Tiny Attacher (love that thing to bits). I adhered the damask boots to the red boot and vellum panel using some dimensional adhesive to let it pop even more.
I embossed the stars on white cardstock using my Cuttlebug using a Cuttlebug embossing folder which I adhered under the boot panel onto the card.
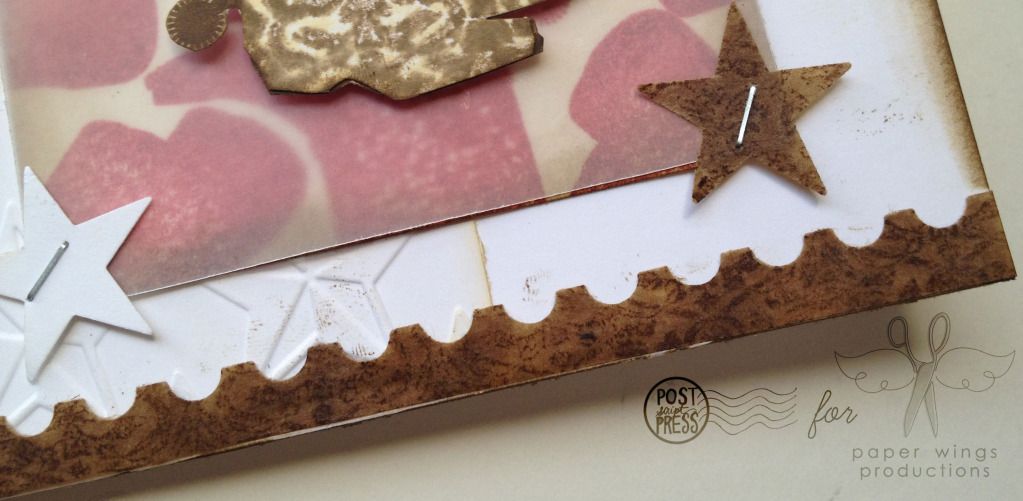
From the damask stamped kraft glassine paper I also punched out a postage edge which I adhered to the bottom of the card.

I cut along thiner strip from a dark blue patterned paper. I punched the tab and stamped "howdy" from Texas Sayings in dark blue, edging it in dark brown ink before adhering it under the blue patterned paper strip.
I tied some red and white baker's twine over the blue patterned paper and finished the whole card with inking the edges with brown ink.
There you have a pretty literal interpretation of this month's Flight Plan.
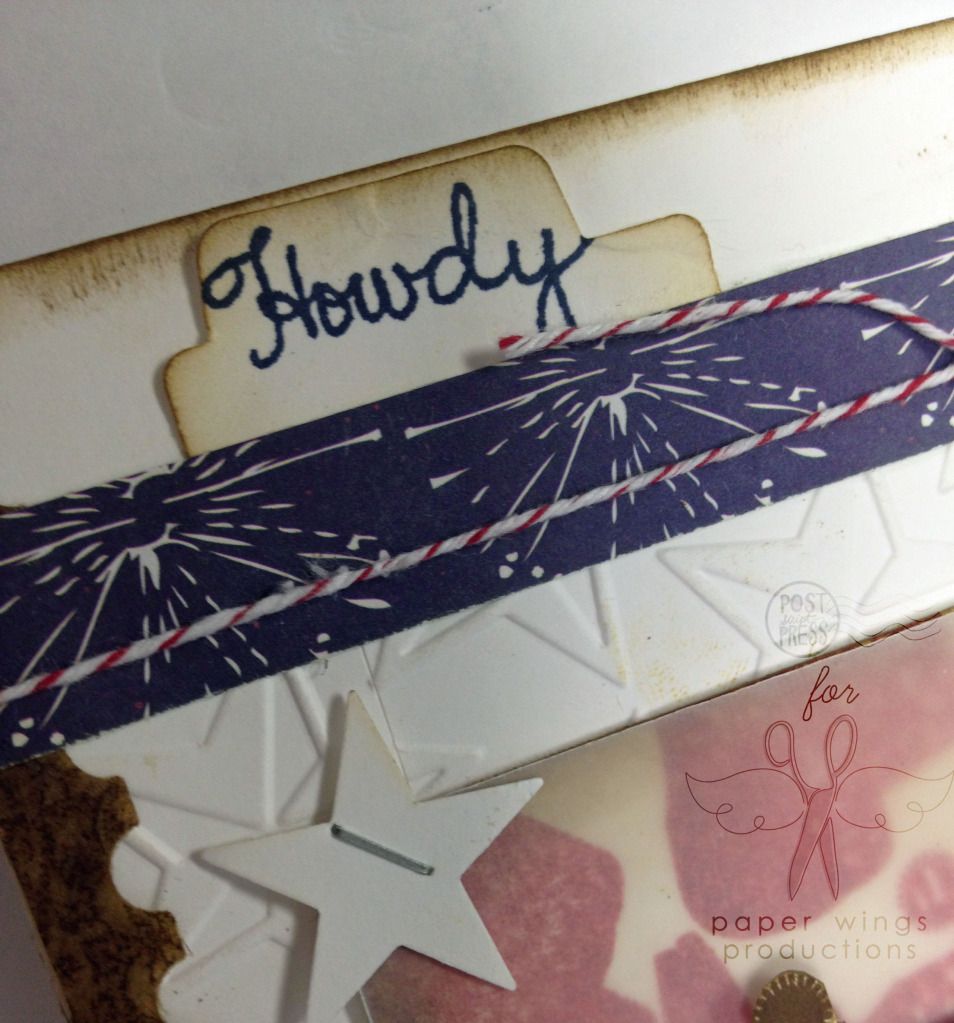
Stamps: Backgrounds, Lyrics and Texas Sayings
Ink: Jenni Bowlin by Ranger in spice tin, cough syrup, malted milk and brown sugar
Paper: Seasonal-Easy Green by Cherry Arte (older); kraft glassine by Tim Holtz; vellum
Cardstock: Neenah Papers in solar white
Tools: Tiny Attacher by Tim Holtz; Cuttlebug; star embossing folder by Cuttlebug (Provo Craft); Tim Holtz Distressing Tool by Ranger; dimensional adhesive by Scotch; liquid adhesive by Scotch; tab punch by Jenni Bowlin for Fiskars; postage border punch by Fiskars; star punch by Stampin' Up!
Embellishments: red and white baker's twine by Martha Stewart Crafts
Julie:
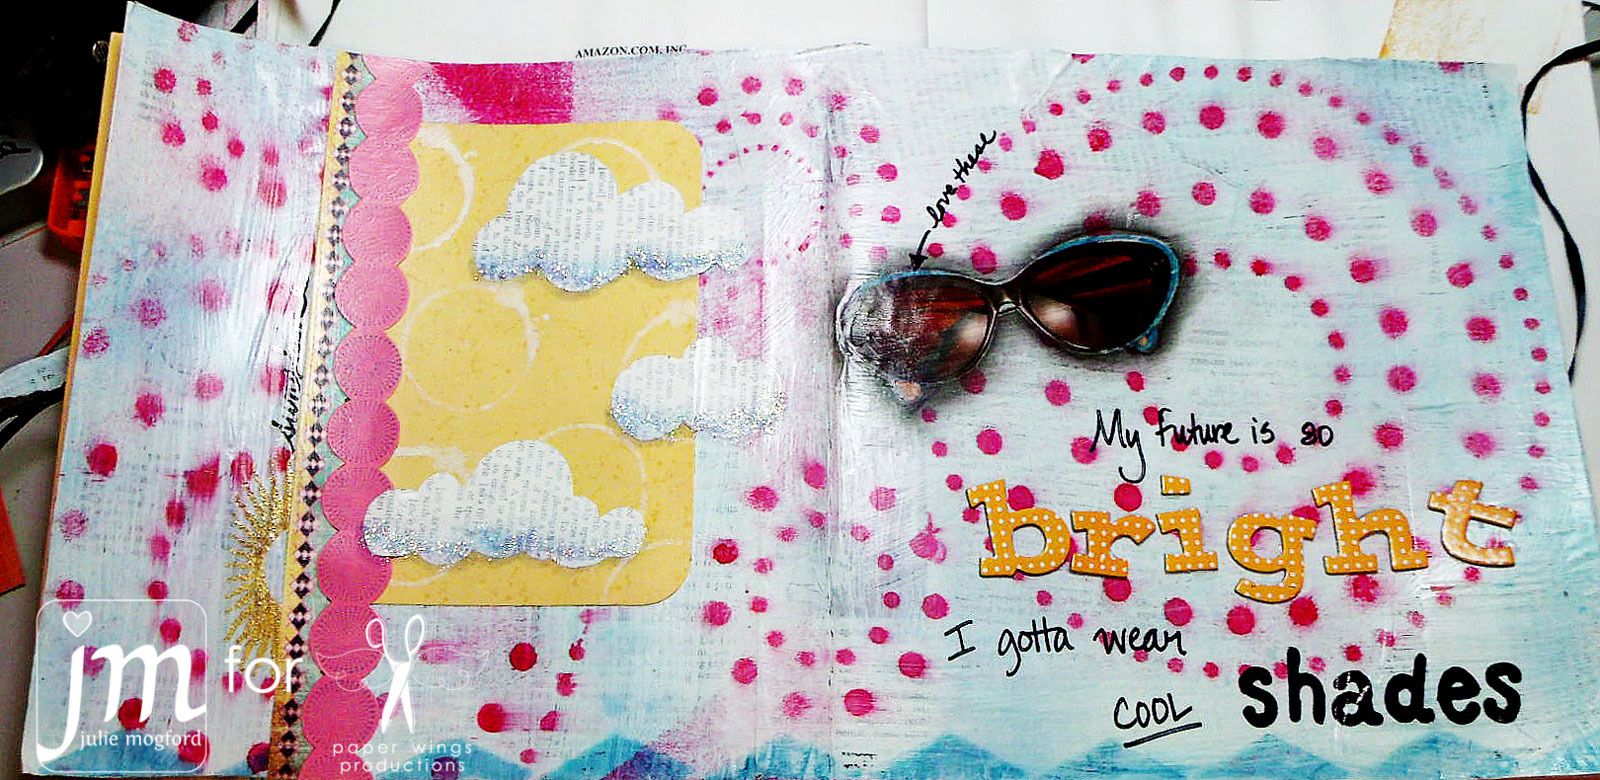
I chose to work in my art journal because I wanted to play a little today. I tried to think outside the box on this one. Can you pick out the paper wings stamps? I was a little sneaky with them this time. Take a closer look...

Here I have used the sun stamp from the Earth and Sky set and embossed it using Scattered Straw Distress Ink and JudiKins Egyptian Gold embossing powder. Although this picture doesn't do it justice, the sun looks so sparkly - love it!! The "circle" strip was created by stamping the Dots background from Backgrounds in Broken China on pink paper, and then cutting around the circles in a scallop shape.
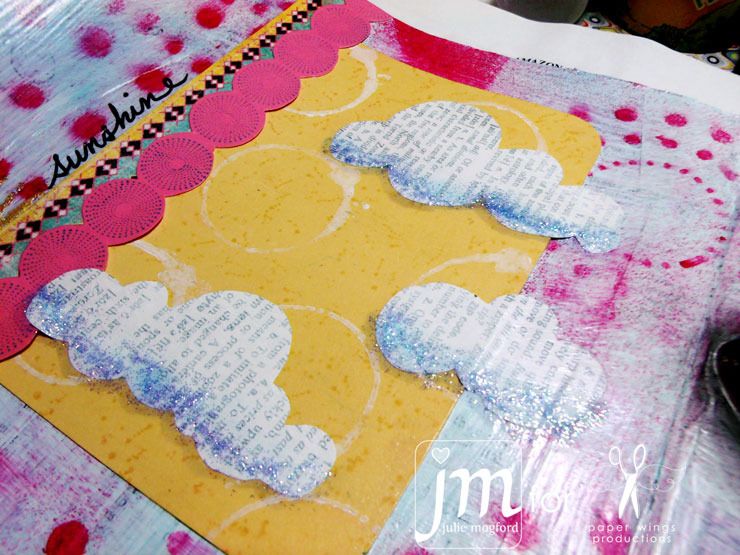
On the yellow paper, I used two stamps from the Art Textures set. The little dots were stamped in Scattered Straw and the white circles were stamped with gesso that I dabbed on the stamp with a makeup sponge. As soon as I was finished, I made sure to clean the stamp with soap and water so that the paint would come off quick and easy. I added a little Waterfall Stickles to the bottom of the clouds, and also shaded beneath with a copic marker.

Did you notice this triangle border at the bottom? I bet you would never guess what stamp I used. I took the new phonograph stamp from the Lyrics set, and turned it upside down, stamping it in Broken China along the bottom to create a zig zag triangle border. Finally, I used the Solid Whimsical Alphabet to stamp the word "shades". I also used Thickers and my trusty sharpie to complete the sentiment.
Stamps: Earth and Sky, Backgrounds, Art Textures, Lyrics and Solid Whimsical
Alphabet
Ink: Memento in tuxedo black by Tsukineko, Distress Inks
by Tim Holtz/Ranger, Sprays by Tattered Angels (Electric Blue and Trunk Bay). Pink is mixed.Paper: Basic Grey
Cardstock: Stampin' Up!
Tools: Sharpie, We R Memory Keepers Corner Chomper, Stencil, charcoal pencil, glue stick and Mod Podge
Embellishments: Thickers, Stickles, sunglasses by Betsy Johnson from Oprah Magazine, Egyptian Gold EP by JudiKins
We hope you try the new Flight Plan and look forward to seeing you creations!
Stay cool,
Paper Wings Gals

Congrats Andrea, enjoy your new stamp set! Your card is great, love it :D
ReplyDelete