Showing posts with label flight plan. Show all posts

Friday, August 3, 2012

Feature Friday--Flight Plan: Mission 004 Winner


Hello Peeps!


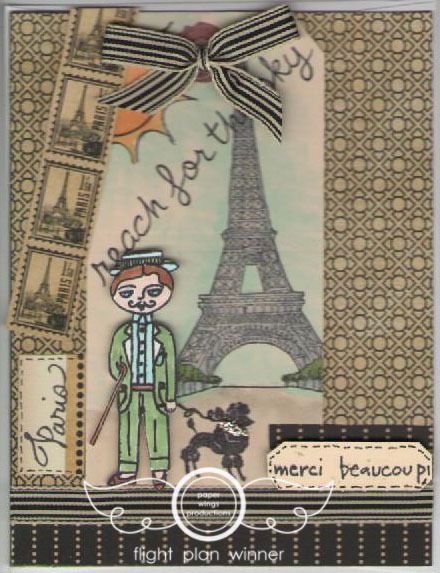
 I'm here to announce our Flight Plan: Mission 004 Winner today!  Mindy Miller's precious card has won this month's challenge, and it is so adorable.


There are so many things I love about this project. The pattern paper mix and muted color pallette really takes me back in time. I think Marcel is fantastic here with the poodle in front of the Eiffel Tower from the Paris set.  The sentiments are used on cute little labels that follow the sketch elements, and a row of postage stamps creates an excellent type of border strip here. And, what a great idea to put the focal image on a tag as part of the sketch plan.  Mindy this is so great!!! Thanks for playing along with us.

Mindy, please contact Shay at shay@paperwingsproductions.com with the name of your choice of stamp set. Congratulations!


That's all for today!  Have a great weekend and Happy Stamping!

Julie


Friday, July 6, 2012

Feature Friday--Flight Plan: Mission 004 and Mission 003 Winner

Hello Peeps!

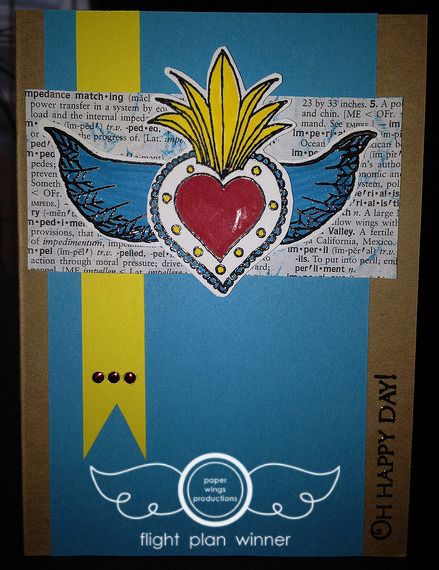
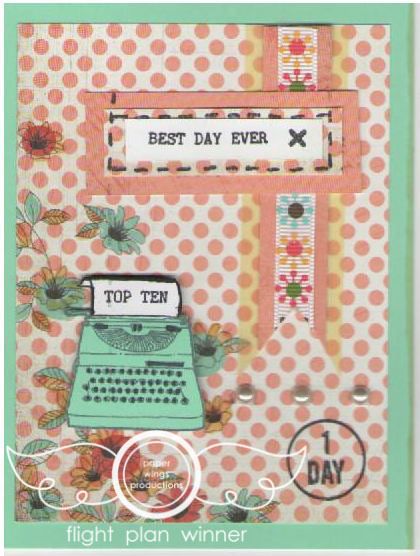
We hope everyone had a great Fourth of July celebration.  As it is the first Friday of the month it is time for a new Flight Plan mission, but first we'd like to announce that Andrea's card "Oh Happy Day!" was chosen as the Flight Plan: Mission 003 winner. 


Not only did Andrea use the Flight Plan, with a few great modifications, but it also looks like her color palette is similar to our May Color Combo.  Things I love about this card: dictionary paper inked and distressed as a backdrop to the heart and wings, the three gems on the yellow banner ribbon, and the sentiment turned on it's side.  Very clever ideas! Stamps used in this project were from the Milagros and Happy Day sets.

Andrea, please contact Shay at shay@paperwingsproductions.com with the name of your choice of stamp set. Congratulations!


I  like this month's flight plan and I'm looking forward to seeing what you come up with.  The new release stamps are so fun and although you can use any Paper Wings stamps, I'm hoping to see some of the newly released stamps on your designs.  Here is your mission - will you accept the challenge?  We hope you join in!


What is a Flight Plan?
It is a guide of sorts to get your project started by giving you some guidelines to follow, but in our case, we hope your creativity will interpret these plans into amazing and clever new creations. We’d love to see your finished pieces, so we have set up a Flickr gallery where you can share your submissions with us. So, put on those paper wings and get ready to take flight!

Your Mission:
Create a project (card, ATC, tag, scrapbook layout, multi-media piece, etc.) using paper wings productions stamps with the Flight Plan as your guide.
  • Share a picture of your project on our Flickr group and/or pin your a picture of your entry on Pinterest.  Make sure to tag it using this code: #FP004 (make sure to include the #). If your picture is not tagged we will not know it has been entered into the challenge and will be unable to find it.

  • You have until Tuesday, July 31, 2012 at 11:59 p.m. central time to post your entries.

  • Enter as many times as you wish before the deadline.

  • We will choose a winner to receive their wings and a stamp set of their choice.
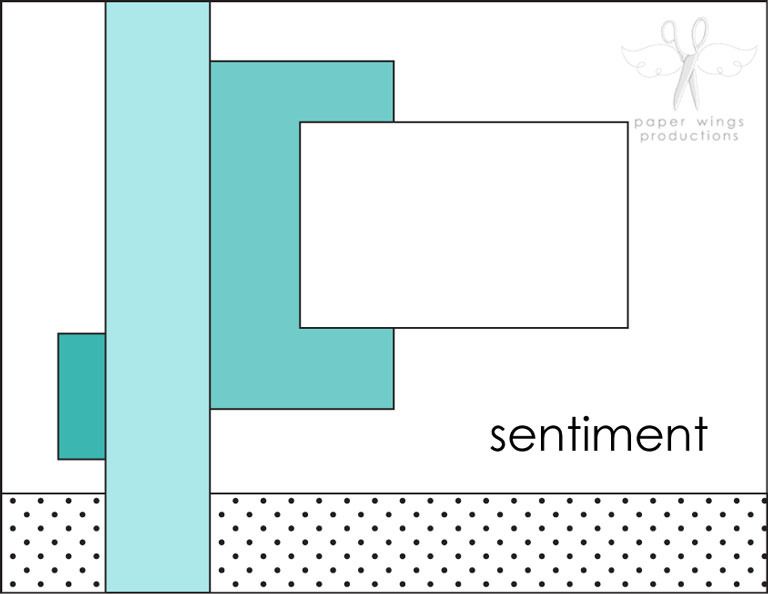
We do have some samples using the Flight Plan: Mission 004.
Shay:


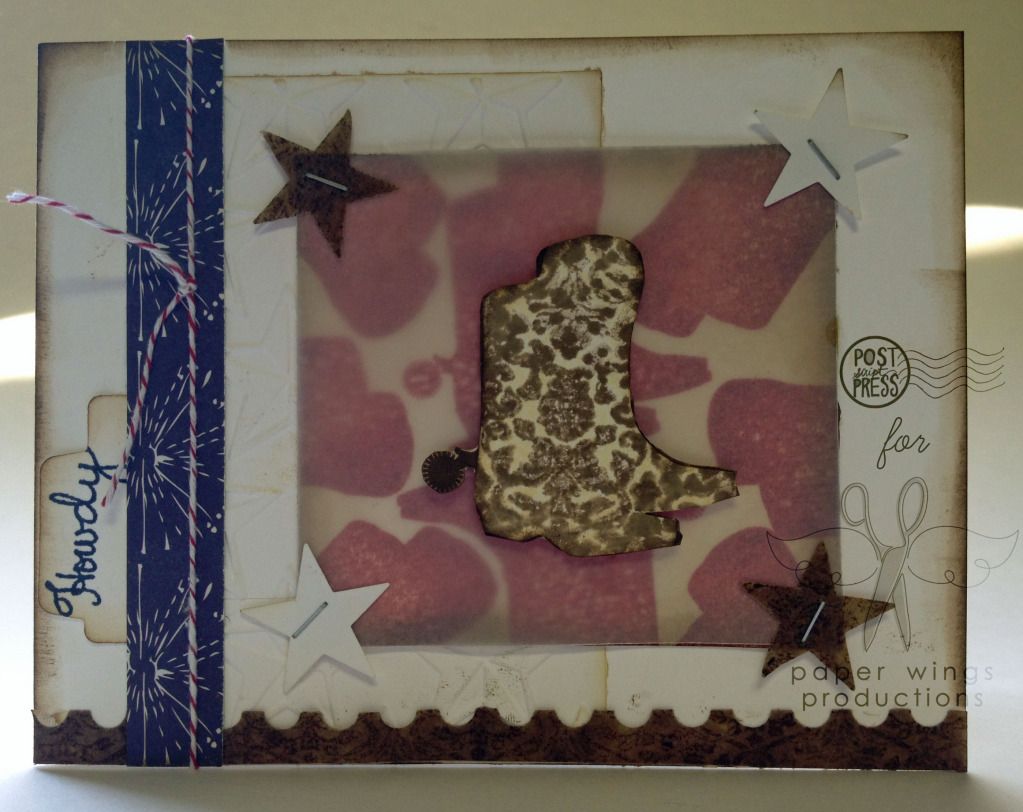
I did a little ode to Texas this time around.  Starting with an A2 white cardstock base (4.25 inches x 5.5 inches or half of a 8.5 inches x 11 inches sheet of paper), I wanted to play around with the boots from Lyrics so I stamped them in a spiral sort of pattern in red ink on a piece of watercolor paper.  I distressed the edges with my handy dandy Tim Holtz distressing tool using some brown ink.

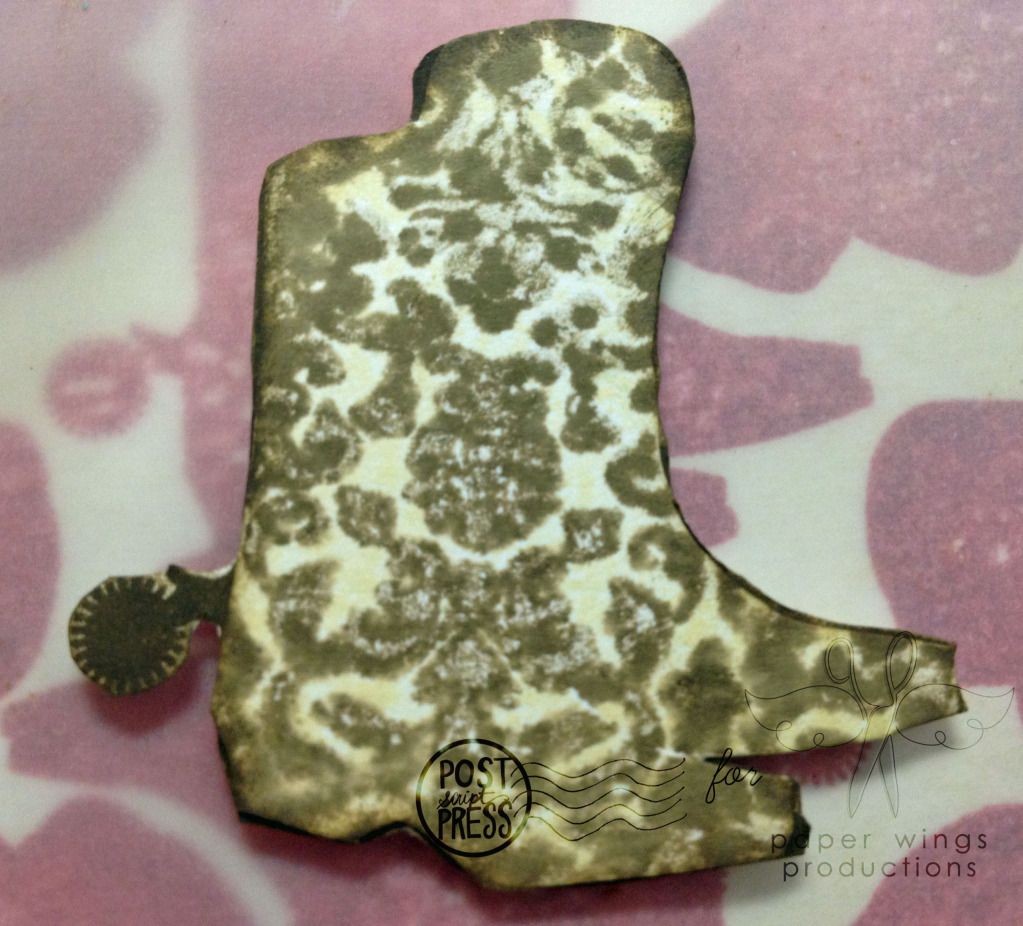
Next I inked up the boot in light brown.  I then inked up the damask design from the Backgrounds stamp set in a dark brown ink and stamped the damask onto the actual boot stamp and then I stamped the boot stamp onto the paper.  The final image turned out really cool I think.  You can do this kissing technique with any solid stamp.  I attached the damasked boots (cutting off the spur) onto a layer of boots I already stamped in dark brown so I could get a solid brown spur.


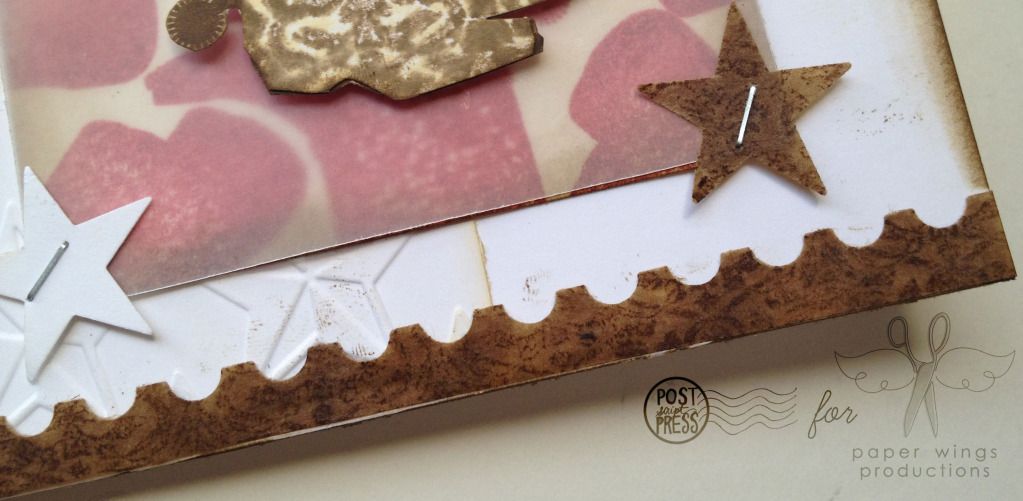
Because I wanted the brown boot to show up on the red boot background I chose to place a piece of vellum over the red to mute it a bit.  To attach the vellum to the red boot panel I punched out two stars from white cardstock and two stars from kraft glassine from Tim Holtz which I stamped in dark brown with the damask onto each corner using my Tiny Attacher (love that thing to bits).  I adhered the damask boots to the red boot and vellum panel using some dimensional adhesive to let it pop even more.

I embossed the stars on white cardstock using my Cuttlebug using a Cuttlebug embossing folder which I adhered under the boot panel onto the card.


From the damask stamped kraft glassine paper I also punched out a postage edge which I adhered to the bottom of the card.


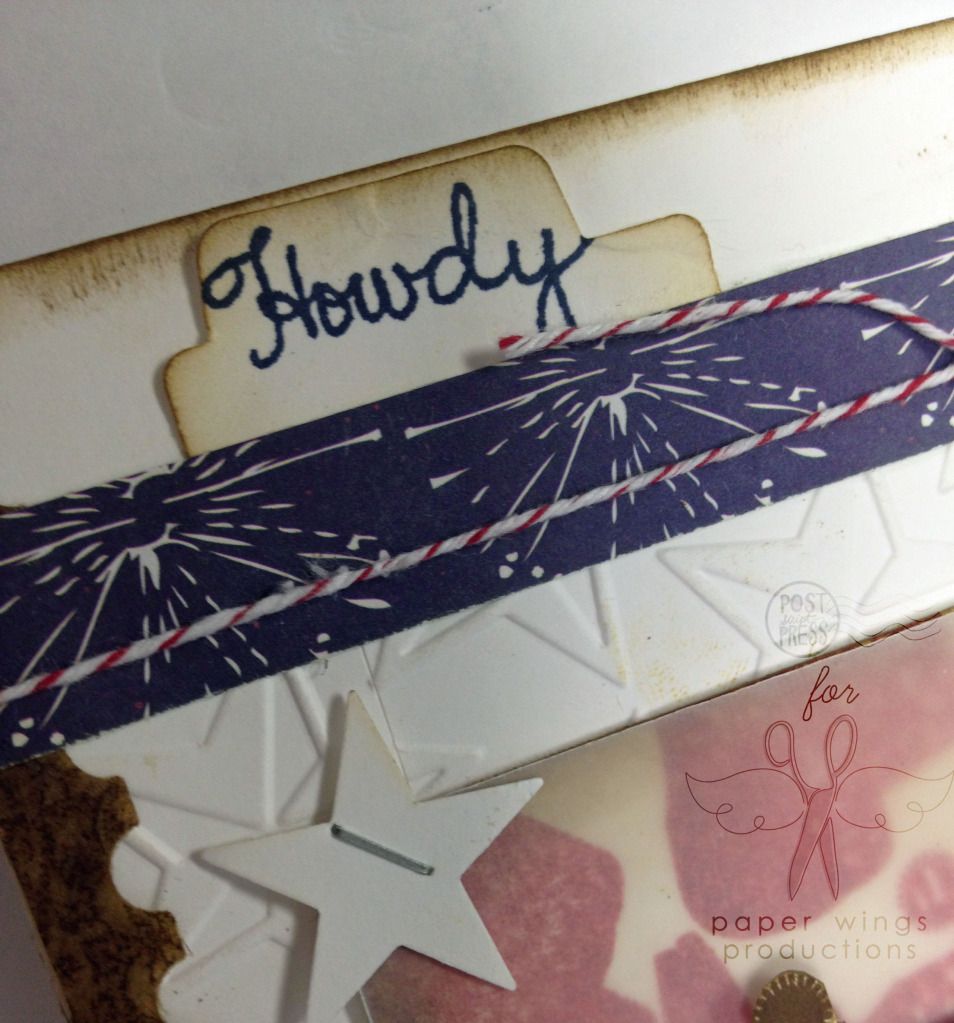
I cut along thiner strip from a dark blue patterned paper.  I punched the tab and stamped "howdy" from Texas Sayings in dark blue, edging it in dark brown ink before adhering it under the blue patterned paper strip.

I tied some red and white baker's twine over the blue patterned paper and finished the whole card with inking the edges with brown ink.

There you have a pretty literal interpretation of this month's Flight Plan.

Stamps: Backgrounds, Lyrics and Texas Sayings
Ink: Jenni Bowlin by Ranger in spice tin, cough syrup, malted milk and brown sugar
Paper: Seasonal-Easy Green by Cherry Arte (older); kraft glassine by Tim Holtz; vellum
Cardstock: Neenah Papers in solar white
Tools: Tiny Attacher by Tim Holtz; Cuttlebug; star embossing folder by Cuttlebug (Provo Craft); Tim Holtz Distressing Tool by Ranger; dimensional adhesive by Scotch; liquid adhesive by Scotch; tab punch by Jenni Bowlin for Fiskars; postage border punch by Fiskars; star punch by Stampin' Up!
Embellishments:  red and white baker's twine by Martha Stewart Crafts 


Julie:
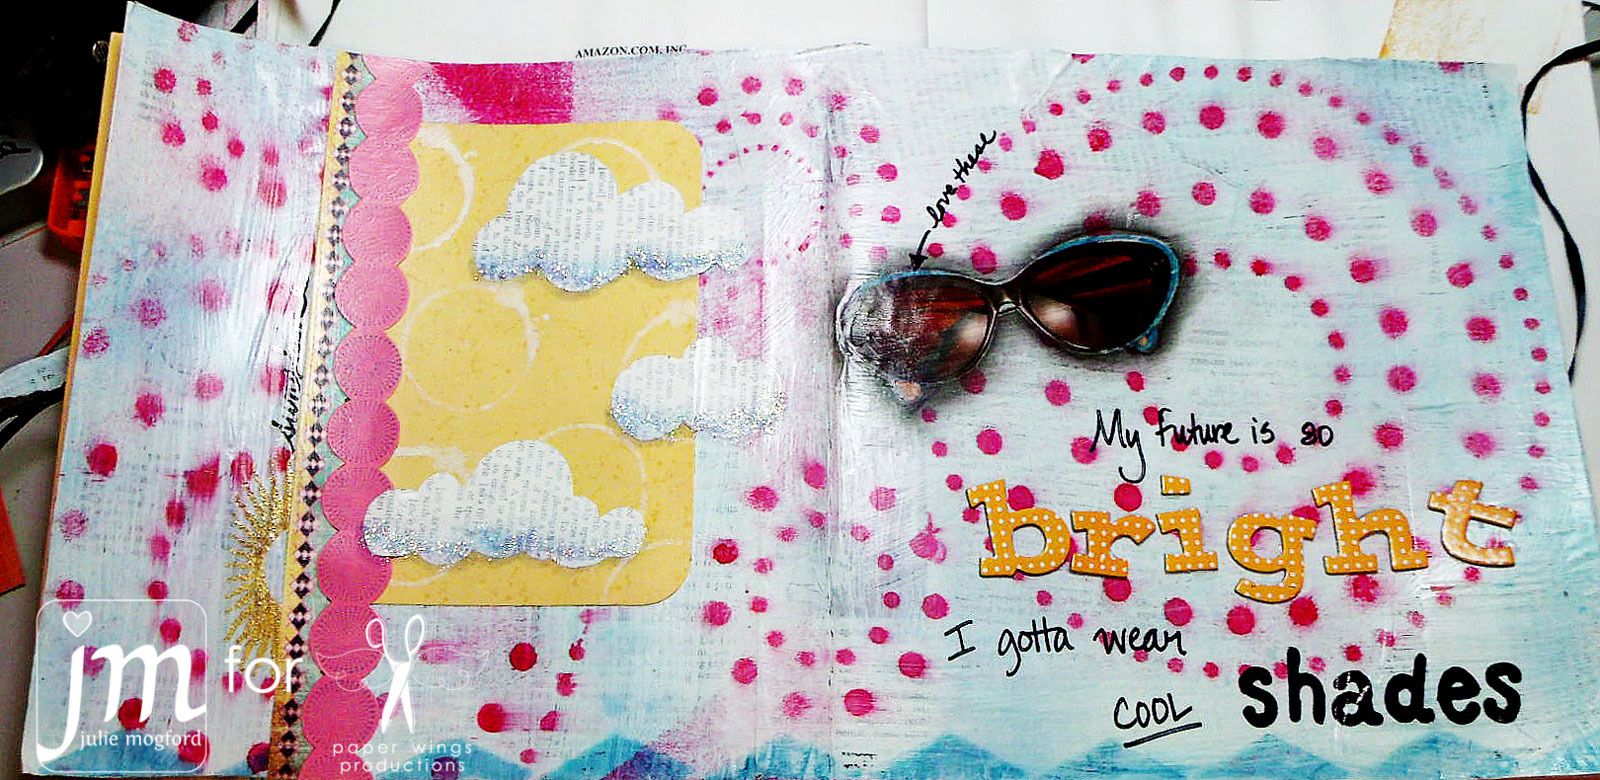
I chose to work in my art journal because I wanted to play a little today.  I tried to think outside the box on this one.  Can you pick out the paper wings stamps?  I was a little sneaky with them this time.  Take a closer look...
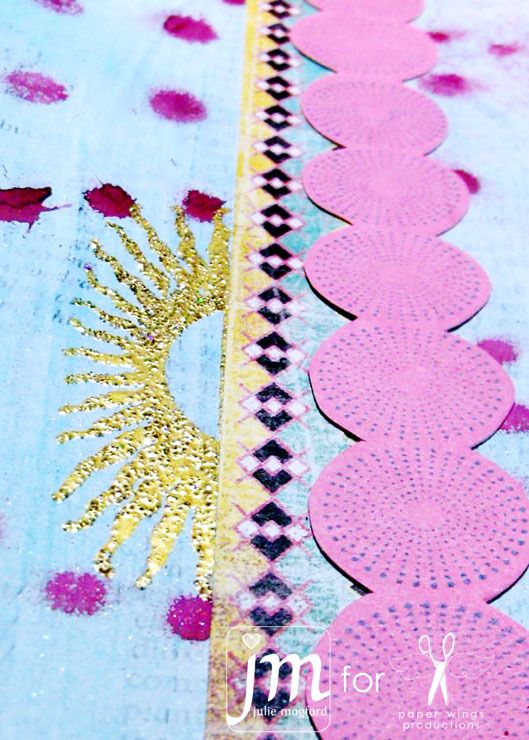
Here I have used the sun stamp from the Earth and Sky set and embossed it using Scattered Straw Distress Ink and JudiKins Egyptian Gold embossing powder. Although this picture doesn't do it justice, the sun looks so sparkly - love it!!  The "circle" strip was created by stamping the Dots background from Backgrounds in Broken China on pink paper, and then cutting around the circles in a scallop shape.

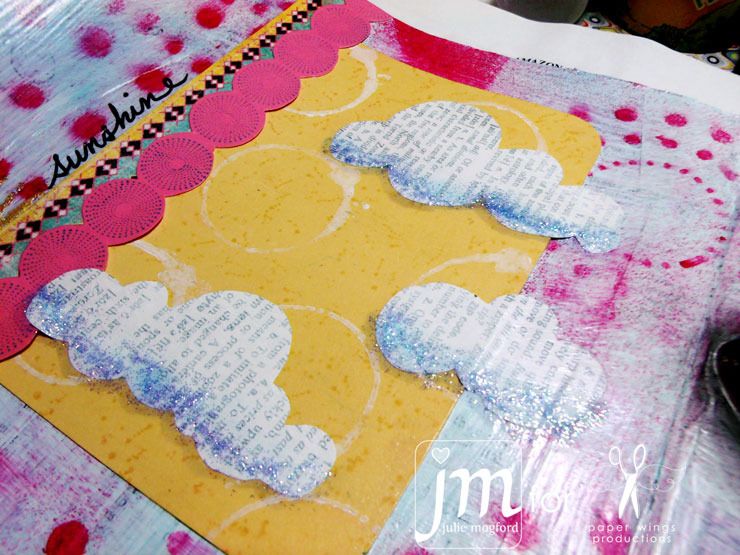
On the yellow paper, I used two stamps from the Art Textures set.  The little dots were stamped in Scattered Straw and the white circles were stamped with gesso that I dabbed on the stamp with a makeup sponge.  As soon as I was finished, I made sure to clean the stamp with soap and water so that the paint would come off quick and easy.  I added a little Waterfall Stickles to the bottom of the clouds, and also shaded beneath with a copic marker.


Did you notice this triangle border at the bottom? I bet you would never guess what stamp I used.  I took the new phonograph stamp from the Lyrics set, and turned it upside down, stamping it in Broken China along the bottom to create a zig zag triangle border.  Finally, I used the Solid Whimsical Alphabet to stamp the word "shades". I also used Thickers and my trusty sharpie to complete the sentiment.

Stamps: Earth and Sky, Backgrounds, Art Textures, Lyrics and Solid Whimsical Alphabet
Ink: Memento in tuxedo black by Tsukineko, Distress Inks by Tim Holtz/Ranger, Sprays by Tattered Angels (Electric Blue and Trunk Bay).  Pink is mixed.
Paper: Basic Grey
Cardstock: Stampin' Up!
Tools: Sharpie, We R Memory Keepers Corner Chomper, Stencil, charcoal pencil, glue stick and Mod Podge
Embellishments:  Thickers, Stickles, sunglasses by Betsy Johnson from Oprah Magazine, Egyptian Gold EP by JudiKins

We hope you try the new Flight Plan and look forward to seeing you creations!

Stay cool,
Paper Wings Gals


Wednesday, June 20, 2012

What's Up Wednesday: Flight Plan Mission 003

What's Up peeps?

What's up here is that we want to see your submissions to our Flight Plan Mission 003!  Now that the new stamps have been released there are even more possibilities to create with paper wings productions stamps.

Don't be intimidated.  If you make anything using paper wings productions stamps and the Flight Plan Mission 003 as your inspiration post it to our flickr group with the tag FP003 and you are entered to win a stamp set of your choice!  For more details about Flight Plan Mission 003 go HERE.  It really is easy.  Perhaps you need a little nudge.

Here is something I made with the flight plan in mind...something easy that can be changed to suit your preferences.


My sister's birthday is today and I knew she would need some thank you notes after her big day so I thought I would make a few to give to her on her birthday so she wouldn't have to wait for me to make her some later (me proactive!?!  Has the world turned on its end?).


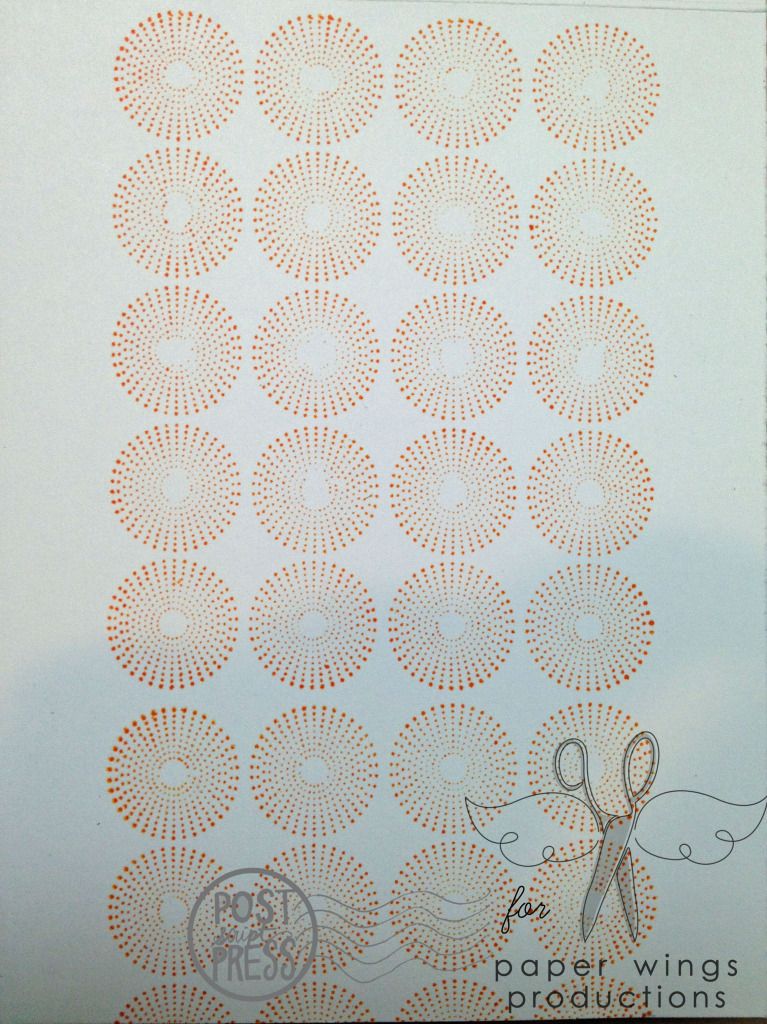
Using inexpensive white cardstock I stamped a strip of the circles from Backgrounds down the middle in Dried Marigold Distress Ink.  What I love about this stamp is it is really easy to align the stamp to repeat the pattern as needed.  Also, you don't need to have the stamp cover the whole surface.  I like it here as a block which mimics the larger background block on the flight plan.

Next I adhered some of the washi tape image from the Pop! kit by Ya Yeah Designs.  If you have not tried using a digital kit to make a hybrid project (printing out something from your computer and using the printed element in a physical project) then you are in for a treat.  Digital kits usually come with elements, alphabets and papers that you can print out as many times as you want or need and you can resize and recolor them!  On top of the washi tape, I adhered a strip of patterned paper from the Pop! kit.

On a strip of white cardstock I stamped "thanks" in Memento ink by Tuskineko spelled out using the Whimsical Solid Alphabet.  I love that with the alphabet I can stamp out the word I want.  Over the "thanks" I adhered a small typed sentiment.  Keeping a sheet of favorite sentiments or words to add to a project is really helpful.


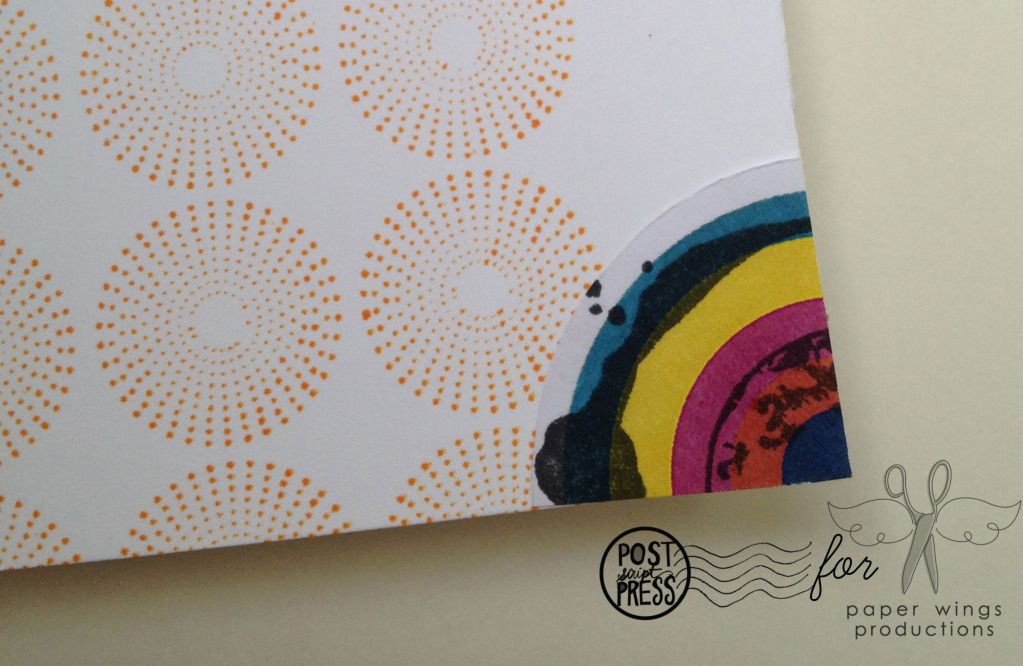
Lastly, there was a sort of bulls eye looking element from the Pop! kit I wanted to use, but I was struggling on how to use it.  I stamped over the element using the large circle from Art Elements and also the earth from Earth & Sky.  It still wasn't working right for this project until I decided to cut it up in quarters to add to the cards as a corner and then I was happy.  I love customizing elements by stamping over them and/or cutting them up.

I considered adding a button or two to the left of the "thanks", but as these thank you notes will most likely be sent in the mail I decided against it, but I think the card could look really cute with some buttons, bling, brads or other decorative elements of your choice.  I think I may even go to the store to get some small sequins that I could add without increasing the bulk for mailing.


Now, that you have seen how simple my cards are using the Flight Plan Mission 003, don't you think you could make something too?  I know you can!   And if you have any questions or problems, please do not hesitate to ask us.  We are here to help.

Take flight,
Shay.

Stamps: Art Textures, BackgroundsEarth & Sky and Whimsical Solid Alphabet
Ink: Memento in Tuxedo Black by Tsukineko; Tim Holtz Distress Ink in Dried Marigold by Ranger
Cardstock: Neenah Solar White
Patterned Paper: from Pop! kit by Ya Yeah Designs (free for a limited time!)
Other: elements from Pop! kit by Ya Yeah Designs (free for a limited time!); computer; color printer; circle cutter by Martha Stewart Crafts


Sunday, June 3, 2012

Flight Plan: Mission 003


Hello peeps!

It's Julie here with a new Flight Plan!  Are you ready for Mission 003?   It's June and I don't know about you, but things always seem to get busy in June - weddings, showers, Father's day, family summer gatherings - and I usually make more cards and projects this time of year than any other.  I can't wait to see your projects, and I am especially excited about the samples you will make when the new stamps are released!!!  The Paper Wings gals really love looking at your projects, but we want to see more.  How about inviting a friend to join you in this challenge?  That would be a fun weekend project!   Here is our sample for Mission 003.


What is a Flight Plan?


It is a guide of sorts to get your project started by giving you some guidelines to follow, but in our case, we hope your creativity will interpret these plans into amazing and clever new creations. We’d love to see your finished pieces, so we have set up a Flickr gallery where you can share your submissions with us. So, put on those paper wings and get ready to take flight!


Your Mission:
Create a project (card, ATC, tag, scrapbook layout, multi-media piece, etc.) using paper wings productions stamps with the Flight Plan as your guide.

  • Share a picture of your project on our Flickr group. Make sure to tag it using this code: FP003. If your picture is not tagged we will not know it has been entered into the challenge.
  • You have until  Saturday, June 30, 2012 at 11:59 p.m. central time to post your entries.
  • Enter as many times as you wish before the deadline.
  • We will choose a winner to receive their wings and a stamp set of their choice.
Shay's card


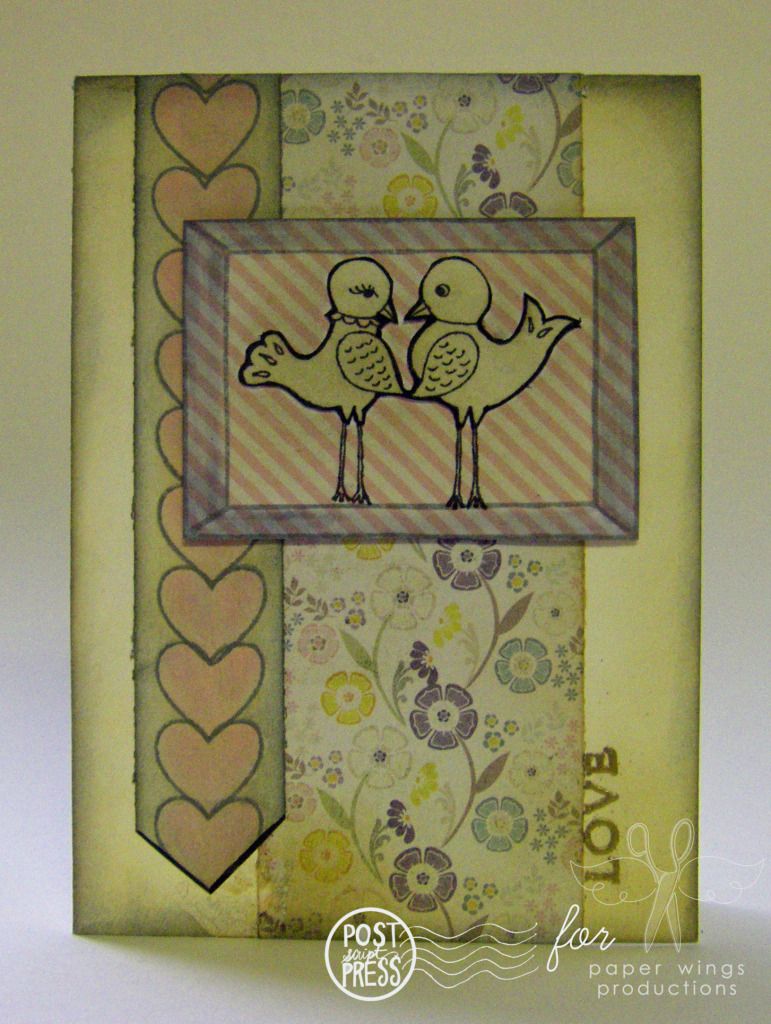
To begin with I wanted to try a card using the Flight Plan.  I decided to go with a love theme using the love birds from Home Tweet Home framed by the frame image from the Life Framer set.  The line of hearts was created using the heart from Frothy Concoctions (I so wanted to use that heart that I based the whole card around it).  Lastly I embossed the word love from Banner in gold using Tsukineko's Versamark ink.


Julie's Card


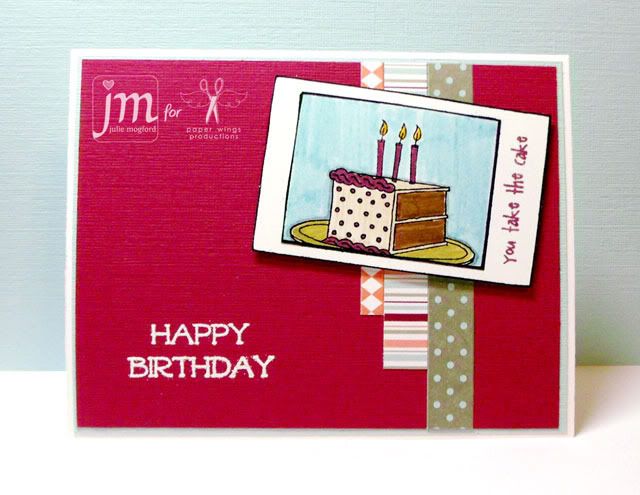
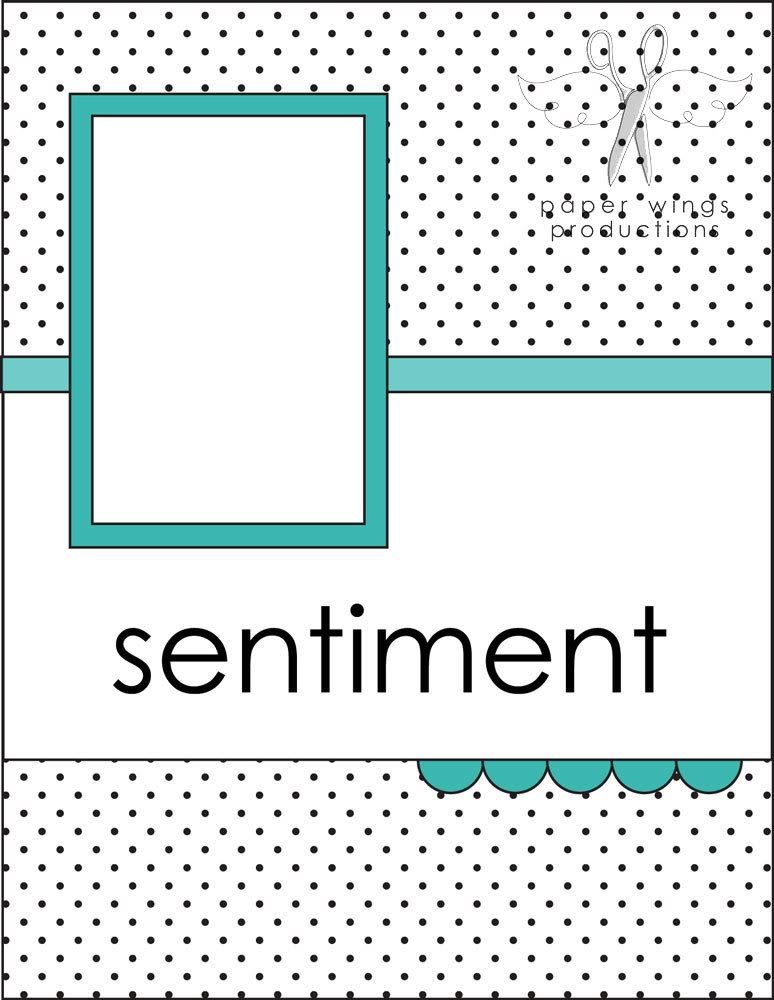
I chose to be very literal with the Flight Plan this time (but as you know from our other samples, you certainly don't have to). The coffee border stamp from Play With Your Coffee works nicely for the rectangle portion of the FP, and I grabbed the Happy Birthday sentiment from Let's Eat Cake.  I wanted to use my new Aquamarkers on this card, so I stamped it on watercolor paper with Memento ink from Tsukineko because once it is dry, it is waterproof - perfect for watercoloring.  I love this polka dot and found all of these pattern papers in my scrap pile.  This card came together in a flash!


We hope you like the new Flight Plan and we look forward to seeing your creations!

Paper Wings Gals
Friday, June 1, 2012

Flight Plan: Mission 002 Winner!

Hello Peeps!

We are so excited to share our May Flight Plan winning submission!  This beautiful card is by Mindy Miller. You can see more of her great projects at her blog.


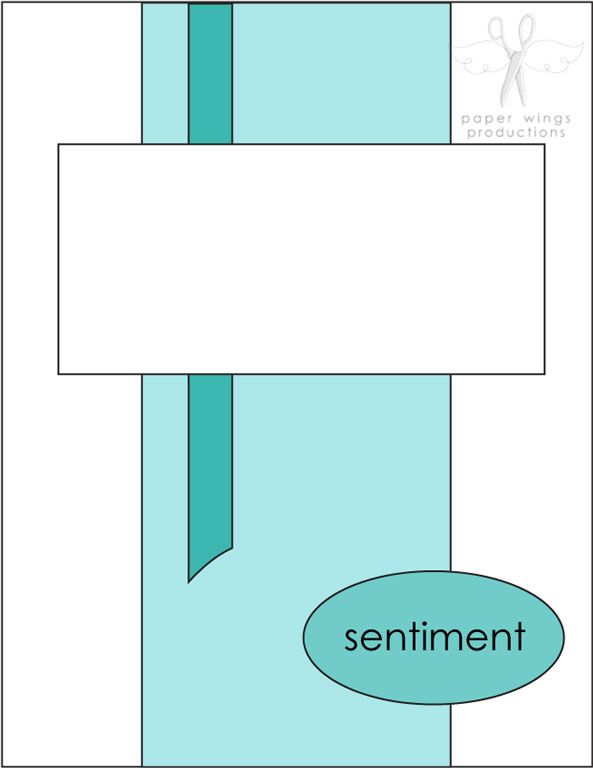
This is a great interpretation of Mission 002.  I love the color combo, and also the use of a variety of our stamps too!  Mindy used Vintage Technology and Day Framer stamps and came up with a very unique, retro card.  We really love it!

Mindy, please contact Shay at shay@paperwingsproductions.com with the name of your choice of stamp set. Congratulations!


Happy Stamping!
Julie

Tuesday, May 29, 2012

Still Time for Flight Plan Mission 002

Hello there peeps,

I just wanted to remind anyone interested in participating in Flight Plan Mission 002 that the deadline is almost upon us, but there is still plenty of time to enter (deadline: Thursday, May 31, 2012 at 11:59 p.m. central time).  We want to see whatever you create that is inspired by this month's flight plan.  For more details and inspiration check this post HERE.

If you want to find other projects we've made with the Flight Plan Mission 002, please check any of this month's posts as we have been using it all over the place.

Take flight,
Shay.

Wednesday, May 23, 2012

A little something for Mother and Baby!

Hi Peeps!

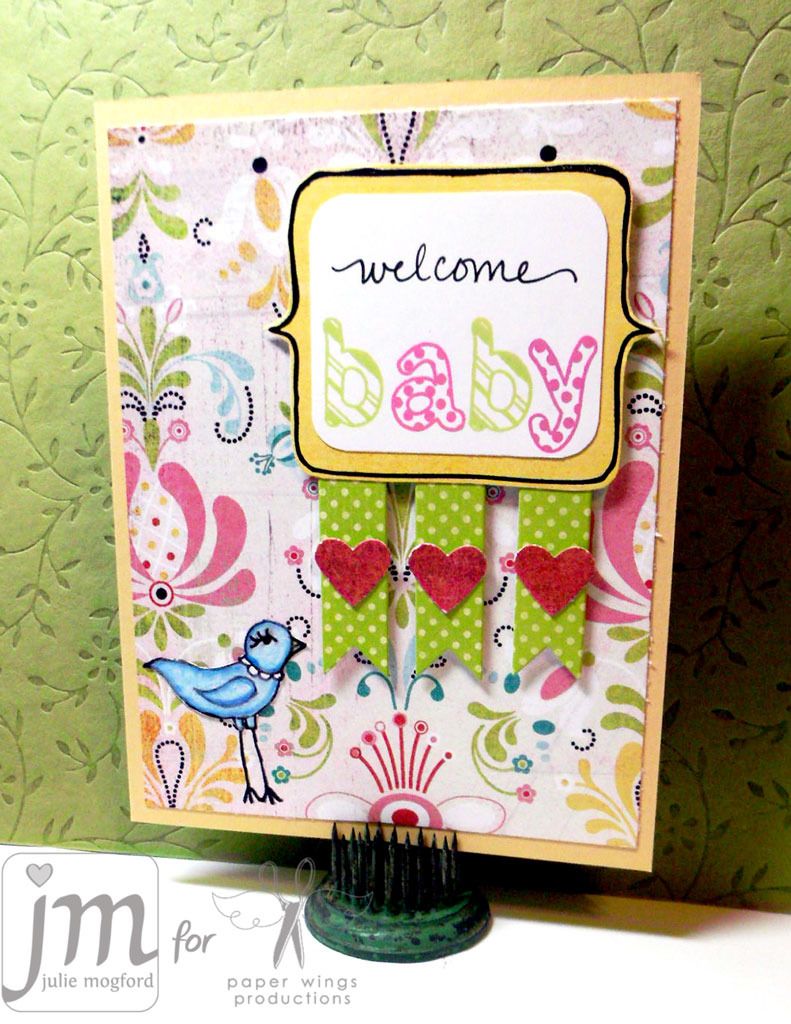
It's Julie here again.  I have a new card that I made for a baby shower that I want to share with you today. Have you ever sat down to make a card, and you look through your sets and realize that you might not have the images you think you need to make your project?  Well, that happened to me this week.  I found great paper to use, and knew I would try a new version of the Flight Plan Mission 002, but looking through the Paper Wings stamp sets, I didn't see anything that jumped out to me and felt "baby".  Then, I took a second look!  I found lots of items that I could mix and match to create the theme I needed.  I love it when a plan comes together :)

This sample includes the frame from the Details Framer set, letters from the Whimsical Pattern Alphabet set, and the "oh so cute bird" from Birds of a Feather.  Look at how it all came together!


I used chalk ink with the alphabet stamps for a color coordinated look.  I stamped the framer on a yellow paper and then trimmed it out and added the sentiment on top and rounded the corners for a custom fit.  I wrote "welcome" to add a little more to the sentiment.  I knew I wanted the bird in the bottom left hand corner, but she would never show up on the patterned paper, and I didn't want her on a separate element.  So - I stamped her on the background so the legs would be in place, then I stamped her on white cardstock, colored her with prisma pencils and then cut and adhered her to the card. 

This was a fun card to make, and would be great for any Mom to Be.  This card could easily be changed for a baby boy, even using the same stamps, and simply changing the colors.  You could even use a star punch instead of the heart.  If you would like to get more details about this card, check out this post on my blog.

I hope you enjoyed this card and maybe it will inspire you to get crafty!  And...If you haven't joined in on the Flight Plan Mission 002, we hope that you do.  We want to see all of the awesome things you are making with Paper Wings sets.  Maybe this Memorial Day weekend will provide some extra crafting time for you.  I know that's what I'm looking forward to!


Happy Stamping!

Julie

Friday, May 18, 2012

Color Combo Part II

Happy Friday peeps,

I know I am meeting this Friday with a great deal of relief.  How about you?  Are you too looking forward to the different pace of the weekend?  Planning on doing some stamping?

Today I have the second part of the yellow, aqua and coral color combo.  In this post are slightly larger projects than the cards from Wednesday.

Julie's project:


Julie made this timely (I could not resist that cheesy pun) art journal page using Flight Plan Mission 002 as a design guide.  Julie first painted the pages with white paint and then she used watercolor crayons to create the gradient yellow and coral background.  I love how she used Tim Holtz's tissue tape for the strips from the Flight Plan and that you can also see the color behind them.  The frame was cut out using her Silhouette and she colored it in with a Distress Marker (barn door)--even though the color is a red I think it could read as a very deep, rich coral.  Don't feel that the colors must match the color combo exactly...like the Flight Plan they are meant as a guide.  Some reds and pinks will be reminiscent of coral for instance. 

I am particularly taken with the punched circles that she stamped with various borders from Day Framer, Detail Framer, Life Framer and Snapshot Framer.  The days of the week are from Snapshot Framer and the date are from the Life Framer

How did she create those circles with perfectly coordinated colors of the stamped image and its background? Julie stamped each circle with one of the borders using Distress Inks in the following colors: tumbled glass, broken china, barn door, scattered straw.  To color in the backgrounds she took the ink pad and pressed it into her craft sheet.  She then sprayed or spritzed the ink she transferred onto her craft sheet with water (use a little water spray bottle) and used a paint brush to paint lighter shades of the color she stamped with onto the circles. 

To add some aqua (or in this instance teal) to the bottom left hand portion of her page she placed a piece of patterned paper under the gold (yellow) and red (coral) chipboard letters.

To future compliment her theme of time she stamped the clock from Melange Women 2 (I think) down the left hand side of the page.

Shay's project:


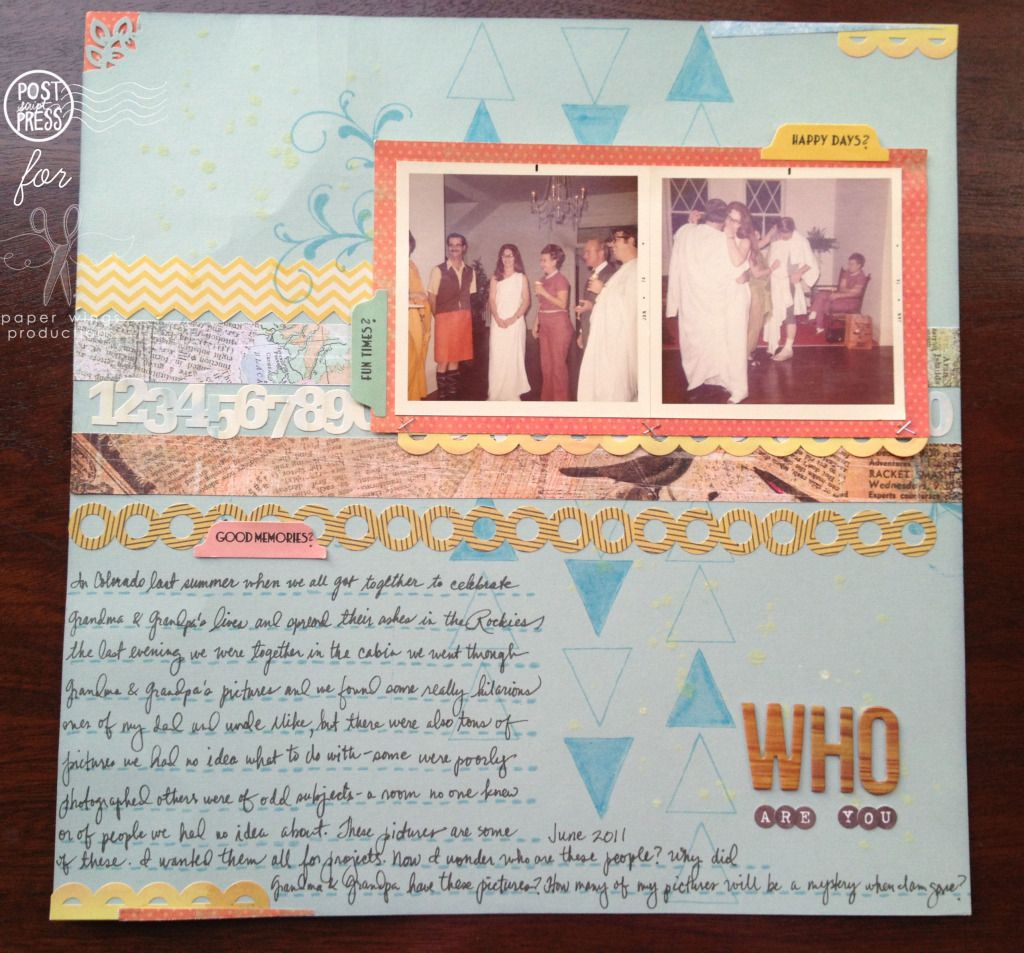
I decided to try my hand again at scrapbooking.  I haven't done a 12x12 spread in ages, but with a color combo and using the Flight Plan Mission 002 I thought I would give it a try.   The main point of this layout is the journaling because the pictures although really cool are a mystery.  Another thing that helped me to tackle something I was pretty unfamiliar with was a scrapbook kit from Studio Calico (Glee Club from September 2011 which had the right colors and elements I really liked).  I think it is always important to realize that you need not do it all.  There are all sorts of ways to help you to create like sketches (like our Flight Plans), color challenges (like our color combo) and/or ready made kits.  I also added a sticker sheet from October Afternoon which were in the right colors to pile of supplies to use along with some cream Mister Huey's (reads as a pale yellow color) which I used in the upper left hand side and lower right hand side.

In my scrapbook layout I think of stamping as the foundation.  I created lines of triangles that remind me of arrows using the large pennant from Happy Day to act as the strips from Flight Plan Mission 002, but also for movement and to direct the eye to the pictures.  I colored in a few odd triangles with an aqua colored marker.  I didn't realize until later that the triangles mimic the diamond pattern of the window in the right hand picture.  Happy accidents which no one but you has to know was unintentional...tell people you meant to do it!  I added the flourishes from Flourish Fun 1 under the upper left hand corner and lower right hand corner of the photo block for some interest and more of an organic feel after so many more angular elements.  All of my journaling was written on journal lines created from one of the border stamps from Day Framer...this border is perfect for journaling lines as you can stamp it over and over to make the line as long as you need it.

You probably noticed that my yellows, aquas and corals on this layout are a bit dusty or aged which is perfect for the older pictures whereas Julie's colors are more saturated and brighter reflecting a happy feeling.  You can always use variations on the colors to reflect your story or project. 
I hope you have the chance to play and experiment with something new or unfamiliar this weekend perhaps trying a new product, some stamps that you have been meaning to ink up, a different color combination than usual or a new technique.  We would love to see what you do!  Share with us on this post, our flickr group, Pinterest, Instagram (our user name is: paperwingsproductions), Twitter or Facebook!

Come back next week for some more Paper Wings Productions projects.

Take flight,
Shay.

Friday, May 4, 2012

Flight Plan: Mission 002


Hello peeps!

It's Julie again!  I can't believe it is already May, can you? April went by so fast.  The Paper Wings gals really enjoyed looking at the submissions for April and can't wait to see what this month's Flight Plan will inspire you to create. Are you ready?  Here we go... 


What is a Flight Plan? 

It is a guide of sorts to get your project started by giving you some guidelines to follow, but in our case, we hope your creativity will interpret these plans into amazing and clever new creations. We’d love to see your finished pieces, so we have set up a Flickr gallery where you can share your submissions with us. So, put on those paper wings and get ready to take flight!

Your Mission:
Create a project (card, ATC, tag, scrapbook layout, multi-media piece, etc.) using paper wings productions stamps with the Flight Plan as your guide.
  • Share a picture of your project on our Flickr group. Make sure to tag it using this code: FP002. If your picture is not tagged we will not know it has been entered into the challenge.
  • You have until Thursday, May 31, 2012 at 11:59 p.m. central time to post your entries.
  • Enter as many times as you wish before the deadline.
  • We will choose a winner to receive their wings and a stamp set of their choice.
Julie's Sample:  This time I chose to use a literal translation of the Flight Plan. The Snapshot Framer and Let's Eat Cake sets made quick work of this clean and simple birthday card.  I like this style, and with a few color changes, would be a perfect card for the birthday guy in your life.
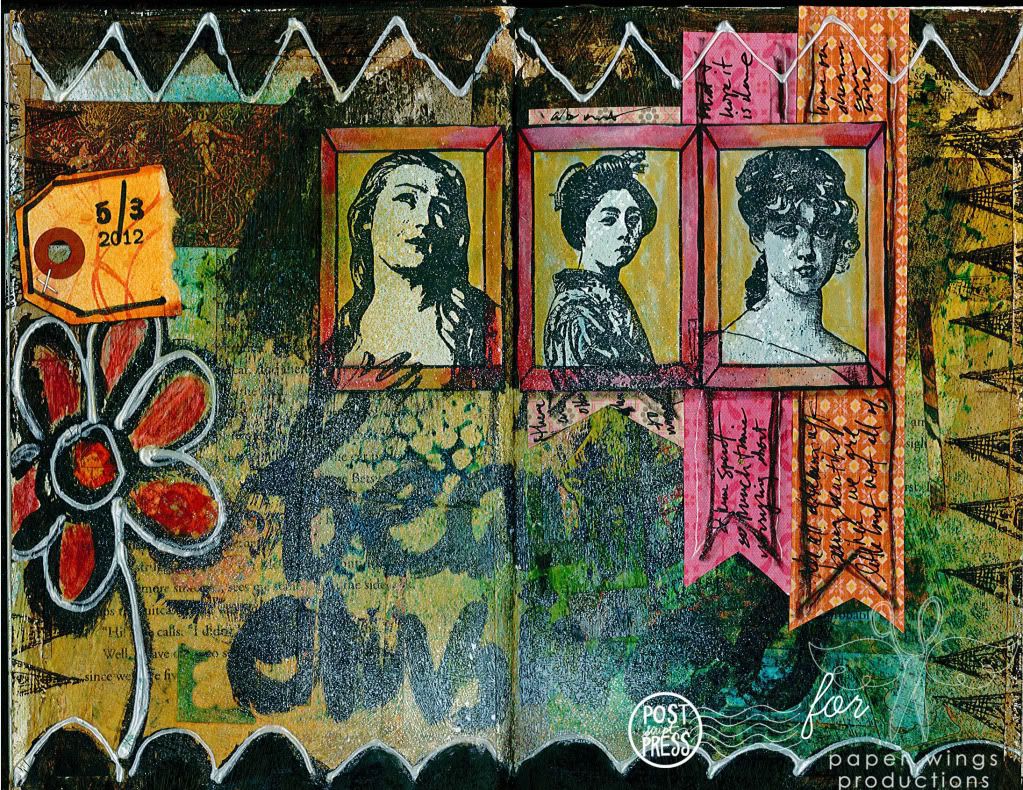
Shay's Sample: My interpretation is pretty literal too as an art journal page.  I decided to use three framed ladies to created the large block and used pattern paper strips behind the framed ladies for journaling.  I was able to use a few stamp sets...one was a leftover scrap from my first canvas.  Waste not, want not!  Stamp sets used: Melange Women (this one I use a lot), Geishas, Melange 4 -Architecture (I used the fairie panel and the tip of the pointed building on the left and right hand edges--fun find), Flourish Fun 2 (as background on the little tag) and Life Framer (the frame image, but also the numbers and year on the little tag). 


We look forward to seeing your creations! 

Happy Stamping!
Julie

Tuesday, May 1, 2012

Flight Plan: Mission 001 winners

Hello Peeps!

We are proud to announce the winners for the April submissions! These projects were so great!


This first winner is Zenda Weaver! For her project, she has used stamps from both the Milagros and Muertos sets. I love the addition of the wings to the Frida image. Bold, dramatic, striking color choices which reminds me of Frida herself. Nice!


Our second winner is from Jill, aka collected mess,  and she has used the borders and sentiments from the Details Framers set in such a unique way. The repetition of the scallop border in a variety of colors makes a very clever and fun background. And if you look closely, you will also see the x border used to accent the letters in LOVE. What a fun tag!

Zenda and Jill, please contact Shay at shay@paperwingsproductions.com with the name of your choice of stamp set.  Congratulations!

Hope to see you all for Mission 002 later this week!

Happy Stamping!
Julie

Monday, April 30, 2012

Enter Today!

Good Monday peeps!

Today is the last day of April which means it is also the last day to enter the Flight Plan Mission 001 challenge.  You have until 11:59 p.m. central time to upload a picture onto our flickr group using the Flight Plan Mission 001 as your inspiration.  You could win a stamp set of your choice.  We want to see your projects!

Here is Flight Plan Mission 001:


For some inspiration and details regarding the Flight Plan go HERE.  And should you have any questions about the Flight Plan or flickr, comment on this post or email me at shay@paperwingsproductions.com.

Take flight,
Shay.

Tuesday, April 10, 2012

Flight Plan: Mission 001


Hello peeps!
It’s Julie! I’m so excited to be here on the Aviary blog today.  I just wanted to take a moment to tell you all how much fun I had at the paper wings launch party at Stamp Antonio.  It was great seeing old friends, meeting new stampers, and exploring  the new stamps throughout the day.  Everyone seemed so excited about the new stamp line, and we couldn’t be happier about that!

Now that you have some of these fantastic stamps in your hands, we thought it was time to see some of your creations.  So, are you ready to let your creativity take flight?  Join us in our first Flight Plan challenge.


A Flight Plan is a guide of sorts to get your project started by giving you some guidelines to follow, but in our case, we hope your creativity will interpret these plans into amazing and clever new creations.  We’d love to see your finished pieces, so we have set up a Flickr gallery where you can share your submissions with us. So, put on those paper wings and get ready to take flight! 
Your Mission:
  • Create a project (card, ATC, tag, scrapbook layout, multi-media piece, etc.) using paper wings productions stamps with the Flight Plan as your guide.
  • Share a picture of your project on our Flickr group.  Make sure to tag it using this code: FP001.  If your picture is not tagged we will not know it has been entered into the challenge.
  • You have until Monday, April 30, 2012 at 11:59 p.m. central time to post your entries.
  • Enter as many times as you wish before the deadline.
  • We will choose a winner to receive their wings and a stamp set of their choice.
Shay and I took on the challenge and created these projects using the Flight Plan as a guide:

Shay's canvas

Stamps used: Melange Women, Melange 4 -Architecture and Flourish Fun 1


Julie's scrapbook page

Stamps used: Flourish Fun 2, Frida Por Vida, Day Framer, Life Framer and Detail Framer

If you have any questions, please comment here or email us at either: julie@paperwingsproductions.com or shay@paperwingsproductions.com.

Enjoy the process and Happy Stamping!
Julie
Related Posts Plugin for WordPress, Blogger...