Showing posts with label skeletons. Show all posts

Wednesday, October 1, 2014

October New Products

Here we are at the beginning of another month!  There are so many great things about October, the best is Halloween!  This month we are bringing you a Halloween Hodgepodge kit that has all sorts of fun products to jazz up your projects.


 The Halloween Hodge Podge Nesting Components Mixed Media Kit contains the following:
- Shrink Plastic Sampler Pack: 2 each of clear, translucent, white and black
- Skull 6"x6" stencil from Crafter's Workshop
- StazOn Midi Ink Pad - Black
- Halloween Stripe Washi Tape from Queen & Co
- Fall/Halloween Clear Stamp Set
- Water Soluble Oil Pastels
- Paper Bag (style will vary)
- Halloween Confetti
- Skull Beads
- Hand Dyed Tags
- 6"x6" Paper from My Mind's Eye
- 6 colored A2 size cards (2 green, 2 orange, 2 black)
- 1 yard of ribbon
- Assorted Die Cut Frames
- Clip Art Sheet


We have a BIG release of stamps this month.  This year we decided that we wanted some of our favorite images done BIGGER.  In this release we bring you some of our very favorite clear images done in cling mounted red rubber and BIGGER!  Here they are!


Here we have stamped out the original clear image (smaller) and the new bigger red rubber image so you can see the difference.


We hope you like our new selection as much as we do!  Click the links below to go shop.

Thank you for your continued support and enjoy the flight!

Carrie

Thursday, November 1, 2012

Feature Friday- Day of the Dead

Happy All Souls Day!

Here are some Day of the Dead tags I made with our stamps...


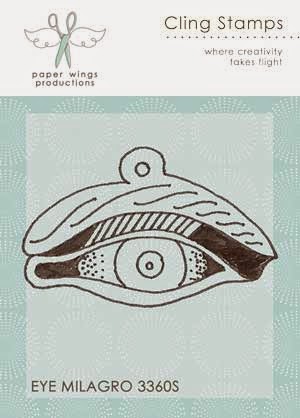
 I made this tag with the very versatile Build A Shrine set.  I have had the idea to make this set for a while.  I'm so excited to be able to use it!  This tag also uses the Circle Frame and the skeleton couple can be found on the Skeleton Melange set and the Skeletons sets.


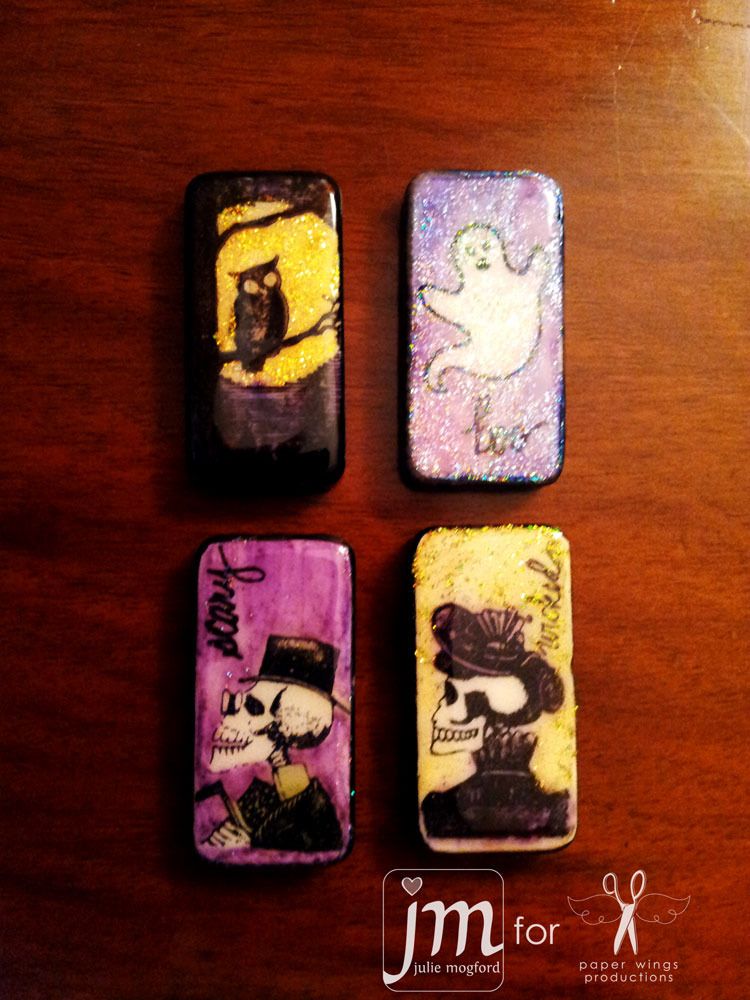
These tags I made with the Dia De Los Muertos Mujer along with the Build A Shrine set and Banner Day set.  These two were stamped with black ink on kraft colored tags and colored with colored pencils.  I love using colored pencils on colored cardstock.  The colors appear so vibrant!  Don't forget about the white pencil, perhaps my favorite.  You can blend and make high lights with it as well as being a must have for skeletons!  


Do you celebrate The Day of the Dead?  Here in San Antonio it is common for people to make shrines for their loved ones who have passed.  Want to know more about the holiday?  Here's an article I wrote for Somerset Studio magazine way back in 2003.  

While images of skeletons and talk of death conjure up uneasy feelings in many of us, the holiday Dia De Los Muertos or Day of the Dead, is actually all about the celebration of life.  At the end of October, preparations begin to remember those who have passed before us.  These are not sad times, but an occasion for remembering and rejoicing.  The holiday is intended to help us accept death, mocking its certainty as opposed to dwelling on death as solely a tragic end.

In the days leading up to the celebration, graves are cleaned and cared for while flowers- especially marigolds- are gathered from the market or gardens.  Special foods are prepared.  All of the work is done to commemorate All Saint's Day, November 1, a celebration for children and All Soul's Day, November 2, meant for adults.

Traditionally, celebrants arrange an ofrenda (offering/shrine) in the home to honor and respect the family member who has passed.  Objects from the individual's life and their interests make up the ofrenda.  These items may include glasses, jewelry, favorite foods and beverages, or perhaps a hat they may have worn.  Pictures of the family member or images that represent them are added if possible.  Marigold petals are often used to make a pathway between the front door and the ofrenda.  The petals are said to lead the souls back home.

All of these preparations and offerings are done out of respect and affection.  Dia de los Muertos is about respect for our ancestors who have, in one way or another, shaped who we are today.

Here's my family shrine my sisters and I made.  It features image transfers done on metal discs and canvas, hand made and traditional milagros, a stamped canvas piece, personal items from family members, newspaper articles, and lots of other favorite pieces.


I hope you enjoyed our post today!


Enjoy the flight,
Carrie

Friday, October 26, 2012

Halloween Greetings from Norma G


Hey there goblins & ghouls, Norma G here!!
Are you ready for all of the Halloween festivities?!  I know I am, I can't wait to show everyone one our costumes.  My hubby's is funny and mine is spooky but they go together like peanut butter and jelly, lol.  Since I've been working on our costumes this week I'm definitely in a Halloween mood so today I have a Spooktacular PWP card to share with you.


To make this card you're gonna need:
Black & Cream Cardstock
Exacto knife & White Gel Pen
Cuttlebug & The Fanciful Labels Plus Embossing Folder
Gesso & Black Stazon Ink
Tim Holtz Distress Inks: Black Soot, Walnut Stain, Vintage Photo & Spiced Marmalade
Black Embossing Powder & Black Bling

 It's that cool, let's get started putting this baby together!


I folded a piece of 12x12 cardstock then trimmed it down to 6 1/2 x 4 1/2 for my card base.  Then I cut a small piece of cardstock, stamped the Time Has Come stamp repeatedly to create a patterned paper and distressed the edges with Vintage Photo.


I used the postcard stamp from the Writings Backgrounds set with some gesso and just stamped it all over on both the front and back of the card.  I also inked all of the edges with Walnut stain.


I used the Build A Shrine set for this part.  I stamped the images on cream cardstock then used used Spiced Marmalade to color it in.   


I cut around the edges and slit the inner border with an Exacto knife to insert the other paper.


You can find the skeleton lady in both the Skeleton Melange and Skeletons sets.  I stamped both images with Black Soot and embossed, fussy cut around the Circle Frame and inked with Walnut Stain (I love inking, lol).


Time for layering!!  The 31st tag is from my stash (sorry can't remember who made it) and I inked it up with Spiced Marmalade & Walnut Stain.  I used Pop Dots on the Circle Frame and the shrine.  For the final touch I added some black bling flourishes by Recollections.


Moving on to the inside of my card, I used my Cuttlebug with the Fanciful Labels Plus Embossing Folder and inked with Walnut Stain.

The sentiment I used can be found on either Witchy Greetings or Witchy Halloween.  Finally I doodled around the edges with a white gel pen and that's it finito!!


Here's one last look at the finished card:

Thanks for joining us today!!

Have a fun, but above all else SAFE Halloween!!!

Feature Friday - It's time for Halloween!!


Hi Peeps!

It's Julie again!  I've been playing with my Paper Wings Productions Halloween stamps these last few days and I've made a couple of goodies I thought I would share.  First, we have the cute Cat on a Jack O Lantern stamped on a dylusions background, trimmed out in black glass glitter with a cute little Trick or Treat sentiment made from the Little Halloween set and the Tabs and Banners set. This is a Quick and Cute card, if I do say so myself!!


The other little project that came to mind was decorating dominos.  There are so many things I love about dominos and so many projects they can be used in.  I've made pins and necklaces with them, but this time I just can't decide.  What do you think?


This year I jazzed these up with a little stickles on the background before adding a coat of Glossy Accents (Ranger).  These pieces include stamps from Owl on a Branch, Skeletons, Fall Add Ons, and the Halloween Mix It Up set.  All of the images were stamped with Stazon Ink, and colored with Distress Markers.  I had to get the Distress Marker color dry before adding stickles and glue because they will react.  You could also spray them first, but I was not in a "wait for it to dry" mood. Having said that, I did leave the dominos to dry overnight with the Glossy Accents coat.  LOL.


If you are in town and also in the mood to get your hands inky with shades of Halloween, come by Stamp Antonio this Saturday for two Make & Takes and a demo ALL FOR FREE using the new PWP Holiday line of stamps.  Our event lasts from 11-1.  We also have a shrink plastic bracelet class from 3-5.  Please call 210-764-7900 to register for the class.  Hope to see you there!


And, one more reminder:  Today is the last day for our loyal blog readers to take 15% off NEW stamps. Use the code BLOGLOVE when you check out. An easy way to find the NEW stamps is to click the word NEW under the categories on the right hand side of the shopping cart.


Happy Stamping!


Julie


Related Posts Plugin for WordPress, Blogger...