Showing posts with label tabs and banners. Show all posts

Thursday, August 8, 2013

Themed Thursday: Vintage Technology


Hello there peeps!  It's Shay here.  For today's Themed Thursday I was inspired by our recent Vintage Design Team Blog Hop.  A little side tracking here: I strenuously suggest checking out this month's Blog Hop if you have not already for awesome projects and to welcome our new design team members, Cathi and Irit.  Don't forget to also check out Irit's deco-riffic project in her very first post here on The Aviary and Dana's glorious tutorial and altered box

As a departure from my own blog hop project, I wanted to do a more colorful spin on vintage. 
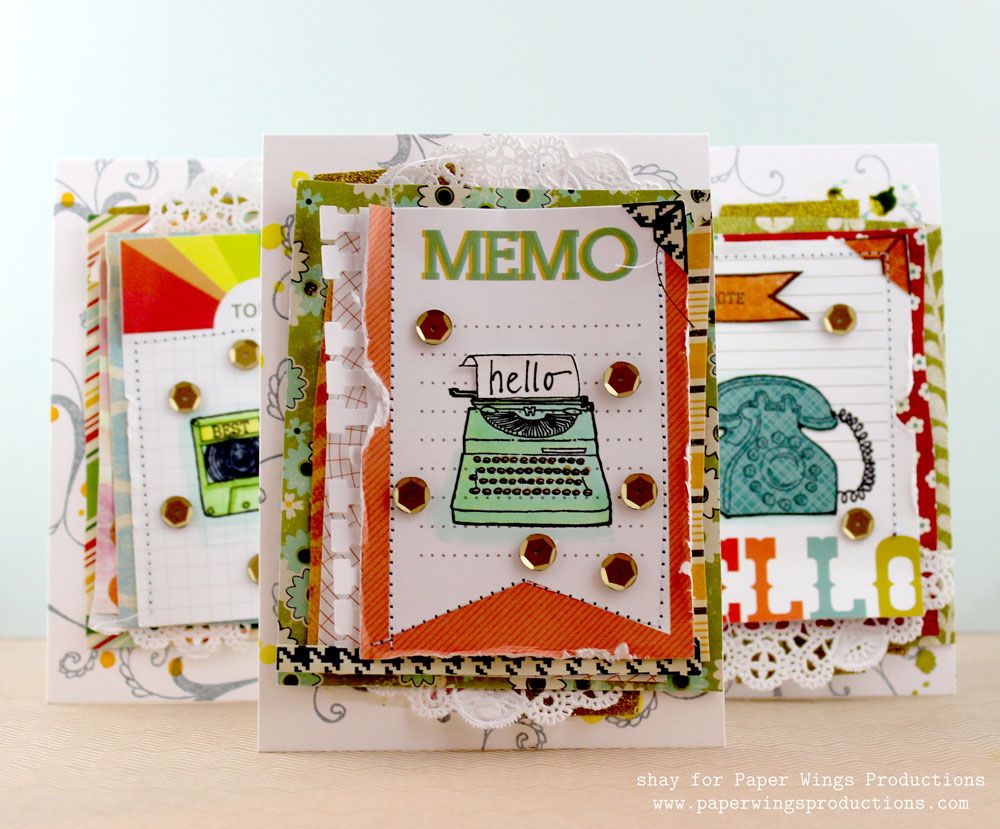

I pulled out my well loved Vintage Technology stamp set and some other stamp sets like Flourish Fun 1, Day Framer, Life Framer and Tabs & Banners, some journaling cards, lots of patterned paper and a few other items. 

Card No. 1
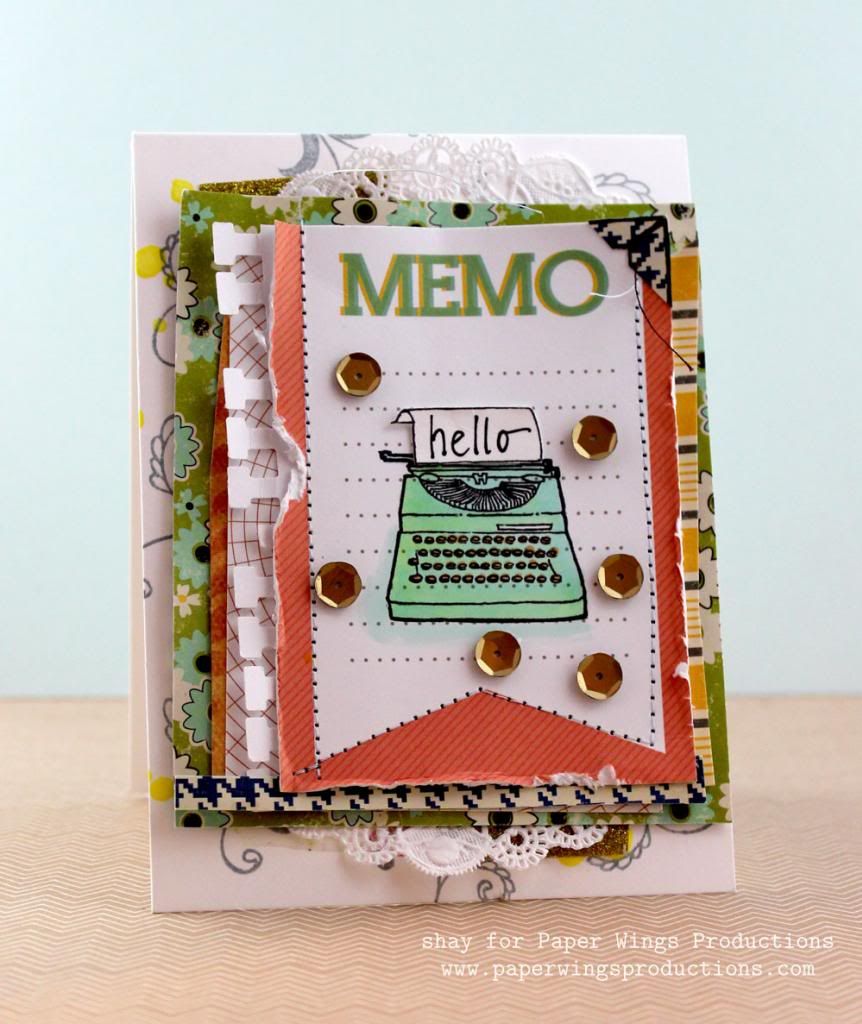

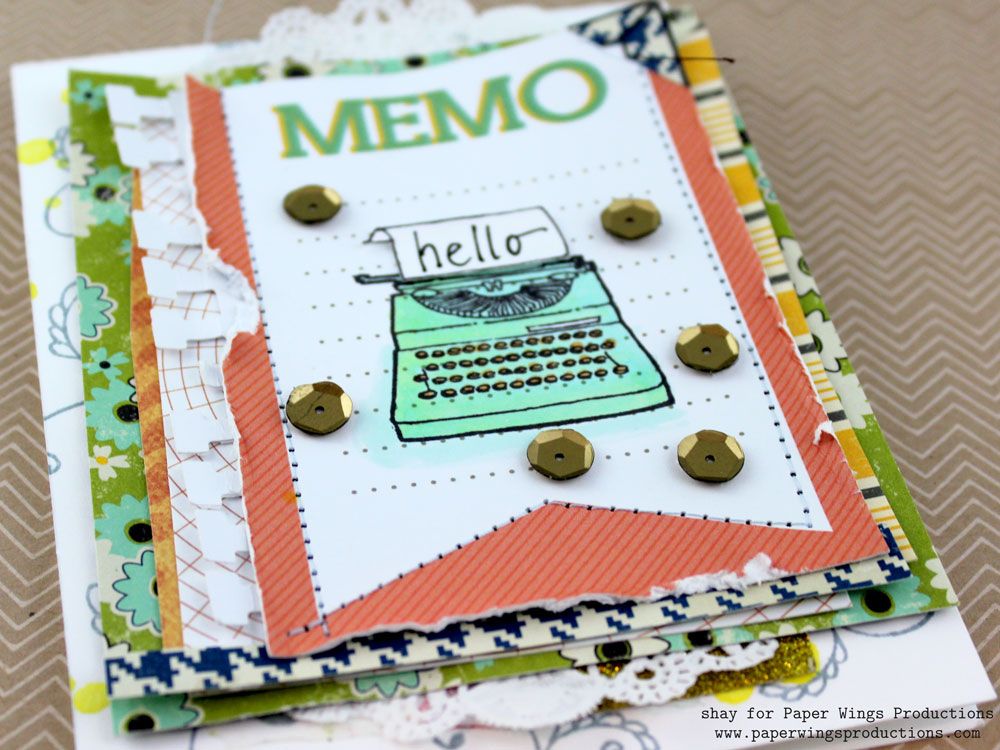
The focal point of the card is a journal card I stamped the typewriter from Vintage Technology upon in black ink and colored in with Copics.  The sheet of paper also from Vintage Technology I stamped in black ink and wrote in the "hello" and attached to the typewriter.  I added a few haphazard layers of paper, another journaling card and punched cardstock.  I made sure to adhere the larger pieces only in the center.  I sewed the layers together following the banner shape of the journaling card.  I made sure to curl up the edges and distress the edges of the journaling card.  The photo corner is actually a corner of the Life Framer frame stamped onto patterned paper and trimmed.

I added bits of doily and glitter tape.  I adhered these layers to a white cardstock base that I stamped with Flourish Fun 1 in grey ink and sprinkled some drops of yellow mist.  Last I added some matte gold sequins.


Card No. 2


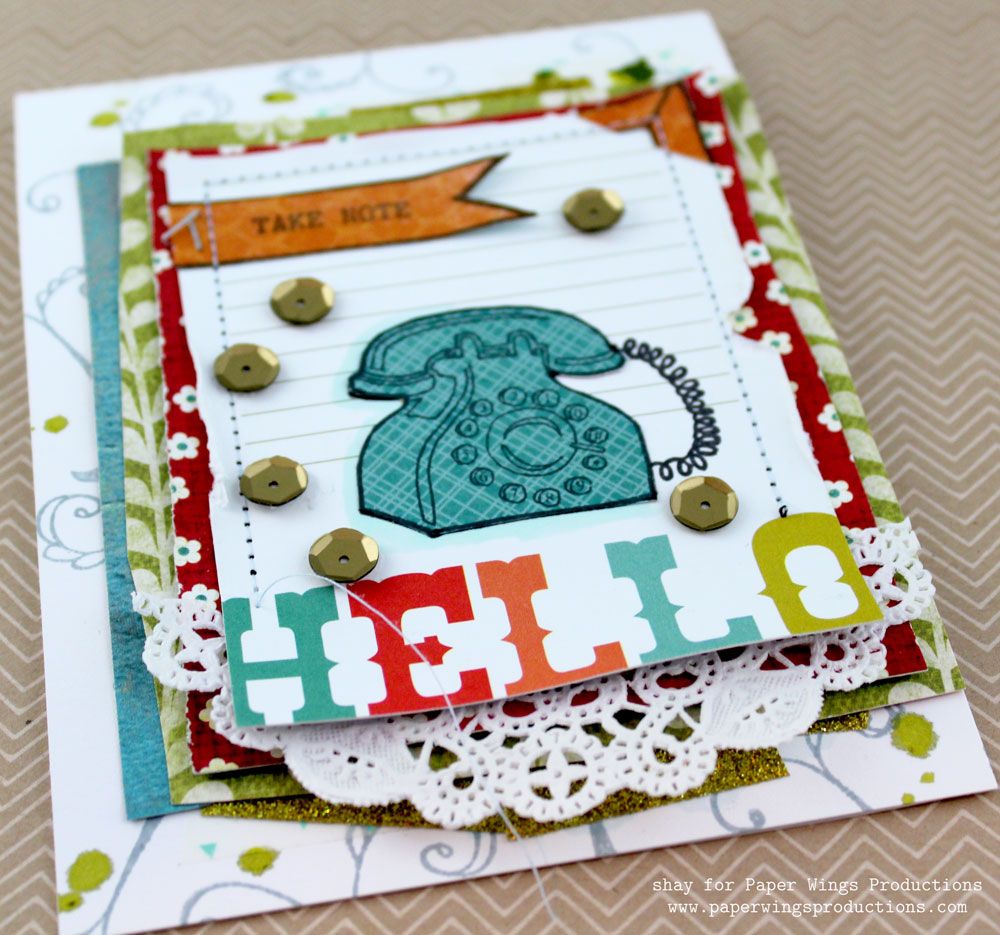
The focal point of the card is a journal card I stamped the telephone from Vintage Technology onto in black ink and then added a teal paper pieced telephone without the telephone wire onto the telephone stamped directly upon the journaling card.  I stamped the double ended banner on orange patterned paper and cut off one end.  On the banner I stamped "take note" from Day Framer.  I adhered the banner with the Tiny Attacher.  I added a few haphazard layers of paper.  I made sure to adhere the larger pieces only in the center.  I sewed the layers together.  I made sure to curl up the edges and distress the edges of the journaling card.  The photo corner is actually a corner of the Life Framer frame stamped onto patterned paper and trimmed.

I added bits of doily, washi and glitter tape.  I adhered these layers to a white cardstock base that I stamped with Flourish Fun 1 in grey ink and sprinkled some drops of green mist.  Last I added some matte gold sequins.

Card No. 3 (the 1970's card according to my sister)


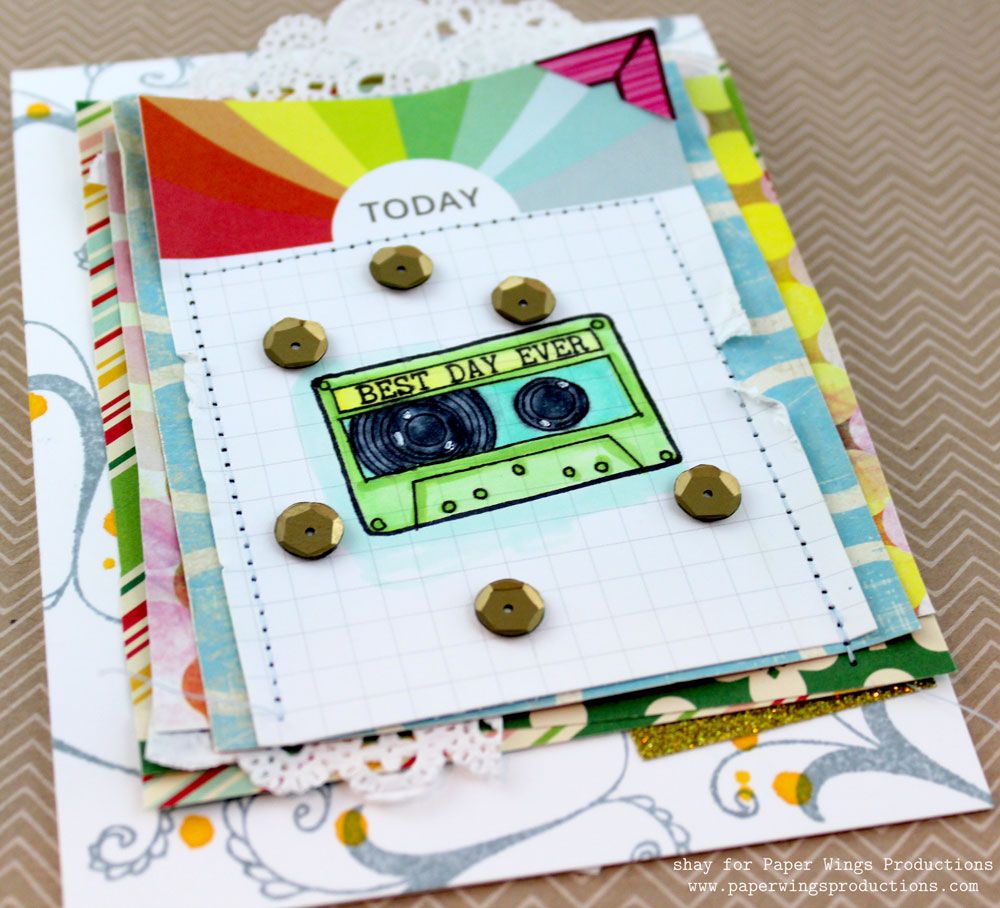
The focal point of the card is a journal card I stamped the cassette tape from Vintage Technology upon in black ink and colored in with Copics and a little highlights using a Uniball white pen.  The "best day ever" is from the Day Framer and happily fits perfectly on the cassette.  I added a few haphazard layers of paper.  I made sure to adhere the larger pieces only in the center.  I sewed the layers together.  I made sure to curl up the edges and distress the edges of the journaling card.  The photo corner is actually a corner of the Life Framer frame stamped onto patterned paper and trimmed.

I added bits of doily and glitter tape.  I adhered these layers to a white cardstock base that I stamped with Flourish Fun 1 in grey ink and sprinkled some drops of orange mist.  Last I added some matte gold sequins.

You can use any sort of scraps of patterned paper or paper pads to change up the look of these sort of cards like I have done here.  If you are anything like me you have so much lovely patterned paper that this would be a great way to use it and be bold with your choices of pattern and color.  Also fun would be to just decorate journaling cards for scrapbooking and/or Project Life without making them into cards.

I hope you have enjoyed today's Themed Thursday.

We would *love* to see what you make with Paper Wings Productions stamps. Add your projects to Facebook, our flickr group, to Pinterest, comment with a link on this post or even email pictures to us!

Take flight,
Shay.

Supplies:
Stamps:

Ink: Memento in tuxedo black, Tsukineko; weather vane, Jenni Bowlin by Ranger
Journaling cards: Studio Calico
Cardstock: solar white, Neenah Paper
Patterned paper: enchanting "sisters" crazy daisy/blue without you from Just Dreamy 2 collection, My Mind's Eye; lucky me "sisters" forever rings from Abbey Road collection, My Mind's Eye; bloom & grow "bloom" vines from Bloom & Grow collection, My Mind's Eye; chicken pox from June Bug collection, Basic Grey; woolworths from Hometown collection, October Afternoon; canning jar from Modern Homemaker collection, October Afternoon; no. 2 pencil from Schoolhouse collection, October Afternoon; sketchbook 6x6 paper pad, Amy Tangerine/American Crafts
Other: colorless blender (0), cool gray no. 3 (C3), cool gray no. 7 (C7), cool shadow (BG10), moon white (BG11), mignonette (YG11), chartreuse (YG13), barium yellow (Y00), canary yellow (Y02) and loquat (YR12), Copic; black precision pen, American Crafts; signo white pen, Uniball; notebook border punch, Fiskars; sewing machine, Brother; buttercup, doris and sherbert Mister Huey's Color Mists, Studio Calico; 4" doilies, Hobby Lobby; matte gold sequins, Studio Calico; sunflower glitter tape, American Crafts; washi

Wednesday, May 8, 2013

What's Up Wednesday: Mother's Day Flowers

Happy Wednesday peeps!  Its Shay here and I was so inspired by last weekend's May Flowers blog hop and the awesome design team's projects that I decided to go floral for today What's Up Wednesday!

Please excuse me for a brief public service announcement ;-):

Before I go further though I need to say how flat-out fantastic the design team is and how inspiring I find their projects!  Dana just made this stunning tag.  Norma made any princess swoon with these pretty-as-a-princess projects.  Carrie wowed with this alcohol ink tutorial.  Amber made this adorable card.  Tara tantalized with this terrific crayon resist technique.  AND don't miss out on Nesting Components, May's incredible mixed media kit...see more about it HERE!

Now back to our regularly scheduled programming....

My late grandma was also an avid lover of flowers of all kinds so I like to honor her memory with making Mother's Day cards featuring flowers.  Mother's Day in my mind (and I don't think I am at all alone) is a natural fit with the blooming flowers of May.

I found myself trying to stretch my conception of some of the Paper Wings Productions stamps to create interesting flowers due to the innovative and clever uses of Paper Wings Productions stamps by the design team for our Paper Wings Productions' May Design Team Blog Hop.

Card No. 1


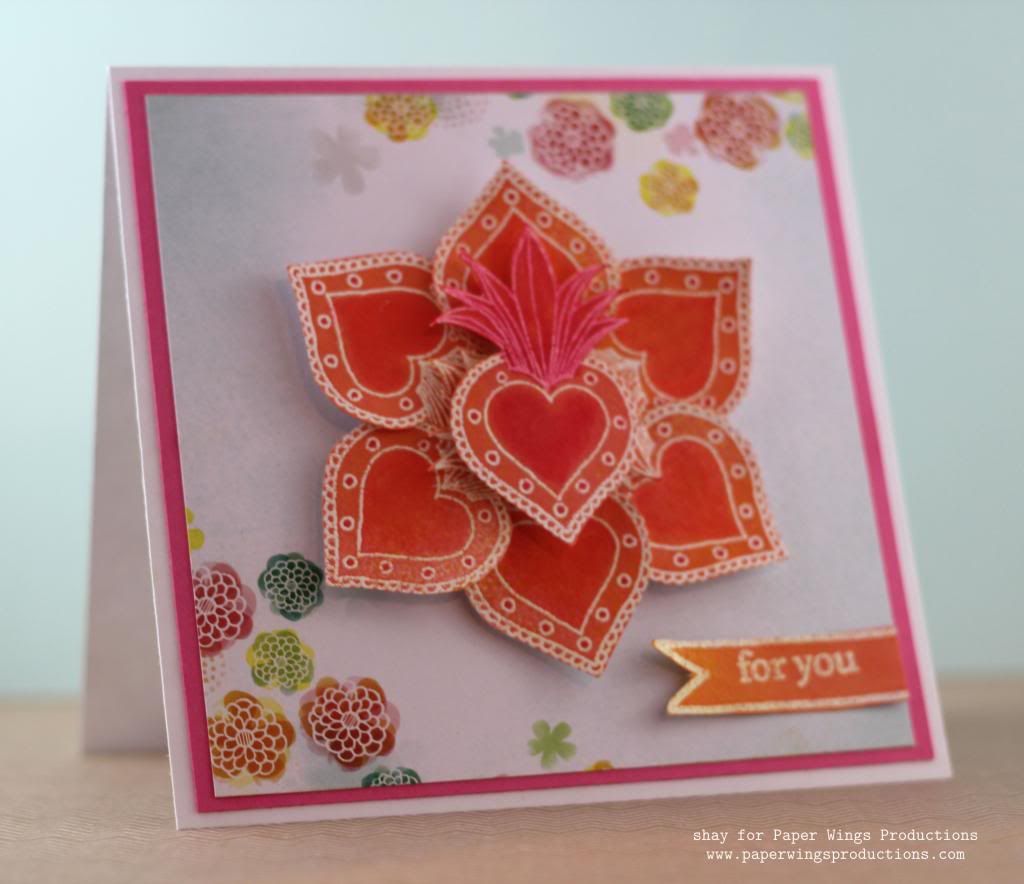
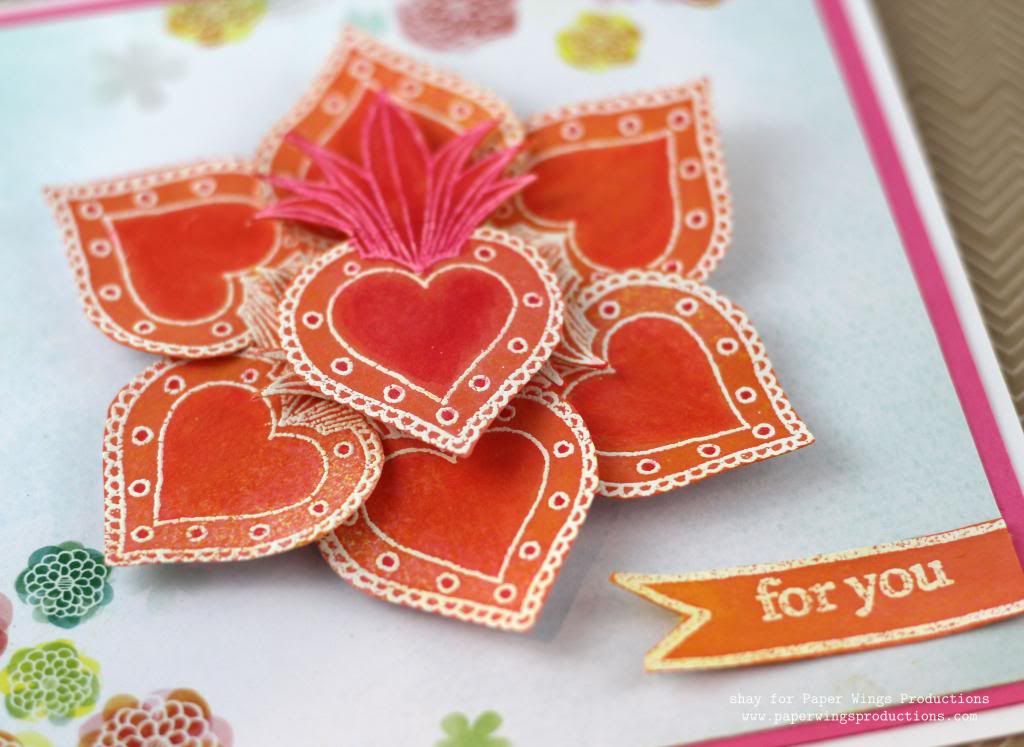
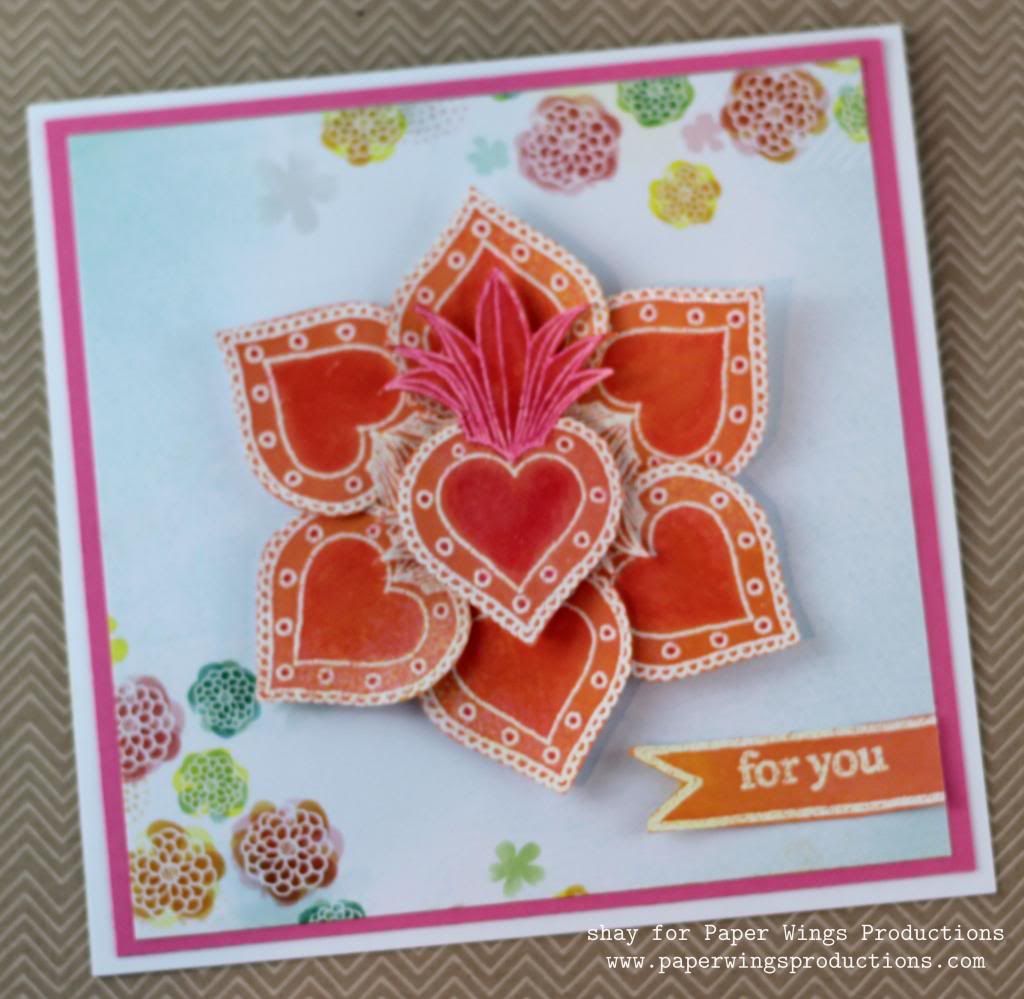
The sacred heart from Milagros put my mind to petals of a flower so I stamped it 7 times with Versamark and heat embossed it with white embossing powder.  I sprayed yellow, orange and pink mists on it and then colored in sections of it with Copic markers.  I cut each heart out.


I nested 6 of the hearts together and added the 7th to the center.  I adhered the flower to a piece of patterned paper that seemed destined for this card and then onto a piece of pink cardstock.  I finished it off on a 5.5" x 5.5" white card base.


For the sentiment I stamped the double ended banner from Tabs and Banners and for you from Thankful with Versamark and heat embossed it with white embossing powder.  I sprayed the same mists over the banner, cut off one end and adhered it to the patterned paper.

Card No. 2


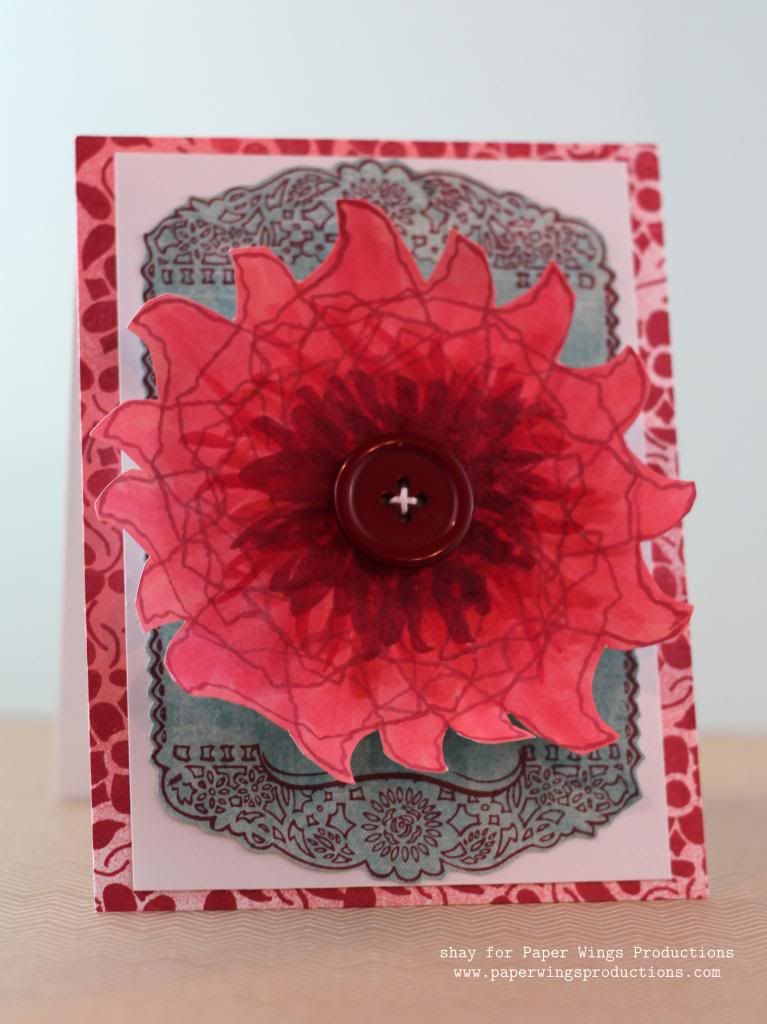
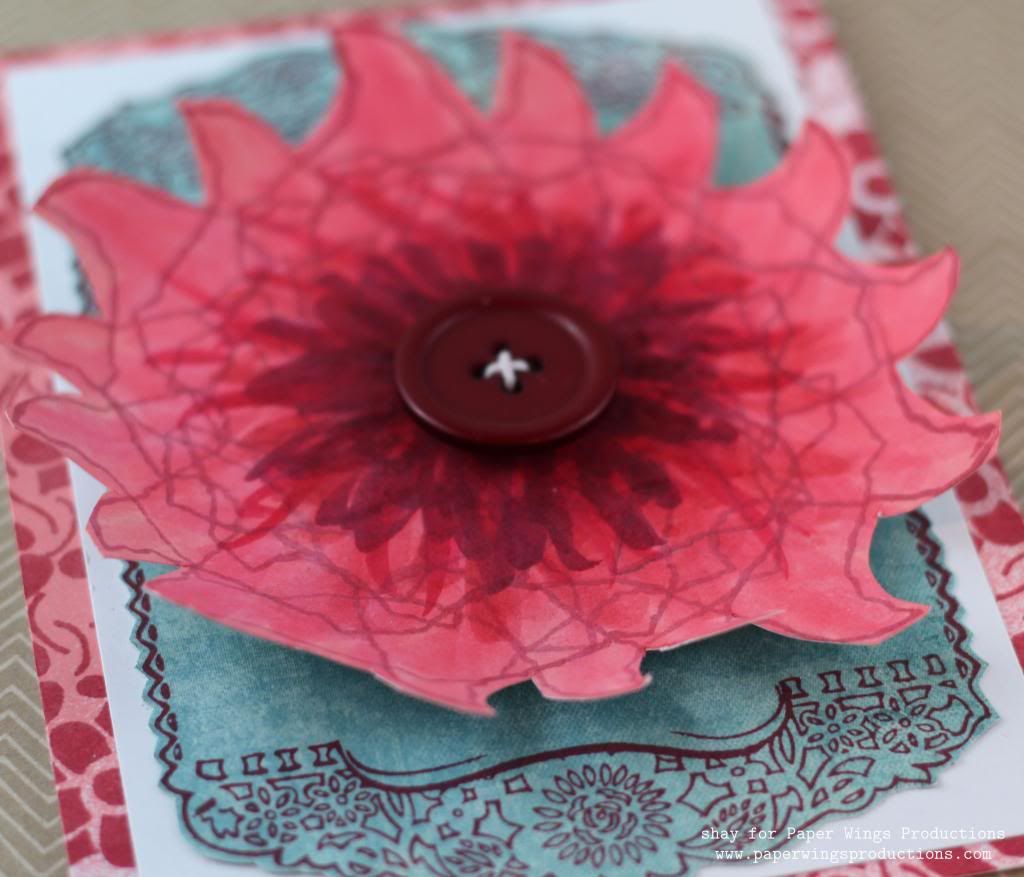
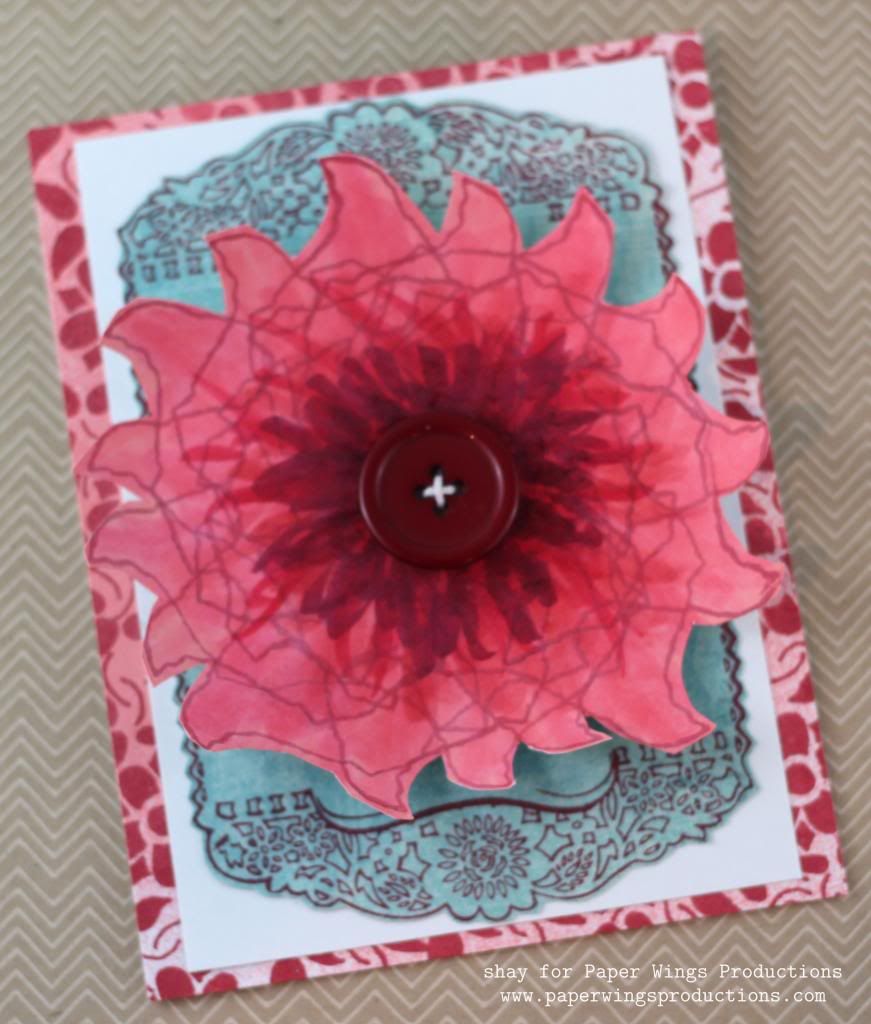
This may be the wildest idea I had for a flower.  I stamped the outline of Texas from Lone Star State in royal red ink with the panhandle facing the middle and then I stamped it over and over rotating it in a circular fashion until it looked more like a flower.  I sprayed pink mist over it and cut out the flower.  To make it more flower-like I colored it with Copics from the center out in a spikey sort of motion with the darker colors in the center.  I added a button to the center of the flower.


Next, I adhered the flower with dimensional adhesive onto the gorgeous floral frame from Dia De Los Muertos Mujer I had stamped onto patterned paper and cut out.  I adhered this all on a white cardstock layer.


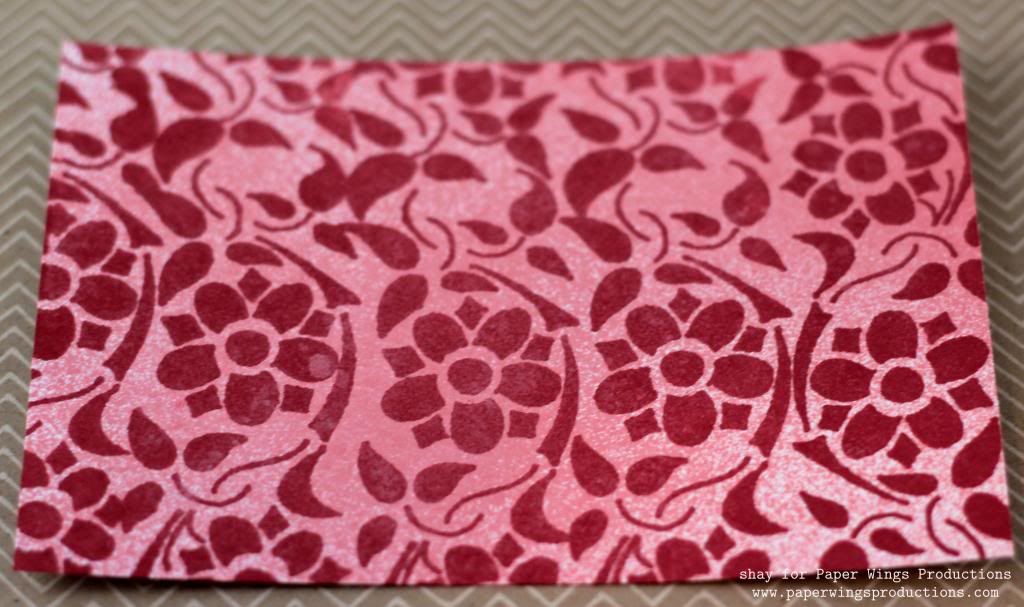
For the card base I created a patterned paper using the lovely stencil like floral border from Muertos using the same royal red ink and pink mist.


Card No. 3


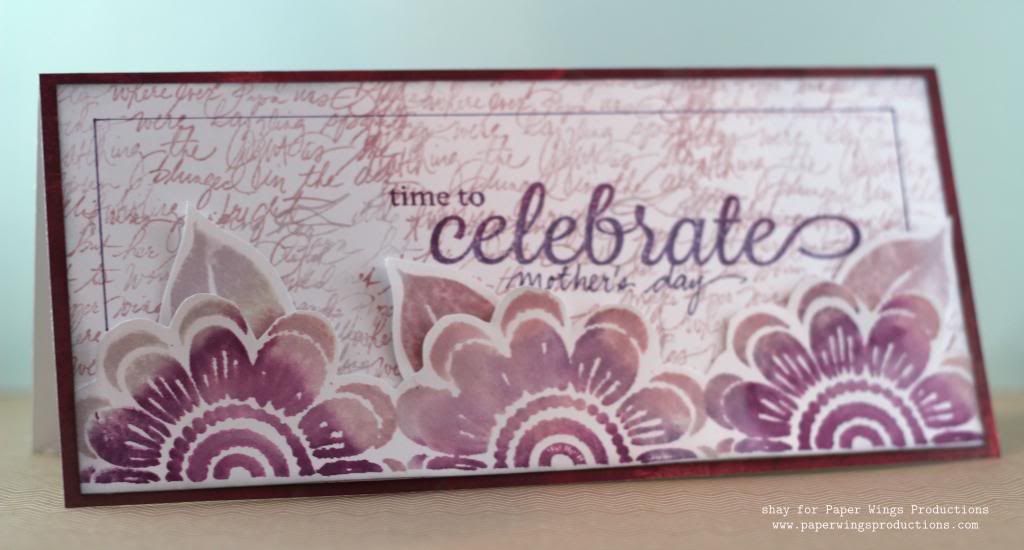
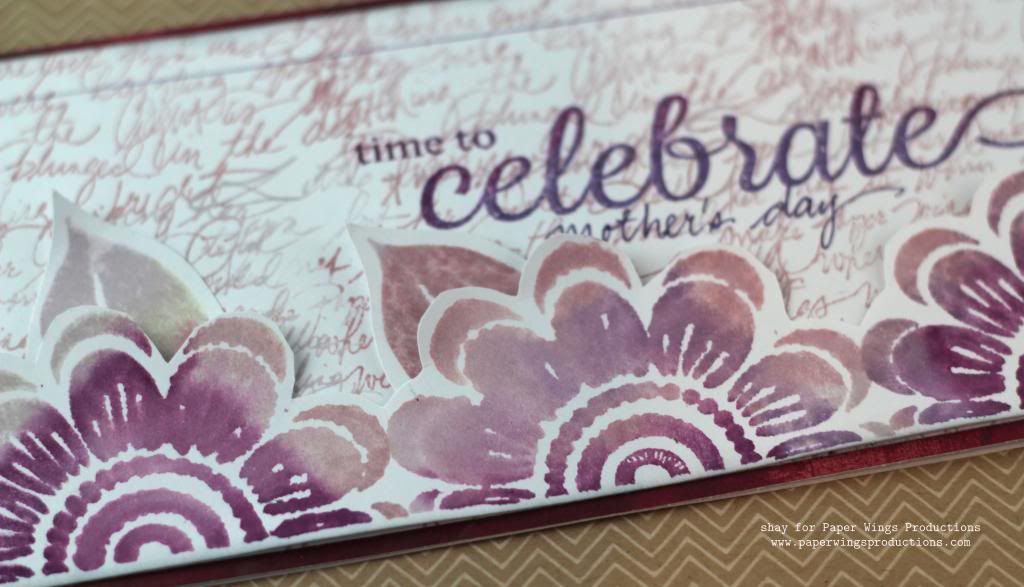
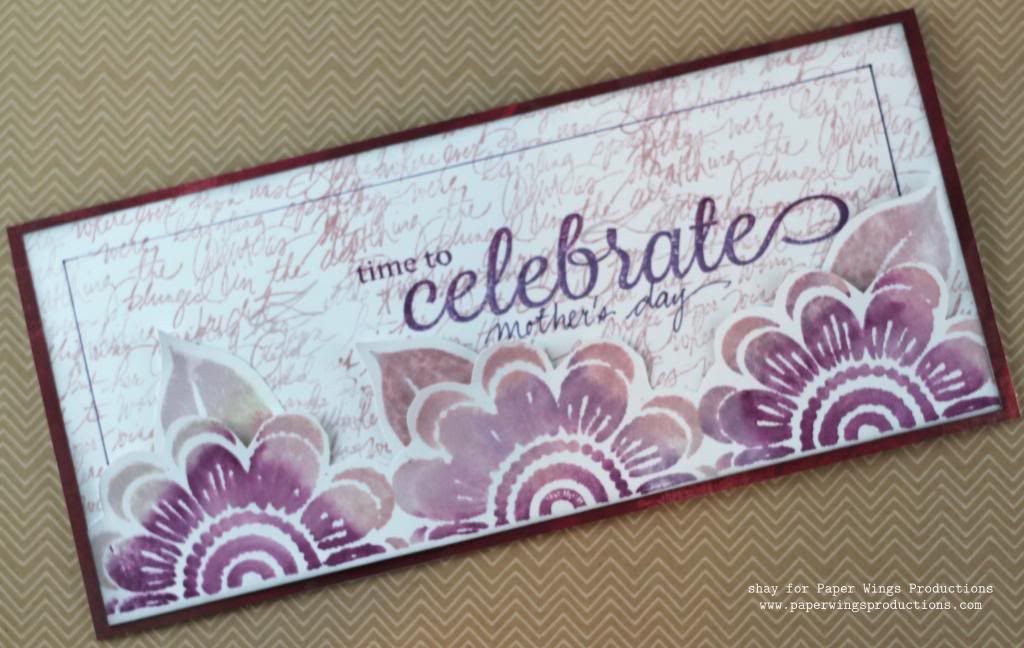
For a more traditional take on flowers I turned to my go-to floral stamp set: Flower Power.  My mom's mom loves purple so I went purplicious with the largest flower from Flower Power or Half Flower by stamping a border of 3 of them using purple Distress Inks that I misted with water before stamping on a piece of white cardstock.  I cut out the flowers and leaves (I later cut off the leaves to put behind the flowers).


On a piece of white cardstock I stamped with lighter purple Distress Inks using the handwriting from Writings Backgrounds or Writing.  With darker purple Distress Inks I stamped celebrate and time to from Celebrate.  I wrote in mother's day using the dusty concord Distress Marker and inked the edges of the panel.  I adhered the floral border to the writing background that was adhered to a patterned paper card base.  I finished this off with a border drawn in with the dusty concord Distress Marker.


Card No. 4


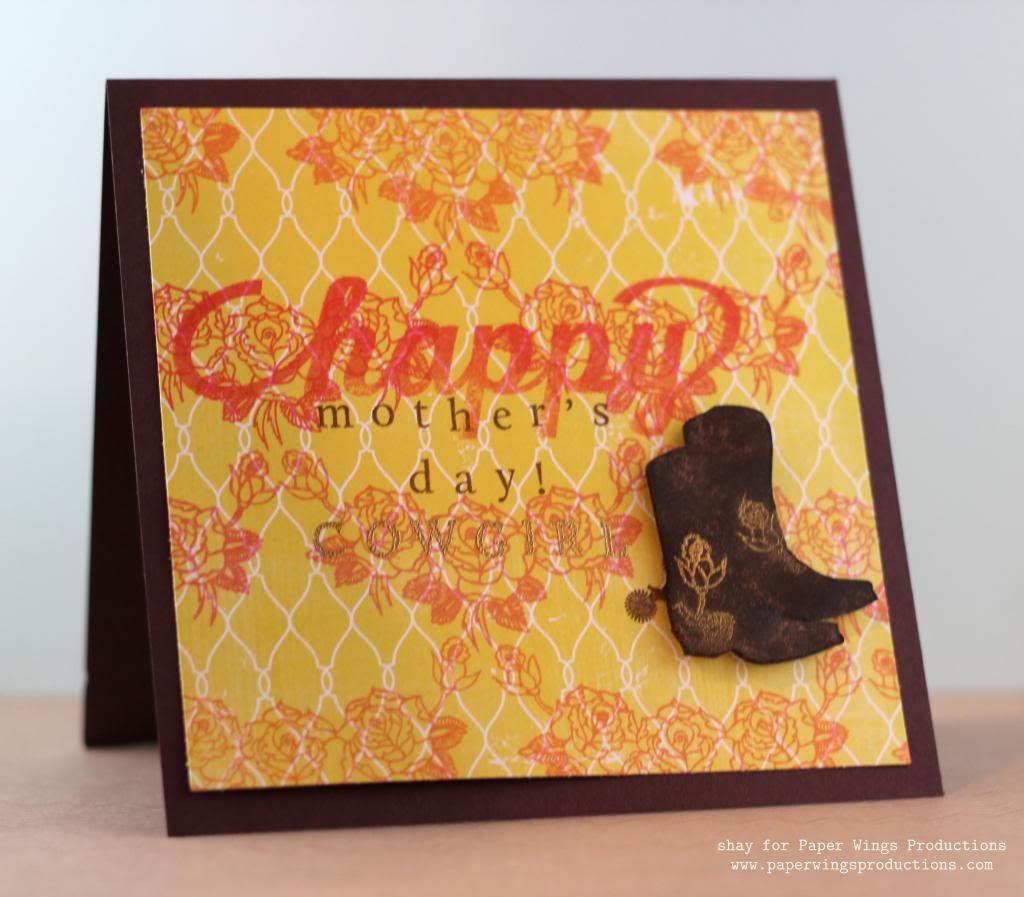
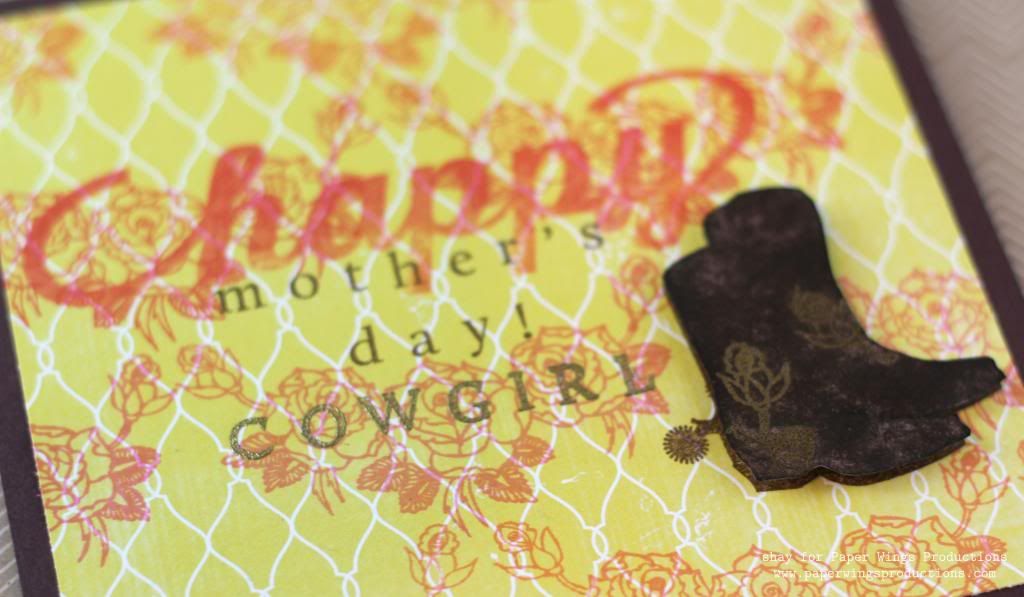
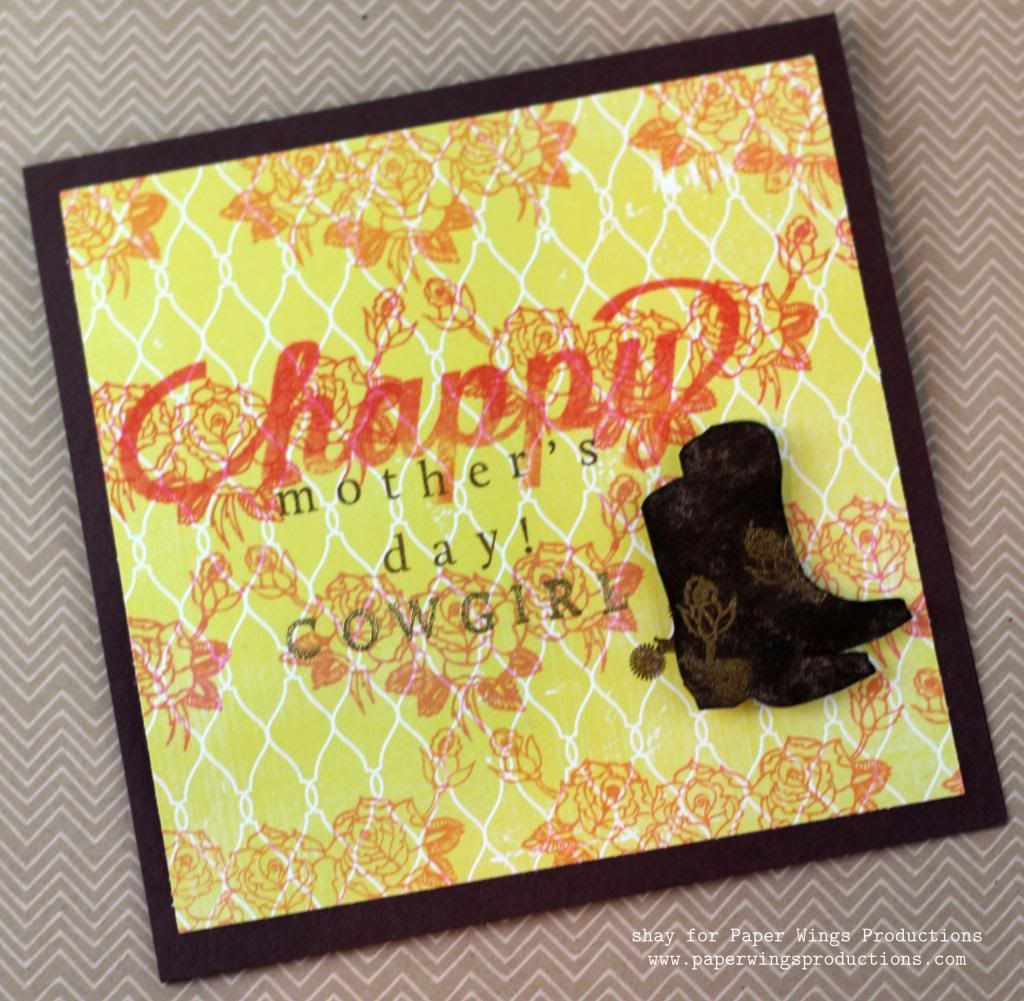
I went with a little honky tonk with my last card.  I stamped the boots from Lyrics or Walking in brown ink on white cardstock and then overstamped with the roses from Dia De Los Muertos Hombre with Versamark.  I then heat embossed in gold.  I cut the boots out.  I pressed the brown ink over the boots image to make the gold stand out more.  I inked the edges. 


On a piece of patterned paper I stamped a pattern using the roses from Dia De Los Muertos Hombre.  I then stamped happy from Happy and spelled out mother's day (stamped in brown ink) and cowgirl (embossed in gold) from Perfect Alphabet.  I stamped the boots again on the yellow panel and placed the embossed boots over that image using dimensional adhesive.  Lastly, I adhered the panel to a dark brown card base. 


I hope you have enjoyed these cards and enjoy a glorious Mother's Day weekend!

We would *love* to see what you make with Paper Wings Productions stamps. Add your projects to Facebook, our flickr group, to Pinterest, comment with a link on this post or even email pictures to us!

Take flight,
Shay.

Supplies:
Stamps:

Stamp not shown: Happy
Inks: Versamark, Tsukineko; royal red, pale tomato, bubble gum and soft cantaloupe shadow inks, Hero Arts; mulled lavender, victorian velvet, dusty concord and seedless preserves, Tim Holtz Distress Ink by Ranger; dark chocolate, Papertrey Ink
Cardstock: white, Georgia Pacific; hibiscus burst, Papertrey Ink; chocolate chip, Stampin' Up!
Patterned Paper: Yes, Please 6x6 paper pad, Amy Tangerine/American Crafts; Love You Madly and Color Me Happy 6x6 paper pads, Glitz; plum wine, Basic Grey
Other: opaque white and detail metallic gold embossing powders, Judi Kins; heat gun; Inkssentials ink blending tool, Ranger; tender pink (RV13), begonia pink (RV14), light prawn (R22), cadmium red (R27), lipstick red (R29) and cardinal (R59) markers, Copic; dusty concord, Tim Holtz Distress Marker by Ranger; pink balloon sprinklers, October Afternoon; buttercup and sherbert Mister Huey's color mists, Studio Calico; button, sassafras

Friday, February 8, 2013

Feature Friday: An Old Fashioned Valentine

Happy, happy Friday!

It's Shay here.  There has been some truly fabulous projects this week so I recommend first scrolling down to see them all before you return to this post.  I can wait.

Welcome back!  Are the design team talented or what?

Today I have some cuties for you.  What is better than miniature little Valentines?  Okay, winning the lottery to name one thing, but do you recall being a little lady or gent at school and giving and receiving Valentines?  I thought it was better than apple pie and I still love them so I thought why not make some with my awesome Paper Wings Productions stamps?

I created three of these little darlings...honestly I could have made dozens with the ideas swimming in my head. 


I used a nifty new die I bought that is a mini pocket to be the sleeve for my little Valentine cards.  The sleeve measures 2.5" x 3.8" while the cards are approximately 2 3/8" x 3 5/8".

Card No. 1:


This is the true romantic card set.  I inked up the Damask from Backgrounds or Damask using pink and red inks that I then spritzed with water and stamped upon the heart and the outside of the sleeve.  Under the heart is music from the Text Melange or Music in grey ink. I love these essential stamp sets...they work for nearly any theme and project.  I added the amor banner from Milagros which I stamped in red and colored in with Copic markers.  I added a heart and dots (remnants from the XOXO border on the sleeve).  I finished the card with some washi.  The sleeve is decorated with washi, XOXO, pink and white bakers twine and a heart.  The final touch is the little ticket/label from Tabs and Banners stamped with "for you" from Sophie.

Card No. 2:


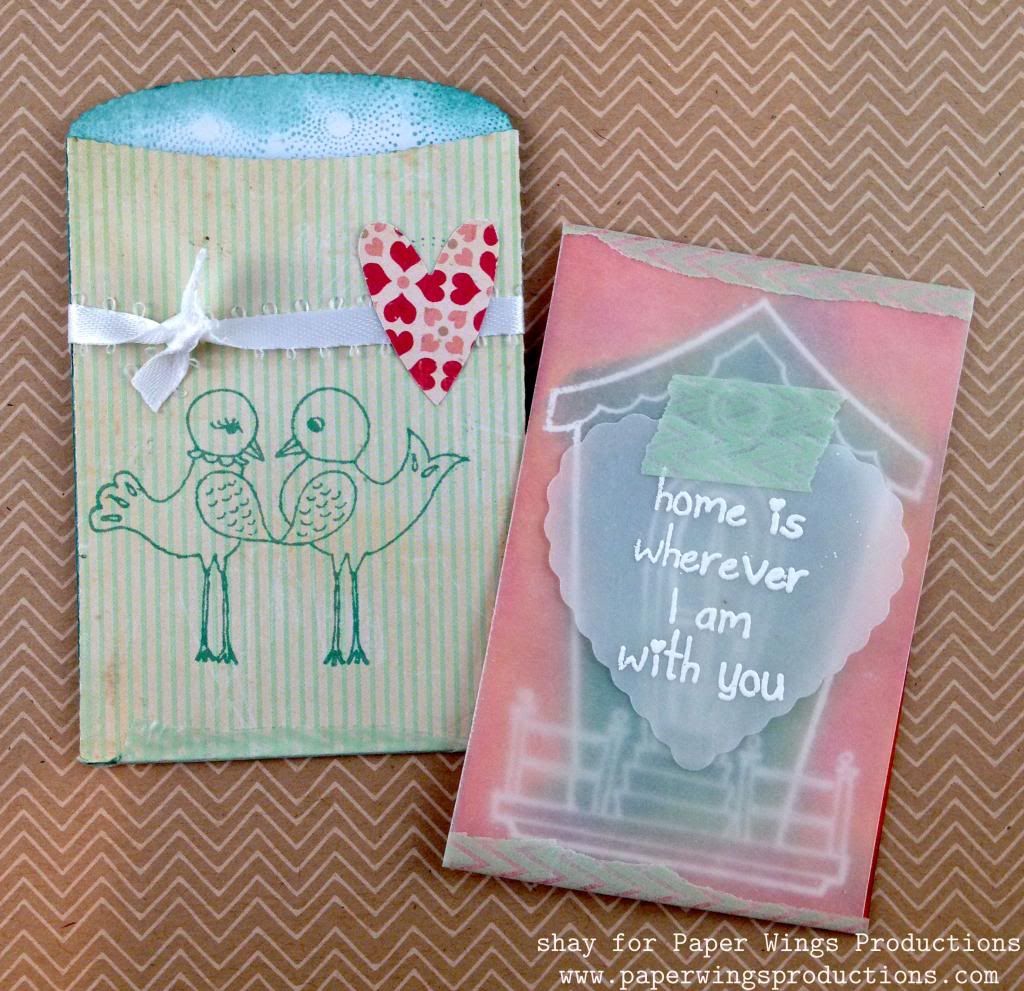
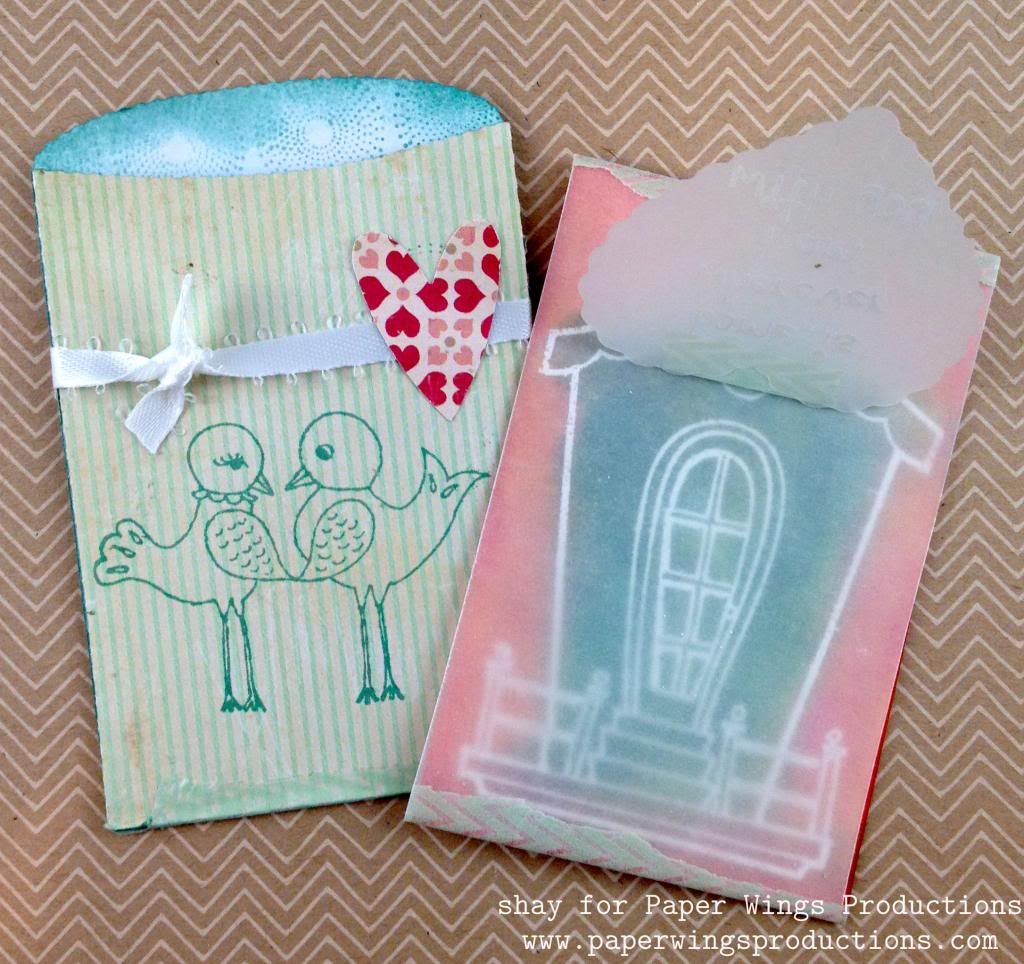
Here's the sweet card set.  The card is stamped with the birdhouse from Home Tweet Home using VersaMark and embossed with white embossing powder.  Then I colored in the image using Distress Inks.  I chose some unusual and bright colors which I then softened by adding a layer of vellum.  I added another layer of vellum with a scallop heart die cut which I embossed with white embossing powder using a sweet sentiment from Home Tweet Home.  How adorable is this stamp set?  I adhered all the vellum with washi.

Here is a look at the house under the vellum heart:


The inside of the sleeve is decorated with the circles from Backgrounds or Circles and I also inked the edges.  The outside of the sleeve is stamped with the love birds from Home Tweet Home, tied with a white ribbon and finished with a heart.

Card No. 3:


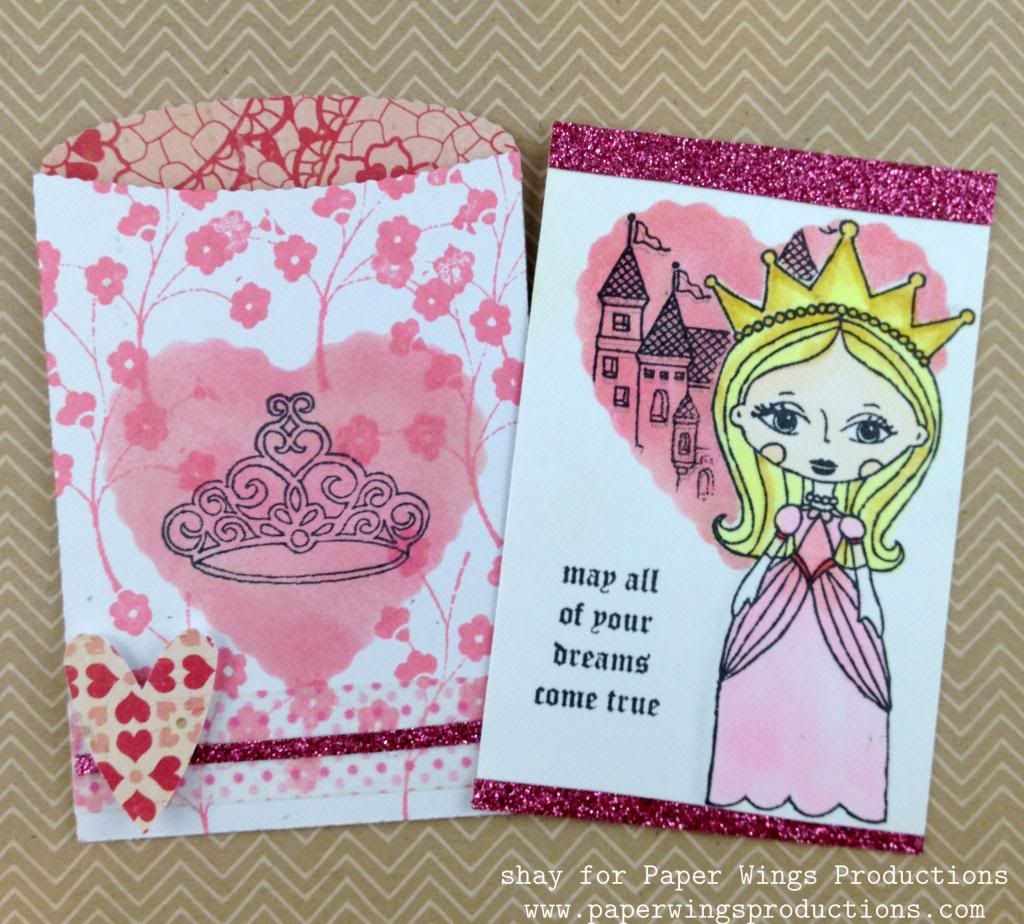
The card for your inner princess or the little princess in your life.  Using Princess I stamped and colored her in with Copic markers.  I then masked her off and used a reverse mask of the scalloped heart to ink in the area behind her and stamp the castle from Prince.  The sentiment is also from Prince.  These are truly charming and lovely stamps and so perfect for children's Valentines.  I finished the card with pink glitter fabric tape.  The sleeve is also decorated with a reverse heart mask that I stamped the crown from Princess on.  Over that I stamped the sprig of flowers from Flower Power or Mini Flowers.  This is finished off with washi, fabric tape and a heart.

What fun these would be to make with your children, grandchildren, nieces, nephews, godchild or with the kids at heart in your life!  They would have so much fun making them and so proud to give them out too.  On the back of the cards is plenty of room for a little handwritten note.  Another alternative is to pack these little sweeties in a lunch for school or work.

The possibilities of which Paper Wings Productions stamps to use and how to use them are endless.  I thought Sophie, Louise, Marcel or Luc would be fun to use not to mention the Prince.  You could easily use Paris or LondonVintage Technology or Play with Your Coffee would be fabulous too.  That is just off the top of my head! 

Another really cool thing about these little card and sleeve duo are that they are still small enough to fit in a Project Life 3x4 pocket which is a lovely thing for anyone doing Project Life.

I hope you feel inspired to ink up your Paper Wings Productions stamps!  There is still time for Valentine's Day. 

We would *love* to see what you make with Paper Wings Productions stamps. Add your projects to Facebook, our flickr group, to Pinterest, comment with a link on this post or even email pictures to us!

Take flight,
Shay.

Supplies:
Stamps:


Cardstock: Georgia Pacific
Ink: tuxedo black Memento and VersaMark, Tsukineko; chewing gum, cough syrup and weather vane, Jenni Bowlin for Ranger; fired brick, worn lipstick, tattered rose, scattered straw, wild honey, iced spruce and evergreen bough, Tim Holtz Distress Ink by Ranger
Patterned Paper: Paper Heart 12x12 paper pad, Crate Paper; Dilly Dally "Hello" Flannel from Miss Caroline collection, My Mind's Eye
Other: vellum; heart punch, Stampin' Up!; washi, various; fabric tape; white ribbon, Offray; opaque white embossing powder, JudiKins; nesting scallop hearts dies, Lifestyle Crafts/QuicKutz; mini pocket die, Lifestyle Crafts/QuicKutz; XOXO border die, Papertrey Ink; Cuttlebug, Provo Craft; Copic markers; pink and white baker's twine


Related Posts Plugin for WordPress, Blogger...