Showing posts with label circle frame. Show all posts

Wednesday, October 29, 2014

RockFairy by Agnieszka Bellaidea


Hi!
It's  Agnieszka Bellaidea  again!
Last time I was showing you my layout and card on the 13th, today I have a new scrapbook page.


My style is  a mix of shabby and romantic with a touch of mixed media. I like to use stencils with gesso and modeling paste, mists and of course stamps.


I have already another set of favorite stamps, you can see I used it over and over around the "door" under my photo.
is not going to be put away. I have already some new ideas how to use it.


Stamping with distressed ink gives impression the stamp is part of paper design.
My butterfly in the right corner was stamped and embossed to match my page and colors.


Below you can see how nice can look a little corner stamp from the very same set.


If you would like to see how I design my pages here are 3 steps , all papers by Bo Bunny.


I have to add I really like the way all set of stamps are packed.
I tend to keep my stamps in original packages so this is important to me.
Thank you so much for looking,can not wait to show you my next projects, I hope you will visit me on my blog too.
Thank you again for inviting me to GD for you!
Agnieszka Bellaidea


<!-- inlinkz code start -->

<div class="_InLinkzPMDiv"><table width="95%" border=0 cellspacing=0 cellpadding=2><tr><td style="vertical-align:top"><div style="display:table-cell;text-align: center;float:left; height:189px"><div style="display:table-cell;vertical-align:middle;width:107px;height:104px"><a title="Frames and Flourishes Cling Stamp Set" rel="nofollow" target=_blank href="http://lm.inlinkz.com/go.php?i=425296&c=117696"><img border=0 class=_inlinkzI src="http://lm.inlinkz.com/thumbs/20130906/32055/100/1378467669.53.jpg"></a></div><div style="overflow:hidden;width:107px;line-height:1.1; text-align:center;vertical-align:bottom;"><a title="Frames and Flourishes Cling Stamp Set" rel="nofollow" target=_blank href="http://lm.inlinkz.com/go.php?i=425296&c=117696">Frames and Flourishes Cling Stamp Set<BR></a></div></div></td></tr></table></div><div><a class=_LMLogo target=_blank rel='nofollow' style='font: normal normal normal 10px/normal arial;color: #BBB; text-decoration: none;' href='http://new.inlinkz.com/pm.php?utm_source=prdlist&utm_medium=widget_o&utm_campaign=powered'>InLinkz.com</a></div>

<!-- inlinkz code end -->


Thursday, April 4, 2013

Themed Thursday: So Many Lines

Hello there peeps!

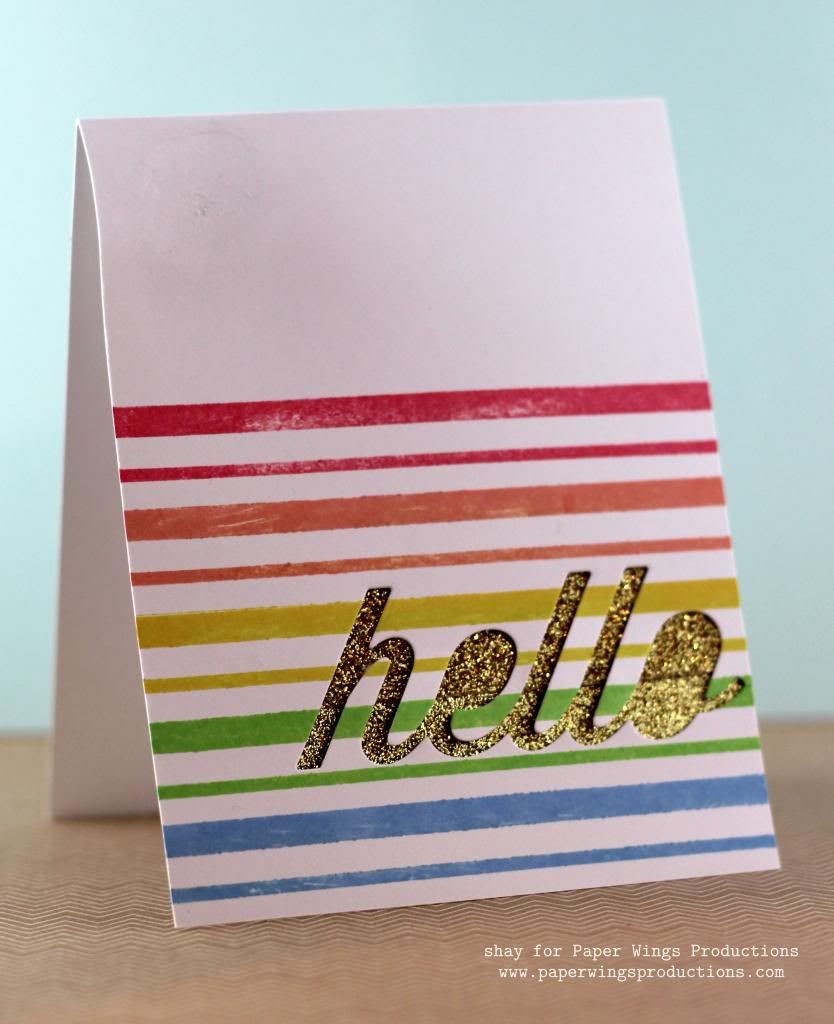
It's Shay here today with a few cards using the Lines Border stamp set and using a rainbow color scheme that I think is appropriate for April. 

Before I share my cards, you dare not miss: Norma's video on how to stamp with Pearl-Ex | April's Mixed Media kit and Norma's amazing creations with the kits featured right here on The Aviary like HERE | Amber's sweet wise card | Tara's fantastic spring wreath and basket | Carrie's gorgeous tag | Dana's beautiful Parisian artist trading cards.  And don't forget that tomorrow is April's Blog Hop!  It should be incredible.

Now that you are back, I wanted to share my colorful medley of cards.


I started with this little number coloring in the envelopes from the Evidence stamp set with Copics.  I stamped the thinner lines from the Lines Border stamp set in black once in the background.  Sending you and laughter & love are both from the Winter Mix It Up stamp set. The envelopes are adhered to the card base with foam adhesive. 


Next I stamped the thicker lines from the Lines Border stamp set in blue, green, yellow, orange and red inks.  I die cut the hello and adhered some gold glitter tape to a piece of white cardstock I taped to the other side of the card front.


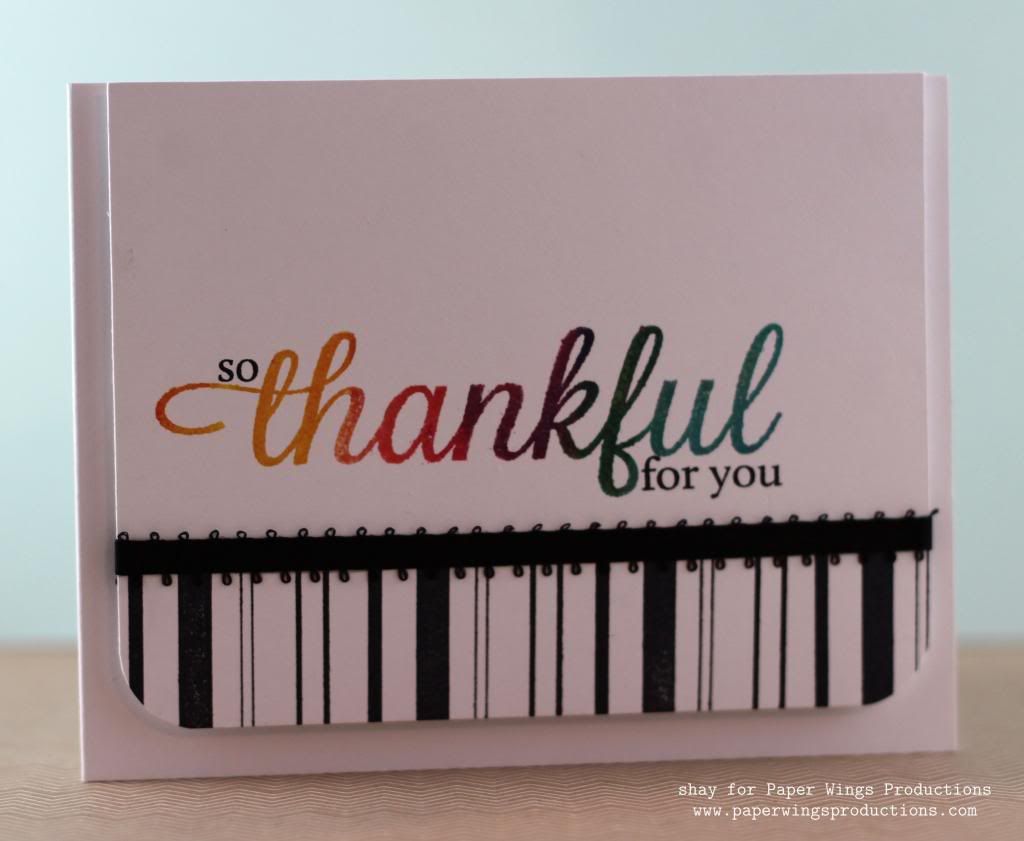
My third card began with inking up the thankful from the Thankful stamp set with yellow, orange, red, green and blue inks.  The so and for you are also from the Thankful stamp set.  I then masked off most of the card front so I could stamp a border using both sets of lines from the Lines Border stamp set in black.  This would also be fun if stamped diagonally.  I then adhered a piece of ribbon over the edge of the stamped line border.  I rounded the corners and then adhered the card front with foam adhesive.


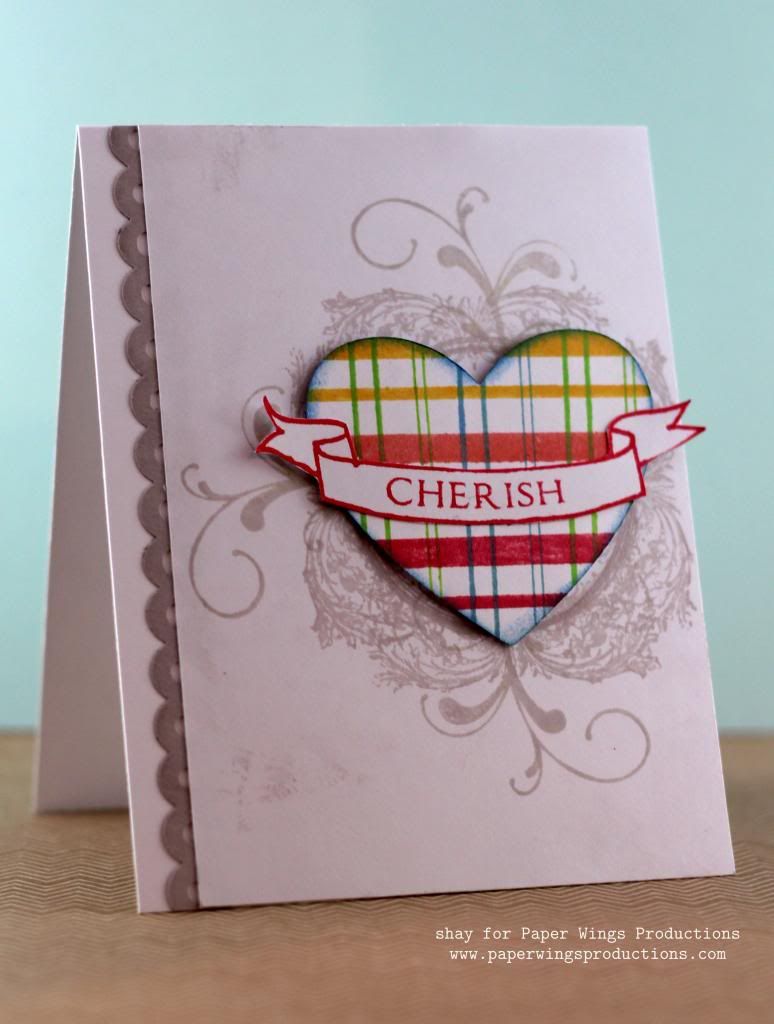
Last, I stamped a heart die cut with the thicker lines from the Lines Border stamp set in red, orange and yellow horizontally and then I stamped the thinner lines from the Lines Border stamp set in green, blue and green again vertically for a plaid look.  I inked the edges of the heart in blue ink.  I stamped the banner from Banner Day stamp set in red and then the word cherish within the banner.  I cut out the banner and adhered it to the plaid heart. On the cardbase I stamped the Circle Frame stamp four times turning it each time in grey ink.  I then stamped one of the flourishes from the Flourish Fun 1 stamp set three times in grey ink.  I adhered the heart over the frame.  I added a punched border strip and adhered it all to the white cardbase.

I hope you are inspired to ink up the Lines Border stamp set and use it all sorts of interesting ways. 

We would *love* to see what you make with Paper Wings Productions stamps. Add your projects to Facebook, our flickr group, to Pinterest, comment with a link on this post or even email pictures to us!

Take flight,
Shay.

Supplies:


Inks: Hero Arts Shadow Ink in pale tomato, soft cantaloupe, butter bar, green hills and cornflower; Tsukineko Memento in tuxedo black; Papertrey Ink in soft stone
Cardstock: stamper's select white by Papertrey Ink; sand by Neenah Papers
Dies: wonderful words: hello by Papertrey Ink; nesting hearts by Lifestyle Crafts
Other: Copic markers; black ribbon by Offray; brown sugar glitter tape by American Crafts; border punch by EK Success; Corner Chomper by We R Memory Keepers


Wednesday, January 2, 2013

What's Up Wednesday - Art Journaling

What's Up Peeps, Norma G. here with  

Today I wanna share one of my VERY favorite things to do, ART JOURNAL.  I began art journaling last year as a way to blow off some creative steam if you will.  It's also a wonderful way to use up scraps, try my new stamps and different techniques.  So I'd like to share my latest page with you:

This page is layer upon layer of paint, scrap papers, crate paper, spray inks and of course stamps.  

The beautiful thing about art journaling, just like mixed media is that there are NO RULES.  You can have as many or as little layers and elements as you want.  An art journal can be very personal, a place to express your inner most feelings or not.  It's all up to you but I think you'll always find that it's definitely a place to grow and nurture your creativity.

You'll be able to experiment with new mediums, ideas and color combinations.  Then over time it'll be fun to look back at your pages and see the evolution of your style and creativity.

If you'd like to try art journaling or mixed media, we have a WONDERFUL new Mixed Media Kit available.  This kit is truly filled with an AMAZING assortment of products for your creative amusement and I HIGHLY recommend it to all of you.  This beautiful kit is so versatile, all of the items can be incorporated into scrapbooking and card making too.  So please don't think of it as just for "Mixed Media" or "Art Journaling", it can be used on anything you want.

Well friends, I hope I've inspired to try something new or if you already art journal, to keep on going!  Thank you all so much for joining me today, below you'll find links to all of the stamp sets I used on my art journal page.

HAVE A WONDERFUL DAY & A BLESSED 2013!!!


Related Posts Plugin for WordPress, Blogger...