Showing posts with label flourish fun. Show all posts

Saturday, July 26, 2014

Thank You Kindly - Scrapbook Saturday


Hi everybody, Norma here with you today! Today I have a cute layout to share with you that I created using the beautiful Tea Time Nesting Components kit, Writing Cling StampBuild A Shrine and Southern Sayings stamp sets.


I started out by layering strips of various papers from the 6x6 Marion Smith paper pad included in the kit.  I also fussy cut some of the images from the paper like the clock and roses you see here.  Next I stamped some of the flourishes from the stamp set included in the kit and the Writing stamp.


I wanted to use this image from the clip art sheet but it just need a little more so I added the ATC frame from UmWow Studio.  I altered the frame by applying a couple of layers of gesso and then embossing with a stamp from the Build A Shrine set.  Then I spayed it with Lindy's spray ink and distressed the edges.


I love the way the frame turned out!  Okay so next I added some more fussy cut images from the paper pad and some Domino washi tape.


I used black tulle along the left edge.  I created a small bunch for the rose to sit on and added the super cute Marion Smith Tea Time Charms.  Aren't those little utensils the cutest?!


I  love how whimiscal the Tea Time Nesting Components kit is, don't you?!


Alright, for the finishing touch I added "thank you kindly" from the Southern Sayings stamp set.   And on that note I'd like to take a moment to thank all of you for your friendship and support over the last two years.  Today is my last post as an official PWP Design Team member.  I have been extremely blessed to be a part of this wonderful Paper Wings family and I am very grateful for the oppourtunities it has given me.  I will definitely miss being a part of this talented group but I felt it was time to give someone else a chance to share their talents with you.  I will still be around supporting my friends and who knows, maybe I'll get to pop in from time to time ;D.  Yah never know!! 


Okay so...I really don't like goodbyes so let's move on shall we! I hope you've enjoyed my post featuring the Tea Time Nesting Components kit.  For more inspiration check out our guest designer Marie's beautiful cards and bookmarks: Themed Thursday - Card Set, Katie's fresh take on the kit: Feature Friday - Tea Album, Dana's fantastic tutorial: Building up an extra heavy gel textured background and Erica's gorgeous accordian mini album: Tutorial Tue.  These ladies have been rockin' this kit so go show them some love, you're sure to be inspired by thier creations.

Thanks again you guys, luv yah, see you around cyber space!!!


Friday, June 20, 2014

Featured Friday-Card Set

Hello Paper Wings fans!  Erica here with you today to bring you this weeks Featured Friday!


Today I am featuring the stamp set Flourish Fun 1 and I have created a card set using a variety of stamps from this set. I started out with 4x4 card bases and a white card front.  I picked a variety of ink colors and then began stamping out different backgrounds and sentiments.  I also used some of the rub-ons from the June 2014 Nesting Components Kit.

There are 6 different stamps in the Flourish Fun 1 stamp set and they great to create beautiful and simple backgrounds for cards.


To finish up my card set I created white envelopes using my envelope punch board and then tied everything together using the beautiful bird ribbon that is included in the June 2014 Nesting Components Kit and put them all inside of a vellum bag.  I used some light molding paste and the birds stencil to add a single bird to the bag.  To close up the bag I added a kraft circle and stamp one of the stamps from the  Handmade stamp set.


Thanks so much for joining me today and I hope you enjoyed my card set!  I think they will make a great a little gift!  For more card inspiration check out this post from Katie using the Play With Your Coffee stamp set.  We love to see what you have created with the Paper Wings Productions products so please tag us on Facebook or Instagram and you can always up load your projects to our Flickr gallery.  Have a wonderful day and remember to let your creativity take flight!

Thursday, August 8, 2013

Themed Thursday: Vintage Technology


Hello there peeps!  It's Shay here.  For today's Themed Thursday I was inspired by our recent Vintage Design Team Blog Hop.  A little side tracking here: I strenuously suggest checking out this month's Blog Hop if you have not already for awesome projects and to welcome our new design team members, Cathi and Irit.  Don't forget to also check out Irit's deco-riffic project in her very first post here on The Aviary and Dana's glorious tutorial and altered box

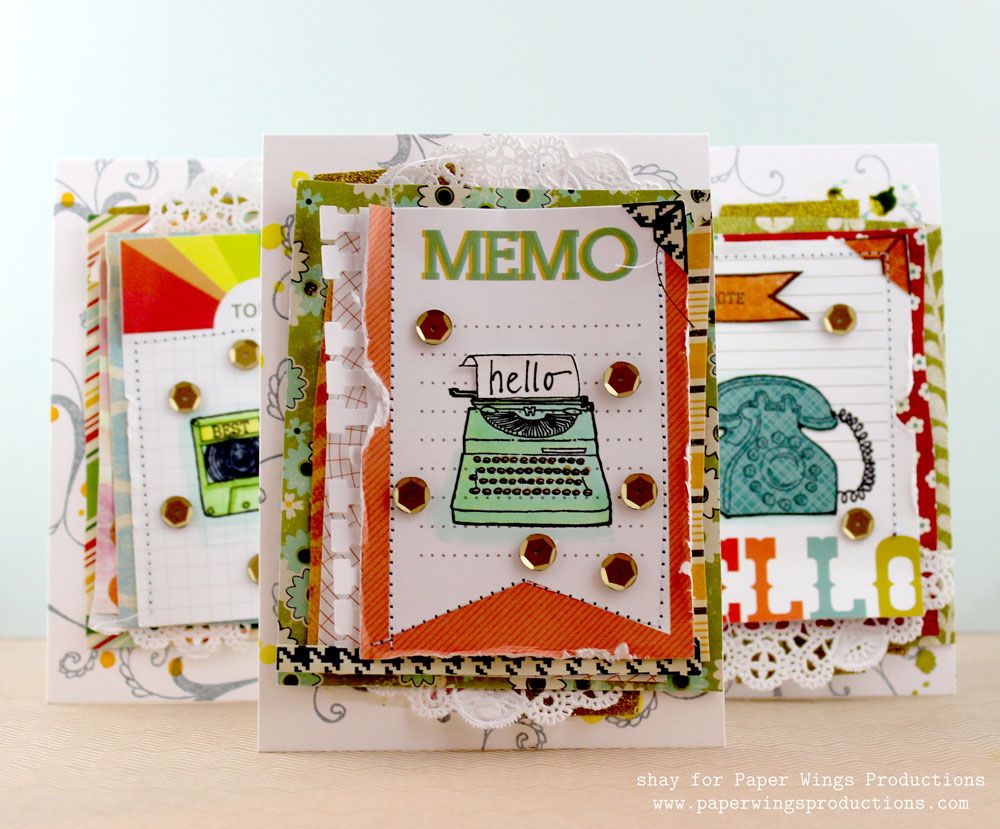
As a departure from my own blog hop project, I wanted to do a more colorful spin on vintage. 


I pulled out my well loved Vintage Technology stamp set and some other stamp sets like Flourish Fun 1, Day Framer, Life Framer and Tabs & Banners, some journaling cards, lots of patterned paper and a few other items. 
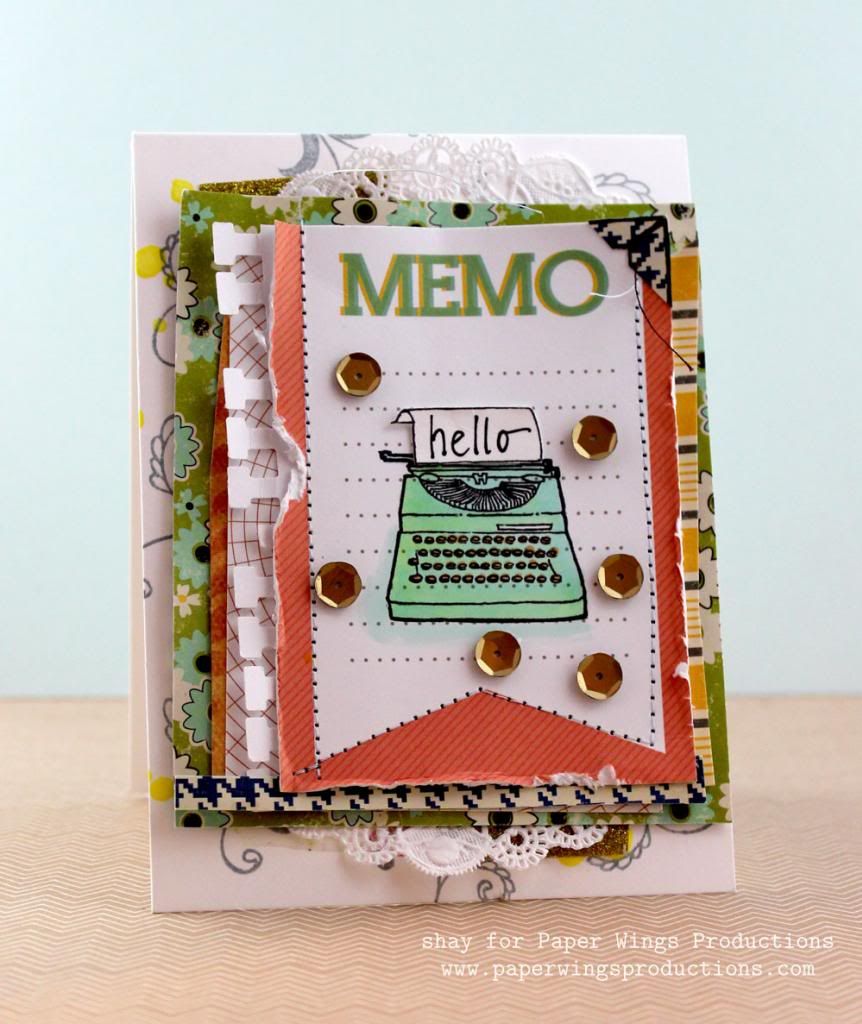
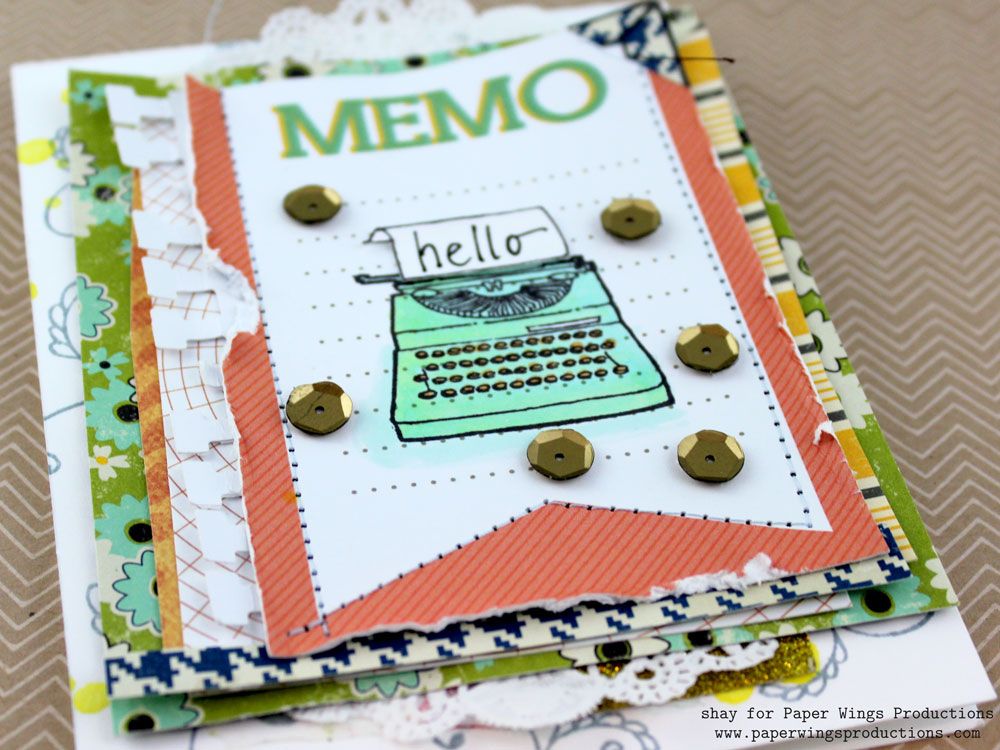
Card No. 1


The focal point of the card is a journal card I stamped the typewriter from Vintage Technology upon in black ink and colored in with Copics.  The sheet of paper also from Vintage Technology I stamped in black ink and wrote in the "hello" and attached to the typewriter.  I added a few haphazard layers of paper, another journaling card and punched cardstock.  I made sure to adhere the larger pieces only in the center.  I sewed the layers together following the banner shape of the journaling card.  I made sure to curl up the edges and distress the edges of the journaling card.  The photo corner is actually a corner of the Life Framer frame stamped onto patterned paper and trimmed.

I added bits of doily and glitter tape.  I adhered these layers to a white cardstock base that I stamped with Flourish Fun 1 in grey ink and sprinkled some drops of yellow mist.  Last I added some matte gold sequins.
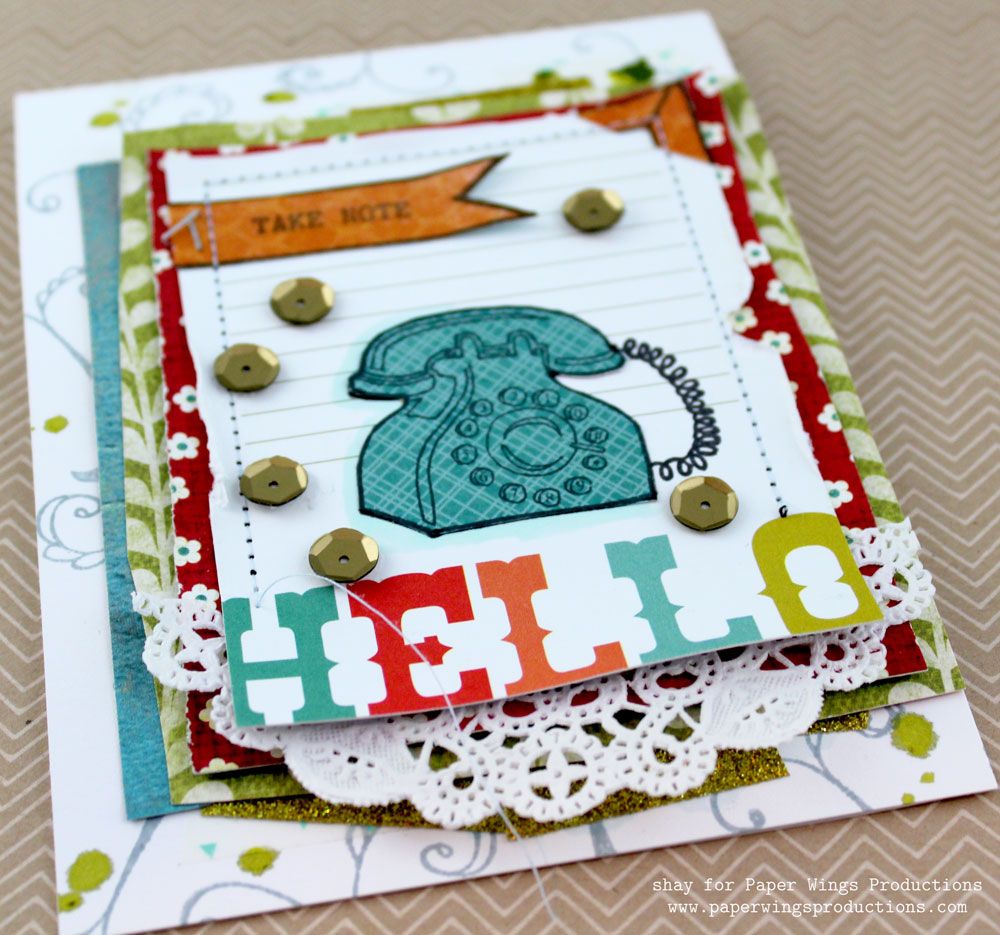


Card No. 2


The focal point of the card is a journal card I stamped the telephone from Vintage Technology onto in black ink and then added a teal paper pieced telephone without the telephone wire onto the telephone stamped directly upon the journaling card.  I stamped the double ended banner on orange patterned paper and cut off one end.  On the banner I stamped "take note" from Day Framer.  I adhered the banner with the Tiny Attacher.  I added a few haphazard layers of paper.  I made sure to adhere the larger pieces only in the center.  I sewed the layers together.  I made sure to curl up the edges and distress the edges of the journaling card.  The photo corner is actually a corner of the Life Framer frame stamped onto patterned paper and trimmed.

I added bits of doily, washi and glitter tape.  I adhered these layers to a white cardstock base that I stamped with Flourish Fun 1 in grey ink and sprinkled some drops of green mist.  Last I added some matte gold sequins.


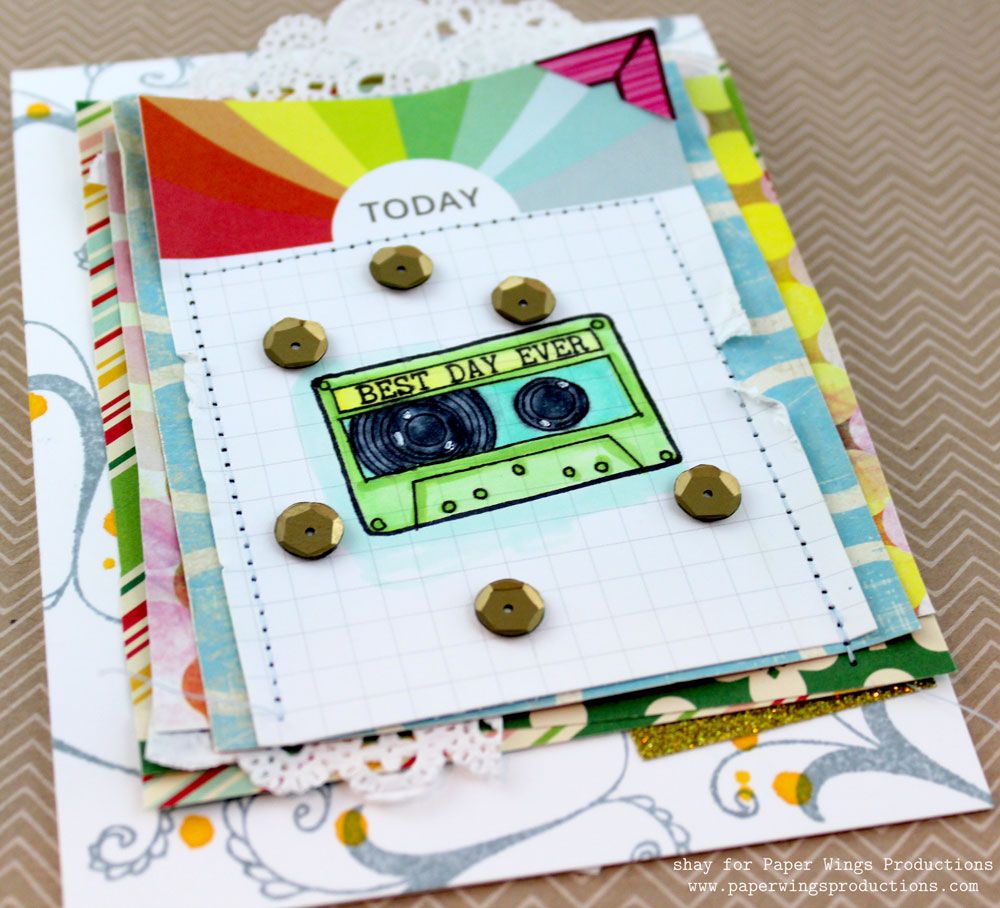
Card No. 3 (the 1970's card according to my sister)


The focal point of the card is a journal card I stamped the cassette tape from Vintage Technology upon in black ink and colored in with Copics and a little highlights using a Uniball white pen.  The "best day ever" is from the Day Framer and happily fits perfectly on the cassette.  I added a few haphazard layers of paper.  I made sure to adhere the larger pieces only in the center.  I sewed the layers together.  I made sure to curl up the edges and distress the edges of the journaling card.  The photo corner is actually a corner of the Life Framer frame stamped onto patterned paper and trimmed.

I added bits of doily and glitter tape.  I adhered these layers to a white cardstock base that I stamped with Flourish Fun 1 in grey ink and sprinkled some drops of orange mist.  Last I added some matte gold sequins.


You can use any sort of scraps of patterned paper or paper pads to change up the look of these sort of cards like I have done here.  If you are anything like me you have so much lovely patterned paper that this would be a great way to use it and be bold with your choices of pattern and color.  Also fun would be to just decorate journaling cards for scrapbooking and/or Project Life without making them into cards.

I hope you have enjoyed today's Themed Thursday.

We would *love* to see what you make with Paper Wings Productions stamps. Add your projects to Facebook, our flickr group, to Pinterest, comment with a link on this post or even email pictures to us!

Take flight,
Shay.

Supplies:
Stamps:

Ink: Memento in tuxedo black, Tsukineko; weather vane, Jenni Bowlin by Ranger
Journaling cards: Studio Calico
Cardstock: solar white, Neenah Paper
Patterned paper: enchanting "sisters" crazy daisy/blue without you from Just Dreamy 2 collection, My Mind's Eye; lucky me "sisters" forever rings from Abbey Road collection, My Mind's Eye; bloom & grow "bloom" vines from Bloom & Grow collection, My Mind's Eye; chicken pox from June Bug collection, Basic Grey; woolworths from Hometown collection, October Afternoon; canning jar from Modern Homemaker collection, October Afternoon; no. 2 pencil from Schoolhouse collection, October Afternoon; sketchbook 6x6 paper pad, Amy Tangerine/American Crafts
Other: colorless blender (0), cool gray no. 3 (C3), cool gray no. 7 (C7), cool shadow (BG10), moon white (BG11), mignonette (YG11), chartreuse (YG13), barium yellow (Y00), canary yellow (Y02) and loquat (YR12), Copic; black precision pen, American Crafts; signo white pen, Uniball; notebook border punch, Fiskars; sewing machine, Brother; buttercup, doris and sherbert Mister Huey's Color Mists, Studio Calico; 4" doilies, Hobby Lobby; matte gold sequins, Studio Calico; sunflower glitter tape, American Crafts; washi

Thursday, July 11, 2013

Themed Thursday: European Vacation


Hello there!  It's Shay here today to bring you Themed Thursday.

But first I need to toot the horn of the rest of the design team because they are doing a fabulous job! 
Want to see what I mean?  Of course you do!

Here are some recent posts to enjoy:


Wow!  That's a whole lot of gorgeous inspiration. 

Hopefully I can live up to what has preceded me.  Let me know how I did!

I went for a set of bright and happy cards using the London and Paris stamp sets.  Summer is the time of travel and although I am not travelling anytime in the foreseeable future, I can always dream and use these stamps to travel vicariously.


What I did:

1. I stamped an image from the London and Paris sets onto a piece of torn watercolor paper with VersaMark and heat embossed it using gold embossing powder.
2. I painted the piece of watercolor paper with watered down Distress Inks.  Flicked water over the image and let it dry.
3. I stamped the postage seal and some of the handwriting from Text Melange or Text onto the piece of watercolor paper in grey ink. 
4. For the background of each card I stamped in grey ink some images from Flourish Fun 1, Flourish Fun 2 and Text Melange or Text
5. The final touch for the background were drops of gold color shine. 
6. I adhered the watercolor panel to the card base with dimensional adhesive.


Voila!  A bunch of fun cards.  You can easily add a stamped or handwritten sentiment under the image or do all the writing inside.

We would *love* to see what you make with Paper Wings Productions stamps. Add your projects to Facebook, our flickr group, to Pinterest, comment with a link on this post or even email pictures to us!

Take flight,
Shay.


Supplies:
Stamps:


Ink: mowed lawn, squeezed lemonade, picked raspberry and salty ocean, Tim Holtz Distress Ink by Ranger; weather vane, Jenni Bowlin for Ranger; VersaMark, Tsukineko
Paper: white cardstock, Georgia Pacific; watercolor cold press 400 series 140 lb., Strathmore
Other: detail metallic gold, JudiKins; heat embossing gun; gold color shine, Heidi Swapp; dimensional adhesive


Related Posts Plugin for WordPress, Blogger...