Showing posts with label muertos. Show all posts

Tuesday, January 7, 2014

Wet Stamping Tutorial


Hello everyone! It's Amber here with another fun tutorial. Before I share my project, I want to announce the winner of our blog hop givewaway!

Sweet blog hop! Loved the mix of projects and the various treatment of white... Silver, white and black, neutrals, white on white... Beautiful!

Congratulations Beatrice, please contact Carrie at paperwingsproductions@hotmail.com for instructions on how to claim your prize.

Today I'm sharing a quick and easy water stamping tutorial. I created four different colorful tags with this fun technique. Every tag features Paper Wings Productions Snapshot Framer Clear Stamp Set, Muertos Cling Stamp set, and Text Cling Stamp Set.
                                                                       

Below are the six steps I used to create these fun little tags.


Step: 1 & 2
Start with a white tag and mist it with some water. I lightly misted mine here but you can mist it as much as you want. The amount of water you add will determine how much of a watercolored effect it will have in the end. This also depends on the type of cardstock and ink pads you use. All inks are different so you might want to try it out on a scrap piece of paper and see how it turns out.


Step: 3 & 4
After you have you tag misted take a large background stamp, ink it up with a light shade of ink, and stamp it onto your  tag. Then after you have you background stamped take a smaller detailed stamp and stamp it over your background. I used one of the little stamps from the Muertos Stamp Set. Note: This is done with the same color of ink while the tag is still wet. You will also notice that the tag has curled up a little from the water but it will flatten back out in the next step.


Step: 5 & 6
Now grab your heat gun and dry the tag completely. You could just let it sit in dry but I use the heat gun to flatten the tag back out and it makes the steps go a lot faster. Now that the tag is dry apply a darker shade of ink to your stamp and stamp it directly over the  first image. This will make the image really stand out. You will be able to see the image below it but it will be light and give the image more dimension.


Here is a close up of my finished tags. I added some string , a smaller tag with my "Joy" sentiment, and some colorful sequins. Hope you enjoy and Thanks for visiting!
Supplies:  4 Tags- Paperbilities / Paper Wings Productions Cling Stamp Sets- Muertos & Text / Paper Wings Productions Clear Stamp Set- Snapshot Framer / CTMH Ink Pads- Breeze, Ocean, Baby Pink, Bubblegum, Petal, Smokey Plum, Sweet Leaf, Topiary / Colored Sequins / Heat Gun / Spray Bottle


Friday, August 30, 2013

Feature Friday: Muertos Birthday


Hello everyone! It's Amber here with this weeks Feature Friday Post.Today I'm sharing a Birthday card using the Muertos Cling Stamp Set and the Let's Eat Cake Clear Stamp Set. First let me start by saying how happy I am to be staying on as a part time designer. I will be stopping in twice a month to share a weekly post and join in on the  Design Team Blog Hops. Speaking of Design Team Blog Hops, next Friday September 6th is the next Paper Wings Productions Design Team Hop so make sure you come back and check it out! Okay now onto my project...For this card I wanted to play with color, pattern, and texture. The color and the pattern part was easy I just pulled out a piece of Crate Papers patterned paper and matched up some cardstock.


For the texture I cut the two bright pink strips of  border paper that is under my patterned paper to look like fringe. You can see it a little better in the photo below. I just used a small pair of scissors and randomly cut little slits all along the border. Tip: It is easier to cut the paper to look like fringe after you have all ready stitched the borders to your patterned paper. This makes it a lot easier to hold while cutting, plus you can see how far up to cut the slits.


We would love to see what you create with Paper Wings Productions stamps.... Show us on our Pinterest page, our Facebook page or our Flickr gallery or leave us a comment with a link to your project. Thanks for visiting!
Supplies: Cardstock- Cream, Dark Gray, Bright Pink / Patterned Paper- Crate Paper's On Trend Collection / Paper Wings Productions Cling Stamp Set- Muertos / Paper Wings Productions Clear Stamp Set- Let's Eat Cake / CTMH Ink Pad- Flannel Gray / Sulky Thread- Black


Thursday, June 27, 2013

Celebrate


Hello everyone! It's Amber here with another Themed Thursday Post. For this weeks theme I'm sharing two Celebration cards that are very much alike but different.  For my two cards I used Paper Wings Productions Text & Muertos Cling Stamp Sets and the Banner Day Clear Stamp Set.


I used the same layout for both cards but changed them up by using different colored cardstock, different focal point stamps, and different Text background stamps. This is a great way to make a set of cards, you can use the same layout but make every card in the set a little different with out having to pull out a million different supplies.


Before I go I thought I would recap a few things that were announced earlier this week. On Monday Carrie announced the new design team, unveiled the new Paper Wings Productions website and shared a few new cling stamp sets that are now available in the shop. You can check all that out HERE.  If that wasn't exciting enough on Tuesday Norma shared this fabulous stamping and embossing technique using gelatos, you can check that out HERE.


We would love to see what you make with Paper Wings Productions Stamps so add your projects to our Flickr Group, Pinterest, Facebook, or leave a comment with a link to your project. Thanks for visiting today!
Supplies:Cardstock- White,Pink,Teal / Patterned Paper- Crate Paper / Paper Wings Productions Clear Stamp Set- Banner Day / Paper Wings Productions Cling Stamp Sets- Text & Muertos / CTMH Ink Pad- Chocolate / Large Circle Punch / Sulky Thread- White / Sewing Machine

Wednesday, May 8, 2013

What's Up Wednesday: Mother's Day Flowers

Happy Wednesday peeps!  Its Shay here and I was so inspired by last weekend's May Flowers blog hop and the awesome design team's projects that I decided to go floral for today What's Up Wednesday!

Please excuse me for a brief public service announcement ;-):

Before I go further though I need to say how flat-out fantastic the design team is and how inspiring I find their projects!  Dana just made this stunning tag.  Norma made any princess swoon with these pretty-as-a-princess projects.  Carrie wowed with this alcohol ink tutorial.  Amber made this adorable card.  Tara tantalized with this terrific crayon resist technique.  AND don't miss out on Nesting Components, May's incredible mixed media kit...see more about it HERE!

Now back to our regularly scheduled programming....

My late grandma was also an avid lover of flowers of all kinds so I like to honor her memory with making Mother's Day cards featuring flowers.  Mother's Day in my mind (and I don't think I am at all alone) is a natural fit with the blooming flowers of May.

I found myself trying to stretch my conception of some of the Paper Wings Productions stamps to create interesting flowers due to the innovative and clever uses of Paper Wings Productions stamps by the design team for our Paper Wings Productions' May Design Team Blog Hop.

Card No. 1


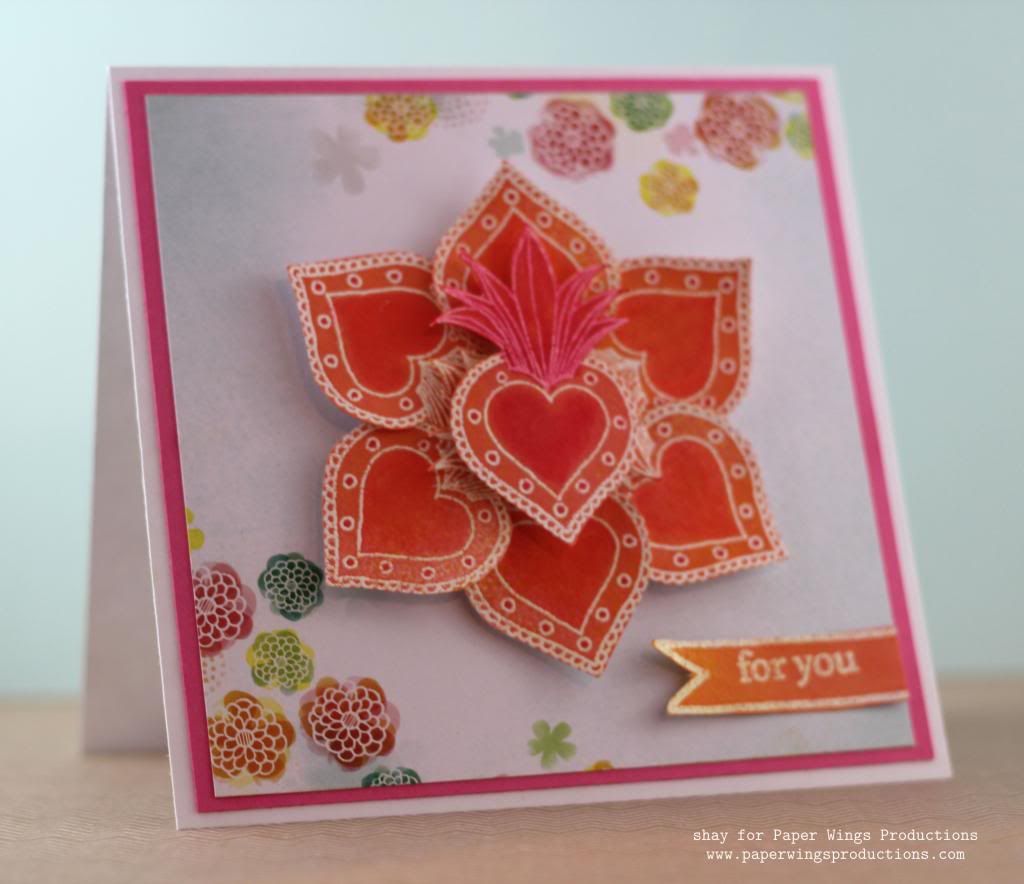
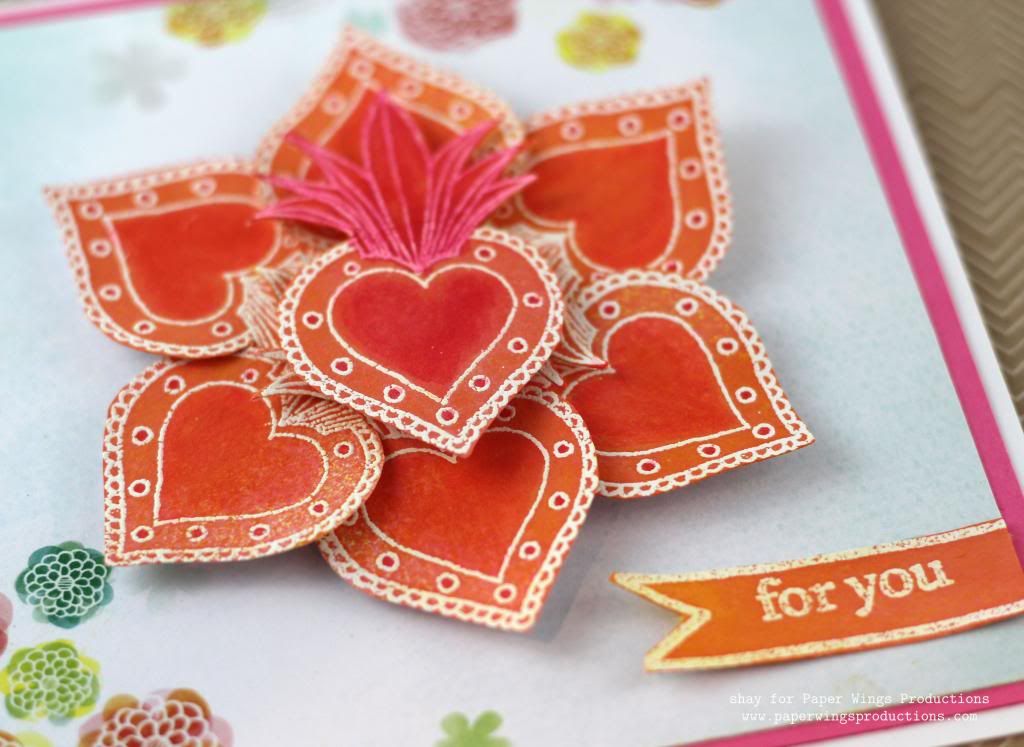
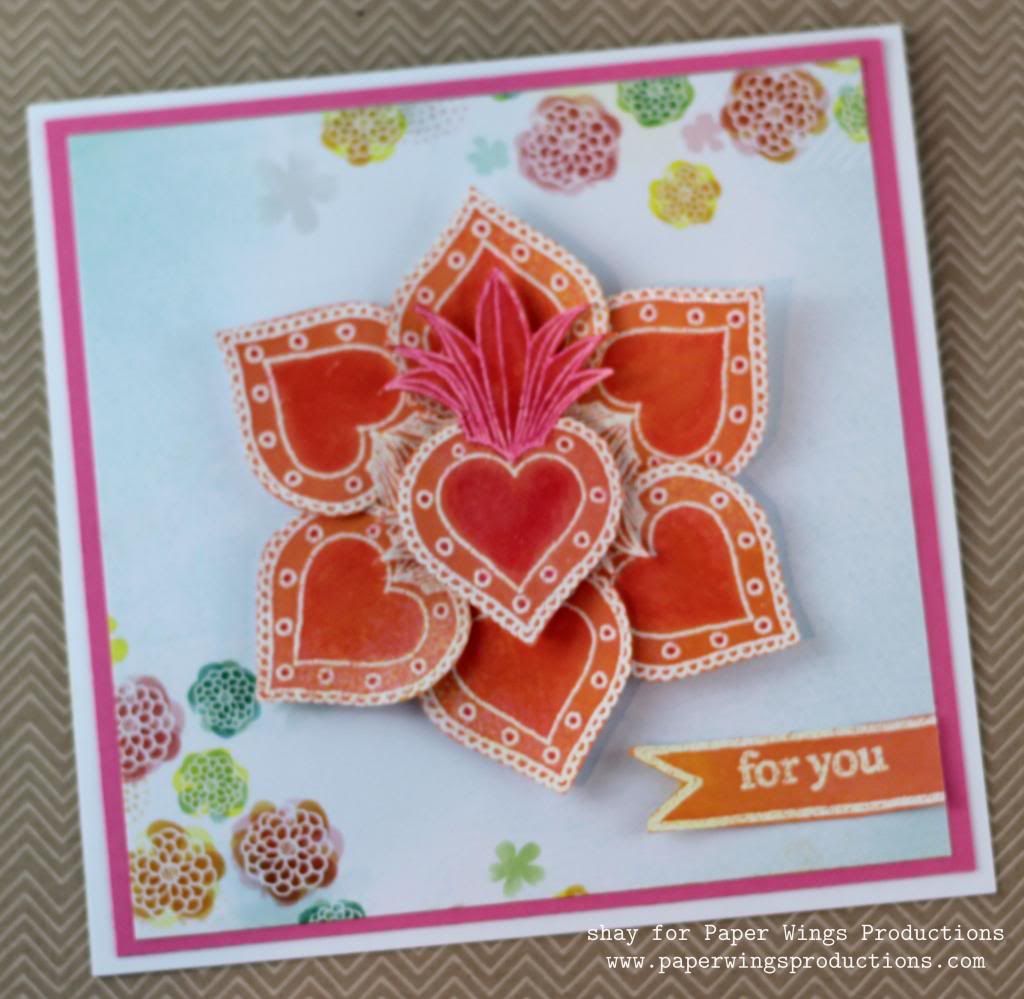
The sacred heart from Milagros put my mind to petals of a flower so I stamped it 7 times with Versamark and heat embossed it with white embossing powder.  I sprayed yellow, orange and pink mists on it and then colored in sections of it with Copic markers.  I cut each heart out.


I nested 6 of the hearts together and added the 7th to the center.  I adhered the flower to a piece of patterned paper that seemed destined for this card and then onto a piece of pink cardstock.  I finished it off on a 5.5" x 5.5" white card base.


For the sentiment I stamped the double ended banner from Tabs and Banners and for you from Thankful with Versamark and heat embossed it with white embossing powder.  I sprayed the same mists over the banner, cut off one end and adhered it to the patterned paper.

Card No. 2


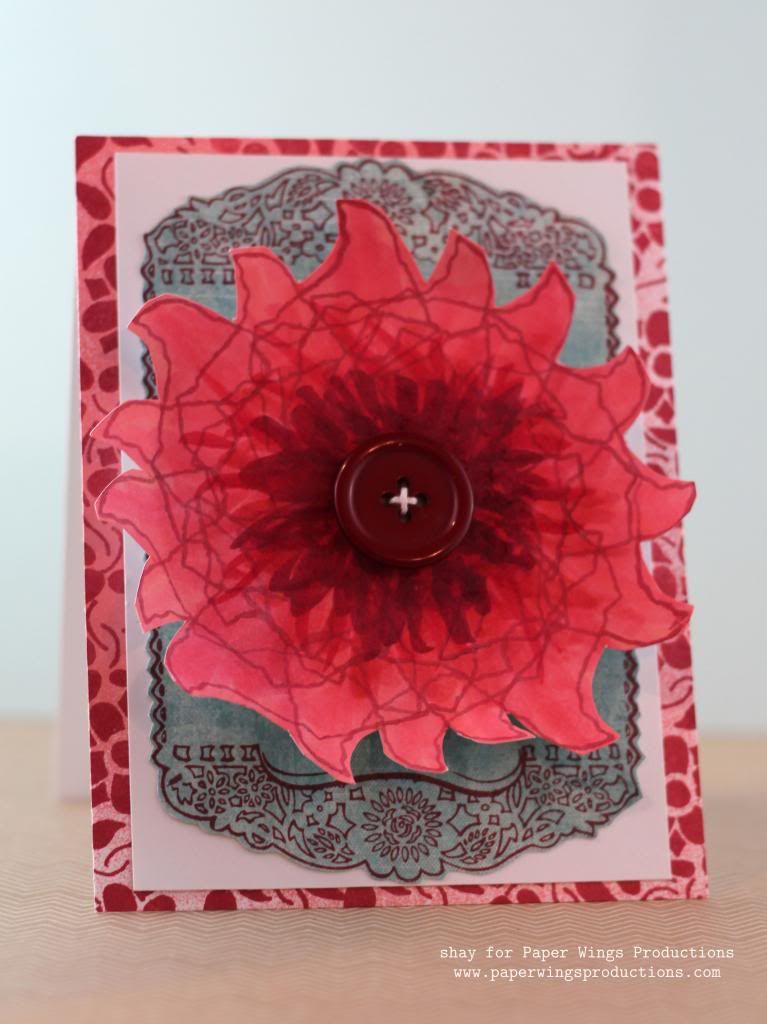
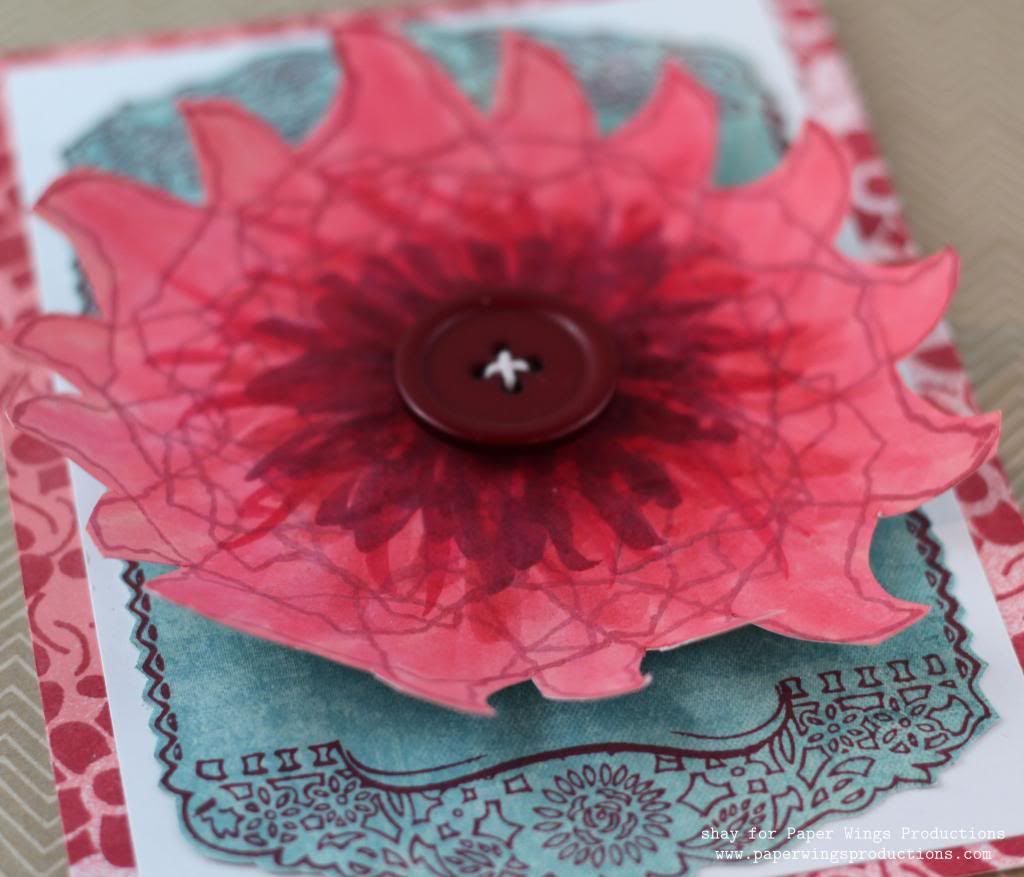
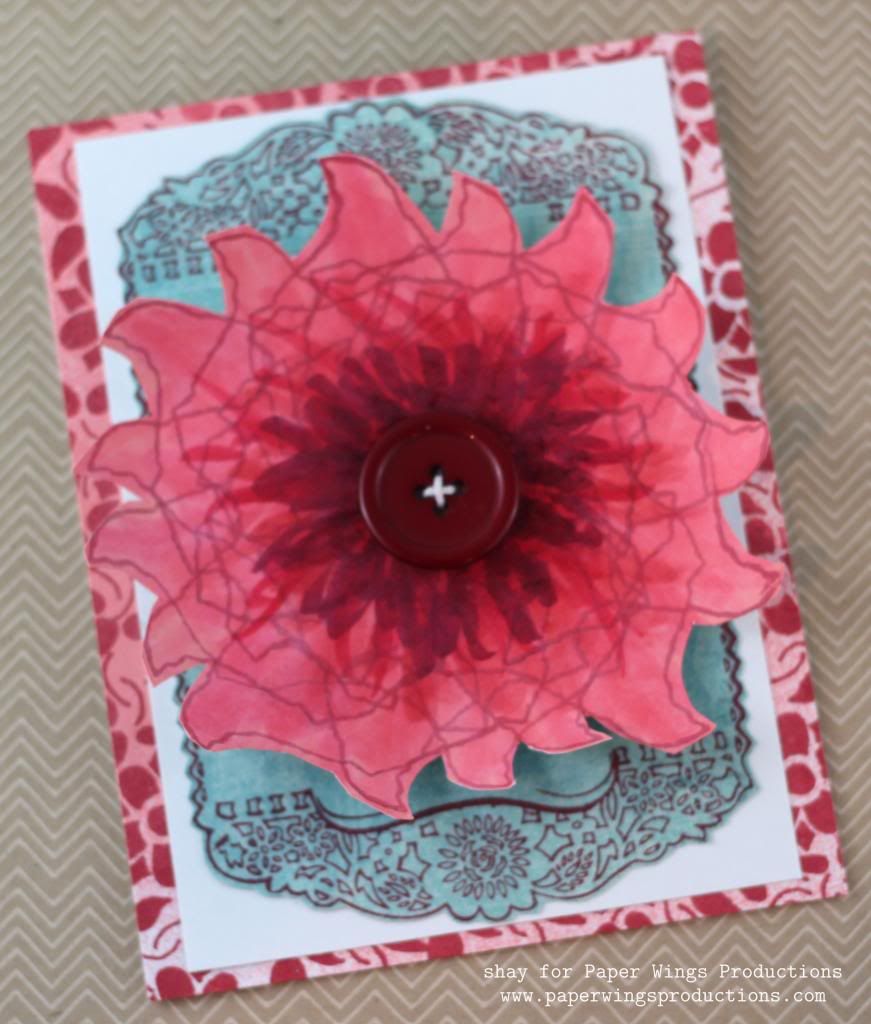
This may be the wildest idea I had for a flower.  I stamped the outline of Texas from Lone Star State in royal red ink with the panhandle facing the middle and then I stamped it over and over rotating it in a circular fashion until it looked more like a flower.  I sprayed pink mist over it and cut out the flower.  To make it more flower-like I colored it with Copics from the center out in a spikey sort of motion with the darker colors in the center.  I added a button to the center of the flower.


Next, I adhered the flower with dimensional adhesive onto the gorgeous floral frame from Dia De Los Muertos Mujer I had stamped onto patterned paper and cut out.  I adhered this all on a white cardstock layer.


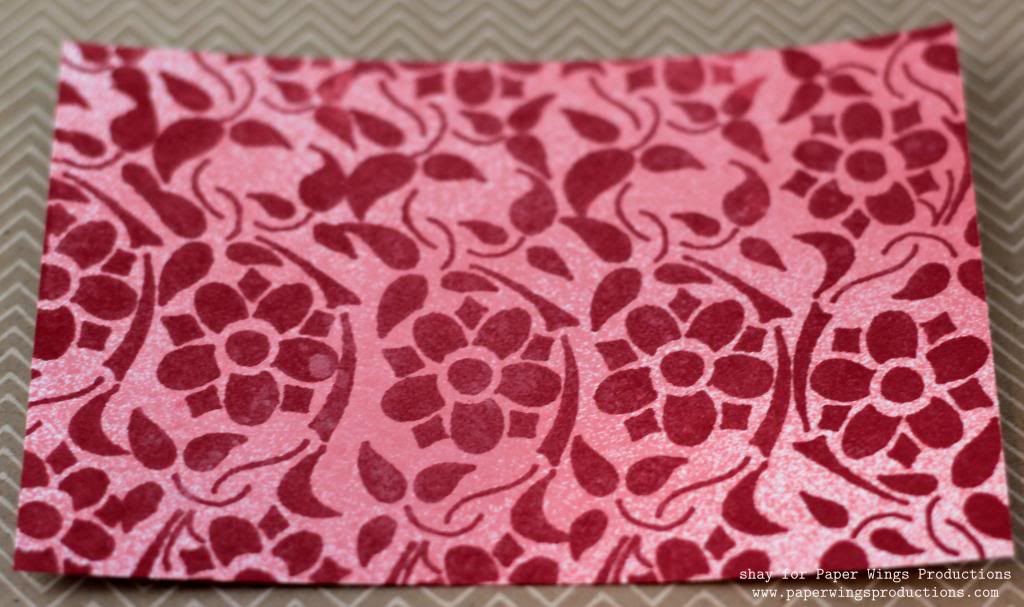
For the card base I created a patterned paper using the lovely stencil like floral border from Muertos using the same royal red ink and pink mist.


Card No. 3


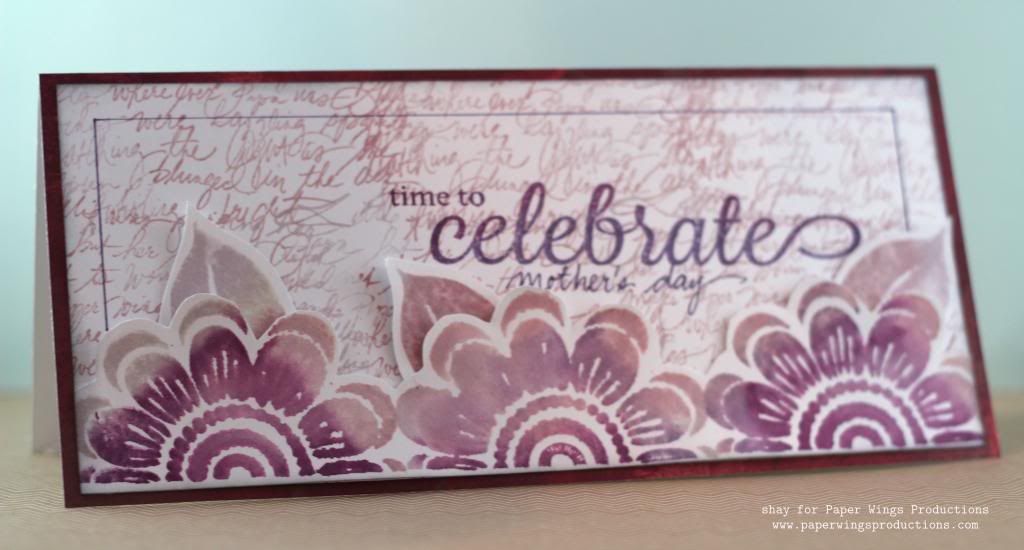
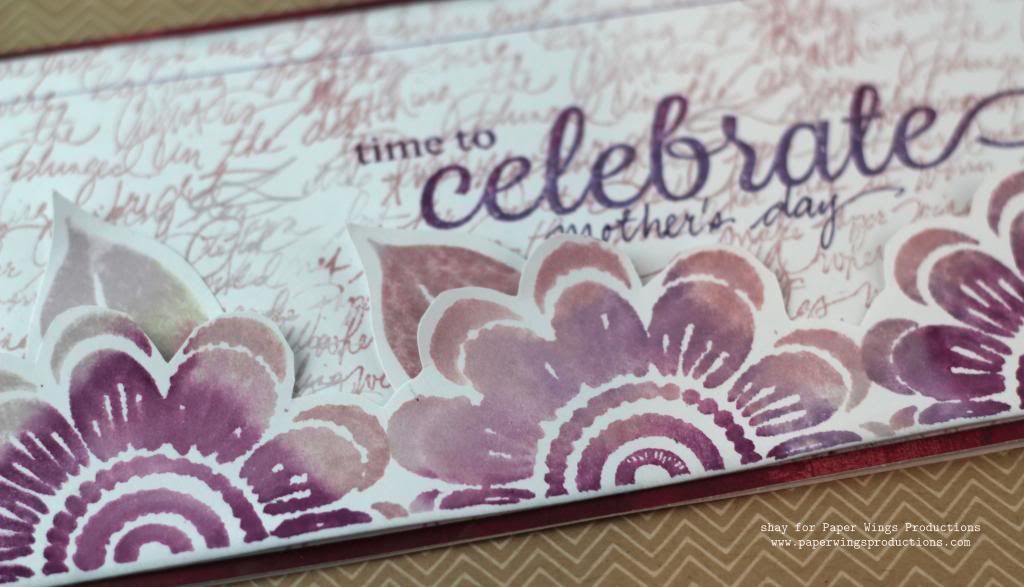
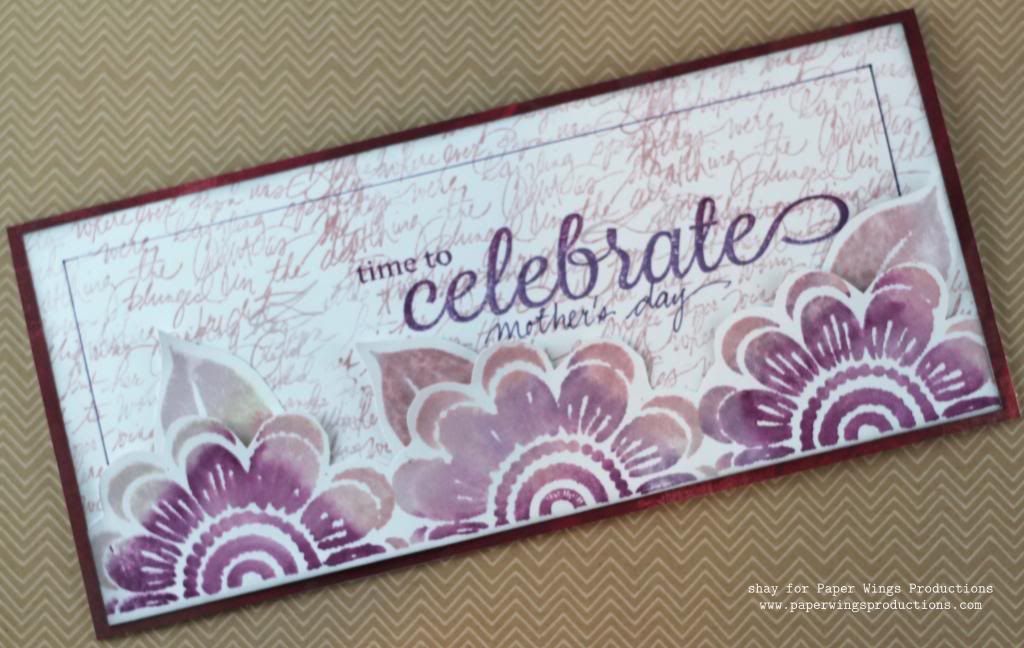
For a more traditional take on flowers I turned to my go-to floral stamp set: Flower Power.  My mom's mom loves purple so I went purplicious with the largest flower from Flower Power or Half Flower by stamping a border of 3 of them using purple Distress Inks that I misted with water before stamping on a piece of white cardstock.  I cut out the flowers and leaves (I later cut off the leaves to put behind the flowers).


On a piece of white cardstock I stamped with lighter purple Distress Inks using the handwriting from Writings Backgrounds or Writing.  With darker purple Distress Inks I stamped celebrate and time to from Celebrate.  I wrote in mother's day using the dusty concord Distress Marker and inked the edges of the panel.  I adhered the floral border to the writing background that was adhered to a patterned paper card base.  I finished this off with a border drawn in with the dusty concord Distress Marker.


Card No. 4


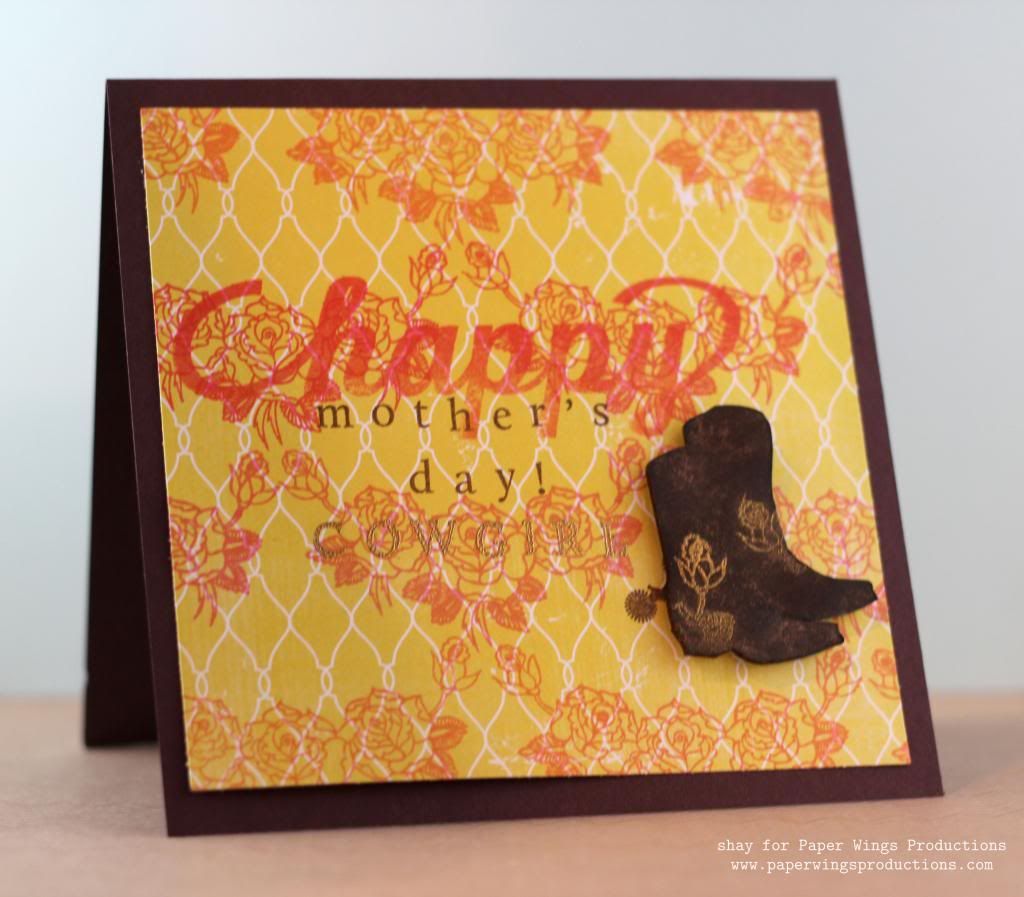
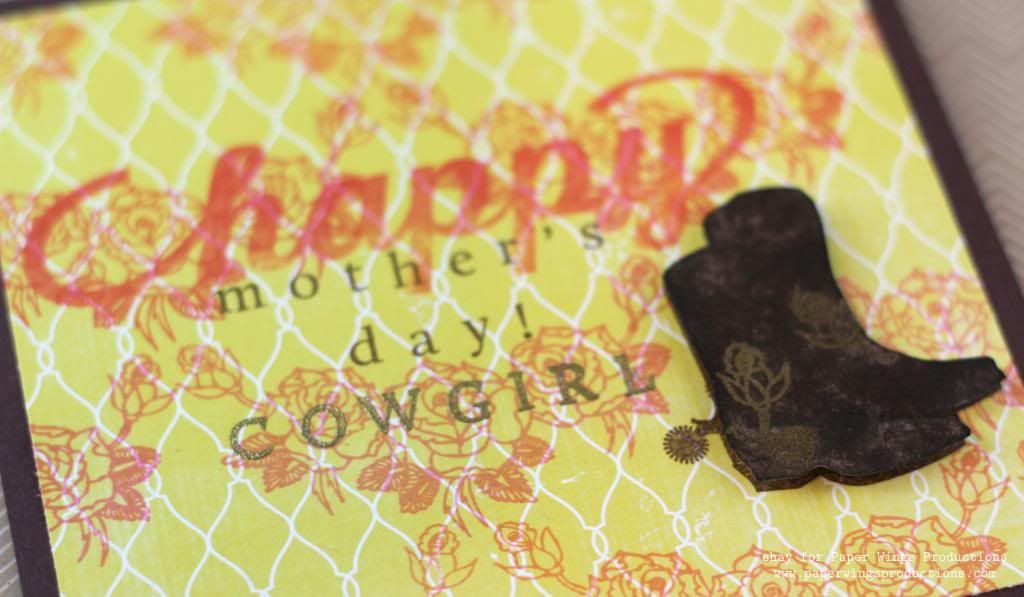
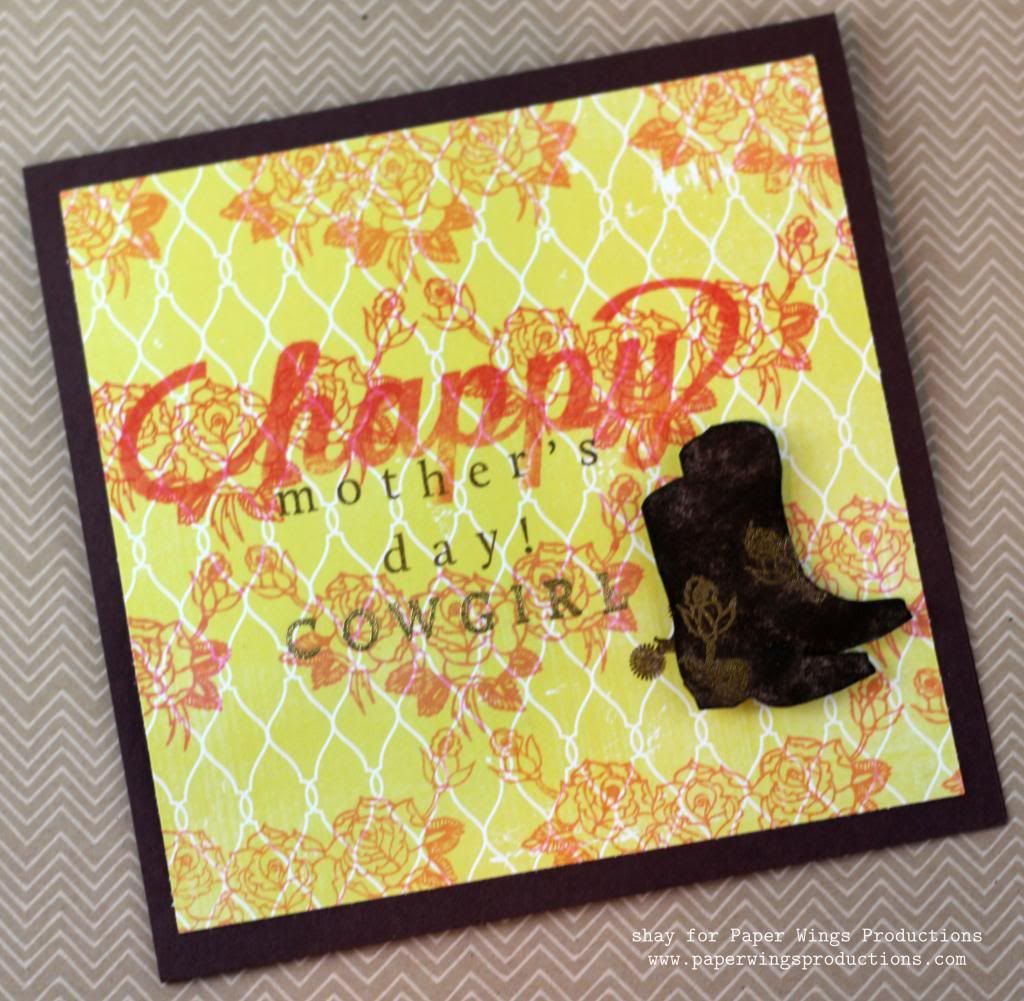
I went with a little honky tonk with my last card.  I stamped the boots from Lyrics or Walking in brown ink on white cardstock and then overstamped with the roses from Dia De Los Muertos Hombre with Versamark.  I then heat embossed in gold.  I cut the boots out.  I pressed the brown ink over the boots image to make the gold stand out more.  I inked the edges. 


On a piece of patterned paper I stamped a pattern using the roses from Dia De Los Muertos Hombre.  I then stamped happy from Happy and spelled out mother's day (stamped in brown ink) and cowgirl (embossed in gold) from Perfect Alphabet.  I stamped the boots again on the yellow panel and placed the embossed boots over that image using dimensional adhesive.  Lastly, I adhered the panel to a dark brown card base. 


I hope you have enjoyed these cards and enjoy a glorious Mother's Day weekend!

We would *love* to see what you make with Paper Wings Productions stamps. Add your projects to Facebook, our flickr group, to Pinterest, comment with a link on this post or even email pictures to us!

Take flight,
Shay.

Supplies:
Stamps:

Stamp not shown: Happy
Inks: Versamark, Tsukineko; royal red, pale tomato, bubble gum and soft cantaloupe shadow inks, Hero Arts; mulled lavender, victorian velvet, dusty concord and seedless preserves, Tim Holtz Distress Ink by Ranger; dark chocolate, Papertrey Ink
Cardstock: white, Georgia Pacific; hibiscus burst, Papertrey Ink; chocolate chip, Stampin' Up!
Patterned Paper: Yes, Please 6x6 paper pad, Amy Tangerine/American Crafts; Love You Madly and Color Me Happy 6x6 paper pads, Glitz; plum wine, Basic Grey
Other: opaque white and detail metallic gold embossing powders, Judi Kins; heat gun; Inkssentials ink blending tool, Ranger; tender pink (RV13), begonia pink (RV14), light prawn (R22), cadmium red (R27), lipstick red (R29) and cardinal (R59) markers, Copic; dusty concord, Tim Holtz Distress Marker by Ranger; pink balloon sprinklers, October Afternoon; buttercup and sherbert Mister Huey's color mists, Studio Calico; button, sassafras

Wednesday, January 2, 2013

What's Up Wednesday - Art Journaling

What's Up Peeps, Norma G. here with  

Today I wanna share one of my VERY favorite things to do, ART JOURNAL.  I began art journaling last year as a way to blow off some creative steam if you will.  It's also a wonderful way to use up scraps, try my new stamps and different techniques.  So I'd like to share my latest page with you:

This page is layer upon layer of paint, scrap papers, crate paper, spray inks and of course stamps.  

The beautiful thing about art journaling, just like mixed media is that there are NO RULES.  You can have as many or as little layers and elements as you want.  An art journal can be very personal, a place to express your inner most feelings or not.  It's all up to you but I think you'll always find that it's definitely a place to grow and nurture your creativity.

You'll be able to experiment with new mediums, ideas and color combinations.  Then over time it'll be fun to look back at your pages and see the evolution of your style and creativity.

If you'd like to try art journaling or mixed media, we have a WONDERFUL new Mixed Media Kit available.  This kit is truly filled with an AMAZING assortment of products for your creative amusement and I HIGHLY recommend it to all of you.  This beautiful kit is so versatile, all of the items can be incorporated into scrapbooking and card making too.  So please don't think of it as just for "Mixed Media" or "Art Journaling", it can be used on anything you want.

Well friends, I hope I've inspired to try something new or if you already art journal, to keep on going!  Thank you all so much for joining me today, below you'll find links to all of the stamp sets I used on my art journal page.

HAVE A WONDERFUL DAY & A BLESSED 2013!!!


Related Posts Plugin for WordPress, Blogger...