

Hi Paper Wings fans! Dana here today sharing a fun resin paper tutorial. Before I start my post I want to thank everyone who hopped with us over the weekend. We hope that our colorful projects were inspiring!
Congratulations to the winner of our August Blog Hop:
Jean BullockAugust 1, 2014 at 2:08 PM
I shared about the contest. jean.bullock.148
Please contact Carrie at paperwingsproductions@hotmail.com for instructions on how to claim your prize.

I had a blast creating resin paper, which I then stitched onto the cover of a linen mini journal.

I wanted to create a one-of-a-kind print so I used a Gelli Plate with block printing ink and some of my favorite stamps. I do have to apologize for not having step-by-step photos on how I created my prints. The gelli print process is fast and if I stopped to take photos during the process I would risk having the ink dry on my plate. That being said, I kept my prints simple, so these written instructions should help you create similar prints if you are so inclined.
To create the print on the right, I applied a layer of turquoise ink over a 6x6 Gelli Plate. I then stamped onto the plate using the small circle stamp from the Art Textures Stamp Set, which removed paint from my plate. I then pressed a sheet of deli paper over my plate, pressed down, and peeled the paper away. I stamped the red numbers (Perfect Numbers Cling Stamp Set), bird (Bird Beauty Cling Stamp Set) and arrow (Vintage Melange Cling Stamp Set) once the turquoise ink was dry using red block printing ink and black archival ink directly onto the deli paper (no Gelli Plate transfer).
The base of the print on the left was created by passing a second piece of deli paper over the Gelli Plate after I took my first print off. The second print removed the rest of the ink from the plate. I love this print because it has the same pattern, but in a lighter shade of turquoise that I prefer. I added a small amount of yellow block printing ink to half of my Gelli Plate and pressed the deli paper over my plate to transfer the ink. I used the red numbers and black arrow I had out from my first print again, stamping directly onto the deli paper. I still had red ink on my paintbrush so I added a red stripe to separate the yellow and blue halves of my print. To finish this print I stamped several bees (Vintage Melange Cling Stamp Set) with brown archival ink onto the deli paper.
Note: Any letters or numbers will print backwards during the Gelli Plate transfer process. I think this is cool! If you want spell a word or have the numbers print in the right orientation, you must apply them to the gelli plate backwards.

I mixed up Ice Resin per the package directions. Once the resin is mixed there is a limited working time before the resin hardens. I only needed a small amount of resin to cover my prints. I did not want to waste the rest of the resin in the cup, so I covered several more gelli prints with resin.

I covered my workspace with a plastic garbage bag and used a piece of sponge to spread a thin layer of resin over both the back and front sides of my prints.

While the resin was wet I sprinkled some Relique Glitz Gold Iced Enamels over the top. I then left the paper to dry for about 8 hours. After that, I peeled the prints from the plastic, they were a bit tacky, and hung them to dry overnight.

Here are my finished resin prints. The texture is similar to that of a fruit roll-up and the shine is fantastic!
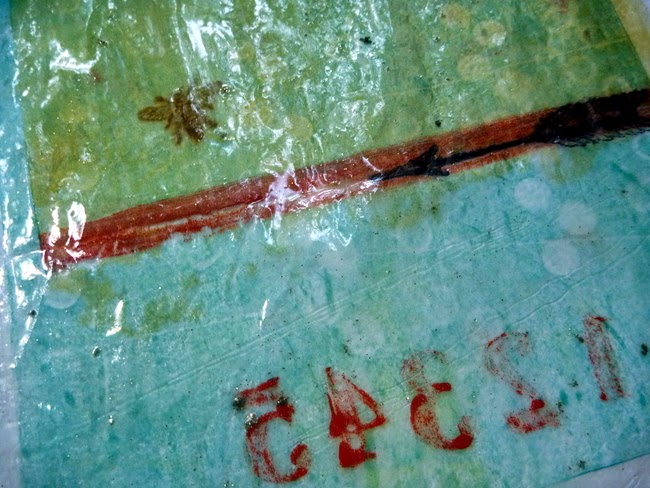
Here is a closer look. The resin helped to brighten and highlight the details of my print.
I trimmed my print to size and then stitched it onto the cover of a linen mini journal. I haven't altered the inside pages yet.

This is a shot of the back of the journal.
Thank for stopping by today! I hope I have inspired you. If anything was unclear in this post, please don't hesitate to ask me questions. Be sure to stop by here tomorrow for the August challenge reveal!
        |


.jpeg)
.jpeg)
.jpeg)
.jpeg)
.jpeg)
.jpeg)
.jpeg)
.jpeg)
.JPG)

