Showing posts with label scriptures. Show all posts

Tuesday, August 4, 2015

the Lord is my Shepherd

Hey everyone! It's Ashley with my first August post at The Aviary, the Paper Wings Productions blog. I sure hope you're enjoying the projects the design team is putting out because I know we're having fun creating! Today I have a card using the Scriptures clear stamp set + the Howlin' For You cling stamp set. Just fyi, the Scriptures stamp set is easily one of my favorites by PWP. I love the sentiments and I love the font.
So the first thing I did was stamp my trees with Versamark ink and heat emboss the image with white embossing powder. Next I started using distress inks to blend the background. I used old paper and shabby shutters ink colors. When I got the background how I liked it, I grabbed a stencil.
I mixed Faber-Castell gel medium + Lindy's Stamp Gang mist to create a brown paste and then applied it over my stencil. I sped up the drying process by blasting it with my heating tool. Then I added splatters of the LSG mist onto the card.
Finally I stamped my sentiment with Memento Tuxedo Black ink and tied some twine around the card. Have you ever used mist with a gel medium?
can you see the detail and texture in the trees?
 Thanks for stopping by today! If you're looking for more ideas on how to use your stencils, check out this post by Pam.

Wednesday, August 13, 2014

What's Up Wednesday - Scriptures card.


Hey everyone! It's Ashley and I'm super excited to be the guest designer this month. Today I'm sharing the card I made for What's Up Wednesday.


I just loved the Scriptures stamp set and I think I can use it for tons of cards.


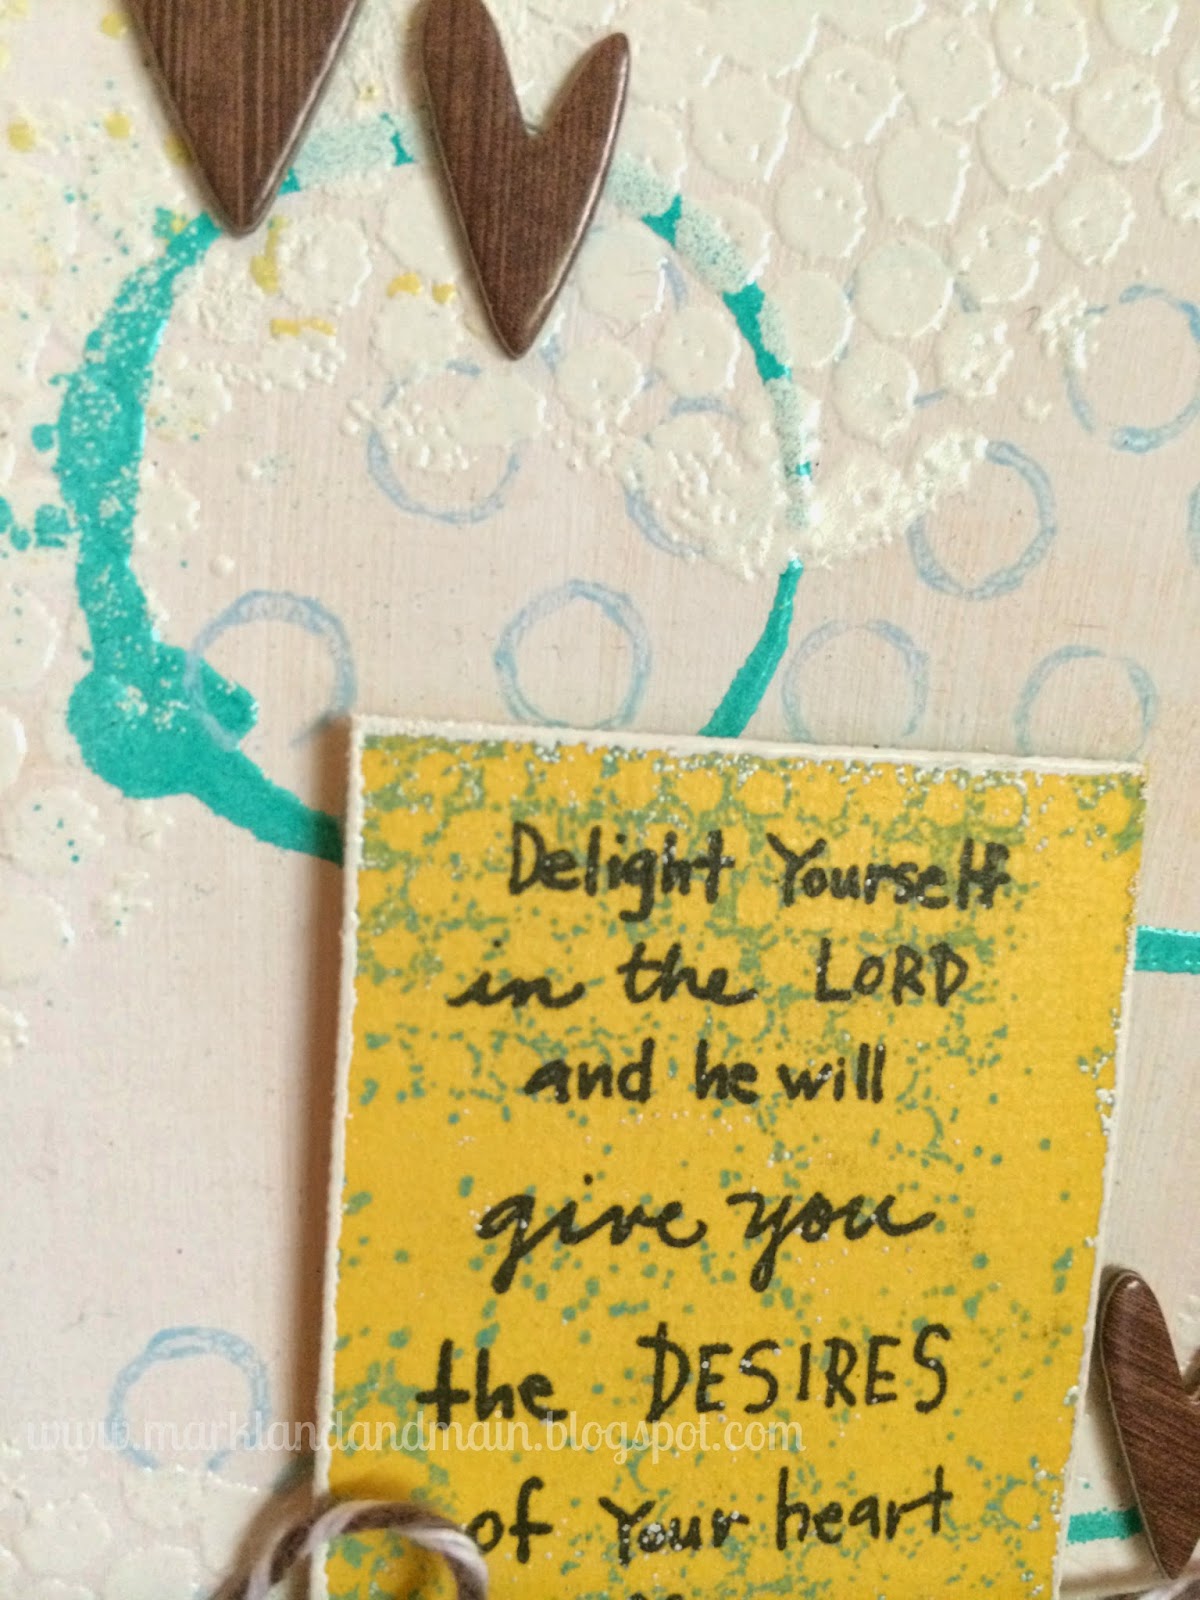
To create the base of my card, I used a lot of mediums for dimension and color. First I painted the whole base with gesso. Then I used the Art Textures stamp set to heat emboss some white circles onto the background. I mixed gesso with Lindy's Stamp gang mist for the bright blue stamping and then I added even more gesso to the mist for a toned down blue and stamped the smaller blue circles with that.


I heat embossed another of the textures stamps with yellow. I wanted to use a few different texture stamps from the set with different techniques for visual interest.

For the square that my sentiment is stamped on, I just dipped the edges of the card in Versamark, sprinkled on some embossing powder, and heat embossed the edges. Now the yellow sentiment square doesn't stand out quite as much against the white background.


I've linked my products below. Thanks for joining me today!


Thursday, December 12, 2013

Christmas Ornaments

Hello. Hello and Merry Christmas to you all!  Norma here with you today for:


Before I get started, I'd like to invite you to check out Cathi's wonderful Tutorial Tue post: Stamped & Image Transferred Soaps.


Okay so my theme today is ornaments and I've made two to share with you.


The holidays are a fun time to make new ornaments.  You could give them away as gifts or get together each year and create new ones with your family.  So with that in mind, here are a couple of ideas to get you started.  One is very simple and the other is very layered.  I tried to use the same stamp sets for both ornaments to show you how versatile they are.


This was the first ornament I made and I used a TON of stamps to add texture to my background.


I started out with a sheet from a shaped chipboard mini album and applied a layer of gesso.  (tidbit: I buy a lot of mini albums but never use them for their intended use.  I like creating ornaments, wall hangings and altered art with them instead.)


I created the first layer of the background using the following stamps: Damask Cling Stamp, Lace With Border Clear Stamp & Tile Pattern Clear Stamp.  I stamped each one in a patchwork pattern and then used the lace boarder to define each section.  After that, I added another layer using these stamps: castle from the Prince Clear Stamp set, flying fairy from Fairy Friends Stamp set and the Text Cling Stamp set.


Next I stamped a strip of cardstock with the Postcard Cling Stamp and then ran it through my Cuttlebug to cut the mini snowflake rosettes.


Finally I stamped Psalms 46:10 from the Scriptures stamp set and cut into strips.  I layered all of the embellishments, inked the edges and added a second hole to create the ribbon hanger.


Now for a much simpler ornament that is just as beautiful.


I started out with a paper mache ornament and gesso'd it just like before.  Then I applied a coat of paint and used the Postcard stamp all over the background.


After that, I used the same lace ribbon border on the perimeter of the ornament.  I simply curved the clear stamp to fit my ornament and stamped it all the way around.  Next I stamped the prince onto cardstock, colored, fussy cut and glued him on.  I stamped Proverbs 15:13 from the Scriptures stamp set and added ribbon around the edges meeting at the top to create a bow.


When using stamps, the possibilities are endless!  Thanks so much for joining me today and don't forget to pick up the Dec Nesting Components kit!!


Have a wonderful day!!


Thursday, March 7, 2013

Themed Thursday - Happy Easter!

Hello everyone, Norma here with you today!!  Did you guys see Dana's "Faux Paper Casting" technique on Tuesday?!  WOW, she shares the coolest techniques doesn't she!  I'm learning so much from her so if you missed it just click on the link.  ;D

The new Mixed Kit just came out too and it's AWESOME!  Click on the link to check it out: PWP Mar Mixed Media Kit Release


Okay so for today I'm sharing a fun little Easter project that I made using a variety of PWP stamp sets:

     
This cute little project started out as an empty ribbon spool and shoe box lid.  Here's a look at the lid before I cut it up:

I actually intended to make this into a shadow box for my Feb hop project but I just couldn't make it work.  So I set it aside and it just happened to be perfect for this project. ;D  I added some additional layers of green paint, 3-D Enamels flourishes and randomly stamped the Writings Backgrounds Cling Stamp.  Next I cut it down to size creating a nice backdrop for my project.

For the base, I padded the empty spool with foam then covered it with a scrap piece of Debbie Mumm fabric.  On the top, I adhered a piece of white cardstock that I ran through my Cuttlebug to emboss with the Swiss Dots folder and then inked with Tim Holtz Shabby Shutters.

Moving onto the banner, I cut a wooden dowel into two pieces for my "poles" and gave them a light wash of TH Vintage Photo.  I stamped the pennants onto various patterned papers with the Happy Day stamp set.  Next I fussy cut, layered the pennant pieces and highlighted with a white gel pen.  To string my banner, I punched holes and added grommets for a nice finished looked.  I hung the banner on a thin sheer ribbon.

I stamped two sets of the flowers onto pink patterned paper, fussy cut and highlighted with white.  (Tip: highlighting helps create depth on the image.)  After attaching to my "poles", I wrapped pipe cleaners around the poles to soften them a bit and add visual interest.  

 I choose to use a bird from the Bird Melange set and stamped him on yellow patterned paper.  He's topped off with a small crown from the Crowns stamp set.

For the sentiment I used a verse from the Scriptures stamp set and layered it on various pieces of K&Company cardstock die-cuts.

To finish off my scene, I stamped the butterfly wings from the Mini Wings Stamp set on yellow patterned paper and added a little blue coloring with Tim Holtz Distress Markers.  

I cut the banner with my Cricut Stand and Salute Cartridge then stamped "Happy" from the Happy Day stamp set and hand wrote "Easter".  Next I attached ivy, flowers and an Easter egg to finish it off.

That's it friends, I hope you enjoyed my little Easter project!  Thank you so much for stopping by today and for all of the sweet comments you leave me.  I really appreciate it and enjoy reading them.

Have a Beautiful Day :D


Related Posts Plugin for WordPress, Blogger...