Showing posts with label wings. Show all posts

Monday, August 26, 2013

Mixed Media Mondays:Spread your wings Bottle frame


Hello my dear friends and welcome to our Mixed Media Monday
 Irit is here today and this time with another Mixed Media project.
My project this time is an altered chipboard Bottle frame from Tando creative, but then it is full of our gorgeous PWP stamps, cut image and all possible mediums too.


It's an easy project to make even for not experienced MM crafter: all the work is done over the solid cream cardstock and  then embellished over the frame.
The cardstock is cut to the basic chipboard shape and then I added a few parts of one single stencil (TCW)  with gesso only. I made it pretty much around the frame as I wanted to leave space for the cut out  image  and for some stamping too.


I used  Build a Shrine set of  stamps- the upper one with an angel  and a part of the Celtic knot here and there. Then I added a few splashed of Textures  stamps and then, as it happens with  frames, the Angel was suddenly all covered. So we need to be creative and I just added it over the frame and over the heat embossed with red powder heart. All inside of the frame was misted with a mix of Nantucket mists set ; 
so was the cut out Angel head.


The girl from Summer clip art sheet was hand cut and glued  over the background. 
Then I stamped a pair of wings from Wings set over vellum and heat embossed with gold embossing glitter. The cut out wings were glued over the  image back and now she became an angel too.


Anything else was just embellishing: golden leave, vintage flowers, some pearls, a bit of lace and the cap, heat embossed with the same glitter as my wings.


This is a lovely vintage piece that can be a great gift to a teen girl who adores fairies and angels, pearls, flowers and golds. 
 And here is our supply list:


Monday, March 11, 2013

Mixed Media Monday: Happy

Good Monday morning peeps!

It's Shay here, but before I share with you today you must go be amazed by the stupendous Easter project by Norma or the fantastic faux paper casting tutorial by Dana.

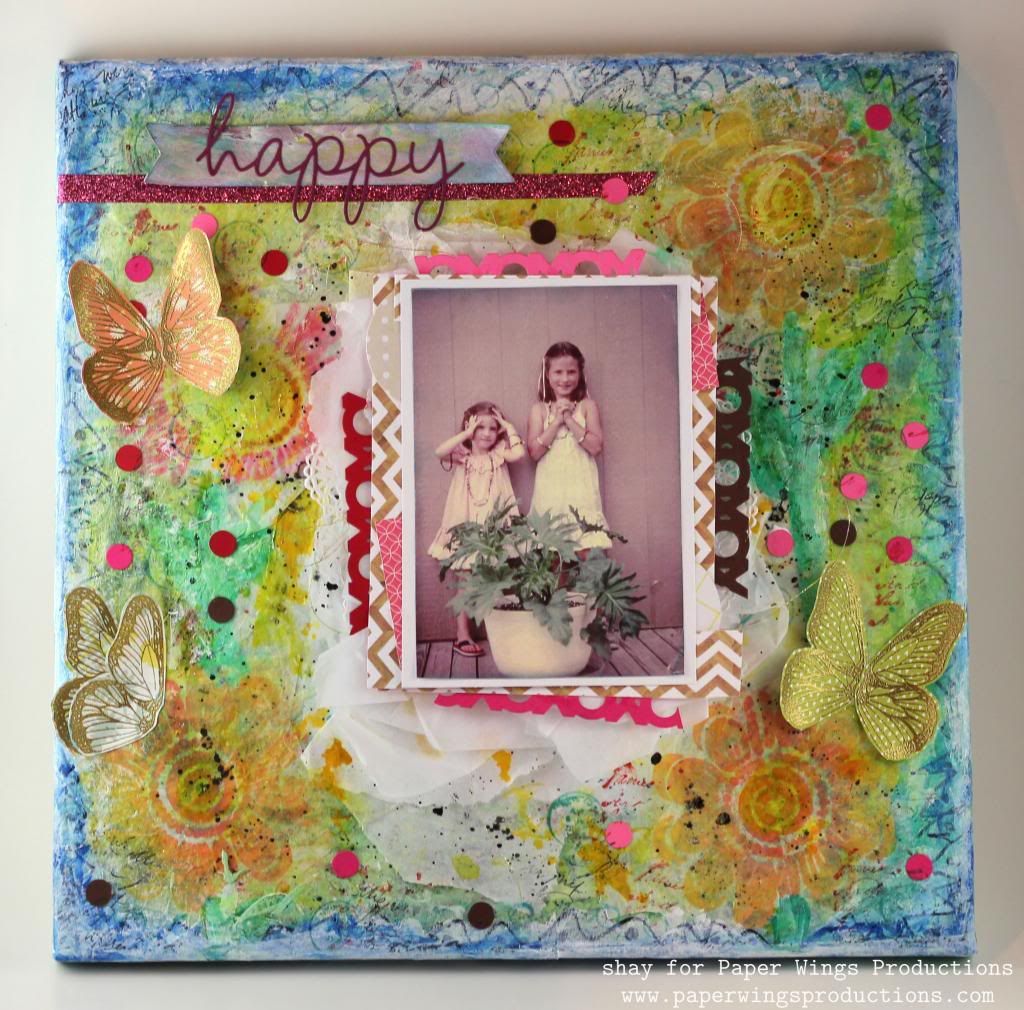
Now that you are back, I have a 12x12 canvas I made to highlight a picture of my sister and I that I am partial to and find funny...we are posing showing off jewelry we had just made with our mom.  My sister (she's the little one on the left) was so sassy and adorable and this really captures her personality from when she was young.  The colors are pretty washed out so I actually did the unexpected thing and made a very busy and bright background for it.  It pops from the background because of the muted tones, a lot of dimension and white around it.


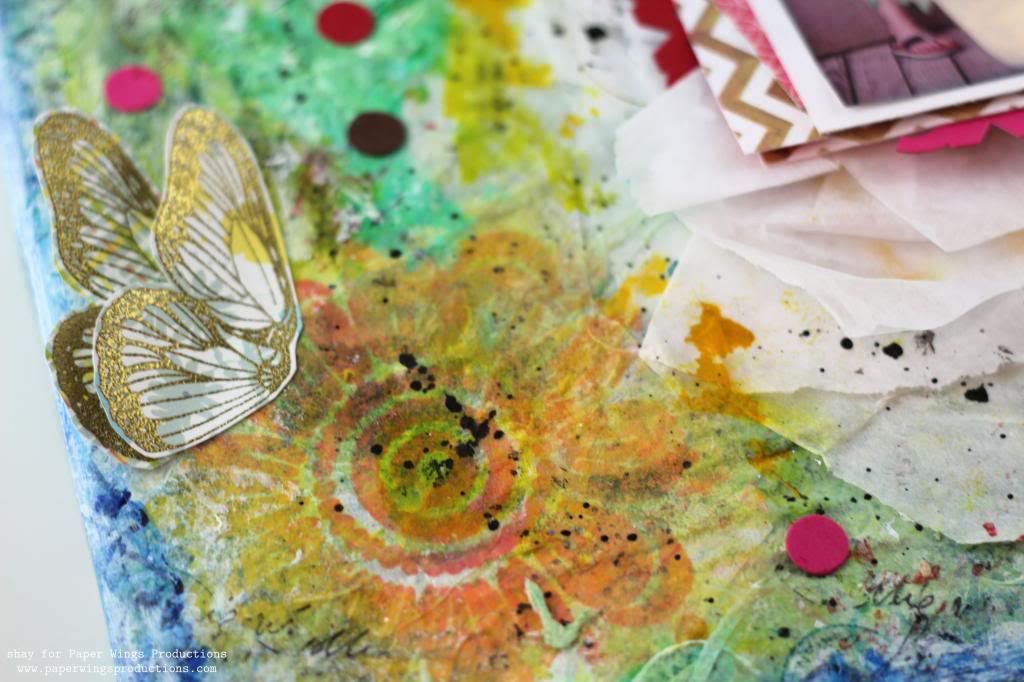
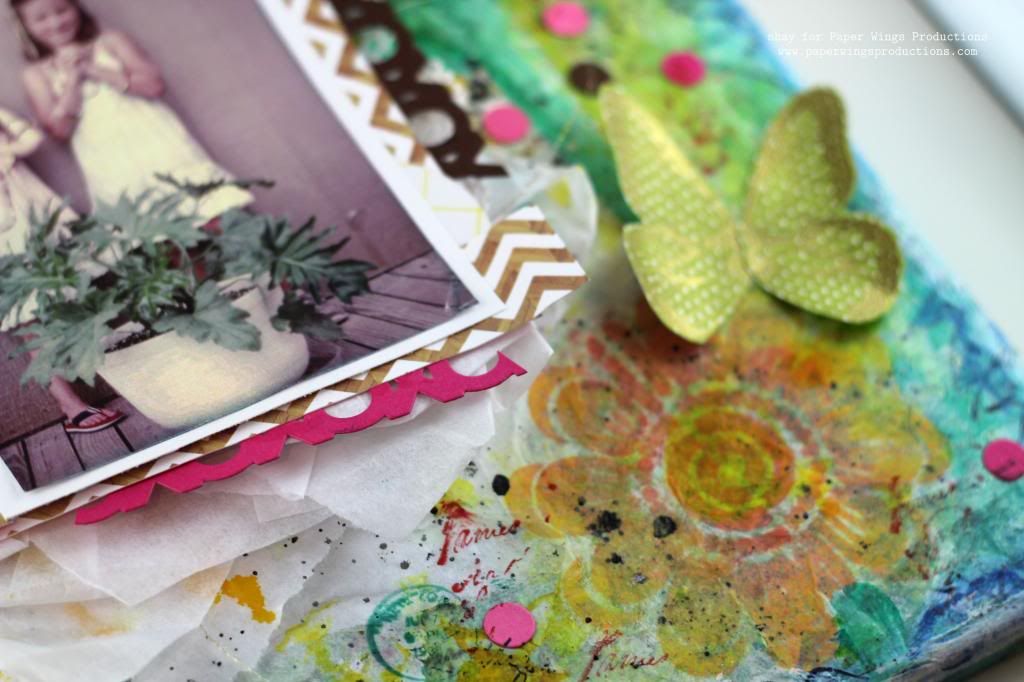
Believe it or not most of the accents on this page are actually bits and pieces sitting on my worktable left over from other projects.  Perhaps you recognize the butterflies from my March Blog Hop project?  I had 3 I didn't use and wanted to add to this piece.  They were the butterfly wings from Wings or Butterfly Wings that I gold embossed on patterned paper from the 6x6 paper pad from Daphne's Closet by Lawn Fawn.

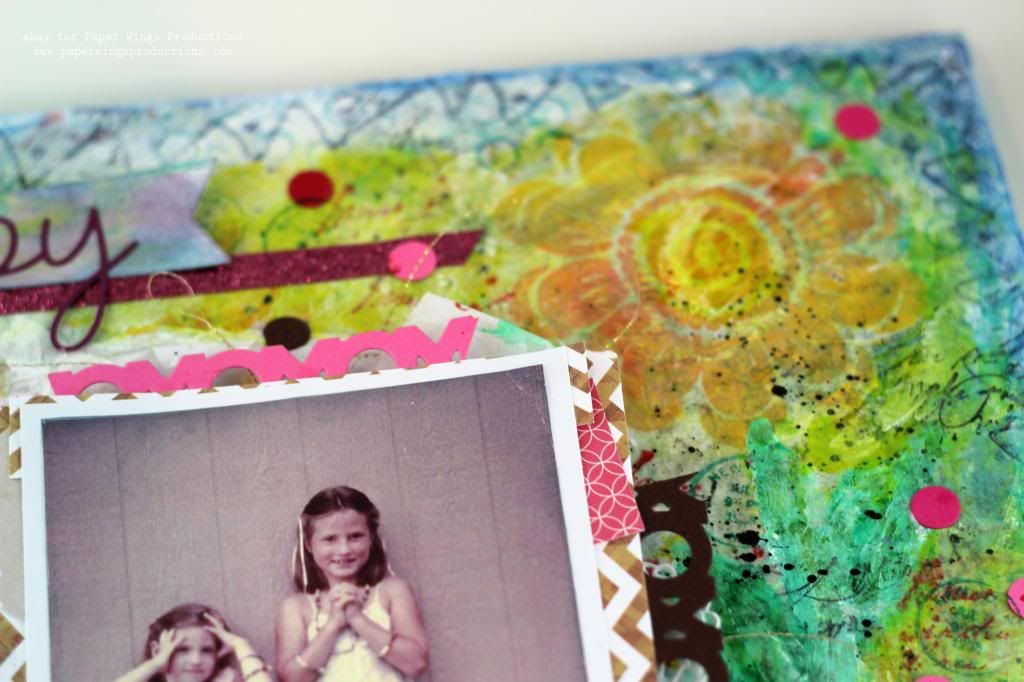
I began the canvas innocently enough with torn pieces of book paper that I adhered all over with Golden Soft Gel (Matte).  I will skip ahead about 50 steps or so because they all amount to adding and taking away paint by dabbing with a paper towel...the colors were yellow, green, blue and white.  I did add some sheets of tissue paper to the center using the Soft Gel.  I had previously stamped the large half flower from Flower Power or Half Flower onto white tissue paper in various shades of yellow, orange, pink and red.  I stamped two halves together to make an entire flower. I adhered some of the less successful ones in various places on the canvas, but added three of the best ones to three corners around where the central image would be.  Stamping on tissue paper ensures a good stamped impression and also for the image to become part of the piece it is adhered to unlike if you stamped on paper or cardstock.   I colored and painted in stems and leaves for the flowers.


I flicked mist in white and orange and pale green and black paint.    I drew in a border with a black Sharpie.  I felt the border was too harsh so I painted over it with gesso and paints.  I added some little leftover cardstock circles all about the canvas and adhered the wings.  I added a strip of pink fabric glitter tape from the leftovers and over that I added a banner painted with gesso and paint and ink and added the happy die over it (also from my leftovers).


For added interest I stamped all over the canvas using Writing Backgrounds or Writing with black ink, some of the writing from Text Melange in red and the cancellation seal in green also from Text Melange.  Around the edges I stamped the open circles from Art Textures in blue.


The photo is layered on a piece of white cardstock then pieces of patterned paper, leftover XOXO die cuts, a doily, metallic gold thread and many layers of ripped and/or folded white tissue paper.


I got very messy, but had a whole lot of fun creating this canvas.  So the happy sentiment is true about the picture and the making of this mixed media piece.  I hope you will get out your Paper Wings Productions stamps and happily experiment too!

We would *love* to see what you make with Paper Wings Productions stamps. Add your projects to Facebook, our flickr group, to Pinterest, comment with a link on this post or even email pictures to us!

Take flight,
Shay.

Supplies:


Inks: Hero Arts Shadow Ink in butter bar, soft cantaloupe, bubble gum and pale tomato; Memento by Tsukineko in tuxedo black; Tim Holtz Distress Ink in fired brick, evergreen bough and broken china
Paints: Golden Gel Mediums Soft Gel (Matte); Claudine Hellmuth Studio by Ranger gesso; Golden Fluid Acrylics in hansa yellow medium, phthalo green (blue shade) and phthalo blue (red shade); Folk Art in metallic sequin black
Mists/sprays: Mister Huey's Color Mists by Studio Calico in sherbert and calico white
Patterned Paper: Lawn Fawn Daphne's Closet 6x6 paper pad; Allison Kreft/Echo Park Paper Co. Everyday Eclectic 6x6 paper pad; Dear Lizzy/American Crafts Neopolitan Collection sea breeze
Other: 12x12 canvas; book paper; paper towels, water, doily; copic markers; Coats gold metallic thread; white tissue paper; Papertrey Ink XOXO and happy dies cut from Papertrey Ink and Stampin' Up! cardstock (leftovers); banner cut with Lifestyle Crafts Tape It Kit using Stampin' Up! cardstock (leftover); pink glitter fabric tape; black Sharpie; Scotch Quick-Dry Adhesive (works so well!)
 

Thursday, March 7, 2013

Themed Thursday - Happy Easter!

Hello everyone, Norma here with you today!!  Did you guys see Dana's "Faux Paper Casting" technique on Tuesday?!  WOW, she shares the coolest techniques doesn't she!  I'm learning so much from her so if you missed it just click on the link.  ;D

The new Mixed Kit just came out too and it's AWESOME!  Click on the link to check it out: PWP Mar Mixed Media Kit Release


Okay so for today I'm sharing a fun little Easter project that I made using a variety of PWP stamp sets:

     
This cute little project started out as an empty ribbon spool and shoe box lid.  Here's a look at the lid before I cut it up:

I actually intended to make this into a shadow box for my Feb hop project but I just couldn't make it work.  So I set it aside and it just happened to be perfect for this project. ;D  I added some additional layers of green paint, 3-D Enamels flourishes and randomly stamped the Writings Backgrounds Cling Stamp.  Next I cut it down to size creating a nice backdrop for my project.

For the base, I padded the empty spool with foam then covered it with a scrap piece of Debbie Mumm fabric.  On the top, I adhered a piece of white cardstock that I ran through my Cuttlebug to emboss with the Swiss Dots folder and then inked with Tim Holtz Shabby Shutters.

Moving onto the banner, I cut a wooden dowel into two pieces for my "poles" and gave them a light wash of TH Vintage Photo.  I stamped the pennants onto various patterned papers with the Happy Day stamp set.  Next I fussy cut, layered the pennant pieces and highlighted with a white gel pen.  To string my banner, I punched holes and added grommets for a nice finished looked.  I hung the banner on a thin sheer ribbon.

I stamped two sets of the flowers onto pink patterned paper, fussy cut and highlighted with white.  (Tip: highlighting helps create depth on the image.)  After attaching to my "poles", I wrapped pipe cleaners around the poles to soften them a bit and add visual interest.  

 I choose to use a bird from the Bird Melange set and stamped him on yellow patterned paper.  He's topped off with a small crown from the Crowns stamp set.

For the sentiment I used a verse from the Scriptures stamp set and layered it on various pieces of K&Company cardstock die-cuts.

To finish off my scene, I stamped the butterfly wings from the Mini Wings Stamp set on yellow patterned paper and added a little blue coloring with Tim Holtz Distress Markers.  

I cut the banner with my Cricut Stand and Salute Cartridge then stamped "Happy" from the Happy Day stamp set and hand wrote "Easter".  Next I attached ivy, flowers and an Easter egg to finish it off.

That's it friends, I hope you enjoyed my little Easter project!  Thank you so much for stopping by today and for all of the sweet comments you leave me.  I really appreciate it and enjoy reading them.

Have a Beautiful Day :D


Friday, March 1, 2013

"Wing Things" PWP Design Team Blog Hop & Giveaway!


WELCOME to the March Paper Wings Production Design Team Blog Hop & Giveaway!  This month we're featuring our beautiful “Winged” stamp sets and of course, sharing some blog candy.


 For a chance to win all you need to do is: be a follower, visit each of the participating designer's blogs and leave them some love.  Then make sure to come back and leave us a comment telling us you  completed the hop.  To increase your chances of winning:  like our Facebook page and/or invite your friends to the hop.  Be sure to leave a separate comment for each of your additional entries.  We will announce the winner here at The Aviary on Tuesday, March 5, 2013.

 It's my pleasure to introduce you to this month's featured guest designer, the lovely Heather Lynn Novinger of Random Recipes, Paper Crafts & Photos by HL.


Hi everyone! My name is Heather Lynn and I am a 30's something mom living in the Cleveland, Ohio area. I have been blessed with five beautiful children with ages ranging from fifteen months to nine years. They make me smile and laugh every single day! I just recently found my soul mate and am so happy in love and man, does it feel good! I love to spend time with my friends and family, cook, bake, shop, and I love to craft! I enjoy crafts of all kinds including scrapbooking, card making, altered art, clay, quilling, sewing, and I am sure there is more that I can't think of right now.  Please stop by my blog,http://heathernovinger.blogspot.com/, I would love to have you stop by for a visit!

Heather Lynn, Thanks so much for joining us!  We're so happy to have you guest designing for us this month!!

Alright, get comfortable and get ready to be inspired!!  Your first stop in the hop is at our lovely guest Heather Lynn's blog - Random Recipes, Paper Crafts & Photos by HL.

***Here is the complete line up just in case you get lost along the way***

Heather Lynn Novinger - http://heathernovinger.blogspot.com/
Dana Tatar - http://datatar.blogspot.com/
Tara Chaussee - http://secretbeesstudio.blogspot.com/
Norma Gomez - http://lilhoneybeestudios.blogspot.com/
Amber Rasmussen - http://sew-ink.blogspot.com
Shay - http://verdigrishall.blogspot.com/

***then come back here to leave a comment http://paper-wings-productions.blogspot.com/***


THANK YOU SO MUCH FOR JOINING US TODAY, ENJOY THE HOP!!!

Monday, February 4, 2013

Mixed Media Monday - Butterfly Tag


Happy Monday! Dana here today sharing a tag for Mixed Media Monday. Before I share my project, I want to mention that the Paper Wings Productions Design Team, and special Guest Designer Lisa Fish, showcased some "love"ly projects for the February Blog Hop over the weekend. If you could use an extra dose of mojo this morning, click through the blog hop and let your creativity take flight!


I started this tag with a handful of my favorite mediums; gesso, extra heavy gel, gold mica flake, several colors of mist, ink and paint, some vintage book pages, a couple Paper Wings Productions stamp sets and a piece of watercolor paper. I built up several layers of patterns and colors on my watercolor paper, and once dry, I cut a piece of the paper to fit my tag.


The Wings Cling Stamp Set has a beautiful set of butterfly wings that I used both on the background paper for my tag and for this layered butterfly on the flower.


I selected the quote for this tag from the Banner Day Clear Stamp Set.


Under the quote you can see some script from the Writings Backgrounds Cling Stamp Set.

Thanks so much for stopping by! I hope I have inspired you today! Be sure to visit again this week for more inspiration from my fellow design team members.  If you're interested in purchasing some of these fabulous stamps, visit the Paper Wings Productions Store to browse the full collection of stamps and kits. The February Mixed Media Kit is now available while supplies last!


Supplies: Tag: Avery; Watercolor Paper: GCD Studios; Flower: Recollections; Lace: Prima; Stamps: Paper Wings Productions; Mist: Ranger, Studio Calico, Tattered Angels; Distress Stain; Ranger; Ink: Ranger; Paint: Shimmerz; Gesso: Golden; Extra Heavy Gel: Golden; Gold Mica Flake: Golden; Other: Ribbon, Book Pages
Related Posts Plugin for WordPress, Blogger...