Showing posts with label lindy's stamp gang. Show all posts

Thursday, September 25, 2014

Themed Thursday - Wings


Hello Crafters!
Zoey's here again for another post as Guest Designer!
It seems I totally felt in love with the amazing For the Birds Nesting Components Mixed Media Kit that I can't stop using it! For this project I will use some products from the For the Birds Nesting Components Mixed Media Kit , Lindy's Sidekick - Prairie Wildflowers (Hibiscus Rose), Stamper's Big Brush Pen - Nougat and Bird Beauty Unmounted Stamp Sheet.


For my project I created one ATC and one TAG, I used the same exactly elements / materials and also the same stamps set.

First step was to cover my ATC with some scrap paper, I glued it down using gel medium, covered it with a bit of gesso mixed with water and then I used the Lindy's Flat Fabio to color over the collage


Then I added my stamping using Stamper's Big Brush Pen - Nougat as ink. Both the stamps I have used are from the fab set Bird Beauty Unmounted Stamp Sheet


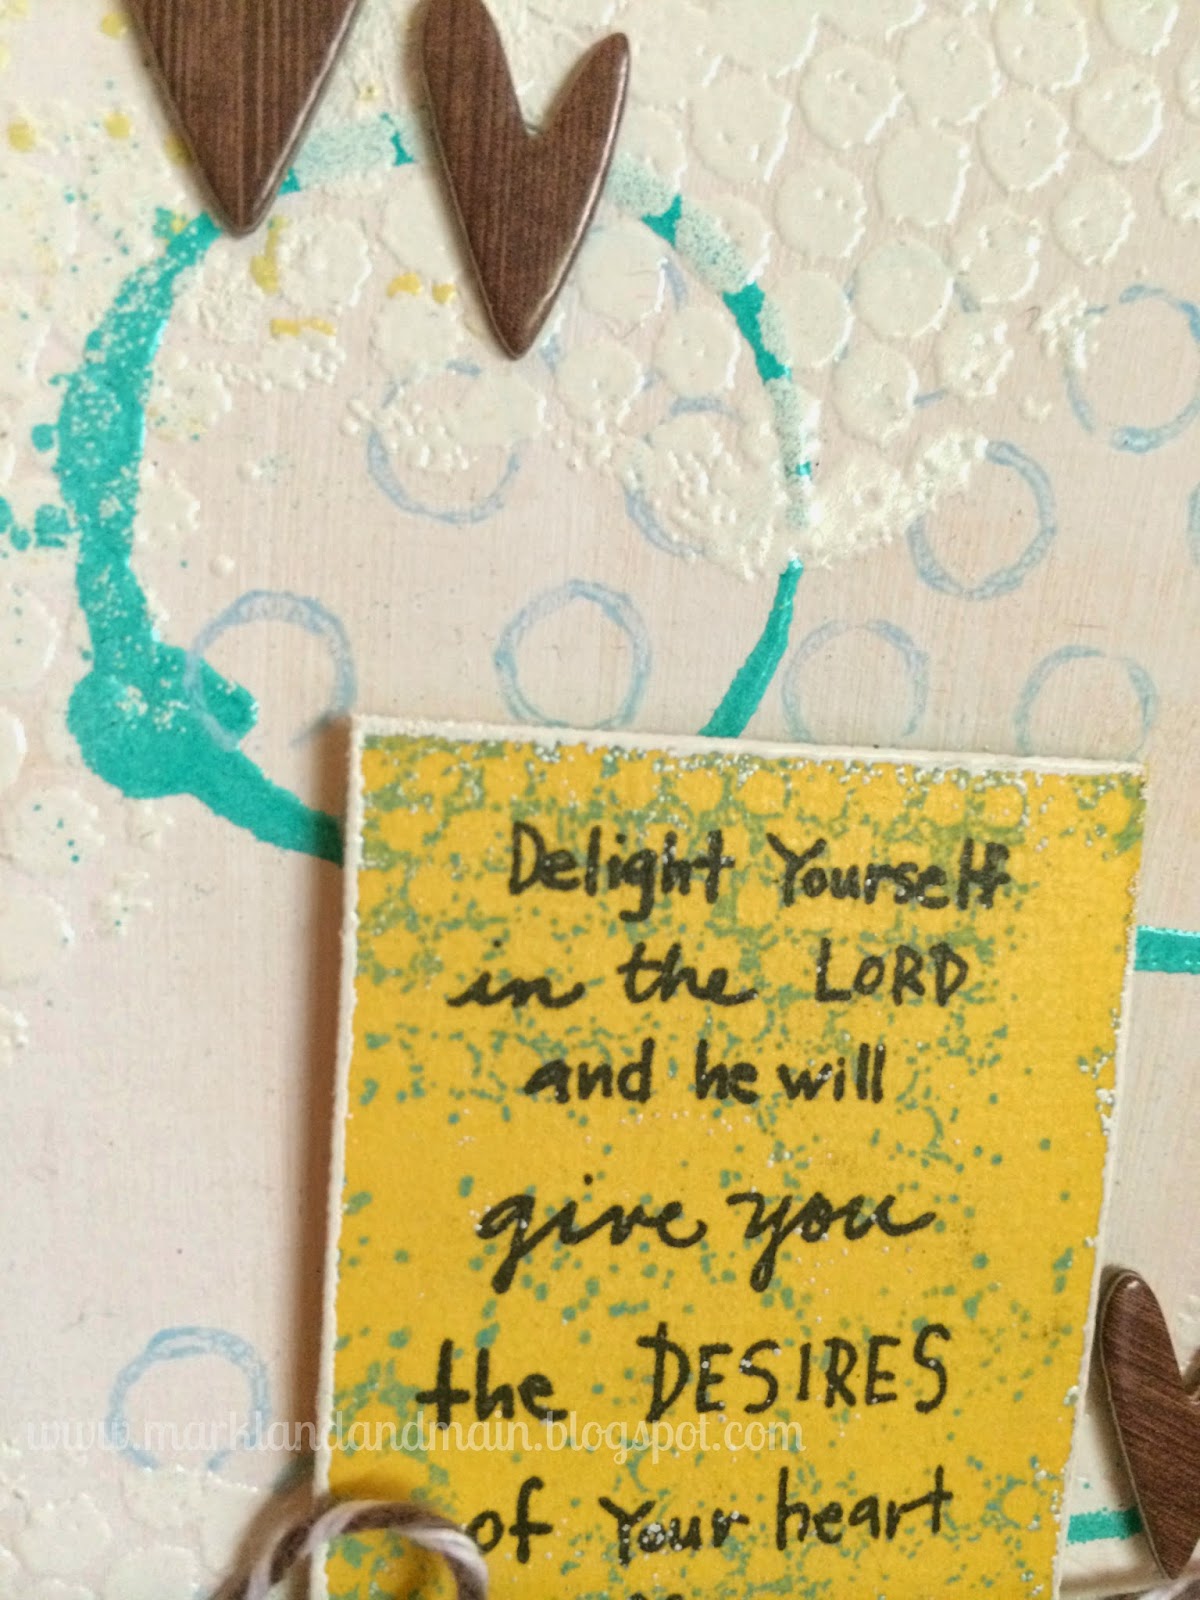
Then I added some light modeling paste through the stencil from the For the Birds Nesting Components Mixed Media Kit - I also added some color around the stenciled image using Inktense pencils. 


For my final touches I simply added washi tape and the sentiment


I repeated the same exact step on my tag. I just moved few things around and changed the bird -- I also had more space so I could fit the sentiment straight. It was very interesting for me to try and repeat the same technique / process on different thing. It gave me more ideas and even more inspiration. So I really challange you to do something like this aswell! Create something and then try to repeat more or less the same thing on a different support. You will notice how fun it is!

Here is the TAG:


...and finally my both project close to each other! What do you think? 


And that is all for today Themed Thursday! The week is almost over so make sure you check out what our talented design team/guest design team created for you this week, here are some links:
A super fun tutorial that our lovely Erica shared with us on how to make a mini album just here and our Spotlight Sunday where the talented Amanda showed us how to use both Vintage Domino Melange and Nouveau Stamp!
Also you still have a bit of time to join our September challange, the theme is"use twine or ribbon".

I hope you had fun with me!
Stay Happy, Stay Creative...till next time! 


Wednesday, August 13, 2014

What's Up Wednesday - Scriptures card.


Hey everyone! It's Ashley and I'm super excited to be the guest designer this month. Today I'm sharing the card I made for What's Up Wednesday.


I just loved the Scriptures stamp set and I think I can use it for tons of cards.


To create the base of my card, I used a lot of mediums for dimension and color. First I painted the whole base with gesso. Then I used the Art Textures stamp set to heat emboss some white circles onto the background. I mixed gesso with Lindy's Stamp gang mist for the bright blue stamping and then I added even more gesso to the mist for a toned down blue and stamped the smaller blue circles with that.


I heat embossed another of the textures stamps with yellow. I wanted to use a few different texture stamps from the set with different techniques for visual interest.

For the square that my sentiment is stamped on, I just dipped the edges of the card in Versamark, sprinkled on some embossing powder, and heat embossed the edges. Now the yellow sentiment square doesn't stand out quite as much against the white background.


I've linked my products below. Thanks for joining me today!


Monday, July 14, 2014

When Angels Are Near: Bird Cage Assemblage

*****To Join our July Challenge: Click Here*****


Happy Monday Everyone, Norma here with you today!!


Today I have a sweet little bird cage assemblage piece to share with you.  This project is very simple to create and I LOVE the way it turned out.


For this project I'm using the NEW Bird Beauty stamp set along with bits and pieces from my handy dandy scrap pile :D


I embossed all of the stamped images with black Super Fine Detail embossing powder.  Then I spritzed the bird's nest with Lindy's and inked the edges.  The base is just an empty ribbon spool (I don't like anything to go to waste around here, lol).  I used my Exacto knife to cut a slit for the paper to go into. 


This bird is embossed with the same black embossing powder and inserted into the spool the same way.


To create the bird cage I used 20 gauge wire, wire cutters, the rim of a mason jar and hot glue.  I simply cut the wire into strips, wrapped them around each other on the top to create a dome and hot glued the ends inside the rim.  Next I glued the ribbon spool to the mason jar rim.


To keep with the feathered theme, I added beautiful feathered wings from the craft store.


I found the perfect hanger in my stash of findings.  The beautiful blue gemmed piece came from a local thrift store.  I think it may have been on a chandelier at some point.


I added cream colored glittered tulle to soften the edges of the wired bird cage.


An angel in near!!  

Thanks so much for joining me today and be sure to check out Erica's gorgeous projects: Accordion Mini Album & Scrapbook Saturday.  Have a beautiful day :D


Monday, June 2, 2014

Believe in Magic - Fairy Tag


Happy Monday everyone, Norma here with you today!  I hope you all had a wonderful weekend.  Did you see the gorgeous NEW Nesting Components kit released yesterday?!  If you love birds then this kit is for you, take a look:


Isn't that beautiful AND it includes one of my very favorite supplies, molding paste.  You also get your choice of the bird panel stamp sets.  BUT WAIT, there is MORE!!   The NEW June stamp and Stamp of the Month have been released.  Here is the link to find out more:  BIRDS.


Okay so now for my project :D Today I have a fun mixed media tag to share you, let's get started.


I began with one of my favorite stamps, the beautiful Fringe Lace stamp.  I achieve this look by stamping and then using a mask over the first stamped image.


Next is another favorite: molding paste.  I love adding texture with molding paste!  Here I'm using it with a stencil.


For subtle color I opted for several shades of Lindy's inks and Distress ink.


I'm using an image from the summer clipart sheet and I added chipboard butterfly wings.


I cut the butterfly in half and then embossed them to add shimmer.


Next I added a handmade flower.  To make a flower like this, punch a circle for the base then wrap trim starting at an edge working your way to the center.  I used white trim and dyed it Lindy's inks.


The sentiment is from the beautiful Dragonfly Fairy stamp set.


Here's a closer look at the gorgeous Fringe Lace.


Thanks so much for joining me today, have a beautiful day!!

PS: Go check out all the NEW stuff in the online store HERE


Tuesday, May 20, 2014

Winged Things Tag

*****Join our May Challenge: ANYTHING GOES, HERE*****


Hey there PWP Fans, Norma here with you today for Tutorial Tuesday!


Today I'm going to show you how to create a beautiful layered tag.  This "winged things" tag is filled with beautiful texture and custom made flowers using PWP stamps.


I started out by stamping one of this month's featured stamp sets, Half Flower.   (You can pick up this stamp for just $4.50 this month!)


Next I added my background color using a variety of Lindy's inks.  I love the way they shimmer in the light.


I continued adding to the background using the Mini Flowers stamp set (only $3.00 this month).


The focal image I'm using is from the Fairy Friends stamp set.  I used Prismacolor pencils to color them.


I wanted to elevate the image so I layered scraps of cardboard til I got the height that I wanted.


I created custom satin flowers using the Sacred Geometry and Single Flowers stamp set (only $3.00 this month).  I stamped them onto satin fabric using Stazon.


 Next I cut them out and dyed them with Lindy's inks.


To assemble the flowers, I simply polked a whole in the center of each flower and then layered them.  I'm using earrings in the center to hold them together and attach them to the tag.  Once they were assemble, I used my heat gun to dry and shape the flowers.


I used the Leaf Border and Text Cling stamp sets to create a stem.


I embellished the tag with a heart doily tucked behind my fairy friends, ribbon, a heart charm, butterfly and a sentiment.  I love all of the bright colors, dimension, shimmer and whimsy of this sweet little tag.  I hope I've inspired you to use your stamps to create gorgeous custom flowers for your projects.  Thank you so much for joining me today and don't forget to enter the May Challenge: Anything Goes!!


Related Posts Plugin for WordPress, Blogger...