Saturday, December 13, 2014

Scrapbook Saturday - Treasured Memories


Welcome back to The Aviary!


Amanda here today sharing a super fun layout with you all!
This is my final guest designer post here at The Aviary, 
so I wanted to share a mixed media scrapbook layout!
Hope you like it.....

"Treasured Memories" layout


I love this! So bright, fun and oh-so-cool too!
Lots of mixed media juiciness here! & how cool are those stamps?!!!
So  do you want to know how I created this lil number?
Well, it's so easy I can guarantee you'll be giving it a go!
Here's how.......


On white 12 x 12in cardstock
position a stencil/template and apply texture paste. 
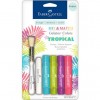
Heat gun dry, then colour with Tropical 4pk Gelatos, as shown above.  


Activate gelatos with water (paintbrush or spray bottle works well) 
& adhere chipboard elements.


Coat chipboard thoroughly with gelatos, and this time activate with a coloured misting spray.
Allow colours to run!!! 


Once dry, commence the stampy inky fun! 
For boldness & a super striking effect,
I used a black permanent ink for all my stamp work on this layout.
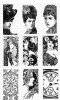
I started by stamping my background with Art Textures Stamp Set in random repeated patterns
(as shown above)


Because this page is all about my two darlings 
- my lil prince and princess - 
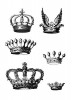
I couldn't help but use the Crowns Stamp Set.
This stamp embellishes my page perfectly! Too cute! 


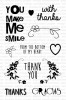
I then randomly stamped both the heart stamps from the 
Say It - Thanks Clear Stamp Set.
As you can see, it really adds to the layout.


Next, I attached my chipboard framed photo, and embellished it with a few blooms.
I used a lil black gesso on my title, and attached to page.
For my final finishing touches I added a few strands of frayed muslin.

And Voila!


That's how I created this super cute, inky, messy, fun layout!
Told you it was super easy! 
Hope you'll try it today!

As this is my final guest post I would just like to say an enormous THANKYOU to Carrie & the fabulous Design Team here who have been truly wonderful to me! :)
I would also like to thank all of you for your amazing comments and support - it means so much!
I will be keeping an eye out for all your wonderful creative link ups in 2015!

Thankyou & happy stamping!

For more colourful and inspiring creations, please be sure to visit my blog,


Thursday, December 11, 2014

Themed Thursday: Vintage Domino Melange Card Set


Welcome back to The Aviary for more stamping inspiration!
Amanda here, and I am super excited to be sharing Themed Thursday with you all!
Today I have created this gorgeous card set using only scraps from my stash &
Here's the first two cards in the set......

Simple, clean and absolute 'wow' factor!
The stamps literally complete the cards; oh-so-striking!
Here's the other two cards from the set......


So feminine and girly! Just divine!

& the best part is anyone can make them! 
(Perfectly pretty cards for beginners through to serious stamping addicts)

Here's how......


Start by stamping the Vintage Domino Melange Stamps in black ink onto some scrap cardstock.
I am totally loving kraft again so hence my cardstock choice,
 but white or light coloured card would work well also.

Next you will need to create your card bases.
Take 2 sheets of 12 x 12in cardstock (again I chose Kraft),
 slice both sheets in half, score and fold to create a total of four 6in square cards.
Cut your Vintage Domino Melange images out & start arranging with your scraps.

Here's my 'vintage' card.....


To complete this card, attach a strip of scrapbooking paper, 
& embellish it with ribbon and lace.
Mount the stamped image onto cardstock, 
attach to card with mounting tape 
and finish with a few pearls and flowers.
Soooooo pretty! (& so simple too!)

Here's my super cute doily card up-close.......


A really modern card that sings happiness!

Here's how to recreate this beauty....


Attach doily to card base and then attach ribbon & bow.


Use some pretty paper scraps to create a fun background for your stamp image.


Attach the Domino Vintage Melange stamped image & Voila!!!
Another super quick but really lovely card.

For my next two cards, I decided to paper the card bases.

Here's my feminine, girly 'left-overs' card....


I really loved this paper collection but only had snippets of it left. 
So in good recycle fashion, I used the snippets to my advantage - 
creating interest and drawing the eye to those stunning stamped images.
This one's my absolute fave!!! Love it!

My final card in the set has a really contemporary and fresh look....


Double paper base, a bit of chipboard, some gemstones & you're done!
So simple but so beautiful!

I hope these cards have inspired you to give the Vintage Domino Melange stamps a try!
They're so very versatile - just look at how different these cards all are - and they suit all types of creative projects.

Thanks for joining me today!

For more beautiful but simple creative ideas please visit my blog,


Tuesday, December 9, 2014

Tutorial Tuesday- Winter Scene Card


Hey everyone, Katie here! Today is Tutorial Tuesday so I wanted to show you guys how I created the wintery scene on my card. I was actually inspired by this card I saw on pinterest, but I changed up the colors a little bit and made it my own.


I used the Holiday Tags stamp set and the Nature stamp set for this card.
I started by stamping and heat embossing the tree from the Nature stamp set onto the bottom of my watercolor paper. Then I heat embossed the stars from the Holiday Tag set up in the "sky" area of my card.


Next I got out my gelatos. I decided to make my sky a blue/yellow color like the sun is setting on a winter day.
I scribbled the colors on in a sort of ombre style and then spritzed them with water so that they blended together.


I finished my card my heat embossing my sentiment from the Holiday Tags stamp and adding white spray mists drops like snow. I also cut some shapes from white cardstock to put at the bottom of my card for snow.


Thanks for stopping by! It was pretty easy to create this dreamy winter scene, I hope I inspired you to get out your stamps!

If you get a chance, take a look around the blog at some of the other PWP designers work!

Friday, December 5, 2014

December Blog Hop


No matter how you celebrate the holidays in December, I would guess you see a little more gold than usual.  Our designers have been given the challenge to create a project using Paper Wings Productions stamps with the color theme of GOLD.  Whether is glitzy, elegant, sleek, or sparkly- we are all about inspiring you with gold delights.  "Hop" along the links below to visit each designer’s blog to see their projects.

To entice you even further to follow our hop, one lucky winner will get a $25.00 gift certificate to the Paper Wings Productions online store. 
For a chance to win all you need to do is:
·         be a follower of this blog, The Aviary
·         visit each of the participating designer's blogs and leave a comment
·         come back and leave us a comment here telling us you completed the hop

To increase your chances of winning you can like our Facebook page and/or invite your friends to the hop.  Be sure to leave a separate comment for each of your additional entries. The winner will be announced on Tuesday December 9, 2014 here on this blog.

It's time to send you off hopping; your first stop will be Dana'sblog, so click here to get started.


***Here is the complete line up just in case you get lost along the way***


THANK YOU SO MUCH FOR JOINING US TODAY!!
&
Let Your Creativity Take Flight!


Wednesday, December 3, 2014

What's Up Wednesday

Hi y'all! It's Stephanie here again today for today's What's Up Wednesday feature!


I have some winter themed cards to share. These will be great for the Christmas season, but also after the holidays are over, they can be sent as winter cards!!


I started by punching many snowflakes from different colored cardstock. 


I saw the idea for these cards on Pinterest. I love the wreath made from snowflakes!!
I used Glue Dots to form a circle with my punched snowflakes. 


On some cards I did only one layer of snowflakes and on others I added a few layers to give the wreath more dimension.

The snowflake & sentiment stamps are from the Winter Mix It Up Clear stamp set . 


I added some glitter over some of the sentiments & snowflakes. I love the sparkly touch this lends to the cards. 
I am all set to send out some handmade cards this holiday season!!
Thanks for visiting today! Make it a crafty one!


Tuesday, December 2, 2014

Paper Wings Productions December Challenge


Welcome to the last challenge here at Paper Wings Productions!  We have enjoyed seeing all your lovely projects each month!  We hope you will continue to follow us and we know you will love what we have coming up in the new year!  November's Challenge was Anything Goes and we had so many fantastic link ups!  The randomly chosen winner is #21 Crystal Thompson!


Congrats and thanks so much for linking up to our November Challenge Crystal!  We hope to see you linking up again this month!  Please contact Carrie at paperwingsproductions@hotmail.com to claim your prize.  Please include November Challenge Winner in the subject line!

This month we are celebrating the Holidays here in the states so this month challenge theme is Holiday or use the colors red and green!  We are super excited to see what you create this month!  This months challenge is sponsored by Paper Wings Productions.


Here are a few challenge details...

  • Create a project (card, ATC, layout, tag, mixed media piece, etc.)
  • Add your project using the blue button below
  • You will have until December 31st at 11:55 p.m. CST to link up your project
  • You may enter our challenge up to 3 times
  • You may combine our challenge with other challenges
  • The use of Paper Wings Productions products is not required but will give you 3 extra entries to win

 Here is a look at how the Paper Wings Productions Design Team was inspired by this challenge!


Thanks so much for joining us today!  We look forward to seeing your creations this month!  Have fun and remember to let your creativity take flight.


Monday, December 1, 2014

December Kit Reveal

Hello Paper Wings Fans,

So glad you've dropped by for a visit today!  Here is our December Mixed Media Kit.  This will be our last kit, or at least the last monthly kit released.  We will be shaking things up in 2015 with different specials each month.  Some months we will release a kit and others may be a class project or even a special offer.  Something new and different each month!

We have a special going on right now through this Friday 12/5/14, 30% off everything in our online store.  Use code THANKS30 when you checkout.  Since it's Cyber Monday, we also have FREE SHIPPING on all orders for TODAY ONLY!  That's some serious savings, folks!

On to our new kit-

The December kit includes:
The Christmas Nesting Components Mixed Media Kit contains the following:
-Tim Holtz Worn Cover - Christmas Wishes
-Tim Holtz Christmas Rub-Ons
- 2 different ribbons
- Natural color Christmas tree
- Holiday bling
- 3 Stocking Tags
- Manila Tags
- Jingle Bells
- Paper Doily
- Stickles - Mercury Glass
-Tear shaped gems
-clip art sheet
-Your choice of Holiday Tags or Snowman Love clear stamp set


Thanks for stopping by.  Just as a reminder, our December challenge will be posted tomorrow and our fabulous blog hop is this Friday.  Many thanks for your continued support, we cherish each and every one of you!


Related Posts Plugin for WordPress, Blogger...