Wednesday, October 31, 2012

What's Up Wednesday: Build A {Halloween} Scene


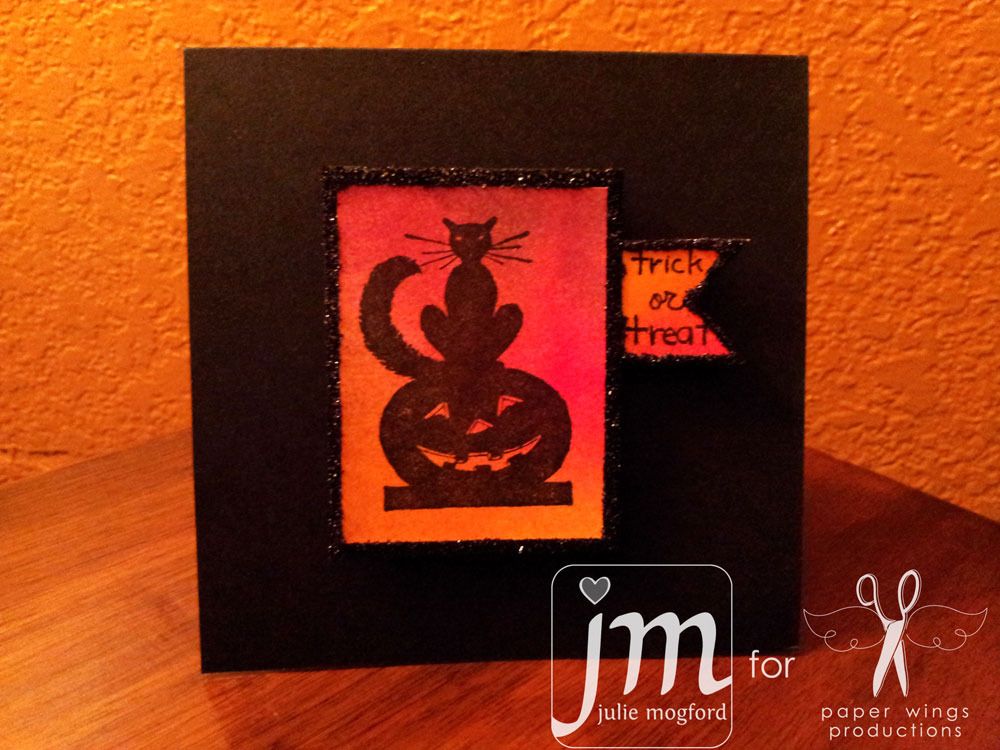
Happy Halloween peeps!

It's Shay here to wish you all a spooktacular Halloween.  Have you seen all the bootiful Halloween projects on the blog lately?  Julie and Norma are really blowing me away.

With the new stamps it is easy to create for Halloween and autumn.  I made a companion card to my fall card made with the Build A Scene stamp set.  You can find the fall card HERE.


The inked background from that first card was actually one half of a larger piece.  I had set aside the other half for a Halloween card that would be just like the first, but with some Halloween touches using the Fall Add Ons stamp set.  I love that with some changes of stamps and changing brown ink for black I now have a spooky scene perfect for Halloween.  I could make a new card using the Build A Scene for each season.  Imagine changing the colors for winter to make pretty and easy holiday cards.

One of the first major deviations from the fall card is that I stamped the large tree in black and kept it bare.  This way the tree immediately has a creepy feel.  Of course the Another touch is the iridescent spray over the card which I think is very appropriate for Halloween.  Instead of the orange jewels in the fall card, I chose to stamp "Halloween" from the Halloween Mix It Up stamp set under the "celebrate" and add a touch of glittery orange Stickles to the moon.

Can you see the shimmer?


Let's see the two cards together:


We would love to see what you make with this stamp set and any Paper Wings Productions stamps.  Add your projects to our flickr group, to Pinterest, comment with a link on this post or even email pictures to us!

Take flight my pretties,
Shay.

Supplies:
Ink: Tim Holtz Distress Ink by Ranger in spiced marmalade, scattered straw, brushed corduroy, chipped sapphire, fired brick, wild honey, barn door, black soot and mustard seed
Cardstock: Neenah
Patterned paper: Pink Paislee and Memory Box
Other: Corner Chomper by We R Memory Keepers; Inkssentials Ink Blending Tool by Ranger; water; Memory Mist in iridescent; Ranger Ink Stickles in orange peel; Copic markers

Monday, October 29, 2012

Mixed Media Monday with Norma G


Here's another great mixed media canvas from Norma G!


Hi there! 
Today I want to show you how to use multiple stamps to create a large piece of art.  For this project I'm using a 9x12 canvas and LOTS of PWP stamps.


My inspiration for this piece was the PWP Earth & Sky stamp set.

I wanted to give my background an earthy feel so I began by applying a layer of old gesso.  It was all lumpy and ugly but I was determined to use it anyway so I added some water to loosen it up.  I used a pallet knife to spread it over the canvas and let it cure overnight.  The lumpiness worked beautifully to create the perfect texture.  Next I applied Liquitex Soft Body Acrylics in Cerulean Blue, Vivid Lime Green, Cadmium Yellow and Unbleached Titanium.  Once my paint was dry, I cut a strip of joint tape in half and used it as a mask with Dylusion Vibrant Turquoise.  I randomly stamped the earth and clouds with black Stazon.  You can find these stamps in the PWP Earth & Sky , Cloudy Cling Stamp Set & World Cling Stamp.


Once my background was complete I began working on the tag.  I used a #8 size manila tag by Ranger.  The first thing I did was use gesso to resist the inks.   I chose to use the borders in the new PWP Build A Shrine Stamp Set and an angel from the new PWP Angels Cling Stamp Set.  To color the tag I used Dylusions Ink Sprays in Vibrant Turquoise and Fresh Lime.  I also mixed in a little Tim Holtz Vintage Photo Distress Ink.  Finally I stamped two of the flourishes from the PWP Flourish Elements Cling Stamp around the edges with Timber Brown Stazon.


Moving onto the sentiment, I placed the quote between the two split horizon stamps, embossed and colored the same way as the tag.  You can find these stamps in both the PWP Earth & Sky and PWP Sunrise Cling Stamp Set.  I stamped/embossed the quote again on a scrap piece of cream colored cardstock, inked the edges and stamped flourishes around all of the edges of both pieces.  For added dimension, I attached the sentiment with pop dots.


To add a little softness, I attached cream glittered tulle.


To build my collage, I first attached a piece of cardboard.  I peeled pieces of the top layer off to expose the corrugation, inked and painted to match the background.  I stamped the angel from the PWP Angels Cling Stamp Set again, fussy cut her out and inked the edges.


I doodled around the tag with a white gel pen then attached it to the cardboard.  I also added scraps of fabric, ribbon, twine and a cross charm to the tag.


This little angel is from the new PWP Angels Cling Stamp Set.  She's attached with pop dots.


Here's a closer look at all of the texture in the background and all of the little details.  For the final finishing touches, I decided to stamp two more of the borders from the PWP Build A Shrine Stamp Set along the left edge and added some twine.  

I was really inspired by all of the new PWP stamps and I hope you are too.  Thanks so much for stopping by today.  We appreciate all of your comments so keep them coming!

Have a Beautiful Day!!

Friday, October 26, 2012

Halloween Greetings from Norma G


Hey there goblins & ghouls, Norma G here!!
Are you ready for all of the Halloween festivities?!  I know I am, I can't wait to show everyone one our costumes.  My hubby's is funny and mine is spooky but they go together like peanut butter and jelly, lol.  Since I've been working on our costumes this week I'm definitely in a Halloween mood so today I have a Spooktacular PWP card to share with you.


To make this card you're gonna need:
Black & Cream Cardstock
Exacto knife & White Gel Pen
Cuttlebug & The Fanciful Labels Plus Embossing Folder
Gesso & Black Stazon Ink
Tim Holtz Distress Inks: Black Soot, Walnut Stain, Vintage Photo & Spiced Marmalade
Black Embossing Powder & Black Bling

 It's that cool, let's get started putting this baby together!


I folded a piece of 12x12 cardstock then trimmed it down to 6 1/2 x 4 1/2 for my card base.  Then I cut a small piece of cardstock, stamped the Time Has Come stamp repeatedly to create a patterned paper and distressed the edges with Vintage Photo.


I used the postcard stamp from the Writings Backgrounds set with some gesso and just stamped it all over on both the front and back of the card.  I also inked all of the edges with Walnut stain.


I used the Build A Shrine set for this part.  I stamped the images on cream cardstock then used used Spiced Marmalade to color it in.   


I cut around the edges and slit the inner border with an Exacto knife to insert the other paper.


You can find the skeleton lady in both the Skeleton Melange and Skeletons sets.  I stamped both images with Black Soot and embossed, fussy cut around the Circle Frame and inked with Walnut Stain (I love inking, lol).


Time for layering!!  The 31st tag is from my stash (sorry can't remember who made it) and I inked it up with Spiced Marmalade & Walnut Stain.  I used Pop Dots on the Circle Frame and the shrine.  For the final touch I added some black bling flourishes by Recollections.


Moving on to the inside of my card, I used my Cuttlebug with the Fanciful Labels Plus Embossing Folder and inked with Walnut Stain.

The sentiment I used can be found on either Witchy Greetings or Witchy Halloween.  Finally I doodled around the edges with a white gel pen and that's it finito!!


Here's one last look at the finished card:

Thanks for joining us today!!

Have a fun, but above all else SAFE Halloween!!!

Feature Friday - It's time for Halloween!!


Hi Peeps!

It's Julie again!  I've been playing with my Paper Wings Productions Halloween stamps these last few days and I've made a couple of goodies I thought I would share.  First, we have the cute Cat on a Jack O Lantern stamped on a dylusions background, trimmed out in black glass glitter with a cute little Trick or Treat sentiment made from the Little Halloween set and the Tabs and Banners set. This is a Quick and Cute card, if I do say so myself!!


The other little project that came to mind was decorating dominos.  There are so many things I love about dominos and so many projects they can be used in.  I've made pins and necklaces with them, but this time I just can't decide.  What do you think?


This year I jazzed these up with a little stickles on the background before adding a coat of Glossy Accents (Ranger).  These pieces include stamps from Owl on a Branch, Skeletons, Fall Add Ons, and the Halloween Mix It Up set.  All of the images were stamped with Stazon Ink, and colored with Distress Markers.  I had to get the Distress Marker color dry before adding stickles and glue because they will react.  You could also spray them first, but I was not in a "wait for it to dry" mood. Having said that, I did leave the dominos to dry overnight with the Glossy Accents coat.  LOL.


If you are in town and also in the mood to get your hands inky with shades of Halloween, come by Stamp Antonio this Saturday for two Make & Takes and a demo ALL FOR FREE using the new PWP Holiday line of stamps.  Our event lasts from 11-1.  We also have a shrink plastic bracelet class from 3-5.  Please call 210-764-7900 to register for the class.  Hope to see you there!


And, one more reminder:  Today is the last day for our loyal blog readers to take 15% off NEW stamps. Use the code BLOGLOVE when you check out. An easy way to find the NEW stamps is to click the word NEW under the categories on the right hand side of the shopping cart.


Happy Stamping!


Julie


Wednesday, October 24, 2012

What's Up Wednesday - Which team are you on???


Hi Peeps!!!
 
 
It's Julie again, and I've been playing in my craft room again!  I wanted to share a tag I made just for the fun of it.  I made this partly for Halloween, and partly in honor of the last installment of the Twilight series coming to theaters very soon.  What team are you on???


Is that too funny or what???  I was looking through the Paper Wings Productions stamps and it just came to me!  The wolf would be easy to use for Jacob, and Luc would be standing in for Edward.  I sprayed the tag with Dylusions sprays for my night time background.  The wolf is stamped on Stampin' Up! Whisper White cardstock using Chestnut Roan Chalk ink, and his features added with Distress Markers.  Luc/Edward  and the moon is stamped with Archival Ink and also colored with Distress Markers and Prisma colored pencils.


I colored his shorts a bit longer to give him pants, and colored his skin a bit lighter than normal. And, it wouldn't be Edward if his skin didn't sparkle, right? I know, the sun's not out, but I just had to do it.  Stickles to the rescue, and I also added some to the moon.  The sentiment was typed with a Twilight style font for fun and I tied on a few fibers to finish it off. 
 
I hope this little project brings a smile to your face! 
 
By the way, I'm definitely Team Edward!  :)


Happy Stamping!
 
Julie


Monday, October 22, 2012

Mixed Media Monday - Sticky Back Canvas Transfer


Happy Monday Peeps!

It's yet another new week, are you ready for it?  Today I would like to share one of my favorite techniques with you.  If you've taken very many of my classes or visited us at one of the trade shows, you may have seen us do this.  It's soooo easy and always gives great results, which is probably why I like it so much!!

The technique was developed by Claudine Hellmuth (also the creator of Sticky Back Canvas).  Here's a video of Claudine demonstrating the technique.


All of the samples shown are done with scrapbook paper.  You can stamp on the canvas with Staz On ink.  Here's a hot tip for you: you can also stamp the paper BEFORE you transfer it using Staz On ink and the stamped image will transfer too!  Just be mindful that the transferred image is the REVERSE or mirror image of the original, so if you want to use words, it's better to stamp after you transfer.

Here's a few samples of what we've done with the technique...

ATC size Sticky Back Canvas
Paper from Pink Paislee
Stamps on the canvas: Little Bird  and Bird Melange. Stamps on the background: Flower Power
, Mini Flowers, and Floral sets

ATC size Sticky Back Canvas
Paper from Pink Paislee
Stamps from Kind Words set

ATC size Sticky Back Canvas
Paper from Pink Paislee
Stamps from Sayings & Sentiments and Backgrounds sets


ATC size Sticky Back Canvas
Paper from Pink Paislee
Stamps from Sayings & Sentiments, Zig Zag set


Paper from Pink Paislee
Stamps from Paris and Leaf Border set


Paper from Pink Paislee
Stamps from Kind Words, Lines Border, and Single Dot Border sets


Upcycled Book Project class embellished with
ATC size Sticky Back Canvas
Paper from Pink Paislee
Stamps from Bird Melange

We hope we share what you make with us either on Flickr, Facebook, or email.  We appreciate each and everyone of you.  To prove it, we are offering our loyal blog readers 15% off any NEW stamps through this Friday.  Use the code BLOGLOVE when you check out.  An easy way to find the NEW stamps is to click the word NEW under the categories on the right hand side of the shopping cart.

Enjoy the flight,
Carrie

Friday, October 19, 2012

Feature Friday - Happy Fall!

Hi Peeps!

It's Friday, and it's beginning to feel a little like fall, even down here in Texas!  I was inspired to create a fall wall / door decoration using some of Paper Wings Productions new stamps.


This wall hanging was so fun to make.  It's a mixture of spray ink and paper piecing that has so much dimension. This same "layout" would be great for a card as well.
 
Background:  The base is a page from an old Basic Grey chipboard book.  I really liked the shape of it and thought it would be fun.  I used a distress marker to write "there is no place like home" over and over, and used spray inks and distress ink to add more color.  One of the sprays was a walnut spray with copper pearl powder (love it!)
 
Door:  The door is stamped on a Studio Calico woodgrain paper, and then used distress markers to color in the panels and give them depth. I love how the wood grain paper looks with this door stamp.
 
Leaf Swag: This was first colored with distress markers, but later I added some colored pencil which worked better on this paper to keep the color intensity.
 
Accents:  All of the bows, topiaries and welcome sign were all stamped on white paper and colored with distress markers.
 
 
Everything was attached with foam tape which I think also added to the dimension of the piece.  Last, but not least, I added a tulle hanger with a bow to finish and tie it all together. Here is another closer look at the finished project.


I love the fall and the time leading up to this holiday season. If you are like me, this is one of the most fun times of the year to create handmade projects. Happy fall to you all,  happy stamping and creating!

Julie
Related Posts Plugin for WordPress, Blogger...