Friday, June 29, 2012

Feature Friday

Hello peeps!

This week I want to feature a couple of tags recently made by some of my friends.  First up is the lovie Ms. Liz Allen.  I have had the pleasure of calling Liz my friend for the past 14 years (holy cow, has it really been that long?!?).  Liz makes awesome samples that are heavy on the embellishing and the bling.  


 Liz's tag features our Mermaid, Art Textures, and Flower Power sets.   The background was created by stamping images from Art Textures and Flower Power in a soft aqua color.  All the other images were stamped separately, cut out, and then mounted onto the tag.


 Liz adhered the stamped images in a manner that left the edges slightly raised off the surface of the tag.  She gently curled the edges of the sun and the waves to give extra dimension.  She also used foam tape where needed to layer the images on top of one another.  Of course, the final touch included a glazing of Rock Candy Distress Stickles for that extra little bit of bling.  Too cute Liz, thanks so much!


This week I also had the pleasure of having an artist night out with a few friends, including my pal Jason, who was in town visiting.  Jason made this AWESOME tag while we were hanging out.  I just love it.  I begged to keep it but settled for taking pics to share with you.


Jason used our Wings set with a metal pen nib from Tim Holtz. Jason just so happens to sell on those cool little nibs on his online store.  He also used the Banner Day set for the Celebrate Banner.


The Celebrate banner and ruffled edge at the bottom of the tag were done with Kraft Glassine paper also from Tim Holtz.


I hope you enjoy these tags as much as I have.  I feel blessed to have such amazing and talented friends.  If you're out there creating something this weekend with our stamps, we sure would LOVE to see!  We hope you'll share with us!

Enjoy the flight!
Carrie

Wednesday, June 27, 2012

What's Up Wednesday: Art Textures and more!!

What's Up Peeps ?!?!

I'll tell you what's up at my house - it's a new little puppy named Walter!  And he is the star of my What's Up Wednesday project I'm sharing with you today.  I know you will get a kick out of this.

When I went to the CKC convention in Houston, I was able to attend a class on Smashbook (you tube video here).  Have you caught on to this latest craze?  It is fun fun fun!  I like to scrapbook, but don't always have time to do a full layout and a Smashbook is scrapbooking but it can be anything you want it to be.  I like it because I can still use it to record memories in a quick / less formal way, and yet, I can do so much more.  People are using them for recording daily life, ideas, thoughts, quotes, magazine finds, you name it.  So, without any further ado, I introduce Walter!


I love the way I can document Walter joining out family in this Smashbook journal. And, unlike my typical scrapbooking methods, I felt so much freedom in how it turned out, and the process was so fast, and with a little puppy, or anyone with little children or little time, fast is VERY important!!! 


Something else that made this process so fast was, of course, the stamping.  I pulled out my Art Textures stamps, and several colors of Jenni Bowlin ink, and started layering the stamps.  Also, in this image, you can see the use of one of the Scriptures stamps in the top left hand corner created by Liz Allen, and the Solid Whimsical Alphabet used to spell out Walter's name. 


I wanted to show pictures of the TV characters Walter is named after, so I used the Window set to stamp the window frame on patterned paper, and added the images to the frame for a perfect mat.  I grabbed a good writing pen, and started writing and "lickity split", I was done!


If you don't have a Smashbook, no problem.  Think about creating a mini book on any theme you like.  They are small, fun, fast, and like a Smashbook, can be anything you want them to be.


That's What's Up this Wednesday.  I hope you find time to put on your paper wings and get creative!

Julie


Stamps: Art Textures, Solid Whimsical Alphabet, Scriptures and Window
Ink: Memento in tuxedo black by Tsukineko, Jenni Bowlin inks in Spiced Tin, Stick Candy, Chicken Feed, and Cough Syrup
Cardstock: Stampin' Up! in Basic Black
Patterned Paper: stash
Other: Journaling Pen by Stampin' Up!

Monday, June 25, 2012

Mixed Media Monday: Mermaid


Happy Monday peeps,

Today, I have a cute little mixed media piece for you using the mermaid from the Mermaid set as the focal image.  Liz Balderas of handmade by Lissie girl drew all of the adorable stamps found in the Mermaid set and the Mermaid is a real treat to play with.  I simply stamped her on a piece of white cardstock with Memento ink, cut her out and colored her in with Distress markers and colored in with a water brush.  Just a word of warning Memento ink does bleed/separates a bit with water so if that bothers you will want to use a waterproof ink like Archival Ink by Ranger...I happen to like that the ink has a softened look.  I added some stickles to the mermaid's tail for a little needed shimmer.  I edged my mermaid in black marker to cover any messy cutting and give her a finished look.  The mermaid is adhered to the background using dimensional tape so she pops off the rest of the piece.


The background...oh how I love those circles from the Backgrounds set by Rag & Bone Studio!  I stamped the background times with VersaMark ink and then embossed it in white on a piece of book paper adhered to watercolor paper.  I then sprayed the back with mists and over sprayed it all with some shimmer spray to produce a night sky.

See the waves?  You can stamp the wave image over and over in a continuous line as shown below which is great when using it on a scrapbook layout or larger canvas.  I stamped the wave onto patterned paper and colored it in with a Distress Marker spreading some of the color with my water brush before cutting it out.  When I adhered the two lines of waves to the background I only put a strip of adhesive on the bottom and curled up the top to give them more dimension.  To ensure they stayed down I also stapled them on the left and right hand edges using Tim Holtz Tiny Attacher.


On a piece of book paper I stamped the sentiment from Sea Melange and then tore it out before edging it with a Distress Marker.

For even more impact I added star sequins with mini brads to the background.  Lastly I added some white photo corners.


This mini piece (measuring approximately 4.5 inches by 5 inches) could be kept as is or added to a journal, handmade book, card, layout, canvas or anything else you can imagine.


What would you make with the mermaid?  Made anything with her we would love to see!  Share a picture on our flickr group, Pinterest, Facebook, Twitter (@PaperWingsProd) or comment here with a link.

By the way, did you see Julie's video?  If not, you really should.

Take flight,
Shay.

Stamps: Backgrounds, Mermaid and Sea Melange
Ink: Memento in tuxedo black by Tsukineko and VersaMark by Tsukineko
Cardstock: Solar White by Neenah Papers; 140 lbs. cold press watercolor paper by Strathmore
Patterned Paper: Destination by Studio Calico
Other: White embossing powder, Judi-kins; Tim Holtz Distress Markers; Stickles by Ranger; Dylusions Ink Spray in London Blue by Ranger; Mister Huey's Color Mists in atmosphere and shine by Studio Calico; book paper; star sequins from stash; mini brads from stash; white photo corners from stash; white Uniball pen; Memory Marker in black by American Crafts; Tim Holtz Tiny Attacher

Saturday, June 23, 2012

Feature Friday finally!!! {on Saturday}

Hi Peeps! 


I'm so excited to post today.  We have our very first paper wings productions video for you!!!  This video takes a closer look at the new Window clear stamp set that was released just last week.  You just gotta check it out! 


I'm so excited and we hope you are too.  Please spread the word to all of your friends and feel free to share it on your favorite social network!  Here are some close ups of the finished cards.


Enjoy the rest of your weekend!


Julie


Friday, June 22, 2012

Feature Friday...slight delay

Hi Peeps! 

We have a great Feature Friday for you, however, it is going to be delayed slightly.  Never fear!  Check back tomorrow for a focus on our new Window stamp set!  Here's a sneak peak to hold you over till tomorrow.


See you then!


Julie

Wednesday, June 20, 2012

What's Up Wednesday: Flight Plan Mission 003

What's Up peeps?

What's up here is that we want to see your submissions to our Flight Plan Mission 003!  Now that the new stamps have been released there are even more possibilities to create with paper wings productions stamps.

Don't be intimidated.  If you make anything using paper wings productions stamps and the Flight Plan Mission 003 as your inspiration post it to our flickr group with the tag FP003 and you are entered to win a stamp set of your choice!  For more details about Flight Plan Mission 003 go HERE.  It really is easy.  Perhaps you need a little nudge.

Here is something I made with the flight plan in mind...something easy that can be changed to suit your preferences.


My sister's birthday is today and I knew she would need some thank you notes after her big day so I thought I would make a few to give to her on her birthday so she wouldn't have to wait for me to make her some later (me proactive!?!  Has the world turned on its end?).


Using inexpensive white cardstock I stamped a strip of the circles from Backgrounds down the middle in Dried Marigold Distress Ink.  What I love about this stamp is it is really easy to align the stamp to repeat the pattern as needed.  Also, you don't need to have the stamp cover the whole surface.  I like it here as a block which mimics the larger background block on the flight plan.

Next I adhered some of the washi tape image from the Pop! kit by Ya Yeah Designs.  If you have not tried using a digital kit to make a hybrid project (printing out something from your computer and using the printed element in a physical project) then you are in for a treat.  Digital kits usually come with elements, alphabets and papers that you can print out as many times as you want or need and you can resize and recolor them!  On top of the washi tape, I adhered a strip of patterned paper from the Pop! kit.

On a strip of white cardstock I stamped "thanks" in Memento ink by Tuskineko spelled out using the Whimsical Solid Alphabet.  I love that with the alphabet I can stamp out the word I want.  Over the "thanks" I adhered a small typed sentiment.  Keeping a sheet of favorite sentiments or words to add to a project is really helpful.


Lastly, there was a sort of bulls eye looking element from the Pop! kit I wanted to use, but I was struggling on how to use it.  I stamped over the element using the large circle from Art Elements and also the earth from Earth & Sky.  It still wasn't working right for this project until I decided to cut it up in quarters to add to the cards as a corner and then I was happy.  I love customizing elements by stamping over them and/or cutting them up.

I considered adding a button or two to the left of the "thanks", but as these thank you notes will most likely be sent in the mail I decided against it, but I think the card could look really cute with some buttons, bling, brads or other decorative elements of your choice.  I think I may even go to the store to get some small sequins that I could add without increasing the bulk for mailing.


Now, that you have seen how simple my cards are using the Flight Plan Mission 003, don't you think you could make something too?  I know you can!   And if you have any questions or problems, please do not hesitate to ask us.  We are here to help.

Take flight,
Shay.

Stamps: Art Textures, BackgroundsEarth & Sky and Whimsical Solid Alphabet
Ink: Memento in Tuxedo Black by Tsukineko; Tim Holtz Distress Ink in Dried Marigold by Ranger
Cardstock: Neenah Solar White
Patterned Paper: from Pop! kit by Ya Yeah Designs (free for a limited time!)
Other: elements from Pop! kit by Ya Yeah Designs (free for a limited time!); computer; color printer; circle cutter by Martha Stewart Crafts


Monday, June 18, 2012

Mixed Media Monday: Love


Good Monday peeps!

I hope you had a wonderful weekend celebrating the father figures in your life and perhaps you got a chance to pick up a stamp or two from the new release.  If not, go check out all the offerings over at our website.

Today, I have a little project you could give a loved one.  I made a 5x7 inch canvas from 140 lbs. watercolor paper so that it could fit into a 5 x 7 frame of my choice (and can be found for a reasonable price and often on sale) that could be hung on the wall.  If you wanted to make it to celebrate an anniversary you could also add a date (possibly using the numbers found in the Life Framer set or you could type it up on the computer, print it out and add it that way) and/or names or initials using the Whimsical Pattern AlphabetFunky Alphabet or Whimsical Solid Alphabet.


The heart was cut out from book paper which I then colored with AquaMarkers and later sprayed with sprays.  The love was stamped using letters from Whimsical Solid Alphabet with Momento ink.  I stamped the heart with the punchella stamp from Art Textures and one of the sayings that I felt really worked with the feel of the piece from Earth & Sky (it says: "Surely the stars danced in the heavens the day you were born." and is sweetly written by Liz Allen aka Fine & Fancy).  I edged the heart in Black Soot ink.

The background was sprayed and then I placed a mask over the background and sprayed through that.  I stamped the lovely floral border from Kind Words in Momento Ink on each side and filled in some of the empty spaces with the small open circles found in Art Textures in Weather Vane.  I again stamped the saying from Earth & Sky on the background in Weather Vane.   I colored in the edges of the background with AquaMarkers.  Like the heart I also edged the piece with Black Soot ink.

To finish off the piece after I adhered the heart to the background, I stapled the heart to the background and attached 3 buttons for some dimension.

It was a whole lot of fun to make and would make a meaningful gift for someone to commemorate your love for them or to give to someone else for a wedding shower gift, anniversary gift, mother's day gift, housewarming gift or with some changes of color for father's day or for a baby boy's shower.  You could also place this panel onto a pretty store bought journal to make another sort of personalized gift.

Take flight,
Shay.

Stamps: Art Textures, Kind Words, Earth & Sky, Whimsical Solid Alphabet
Ink: Memento in Tuxedo Black by Tsukineko, Tim Holtz Distress Ink in Black Soot by Ranger; Jenni Bowlin in Weather Vane by Ranger
Cardstock: 140 lbs. cold press watercolor paper by Strathmore
Patterned Paper: book paper
Other: Mister Huey's Color Mists in Cameo and Piglet by Studio Calico; Intertwined Circles Huey's Masks by Studio Calico; Perfect Pearl in Pearl by Ranger; buttons by Studio Calico; Divine Twine in Black Licorice by Whisker Graphics; Copic Markers; AquaMarkers by Lestraset; Tim Holtz Tiny Attacher


Friday, June 15, 2012

Samples Revealed and New Stamps Available!

Happy release day peeps!

Today not only do you see the samples in all their detail, but the new stamps are available for purchase at our website!


Julie: "Love this majestic boat, and other sea elements from Sea Melange!  I wanted to use the sun from Earth and Sky, so I masked the boat and stamped the sun in a very light yellow.  I colored the waves, sky and boat with Distress Markers and I love how the white marker worked out on the sails. On the navy background, some of the other sea characters are resting on netting from the Art Textures set. It is very subtle to the background but gives it some interest. The sentiment and lighthouse are also on this beautiful Sea Melange set and I like the effect of the sentiment stamped over the watermarked lighthouse on the gold paper. The whole card makes me think of Persuasion, by Jane Austen.  What do you think? Hmmm, that might give me an idea for a future project."    

Stamps: Sea Melange, Earth and Sky, Art Textures
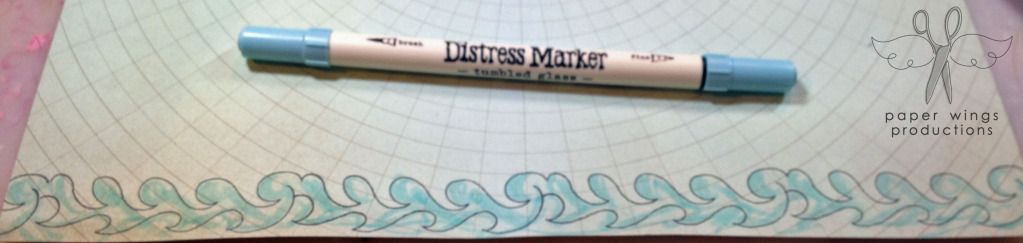
Ink: Archival Ink, Distress Ink and  Distress Markers by Tim Holtz / Ranger
Cardstock: Stampin' Up!
Patterned Paper: Protractor and Departure by Studio Calico
Other: twine, metal embellishment (from stash)


Julie: "I knew this flower would be great, but who knew it would make awesome patterns? It makes me think of wall paper in an old home. Tie that in with the phonograph and a little music background, plus a lovely sentiment, and you have an awesome card for a dear friend.  Can you tell I'm still hung up on the last PWP color combo???  This card makes me so happy!"

Stamps: Phonograph, Flower Power, Kind Words, and Background Melange
Ink: Distress Ink and Distress Markers by Tim Holtz / Ranger
Cardstock: Stampin' Up!, Coated Paper
Other: Sassafrass flower sticker


Julie: "Ahhhhhh, Paris!  It would be so great to go back again!  This card was such fun to make and I had some good results using both Aquamarkers and Copics. You just gotta love the Eiffel Tower, the sweet cafe seating, and the darling Miss Louise!  She is so great, and the little heart comes with her, and many more cute embellishments too!  Although I made this into a card, it would make a cute framed picture for a girls room, or in an art space!  Hmmm, where did I put that frame.....?"

Stamps: Paris and Louise
Ink: Archival Ink by Ranger
Cardstock: Neenah Solar White, Water Color Paper
Patterned Paper: Stampin' Up! (image matte)
Other: Aquamarkers by Letraset and Copic markers


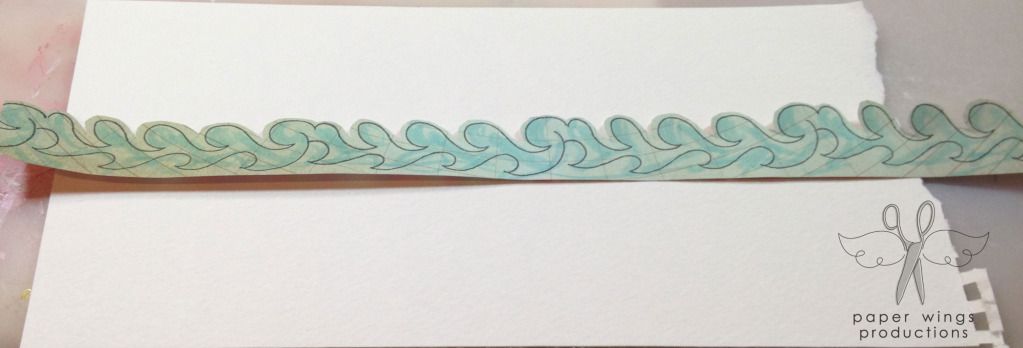
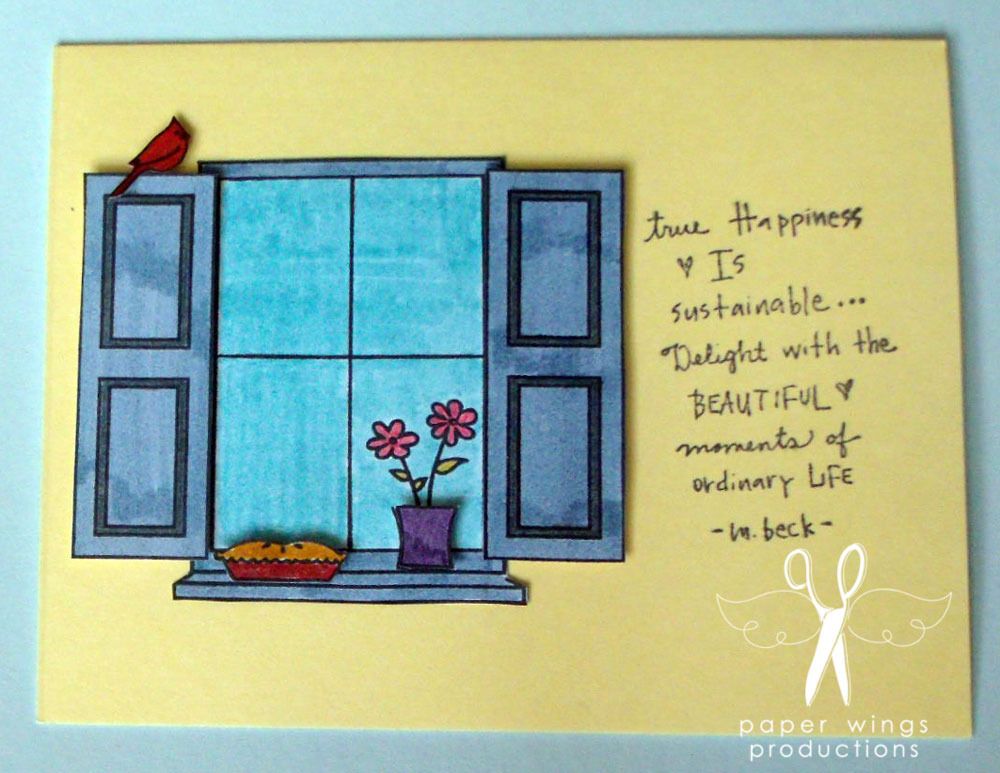
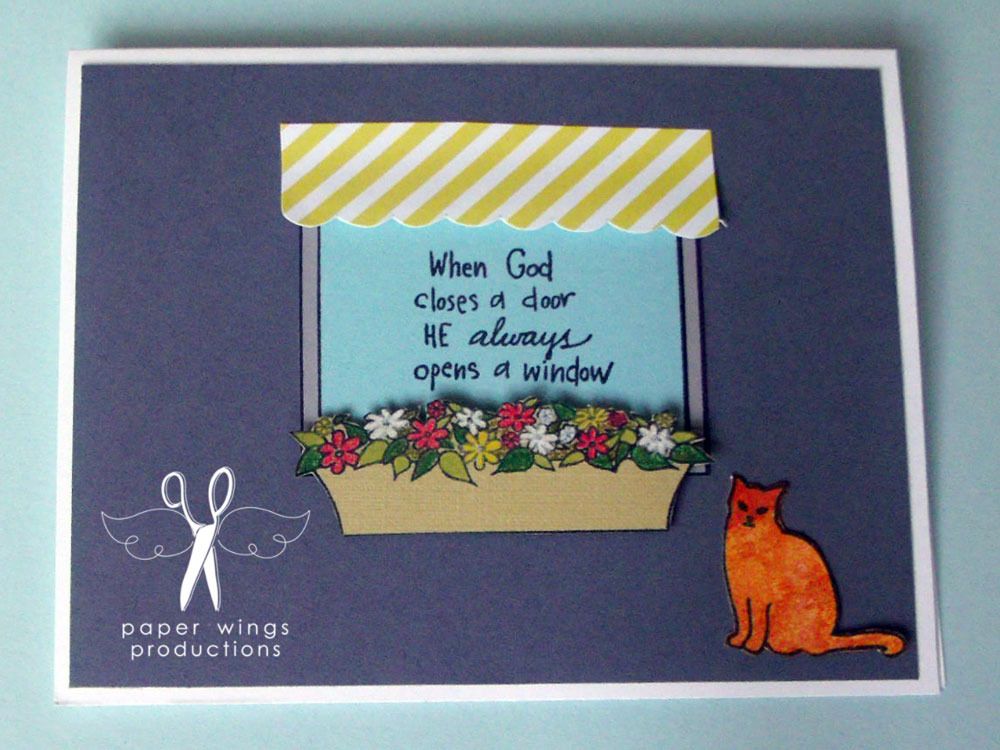
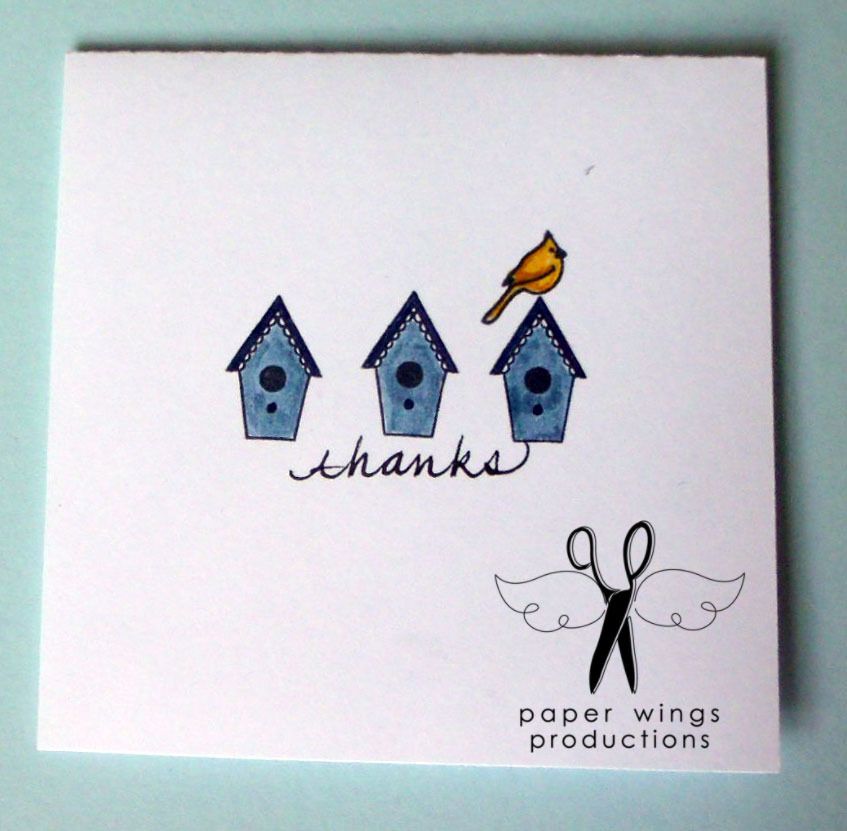
Julie: "This Window set has so many fun pieces that you will have a great time just trying them in various configurations.  On this version, I tried the window landscape style on a 5.5 inch x 4.25 inch card, but I know that it will also fit portrait style too! Not shown here are other extras like a window flower box, pie, bird house and a cat!  And, can I say, I really love this cute little bird?! I have a feeling he will be finding his way on many of my future projects."  

Stamps: Window and Scriptures
Ink: Archival and Distress Markers from Ranger
Cardstock: Stampin' Up! and Watercolor Paper
Patterned Paper: stash
Other: Caran d'Ache watercolor crayons


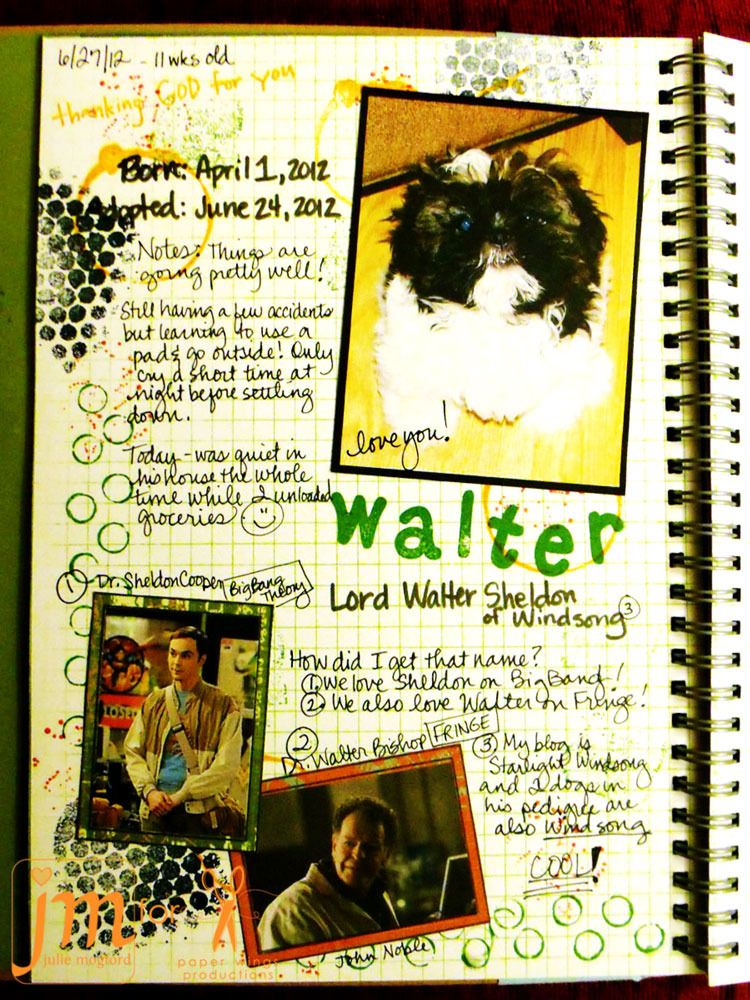
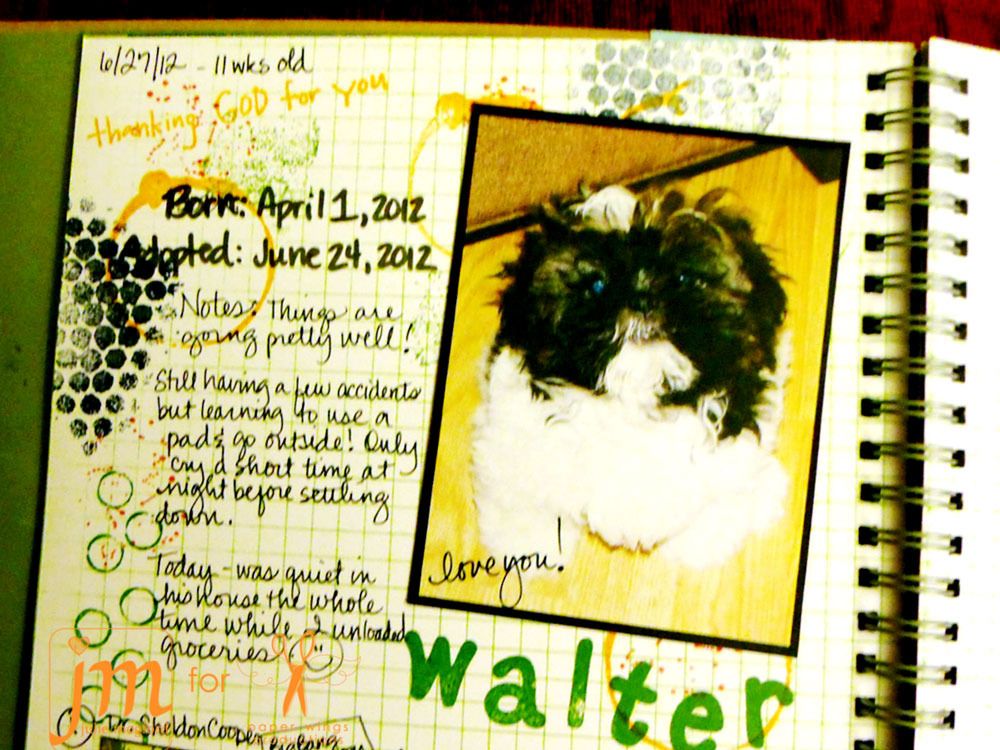
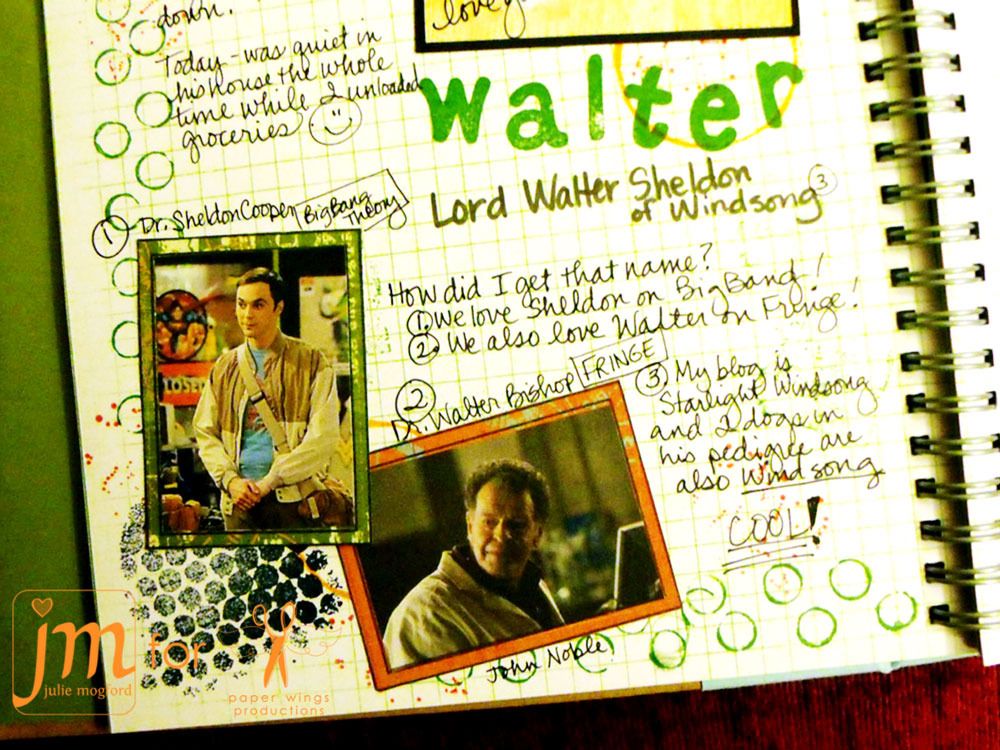
This beautiful book is from a monthly project at Stamp Antonio that Carrie taught.  The book is created from  a recycled book that was gutted and then new pages were added.  The bird and saying is from Bird Melange and it's little crown from Royal Melange each designed by Carrie.  The snatches of writing found in Writing Backgrounds, some of which comes from Carrie's own family, is stamped along the spine of the book.

Stamps: Bird Melange, Royal Melange, Writing Backgrounds
Ink: Versafine Black
Other: Sticky Back Canvas, Book Pages, Snow Cap Dabber, metal corners, Tim Holtz Tissue Tape, ribbon.


Liz Allen (designing under Fine & Fancy) made this lovely piece of Texas art using her own stamp based on her handwriting from Texas Sayings and star drawing from Hanging Stars.  A flag made from stamping the ink pad directly on cardstock--brilliant!  I think the torn inked edges are particularly lovely.  And the Texas as a background--fantastic!

Stamps: Texas Sayings, Flourish Fun, Hanging Stars
Ink: Jenni Bowlin ink pads from Ranger
Cardstock: Straw and White Cardstock
Other: Caran d'Ache watercolor crayons


This tag was a collaborative effort between Erin Edelmann and Dana Edelmann, I was luck enough to see it done this past Sunday at Stamp Antonio.  Erin (who also designed the bird stamp featured as Rag & Bone Studios) created the striped background using distress inks and the Lines Border stamp set.  Dana added the postcard stamp from Writing Backgrounds and then finished it off with the bird image from Bird Lyrics.

Stamps: Lines Border, Bird Lyrics, Writing Backgrounds
Ink: Versafine Black, Memento Brown, Tim Holtz Distress Inks
Other: Shipping Tag, Water mister, craft mat, white Distress Marker


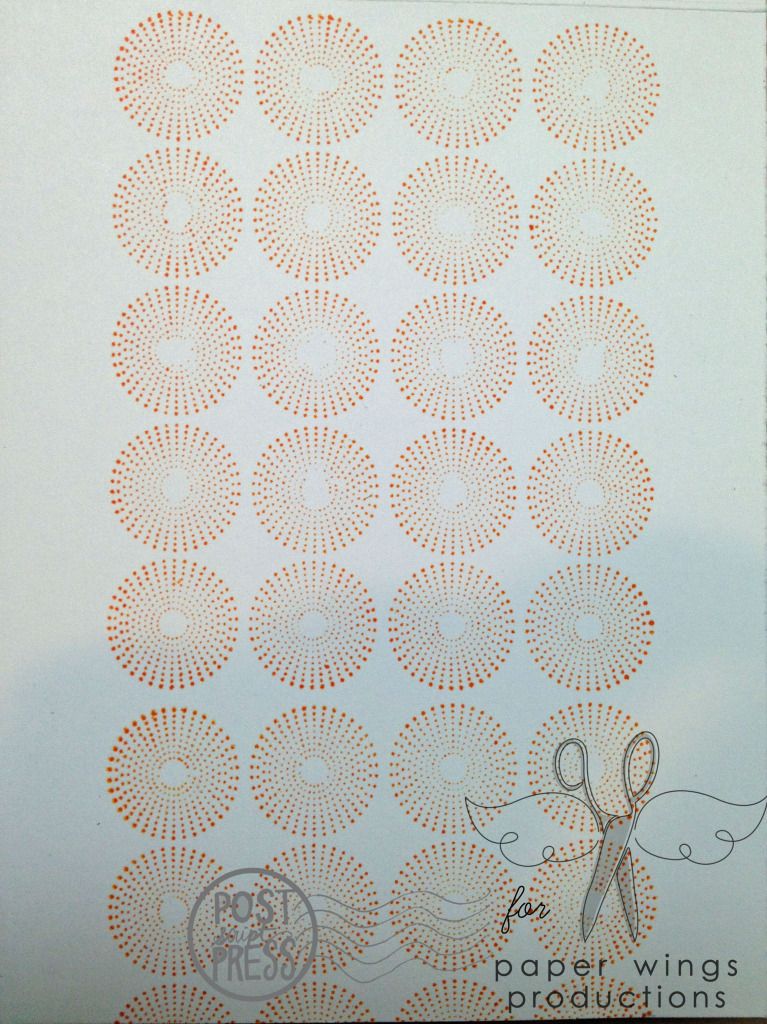
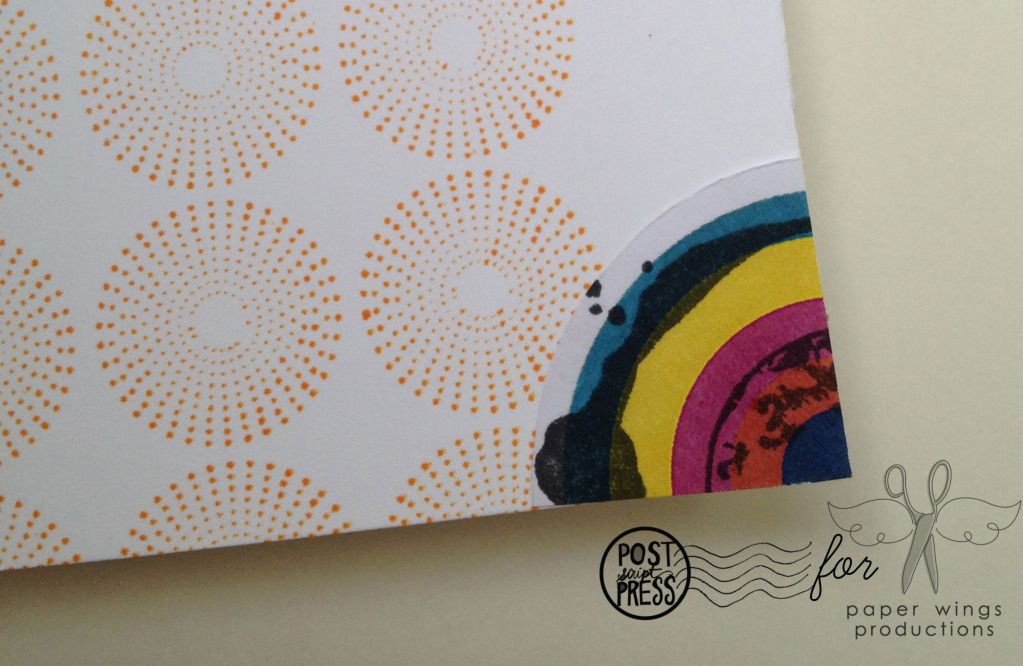
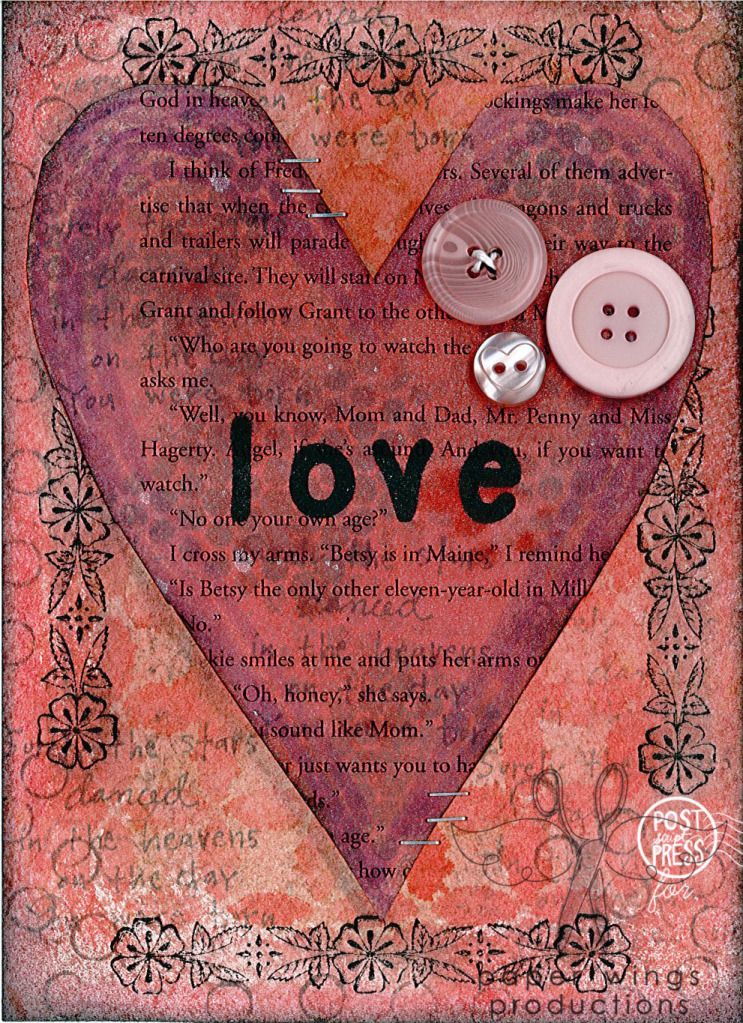
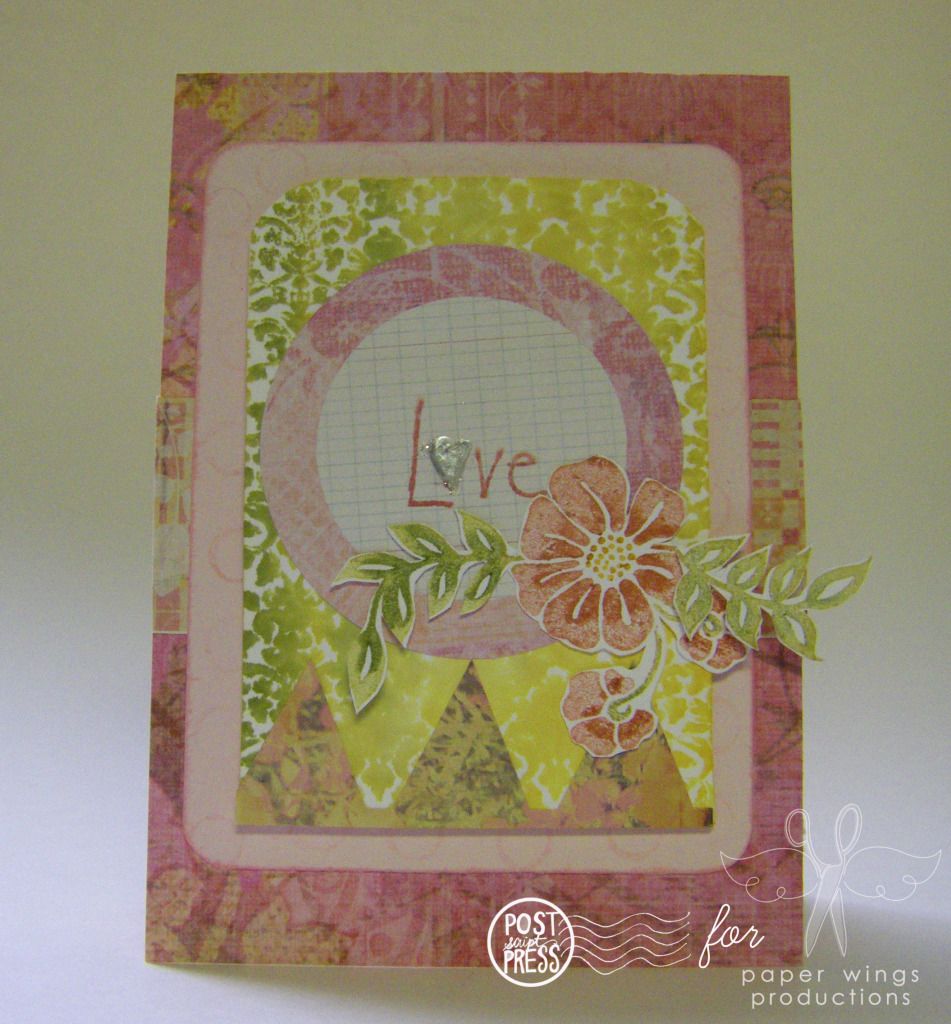
This little card turned out better than I had hoped.  I used Distress Markers to color in the flower from handmade by Lizzie girl's Flower Power (beautiful set!) and I loved how that turned out.  My favorite part is the damask background which I made with Distress Markers using the damask design in the Background stamp set designed by Rag & Bone Studios.  I colored in the design and then spritzed it with water giving this really cool effect.  The love word is super sweet, but I would expect no less from Miss Liz Allen of Fine & Fancy and the word is found in the Sayings & Sentiments set.  The pink layer is actually subtly stamped using some of the open circles found in the fabulous Art Textures set by Julie Mogford.


Stamps: Art Textures, Backgrounds, Flower Power, Sayings & Sentiments
Ink: Jenni Bowlin by Ranger
Cardstock: Neenah Solar White, Stampin' Up! Pink Pirouette or Papertrey Ink Sweet Blush
Patterned Paper: Julianne Vintage Designer Mat Pad by K & Company
Other: Tim Holtz Distress Markers, water mister, Pearl Pen Cream by Viva Decor, border stickers by sassafras for Studio Calico, label from Julianne Vintage collection by K & Company, Corner Chomper (1/2" & 1/4 ") by We R Memory Keepers


I hope you enjoy some fun shopping this weekend!

Take flight,
Shay.

Thursday, June 14, 2012

Sample Sampler Day 4

Greetings peeps,

Today is the last sampling of our samples before they are revealed tomorrow.


Nice place to perch


Feathered friend?

Take flight,
Shay.

Wednesday, June 13, 2012

Sample Sampler Day 3

Hello again peeps,

Wondering what we are sampling today? Wait no further. Remember the projects will be revealed Friday and all the new stamps will also be available for purchase Friday.


Taking a stroll in .....


State of Mind...
Take flight,
Shay.

Tuesday, June 12, 2012

Sample Sampler Day 2

Happy day peeps,

Today's sample sampler come from Carrie and Julie. The full projects will be revealed Friday and you will be able to purchase all of the new stamps on the website too.


Vintage music???


Royal bird?

Take flight,
Shay.

Monday, June 11, 2012

Sample Sampler Day 1

Happy Monday peeps,

Today we introduce you to the new stamps in action, but in a close up. The projects will be revealed in all their glory Friday and also the stamps will be available for purchase Friday too.


Sailing at Sunset???


What's stamped and what isn't?

Take flight,
Shay.

Friday, June 8, 2012

Full Image Peeks

Don't forget, our new release will be available for sale on the website next week!


Related Posts Plugin for WordPress, Blogger...