Showing posts with label bird lyrics. Show all posts

Saturday, January 11, 2014

Cutest Little Baby Face


Welcome!!!  Norma here with you today.  How's the new year treating so far?!  I hope you're staying nice and warm.  Okay so today I'm sharing a layout of my sweet little grand daughter.  We were blessed to have the whole family over and both of our older sons stayed over night so I was able to get lots of greats pics.   This pic is one of my favs.  I think she looks so stinkin cute!!


It's been really nice to FINALLY be able to do pretty little girl layouts!  Alright, let's get down to business, lol.  By now you know that I don't like to waste anything right.  So this layout is mostly made up of my Jan hop project scraps.  The background is cream colored cardstock that I used to spray the frame I made with the Lindy's Sidekicks.  The patterned papers were also hop project leftovers that I simply layers behind my photo.


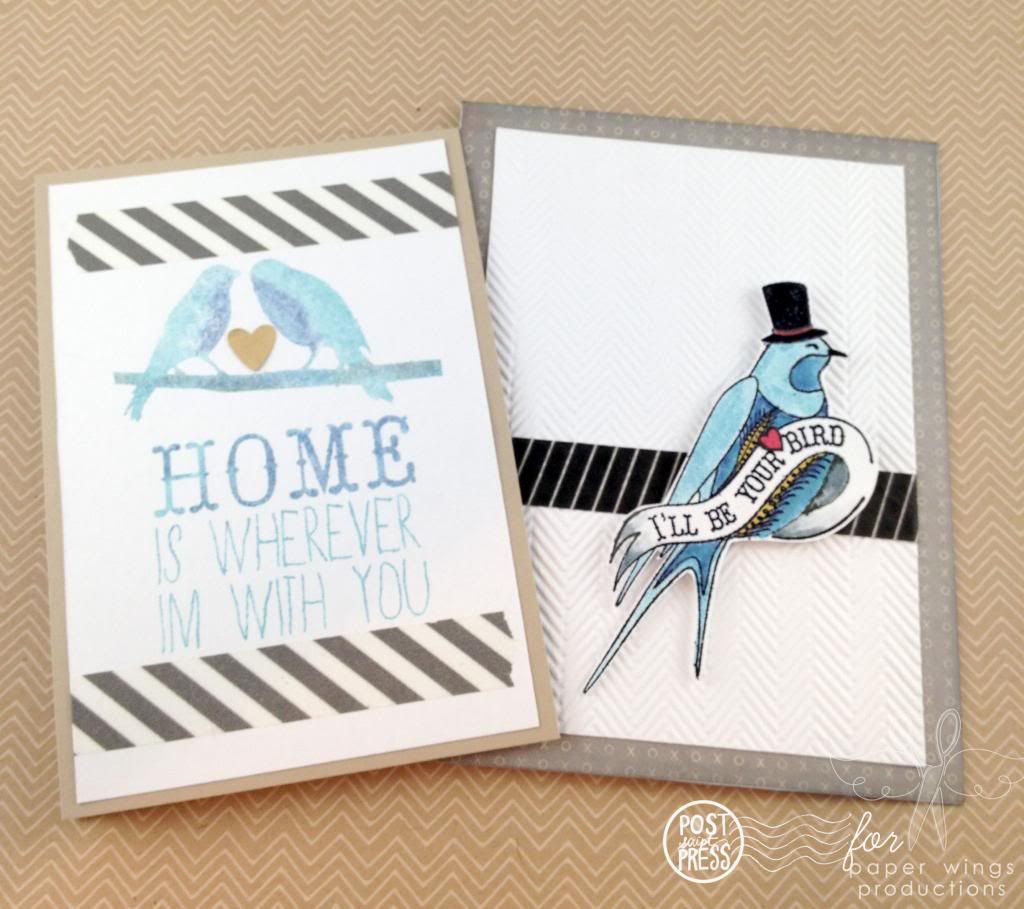
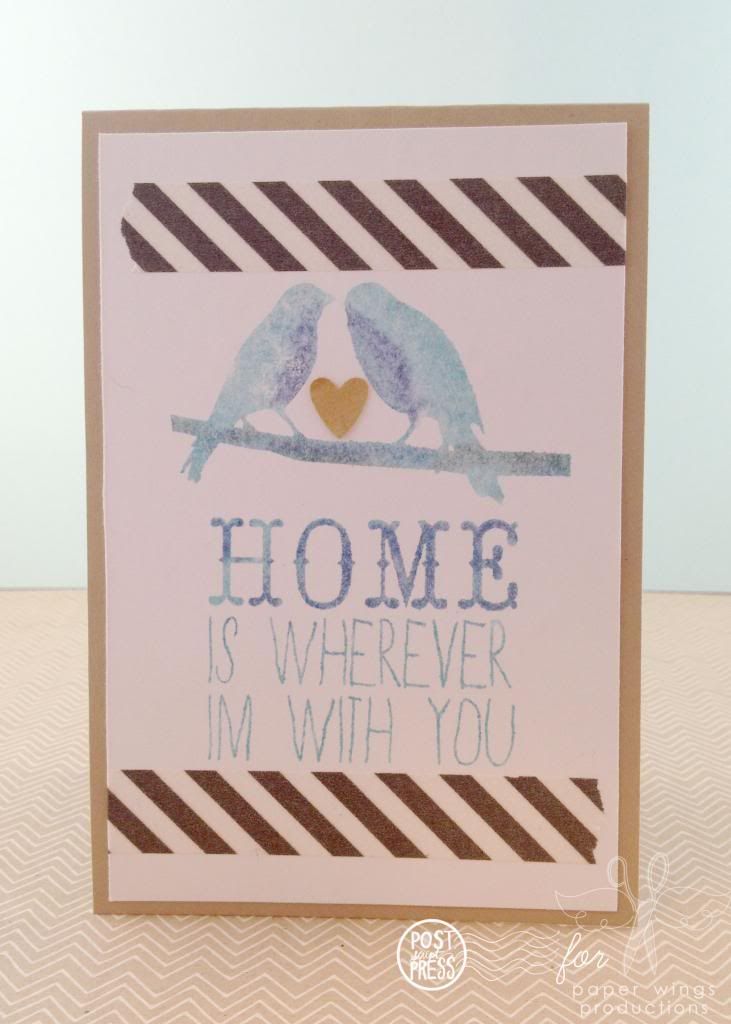
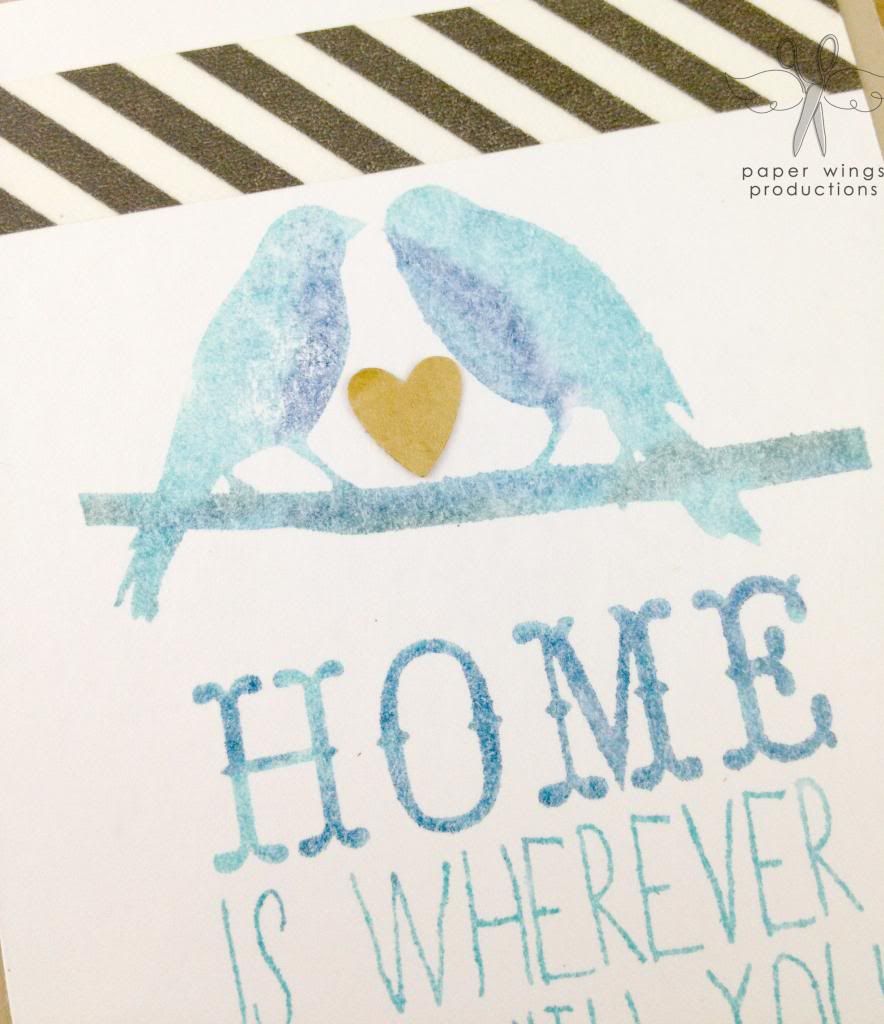
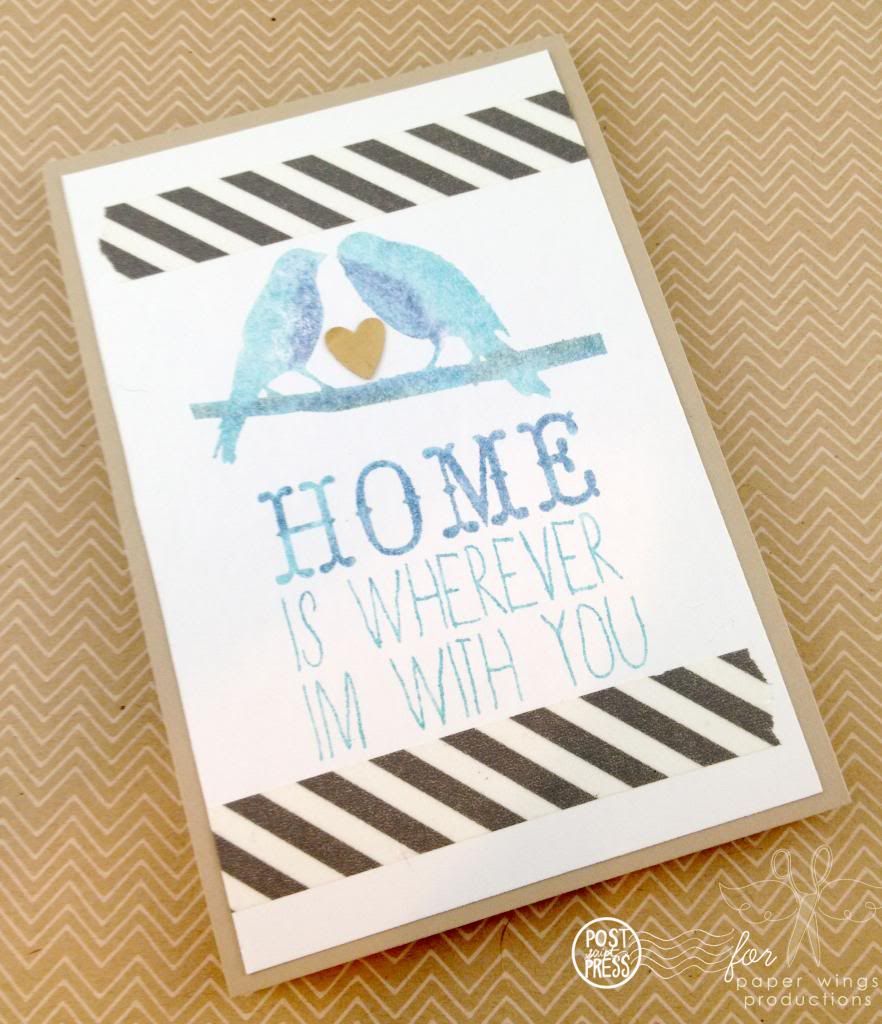
I wanted to pull out the blue from her jammies so I used Cyan Colobox ink.  The stamp I used is from the Bird Lyrics set and it actually has the sentiment "Home is wherever I'm with you" but I only wanted the birds so I only inked that part of the stamp.


Whenever I create, I like to balance my colors around my composition to keep the eye moving.  So I used the same blue to create journaling lines and to frame my layout.  The stamps I used are from the Line Borders set, it comes with two different types of lines.


To help ground my photo, I stacked two of the Cosmo Cricket wooden pieces.  I made sure to line up the rain drops where the two pieces overlap.


To balance the visual weight of the wooden pieces, I added beautiful hanging pom pom flowers from the Happy Day stamp set.  I also added lace and polka dotted ribbon swagged across the top of the layout.


To finish off my layout, I added a little doodling and a chipboard sentiment  "You've got the Cutest little baby face".  Easy peasy and I used up some of the scraps from my Jan hop project, so no waste ;D  All of the beautiful patterned papers, wooden pieces and mist came from the Jan Nesting Components kit.


To pick up a kit, visit the online store.  Today Carrie and I are out at the Grapevine Rubber Stamp & Paper Arts Festival so if you're in the DFW area, we'd love for you to stop by our booth.  Carrie is working the shop and I'm hosting the make & takes!!  So come out and say hi :D


Thanks for joining me, have a wonderful weekend and I hope to see you at the show!!

Tuesday, April 2, 2013

Stamping with Pearl-Ex

Hello, Norma here with you today!  Hey did you see the new April Mixed Media kit that was released yesterday?!  Well in case you missed it, here is the link: April in Paris, go check it out.

Today I have a quick little video tutorial to share with you on stamping with Pearl-Ex Pigment Powders.  I love using these beautiful powders in my art projects so I thought it would be fun to show you how you could use them with your stamps.


If you use Pearl-Ex on a project and you really want it to last, make sure to spray it with hair spray or Fixatif to help protect the pigment over time.  I also wanted to mention that Pearl-Ex is not archival safe so if you'd like to use it for scrapbooking, then you'd wanna spray it with a product like Preserve It by Krylon to protect your layout.

 Thanks for joining me today & Have a Beautiful Day!!


Wednesday, January 30, 2013

What's Up Wednesday: Guy Friendly Valentine's

Happy Wednesday!

It's Shay here. Are you like me and totally amazed by what the design team are making?  Make sure to let them know by commenting because they love to read your comments.  Don't forget that this Friday is February's Blog Hop where leaving a little love could mean you win something lovely for yourself!

Speaking of love, today I have a bit of inspiration for putting a little masculine twist on those Valentine's cards for the special guy in your life.

With the Bird Lyrics stamp set (or Be Your Bird stamp and Home stamp) I made two cards:


Using similar colors and products making two cards is nearly as easy as making one.

Card No. 1


I began with the Be Your Bird image.  Using Versamark I embossed the bird using black embossing powder.  I colored in the image using Tim Holtz Distress Markers (tumbled glass, stormy sky, weathered wood, picket fence, scattered straw and fired brick).  These markers blend well together and I love the look they have when you color in an image.


I cut out the image and adhered it using dimensional adhesive to an embossed white panel that is decorated with a little diagonal striped washi.  I think washi is an excellent alternative for ribbon for masculine cards.

I also added a stamped heart from the Handmade stamp set which I cut out and outlined with a black pen to the bird.


Lastly, I adhered it all to a card base with a subtle Valentine theme and distressed the edges using my ink blending tool and black ink.

Card No. 2


For my next card I also used Distress Markers (tumbled glass, stormy sky and weathered wood), but this time I colored in the image directly on the stamp using the markers.  I lightly sprayed the image with water before I stamped it onto a piece of white cardstock.


Next I added a diagonal striped grey washi below and above the image.  To add to the Valentine's theme I added a small heart that I punched out of a coffee stained manila tag.  I then adhered the white panel to a kraft card base.


And there you have it--two simple, clean and guy-friendly Valentine's cards.

I hope you ink up some Paper Wings Productions stamps and create some Valentine's cards for the guys and gals in your life!  We would love to see what you make with Paper Wings Productions stamps.  Add your projects to Facebook, our flickr group, to Pinterest, comment with a link on this post or even email pictures to us!

And don't forget to mark your calendars for Friday's Blog Hop (and don't forget there is also a giveaway).  I am really excited to see what the talented gals have in store for us all!

Take flight, Shay.

Stamps used:


Other supplies:

Cardstock: white, Georgia Pacific; desert storm, Neenah Papers
Ink: versamark, Tsukineko; cough syrup, Jenni Bowlin for Ranger
Patterned Paper: Fourteen 6x6 paper pad, Crate Paper
Other: detail black embossing powder, JudiKins; washi tape, Freckled Fawn (I think); Tim Holtz Distress Markers, Ranger Ink; heart punch, Stampin' Up!; black pen, American Crafts; dimensional adhesive, American Crafts; embossing folder, Cuttlebug

Monday, January 14, 2013

Mixed Media Monday - Always Remember

Happy Monday bloggie friends, Norma G. here to share a little Mixed Media Fun with you!

I hope you a super fun weekend!!  Mine was great because I had a chance to get back in the studio and paint.  It's been awhile since I've done a canvas or at least it felt like it anyway, lol.


So today I have a very special 12x12 canvas to share with you.   I did this canvas in remembrance of my mother so it was a very emotional process and I hope you like the result.

The inspiration for this piece was this beautiful photo I found of my mother smelling a gorgeous bouquet of red roses.  Initially I knew I wanted to use an old photo for my canvas so I started digging through the box of photos that I inherited when my mother passed many years ago.  I was looking for old black and white photos to transfer onto my canvas but this photo really caught my eye and so it was settled; this would be focal image.


I started out by layering my favorite shades of pinks, reds and blues to the canvas then I attempted to transfer my image.  I say "attempted" because as you can see, I wasn't very successful.  I tried a new transfer technique using Golden Fluid Matte Medium and I missed a step along the way.  The technique I usually use is with Regular Gel Matte but I wanted to try something new.  The wonderful thing about art (especially mixed media) is that it doesn't have to be perfect so I pressed on.  I added some joint tape (that's what the tape with the little circles is) then some more layers of paint.

Since my image didn't transfer completely, I decided to use a second copy.  (I should mention that both images were copied using a laser printer and regular copy paper.)  I cut my image out and adhered it to the canvas.  Next I sprayed a thin coat of Fixatif to seal my canvas, this allows me to continue working on the canvas without smearing any of the water soluble layers.  Since my image is black and white, I added color using Tim Holtz Distress Markers.  I added some color to the dress, cheeks, lips and roses.

From here I added layers using the Paper Wings Productions Melange Women and Bird Melange sets.      I stamped Diana and an angel onto cream colored cardstock, colored them in with Prismacolor pencils, fussy cut and attached to the canvas.  I also stamped a sentiment from the Bird Melange set directly onto my canvas.

I added a second angel watching over my mother and crown from the Royal Melange Stamp Set.

I stamped a bird from the Bird Lyrics Stamp Set directly onto the canvas and outlined it with a white gel pen to add some definition to the image.

To balance out my composition, I added some doodling and corrugated hearts.  I applied some paint to bring out the texture of the cardboard and added butterfly wings from the Wings Stamp Set.

Here's a nice side view of the completed canvas.

I hand wrote "always Remember" with India ink and a white gel pen; and with that I was done.  Completing this canvas was a real journey for me.  At one point I had to just stop and walk away but I'm so glad that I did it.  Art is such a wonderful way to express what we can't always get out with words.

Thanks so much for joining me today.  I hope I've inspired you get those paints, inks, photos and stamps out to create something from your heart.  If you're interested in learning more about a particular technique I've used, just let us know so we can include it in an upcoming edition of Tutorial Tuesday.

Have a Wonderful Day and don't forget to join us on Wednesday.  Amber will be here to share a new project with you for What's Up Wednesday!!

Until Next Time :D


Friday, January 4, 2013

Feature Friday - Jan PWP Design Team Blog Hop & Giveaway!

Happy Friday & WELCOME to the January PWP Design Team Blog Hop & Giveaway!


To celebrate the launch of our new design team, we've chosen a “Friendship” theme for this month's hop. We even have some blog candy to share with one lucky follower!! 


For a chance to win, all you’ll need to do is be a follower here at The Aviary, leave a comment on this post, visit each of the blogs and leave a little bloggie love for of our DT members.   For extra chances to win, just like our Facebook page and/or invite your friends to the hop.  Then just come back and let us know!  Be sure to leave a separate comment for each of the additional entries.  The winner will be announced on Tuesday, January 8th here on the blog.  

Before you leave us, we want to share with you a beautiful tag made by one of our stamp designers, Liz Allen.

She made the background with Distress Inks and embossed with white embossing powder with stamps from Bird Lyrics and Flower Power.  She stamped the sentiment in black ink.  How simple and sweet!

Okay, are you ready to start hopping?!  I hope so because our fabulous designers have been hard at work creating beautiful and inspiring projects to share with you today.  So without further ado...let the hopping begin, first up is Amber Rasmussen!

Here is the complete line up just in case you get lost along the way:

Amber Rasmussen - http://sew-ink.blogspot.com
then come back here and leave a comment http://paper-wings-productions.blogspot.com/

THANK YOU SO MUCH FOR JOINING US TODAY!!


Related Posts Plugin for WordPress, Blogger...