Showing posts with label melange women. Show all posts

Tuesday, November 26, 2013

Tutorial Tuesday - Colorful Embossed Party Invitations

Hi Paper Wings fans! Dana here with you today sharing a colorful party invitation set. With the holiday season fast approaching, I've been thinking a lot about dinner parties, new recipes and spending time with family and friends. I also thought it would be fun to make my own fun and funky party invitation set.


I've been missing the lovey ladies from the Women Melange Cling Stamp Set. I selected Diana for my party invites. (Paper Wings offers a fantastic selection of People Stamps if you have something else in mind.) I selected a nice palette of bright embossing powders for a fresh Warhol-esque design.


I started by embossing Diana in four different colors on pieces of white cardstock measuring 3 x 3.5 inches, which is slightly larger than the stamped image.


I then cut each Diana image into four equal pieces and rearranged them to create four colorful portraits.


I mounted each portrait onto a piece of colored cardstock.


I finished the invitation set by adding a chipboard speech bubble, that I stamped rsvp onto with the Holiday Mix It Up Clear Stamp Set, to each card. There is plenty of room for the party details on the back of the card.

If you're looking for some quick and easy festive holiday cards, check out Katie's Washi Tape Card and Erica's Epoxy Embellishments posts.

Thanks so much for stopping by today! We would love to see what you make with Paper Wings Productions Stamps so add your projects to our Flickr Group, our Facebook page or leave a comment here with a link to your project. You can also find Paper Wings Productions on PinterestTwitter and YouTube!


Monday, January 14, 2013

Mixed Media Monday - Always Remember

Happy Monday bloggie friends, Norma G. here to share a little Mixed Media Fun with you!

I hope you a super fun weekend!!  Mine was great because I had a chance to get back in the studio and paint.  It's been awhile since I've done a canvas or at least it felt like it anyway, lol.


So today I have a very special 12x12 canvas to share with you.   I did this canvas in remembrance of my mother so it was a very emotional process and I hope you like the result.

The inspiration for this piece was this beautiful photo I found of my mother smelling a gorgeous bouquet of red roses.  Initially I knew I wanted to use an old photo for my canvas so I started digging through the box of photos that I inherited when my mother passed many years ago.  I was looking for old black and white photos to transfer onto my canvas but this photo really caught my eye and so it was settled; this would be focal image.


I started out by layering my favorite shades of pinks, reds and blues to the canvas then I attempted to transfer my image.  I say "attempted" because as you can see, I wasn't very successful.  I tried a new transfer technique using Golden Fluid Matte Medium and I missed a step along the way.  The technique I usually use is with Regular Gel Matte but I wanted to try something new.  The wonderful thing about art (especially mixed media) is that it doesn't have to be perfect so I pressed on.  I added some joint tape (that's what the tape with the little circles is) then some more layers of paint.

Since my image didn't transfer completely, I decided to use a second copy.  (I should mention that both images were copied using a laser printer and regular copy paper.)  I cut my image out and adhered it to the canvas.  Next I sprayed a thin coat of Fixatif to seal my canvas, this allows me to continue working on the canvas without smearing any of the water soluble layers.  Since my image is black and white, I added color using Tim Holtz Distress Markers.  I added some color to the dress, cheeks, lips and roses.

From here I added layers using the Paper Wings Productions Melange Women and Bird Melange sets.      I stamped Diana and an angel onto cream colored cardstock, colored them in with Prismacolor pencils, fussy cut and attached to the canvas.  I also stamped a sentiment from the Bird Melange set directly onto my canvas.

I added a second angel watching over my mother and crown from the Royal Melange Stamp Set.

I stamped a bird from the Bird Lyrics Stamp Set directly onto the canvas and outlined it with a white gel pen to add some definition to the image.

To balance out my composition, I added some doodling and corrugated hearts.  I applied some paint to bring out the texture of the cardboard and added butterfly wings from the Wings Stamp Set.

Here's a nice side view of the completed canvas.

I hand wrote "always Remember" with India ink and a white gel pen; and with that I was done.  Completing this canvas was a real journey for me.  At one point I had to just stop and walk away but I'm so glad that I did it.  Art is such a wonderful way to express what we can't always get out with words.

Thanks so much for joining me today.  I hope I've inspired you get those paints, inks, photos and stamps out to create something from your heart.  If you're interested in learning more about a particular technique I've used, just let us know so we can include it in an upcoming edition of Tutorial Tuesday.

Have a Wonderful Day and don't forget to join us on Wednesday.  Amber will be here to share a new project with you for What's Up Wednesday!!

Until Next Time :D


Monday, September 3, 2012

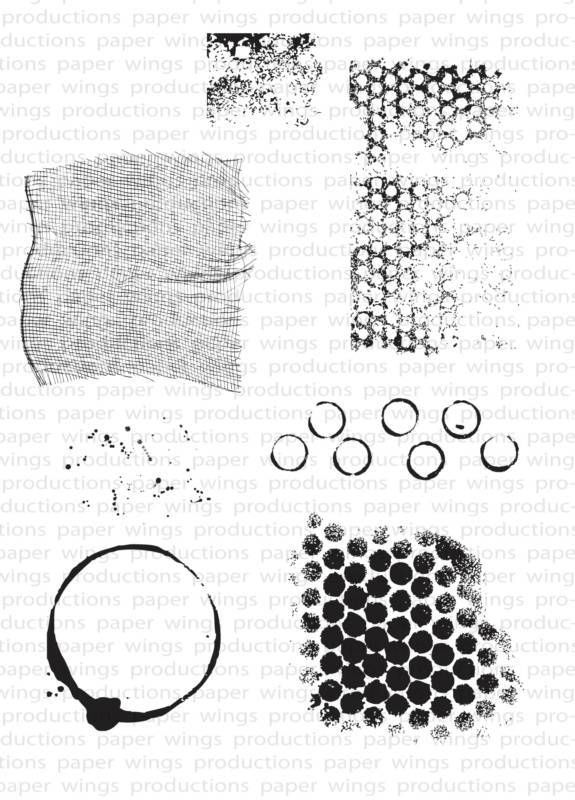
Mixed Media Monday - Art Textures Stamps


Hello everyone!
 
 
We have a video for you today.  This is another Closer Look video featuring our Art Textures stamp set.  This set is very versatile and is one that I think you will keep handy on your desk for so many different mixed media projects. 


This video shows each of the different stamps in action, and discusses multiple uses for some of the images. Take a look!


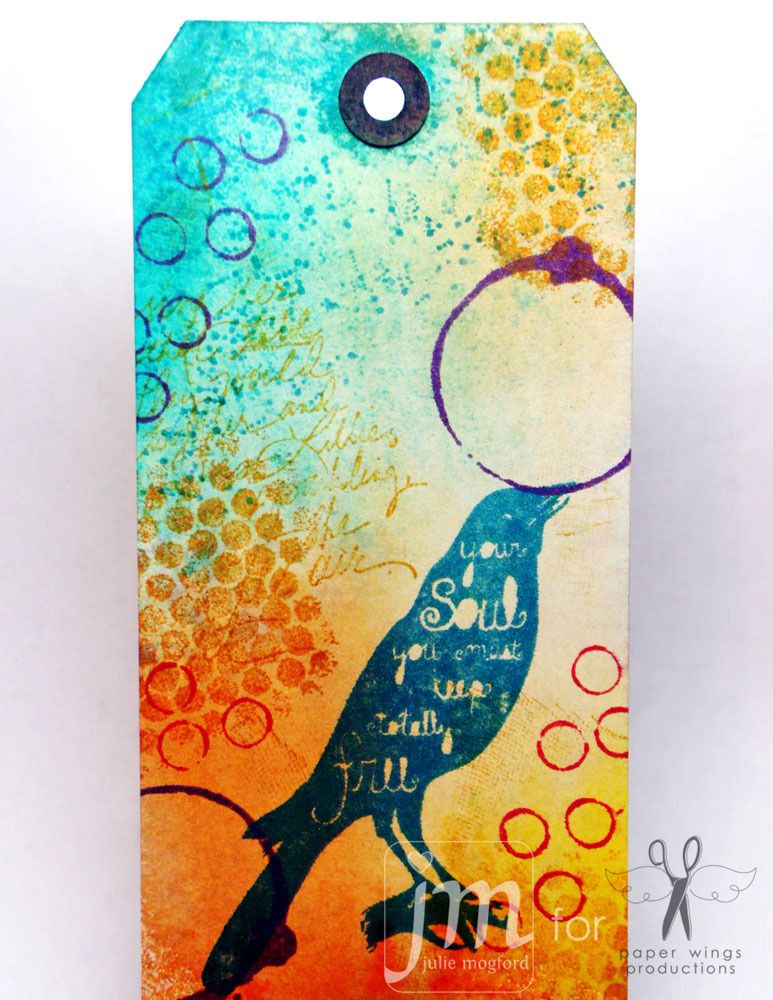
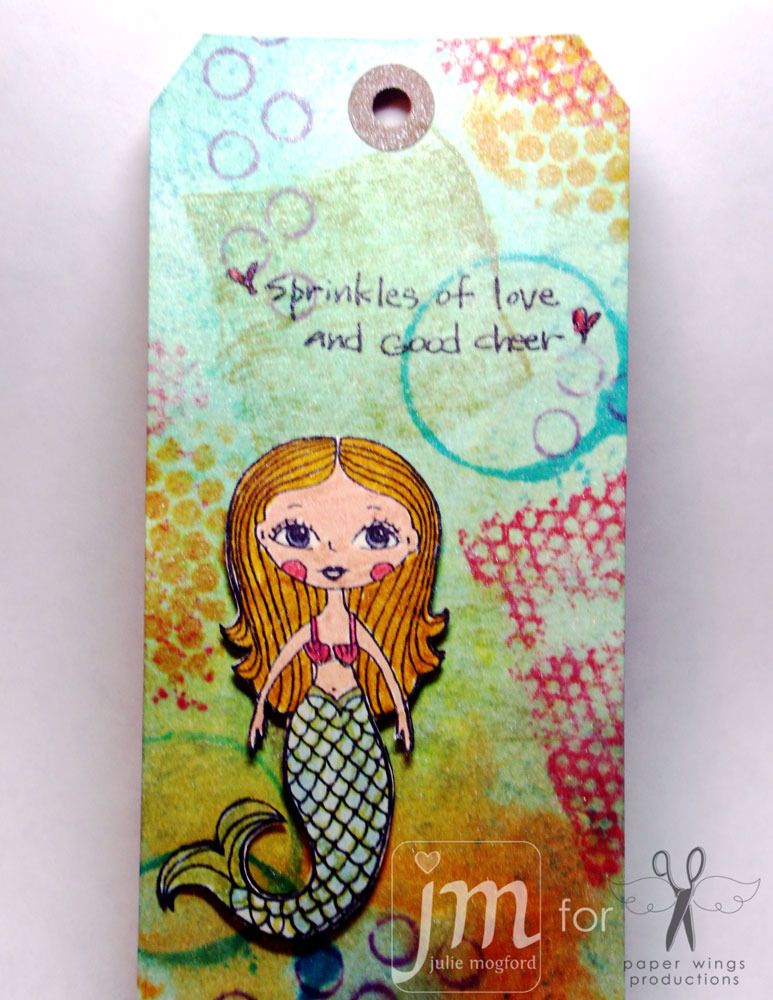
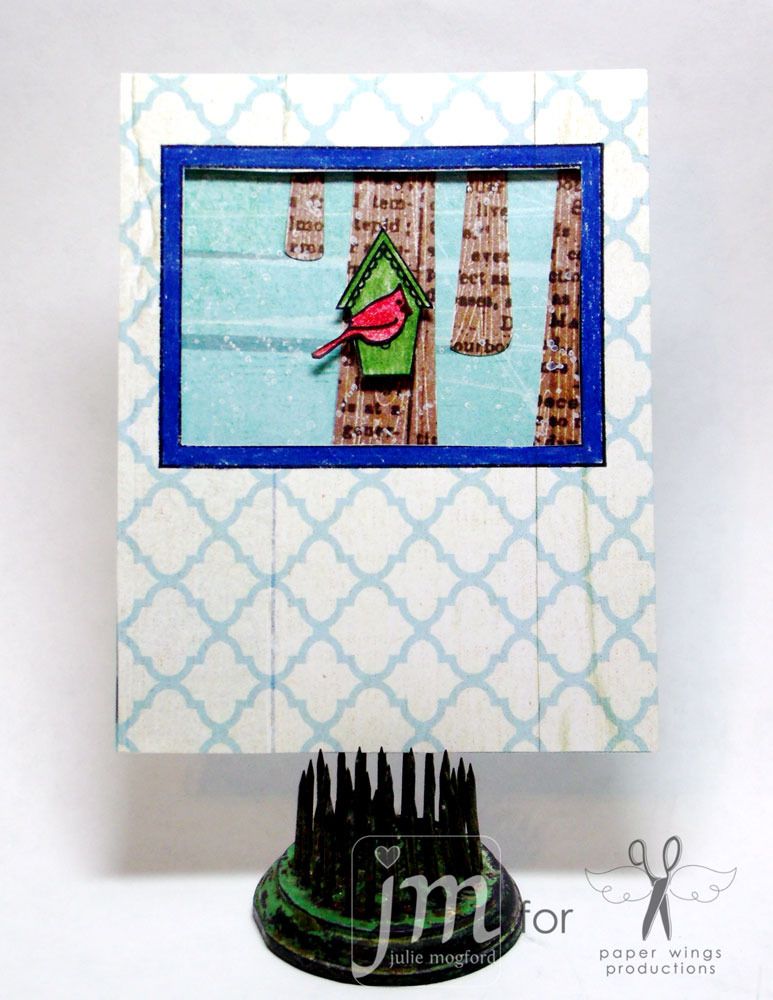
Isn't this set AWESOME?!?  I'm including close ups of the sample projects from the video to emphasize the details of these art texture stamps. 


 These two tags started with the same background techniques, but still look different when completed.


Speckled stamp used to create snowfall.


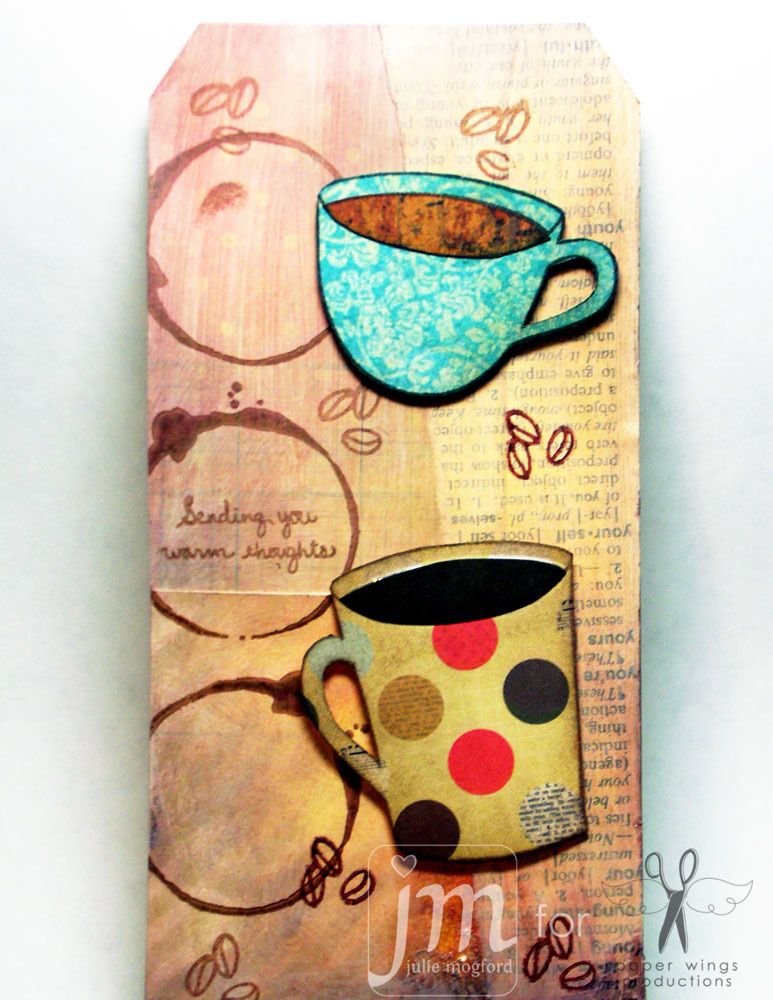
 I've used the large circle with the ink spot as a coffee ring for this fun tag.


 These stamps can be used with acrylic paints too - be sure to clean them up before they dry.


 One last version of the stamps used along with
the Wrinkle Free Distress technique, a la Tim Holtz.
 
 
I hope this post gets you excited about using these stamps on your projects.  I love the variety of effects I can achieve.  Thanks for watching!


Happy Stamping!
 
 
Julie


Supplies
Stamps: Art Textures, Bird Lyrics, Bird Melange, Hanging Stars, Howling for You, Melange Women, Mermaid, Play With Your Coffee, Sea Melange, Sayings and Sentiments, and Window
 
Paper, Ink and Tools:
Chalk Ink (Color Box)
Distress Ink (Ranger)
Whisper White Craft Ink (Stampin’ Up!)
Spray Inks - Dylusions (Ranger), Glimmer Mists,
and Mister Huey’s Shine
Paper - Studio Calico, Basic Grey, and various
scraps.
Ink Blending Tool (Ranger)
Foam Tape
Ribbon / Fibers


Monday, August 20, 2012

Mixed Media Monday- Guest Artist Norma from Little Honey Bee Studio


Today, we have our first guest blog appearance from Norma over at Little Honey Bee Studio!


Hey Friends, Norma G. here!
I’m super excited to be today’s guest designer here at The Aviary!
Carrie, thank you so much for inviting me over :D


Today I’d like to share an altered journal that I made using several of my fabulous PWP stamp sets, paints, a stencil, paper scraps and a composition notebook. Here’s a little peek of the finished project:


Okay, now let’s get started!
I started out by applying Gesso to the front and back of a plain composition notebook.
(Tip: I like to insert wax paper behind both the front and back cover to keep the paint from ruining the notebook paper while I'm working on my project)


Once the Gesso was dry, I used Modge Podge to adhere various scraps of paper to the front and back covers.


Next, I used a Crafters Workshop 6x6 Template and Gesso to stencil the Mini Tie Dyed design to both sides of my journal.


Now to start adding color!

I used Liquitex Soft Body Acrylic in Ceruean Blue to create frame.
I applied the color loosely because I like to have variations in color instead of one solid even coat.


Time for some stamping fun!

I used the Paris &  Royal Melange stamp sets to emboss the medallions and scrolls. The fun neon colors are both from Zing. I also used the script stamp from the Background Writing Set to build up my background.


With the background complete, it's time to work on the focal point and finishing details.

Stamp one of the beautiful ladies from the Melange 1- Women Set onto the notebook and on a scrap piece of cardstock and set aside. Use an oil pastel to color around the stamped image on the notebook and blend outward with your finger.  This will create a nice glowing effect.

The sentiment I choose for my project is from the Bird Melange Set. I stamped and embossed it on white cardstock then cut it into strips and inked with Tim Holtz Black Soot Distress Ink.

Using a Bic White-Out Pen, I doodled circles around the embossed medallions to add interest.


Next color the stamped image on cardstock (I used Prismacolor pencils on my project). Once you've colored her in, fussy cut and adhere to the cover.


The Finishing Touches :D

I used a charcoal pencil to freehand a heart behind the stamped image. Then colored it in using oil pastels in various shades of red, blending with my finger (the heart helps to draw the eye directly to the focal point).

Since the sentiment is about flying, I thought she needed some wings.

I used the angel wings from the Wings Stamp Set and embossed with Enchanted Gold embossing powder by Ranger for a little shimmer. Next I fussy cut and tucked in behind her back.

Using the scrolls from the Paris PWP Stamp Set, stamp and emboss with black powder above and below your focal point.

Stamp the little bird from the Bird Melange Set with the Orange Neon embossing powder onto cardstock, fuzzy cut and adhere. I also used an orange epoxy bird from my stash.


Using Black India Ink, frame out the focal point and outline the circles.


Finally, adhere coordinating patterned paper to the insides of both the front and back covers. I used TH Black Soot to ink all of the edges for a nice finished look.


Here's a look of the backside of the journal :D

I'm very happy with the way this project turned out and I hope you've enjoyed seeing it come together too. Thanks so much for stopping by!!!

Get those stamp set out and play :D

Monday, July 30, 2012

Mixed Media Monday - Persuasion Tag


Hey Peeps!

It's Julie.  Hope everyone had a great weekend!  The Paper Wings gals were stamping their little wings off with the customers at Scrapbook N' More - and they really turned out some cool projects with the stamps.  While I was working on my demo, I was able to create a few tags, and there is one in particular I'd like to share with you here.

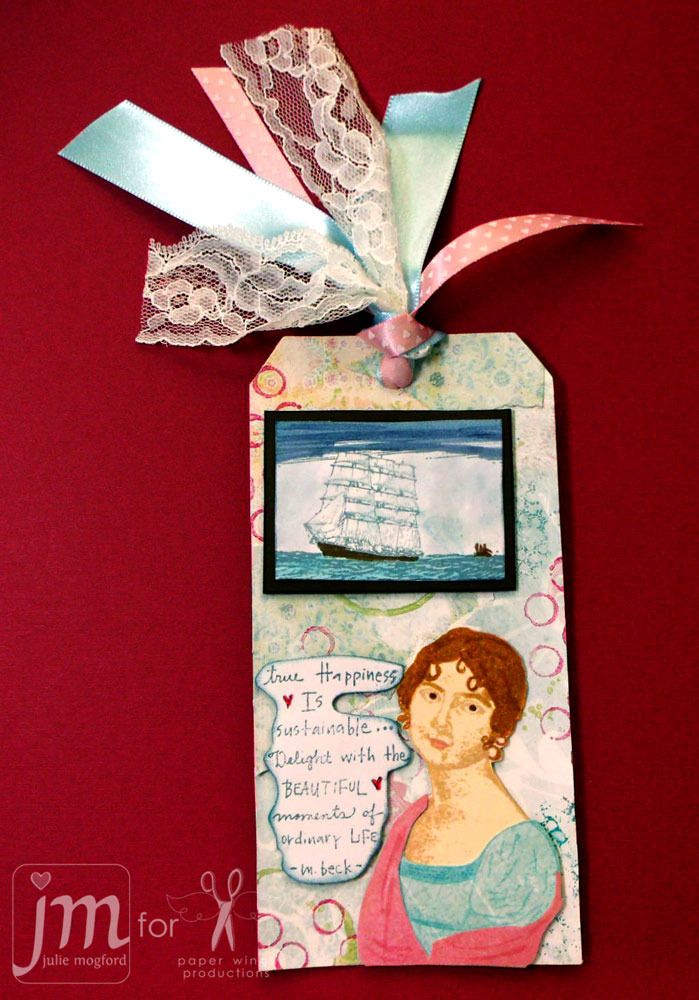
Back in June, I posted a card and made a mention of how the boat reminded me of Persuasion, by Jane Austen and that I was inspired to make a project about it.  Take a look :)


Background Details:
1.  Adhere various scraps of paper to a manila tag with glue, making sure to add glue to overlapping layers.
2.  Add a thin coat of white craft paint or gesson to mute the background and give it a more uniform look.
3.  Use Art Texture stamps and acrylic/craft paint to add interest.  NOTE:  when using paint with stamps, be sure to wash the paint off quickly so that it doesn't stick to the stamp.  Set aside to dry.


Ship Details:
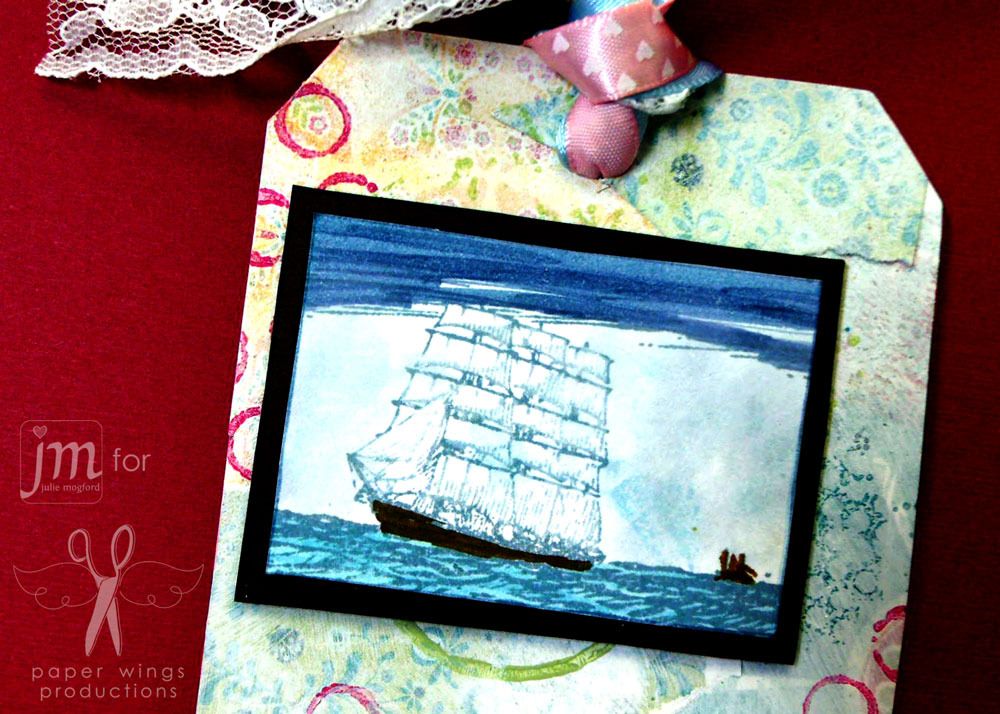
1.  Stamp Window on brown and white cardstock.  Stamp boat from Sea Melange set to same white cardstock inside window shape.
2. Color and trim boat image and add to brown frame. I used markers for the top sky and sea, and boats.  To make cloudy look behind boats I used a distress marker on my craft sheet and added a little water, and then dipped my fingertips into the color and added it to the paper repeatedly.
3. Adhere with foam dots.


Main image and sentiment details:
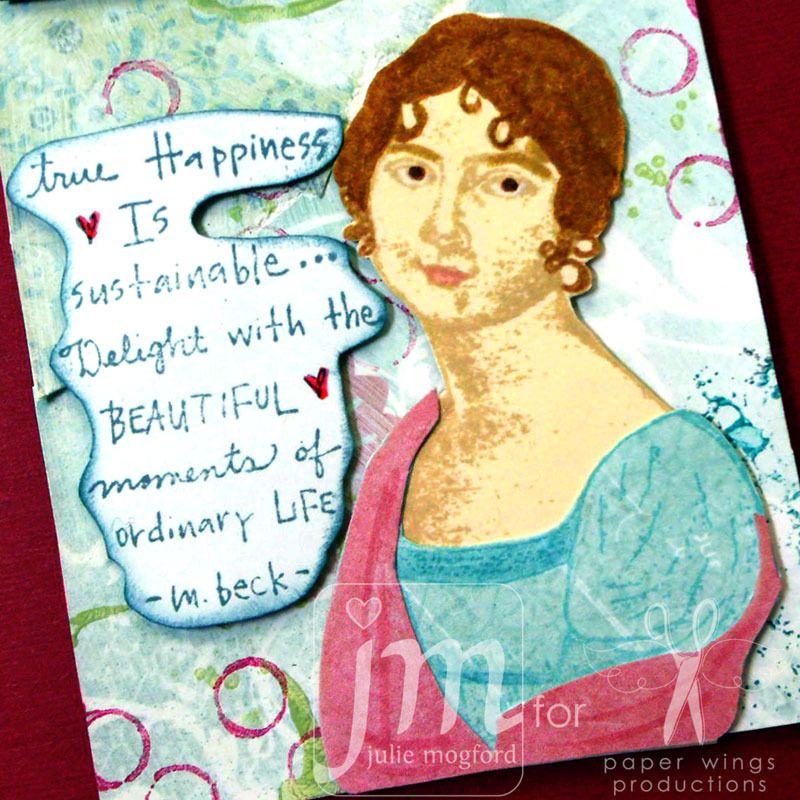
1.  Stamp lady from Melange Women in very light ink on manila tag and color in features with distress markers.
2.  Stamp her again on two patterned papers with a coordinating ink and cut out elements to paper piece dress and shawl.
3. Stamp sentiment from Sentiments and Sayings on white cardstock.  Trim and ink edges with ink blending tool.  Add pink to heart elements.

I always feel so happy for Miss Anne Elliot when she finally finds out that Captain Wentworth really does love her.  Makes me want to go watch it again.

I love how this tag turned out with all of it's elements.  I think the added textures in the back give it something extra, and I liked working on the paper piecing of the dress.  I had not tried it on a stamp like this one, but I think the results are great.

On a side note, tomorrow is the last day for our Mission 004 Flight Plan challenge.  Make sure to get your projects posted to either Flickr or Pinterest.  Maybe this card will inspire you to make a project!

Take Flight!

Julie


Stamps: Art Textures, Window, Sea Melange, Melange Women, and Sentiments and Sayings 
Ink: Distress Inks by Tim Holtz/Ranger
Paper: Scraps from stash and a manila tag
Cardstock: Neenah Solar White and Chocolate Chip from Stampin' Up!
Tools: Crop-a-dile, Ink Blending Tool from Ranger, foam tape, Prisma pencils, Distress Makers (Ranger), glue stick, acrylic paint
Embellishments:  Glaze pen by Sakura and ribbons
Related Posts Plugin for WordPress, Blogger...