Showing posts with label Fusible Webbing. Show all posts

Wednesday, September 25, 2013

What's Up Wednesday - Fall Tag Books


Hi! Dana here today sharing a set of tag books that I created with the September Nesting Components Mixed Media Kit.


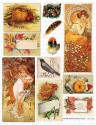
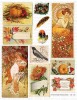
The larger images from the Clip Art Sheet fit perfectly onto the tags from the kit and made pretty, colorful covers for my books.


I added a stamped banner to the top of each book with the Banner Day Clear Stamp Set and the Hanging Stars Clear Stamp Set.


I added a small cluster of flowers and leaves to each tag. I tied the books together with a piece of multicolored seam binding.


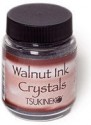
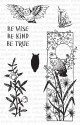
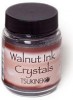
I cut the pages for my tag books from manilla cardstock, that I aged with a wash made from Walnut Ink Crystals. I stamped the bottom of each page with an image from the Owl Panel Clear Stamp Set.


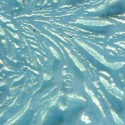
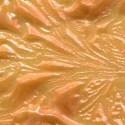
I added both color and texture to both the front and back covers of my books. I melted a layer of Fusible Webbing to each tag. I then added color with Golden Pumpkin Blush and Madonna Blue Robe Embossing Powders. I added another layer of shimmery color with a peach colored mist.

If you're looking for more inspiration for fall projects or the upcoming Halloween holiday, you won't want to miss these posts:

Norma's You Are Special Hanging
Erica's Halloween Favors
Amber's Mini Halloween Card Set
Cathi's Fall Candle Tutorial
Shay's Golden Leaves Card Set
Irit's Every Little Thing Mixed Media Piece

We would love to see what you make with Paper Wings Productions stamps! Add your projects to our Facebook page, our flickr group, to Pinterest, comment with a link on this post or even email pictures to us! You can pick up the September Nesting Components Mixed Media Kit from the Paper Wings Productions Store while supplies last. Check out the selection of NEW stamps HERE.

Thanks for stopping by today!

Tuesday, September 3, 2013

Tutorial Tuesday - Fun with Fusible Webbing


Hi! Dana here today sharing a fun tag tutorial that features Lindy's Stamp Gang Fusible Webbing, just one of the fantastic items included in the September Nesting Components Mixed Media Kit.


I have several jars of ribbon, lace and fiber pieces of various length, many of which are smaller pieces that I have trimmed from the ends of bows or other projects that I just can't throw away. I've finally made use of some of them with the help of Fusible Webbing, creating a funky, colorful background for my tag.


Step One: Select ribbon, lace and fibers of different lengths and colors and arrange them over the top of one of the kraft tags included in the September Nesting Components Mixed Media Kit.


Step Two: Take one sheet of Fusible Webbing, fold it in half, and lay it on top of the tag. Gently apply heat with a heat gun until it begins to melt. Press down on the webbing during the heating process to help fuse all of the fibers to the webbing.


This is what my pile of fibers looked like after heating. I didn't melt the webbing completely because I wanted to be sure that my background would hold together.


Step Three: Flip over the pile of fibers, apply glue to the tag and press the fibers onto the tag. Let dry.


Step Four: Embellish the tag to finish. I selected an image from the September Nesting Components Clip Art Sheet. I stamped the word "nest" with the Perfect Alphabet Clear Stamp Set and Memento Rich Cocoa Ink.

I adapted this technique to fit my supplies from a similar tutorial published in Roni Johnson's Collage & Altered Art.

Thanks so much for stopping by today!

Sunday, September 1, 2013

Dana's September Nesting Components Be Kind Be True Banner


Hi! I'm sharing a fun fall banner that I created with the fantastic September Nesting Components Mixed Media Kit from Paper Wings Productions. The kit contents are in a beautiful, rich color palette of oranges, reds, blues and browns. This kit was extra fun for me because I was introduced to two new products, Lindy's Stamp Gang Fusible Webbing and Walnut Ink Crystals.

Step 1. I started with a blank canvas pennant that I spritzed with water. The wet canvas absorbs color solutions much better than dry canvas.

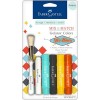
Step 2. I added color with Faber-Castell Design Memory Craft Gelatos - 50's Diner Set, by applying the Gelatos to my craft mat, spritzing with water, blending with my finger, and then dipping the canvas into the color. I added water to a small amount of Tsukineko Walnut Ink Crystals and splattered the ink onto the canvas. I then edged the canvas with Vintage Photo Distress Ink.

Step 3. Once my canvas was dry, I applied Fusible Webbing with a heat gun.

Step 4. I sprinkled Lindy's Stamp Gang Two-Toned Embossing Powder in Madonna Robe Blue Gold and Golden Pumpkin Blush on top of the canvas and melted the powder with my heat gun. The end result is a super shimmery canvas piece that has a cool webbed texture.


I piled on flowers and leaves and colorful images from the Clip Art Sheet onto each pennant. Everything on this pennant is from the kit except the brown flower, white daisies, sheer leaf and brown ribbon.


I created a similar flower cluster for the other side of the banner. Everything on this pennant is from the kit except the black flower, white daisy, sheer leaf and brown ribbon.


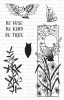
I used a stamp from the Owl Panel Clear Stamp Set on an image that I cut from the Clip Art Sheet. The patterned leaves are from the kit, the other leaves and flowers are from my stash.

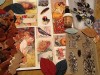
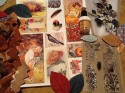
Here's a close up of the contents of the kit.

The kit contains:
Hand dyed fall ribbon - 1 yard
Fusible webbing
Prima Paper Leaves
Prima Flower Vines
Owl Panel Clear Stamp Set
Golden Pumpkin Blush Embossing Powder
Clip Art Sheet
Velvet Ric Rac 1 yard
5 Kraft Tags
Vial of Walnut Ink Crystals

Thanks so much for stopping by today! You can pick up this kit from the Paper Wings Productions Store while supplies last!


Related Posts Plugin for WordPress, Blogger...