Showing posts with label whimsical pattern alphabet. Show all posts

Saturday, October 5, 2013

Scrapbook Saturday: Happy Lovely Delight


Hello my dear crafty friends!
Irit  is here today and this time with a new , cute and very much stamped layout.


This is  my dear happy, lovely and delightful grandson Omer and his typical  posing to the camera.
I made a background full of stamped texture using PWP Punchinella set, Textures set and Flourish fun 2 set using red and blue inks over this light blue basic paper (LYB)


 Then I added some funny words with Whimsical patterns alphabet and you can see those SHY, ADORE AND CUTE words over  the page. The title is a kind of Mixed Title, made with a word Happy from Happy Day set, some fabric letters and a clear die cut word. I really love to make mixed titles; they are fun and  eye attractive.

Here are some more close ups to this funny page.

Here you can see those lovely stamped spots made with Texture set. So easy and non messy (before I owned this stamp I just used a toothbrush and this  was totally messy experience)


I hope you  like this page and see you soon again!


Thursday, May 24, 2012

Oh Baby!

Happy day peeps,

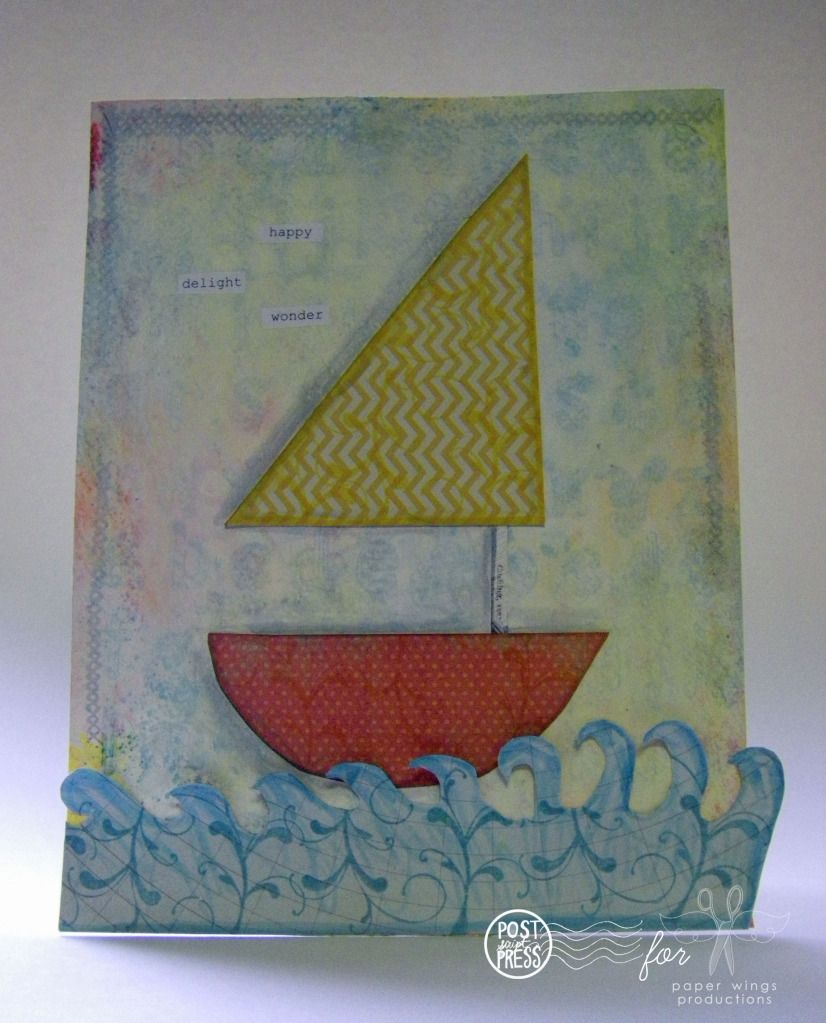
I tried my hand at a gift for a baby (probably boy, but perhaps not) that adds a little color and handmade charm to the nursery using the color combo from last week of yellow, aqua and coral.  For more information and projects using this color combo check out this post HERE and HERE


My background was inspired by Julie's baby card found HERE. I loved how she used all of her Whimsical Pattern Alphabet as a background and that is how I began as well...stamping the entire alphabet to make a fun pattern.

I then added watercolor markers, followed by Dylusions ink sprays and a Dylusions stencil and plenty of water. The colors were very vibrant and pretty, but I thought they were too intense for this project so I used a mixture of gesso and warm white paint to mute the colors. Of course this covered up the alphabet so I stamped it several times after the first time. Luckily the base of my project was a pretty heavy weight watercolor paper which held up to all the layers very well. 

I cut out the little paper boat and waves from patterned paper (don't worry about it being perfect, there is something special when you can see that someone made something themselves) and then I stamped each piece with a matching ink color using a flourish from Flourish Fun 2 and edged each with a matching color of watercolor marker. These flourishes work for nearly anything and I could probably add a flourish to every project I made so I better watch myself! 

My last bit of stamping was done sporadically around the top, right and left borders using the criss-cross border image from Details Framer using a gray ink so that it was somewhat subtle.  The words I had at hand...I like to sometimes type up a variety of words or phrases and have them when I need a few words sprinkled about a project.

Popping this little project into a frame would make a sweet gift for a little sailor.  You could easily change up the colors and patterns along with the image to suit your needs (for instance you could cut out a heart for a wedding gift...a house for a welcome home, hostess gift or housewarming gift).

Don't forget to check out the lovely card Julie made for a baby shower HERE

Take flight,
Shay.

Wednesday, May 23, 2012

A little something for Mother and Baby!

Hi Peeps!

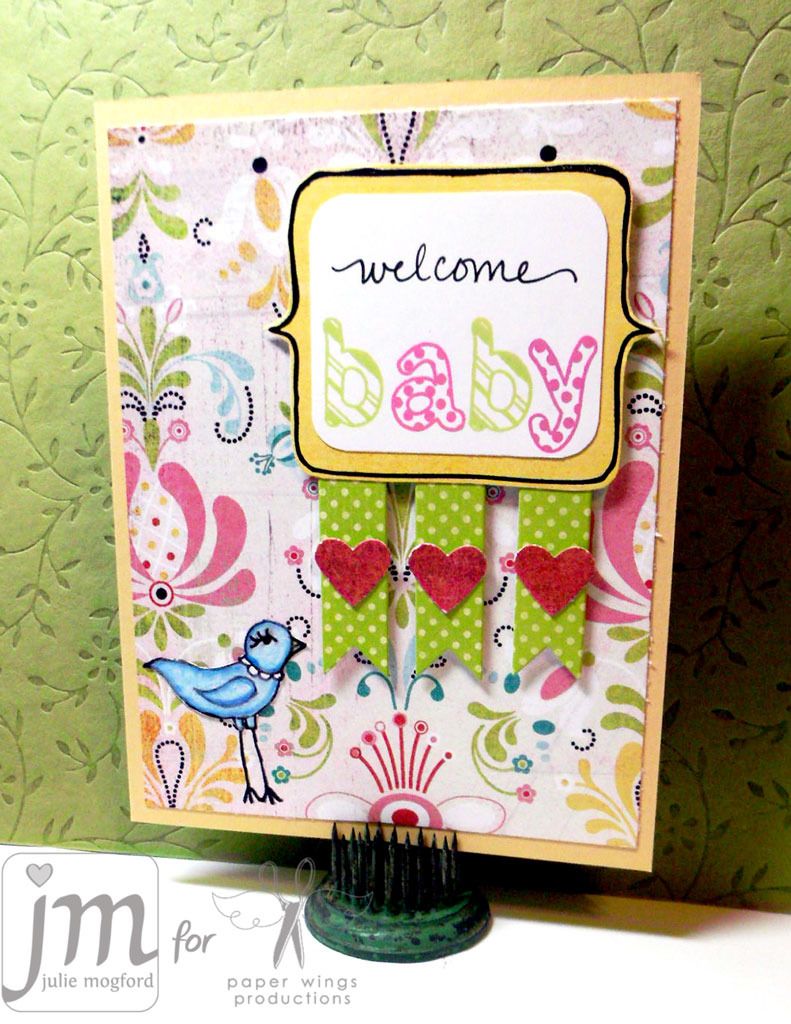
It's Julie here again.  I have a new card that I made for a baby shower that I want to share with you today. Have you ever sat down to make a card, and you look through your sets and realize that you might not have the images you think you need to make your project?  Well, that happened to me this week.  I found great paper to use, and knew I would try a new version of the Flight Plan Mission 002, but looking through the Paper Wings stamp sets, I didn't see anything that jumped out to me and felt "baby".  Then, I took a second look!  I found lots of items that I could mix and match to create the theme I needed.  I love it when a plan comes together :)

This sample includes the frame from the Details Framer set, letters from the Whimsical Pattern Alphabet set, and the "oh so cute bird" from Birds of a Feather.  Look at how it all came together!


I used chalk ink with the alphabet stamps for a color coordinated look.  I stamped the framer on a yellow paper and then trimmed it out and added the sentiment on top and rounded the corners for a custom fit.  I wrote "welcome" to add a little more to the sentiment.  I knew I wanted the bird in the bottom left hand corner, but she would never show up on the patterned paper, and I didn't want her on a separate element.  So - I stamped her on the background so the legs would be in place, then I stamped her on white cardstock, colored her with prisma pencils and then cut and adhered her to the card. 

This was a fun card to make, and would be great for any Mom to Be.  This card could easily be changed for a baby boy, even using the same stamps, and simply changing the colors.  You could even use a star punch instead of the heart.  If you would like to get more details about this card, check out this post on my blog.

I hope you enjoyed this card and maybe it will inspire you to get crafty!  And...If you haven't joined in on the Flight Plan Mission 002, we hope that you do.  We want to see all of the awesome things you are making with Paper Wings sets.  Maybe this Memorial Day weekend will provide some extra crafting time for you.  I know that's what I'm looking forward to!


Happy Stamping!

Julie

Thursday, March 15, 2012

Show and Tell: Whimsical Pattern Alphabet

Good morning peeps,

I am excited to do a Show and Tell for Julie Mogford's Whimsical Pattern Alphabet today.  All the samples for today's demonstration are courtesy of Julie Mogford.

In a very usable lowercase font, there are four fun alternating patterns which give any project a distinctive and playful attitude no matter what style you employ. 


I think Julie did a stellar job in showing how this alphabet can be used in all sorts of ways to give your projects a touch of whimsy.  What do you think of the Whimsical Pattern Alphabet? How would you use them?   

Take flight,
Shay.
Related Posts Plugin for WordPress, Blogger...