Showing posts with label birthday. Show all posts

Thursday, September 17, 2015

Birthday Cake

Hello friends. Larissa back with you today with a Birthday card I made for a friend of mine. I decided to use the stamp set Let's Eat Cake. 

I started out stamping the slice of cake onto a piece of white card stock and colored it using Copic markers. 
I then stamped the Happy Birthday sentiment under the slice of cake. 


 I used 3 different pattern papers for the card front. I finished off the card with three pink enamel dots. No twine this time. 
I think the colors I used makes it s cheerful birthday greeting.
Hope you enjoyed my post today.
Have a wonderful day friends.
Don't forget to check back and see what the Design Team creates for you. 


Saturday, October 5, 2013

Scrapbook Saturday: Happy Lovely Delight


Hello my dear crafty friends!
Irit  is here today and this time with a new , cute and very much stamped layout.


This is  my dear happy, lovely and delightful grandson Omer and his typical  posing to the camera.
I made a background full of stamped texture using PWP Punchinella set, Textures set and Flourish fun 2 set using red and blue inks over this light blue basic paper (LYB)


 Then I added some funny words with Whimsical patterns alphabet and you can see those SHY, ADORE AND CUTE words over  the page. The title is a kind of Mixed Title, made with a word Happy from Happy Day set, some fabric letters and a clear die cut word. I really love to make mixed titles; they are fun and  eye attractive.

Here are some more close ups to this funny page.

Here you can see those lovely stamped spots made with Texture set. So easy and non messy (before I owned this stamp I just used a toothbrush and this  was totally messy experience)


I hope you  like this page and see you soon again!


Friday, August 30, 2013

Feature Friday: Muertos Birthday


Hello everyone! It's Amber here with this weeks Feature Friday Post.Today I'm sharing a Birthday card using the Muertos Cling Stamp Set and the Let's Eat Cake Clear Stamp Set. First let me start by saying how happy I am to be staying on as a part time designer. I will be stopping in twice a month to share a weekly post and join in on the  Design Team Blog Hops. Speaking of Design Team Blog Hops, next Friday September 6th is the next Paper Wings Productions Design Team Hop so make sure you come back and check it out! Okay now onto my project...For this card I wanted to play with color, pattern, and texture. The color and the pattern part was easy I just pulled out a piece of Crate Papers patterned paper and matched up some cardstock.


For the texture I cut the two bright pink strips of  border paper that is under my patterned paper to look like fringe. You can see it a little better in the photo below. I just used a small pair of scissors and randomly cut little slits all along the border. Tip: It is easier to cut the paper to look like fringe after you have all ready stitched the borders to your patterned paper. This makes it a lot easier to hold while cutting, plus you can see how far up to cut the slits.


We would love to see what you create with Paper Wings Productions stamps.... Show us on our Pinterest page, our Facebook page or our Flickr gallery or leave us a comment with a link to your project. Thanks for visiting!
Supplies: Cardstock- Cream, Dark Gray, Bright Pink / Patterned Paper- Crate Paper's On Trend Collection / Paper Wings Productions Cling Stamp Set- Muertos / Paper Wings Productions Clear Stamp Set- Let's Eat Cake / CTMH Ink Pad- Flannel Gray / Sulky Thread- Black


Wednesday, April 24, 2013

Googly Eyed Fish For A Birthday Boy


Hello everyone it's Amber here with another What's Up Wednesday post. Today I am sharing this cute little Birthday Boy card featuring the Mermaid Clear Stamp Set.


I just love this little fish image that is with the Mermaid Clear Stamp Set. When I seen it I thought the little fish would be really cute repeatedly stamped. So I pulled out some white cardstock and started stamping. Once  I had my fish stamped I colored them, added some glitter, added some mini googly eyes, and  then cut the white cardstock to fit my card base. Since I colored the fish blue and green I thought the colors were perfect for a boys birthday card. You can see a close up below as well as my supply list.


We would love to see what you make with Paper Wings Productions Stamps so add your projects to our Flickr Group, to Pinterest, or leave a comment with a link to your project. Thanks for visiting today!
Supplies: Cardstock- White, Blue, Light Blue, Green / Paper Wings Productions Clear Stamp Set- Mermaid / Staz-On Ink Pad- Jet Black / SRM Clear Sticker- Birthday Boy / CTMH Markers / Rangers Stickles- Lime Green / Mini Googly Eyes / Sulky Thread- Black / Sewing Machine

Wednesday, March 13, 2013

Celebrating You


Hello Everyone! It's Amber here sharing a card featuring the Play With Your Coffee Clear Stamp Set and the Lets Eat Cake Clear Stamp Set.


I decided to keep it clean and simple today. I started by stamping the coffee cup onto a square piece of white cardstock and a scrap piece of patterned paper. While I had the ink out I also stamped the steam onto a scrap piece of vellum and stamped my sentiment onto a pink piece of die cut cardstock.  I colored the coffee and then paper pieced the coffee cup adding the stamped piece of vellum under my patterned paper. After that I cut and distressed a piece of buttercup cardstock, matted my image, stitched around the edges, and then added my sentiment to the right side.

Supplies: Cardstock- White, Pink, Buttercup / Patterned Paper- Studio Calico Country Side Collection / Paper Wings Productions Clear Stamps Sets- Play With Your Coffee & Lets Eat Cake / Staz-On Ink Pad- Jet Black / CTMH Marker- Bamboo / Sizziz  Die Cut- Tags / Sulky Thread- Light Teal / Vellum / White String/ CTMH Edge Distresser


Tuesday, February 26, 2013

Faux Stitching


Hello Everyone! It's Amber here with a Tutorial Tuesday  post. Today is my Birthday so I thought I would share a Birthday Card and Tag. For this weeks tutorial I'm sharing a quick and simple faux  stitching technique. I'm using the technique to create a banner today.


See those black lines I used for my banner...its faux stitching. Not everyone has the time or the patience to hand stitch or machine stitch so this is an easy way to add stitching to any project.  All you need is an ink pad and a sewing pattern tracing wheel. These come in most sewing kits and can be found at any craft store in the sewing notions aisles. Below you will see the four steps I used to create my Birthday card.


Step 1. Grab an ink pad and repeatedly roll the tracing wheel over the ink pad until the wheel is fully covered.


Step 2. Roll it onto the card front or cardstock you are going to use. I repeated this 3 times.


Step 3.Stamp you sentiment onto your card front below the banner line and then on a scrap piece of cardstock stamp your banner triangles.


Step 4. Color, add glitter, cut, and add your banner triangles to your banner line.

It really is as easy as that. There are many things you can do with this faux stitching technique like make stitching lines over your patterned paper or cardstock, make lined and grid backgrounds, and make hearts or other shapes with the wheel.  I hope you enjoyed my tutorial today and Thanks for visiting!. We would love to see what you make with Paper Wings Productions Stamps so add your projects to our Flickr Group, to Pinterest, or leave a comment with a link to your project. Thanks for visiting today!
Supplies: Cardstock- Cream / Paper Wings Productions Clear Stamp Sets- Happy Day & Lets Eat Cake / Staz-On Ink Pad- Jet Black / CTMH Markers / Sewing Tracing Wheel / Ranger Stickles- Crystal


Wednesday, September 12, 2012

What's Up Wednesday - Techie Birthday!


Hey Peeps!
 
 
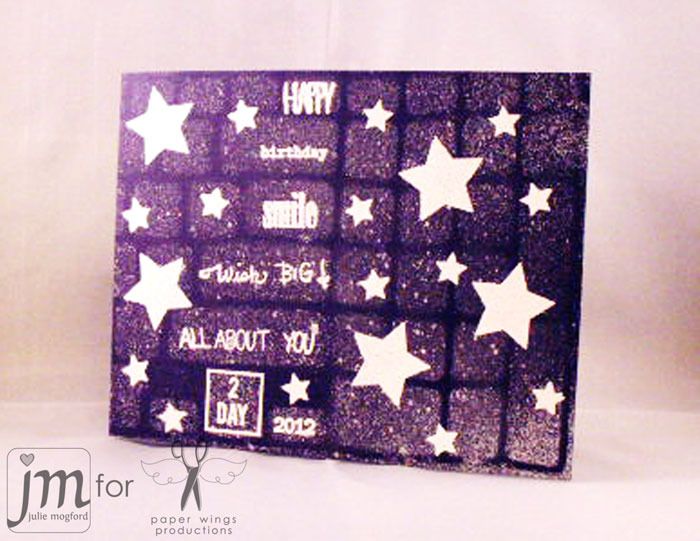
Just dropping in for a quick share of a quick birthday card.  My friend Steven's birthday was yesterday.  I always find myself wondering what I'm going to do for a guy card.  With my dad and husband, there are many things to pick from, but I tried something completely different for this one.  Steven happens to work in IT.  Check out this Birthday Card for him.


I wanted to cheer Steven up, so I picked sentiments from several sets and stamped the stars over and over, embossing everything in white.  Having all of the elements being stamped and embossed with the same color really does help to make a quick card.
 
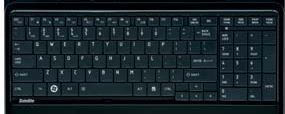
I can imagine that some of you are wondering "what is this background"?  Did any of you figure it out???  Well, when I got my computer about a year ago, I was peeling off the plastic covering that fits around......


...the keys of the keyboard!!!!  I knew that one day it would come in handy as the perfect stencil, and it really did. I used Mister Huey's Opaque White spray with the keyboard stencil to give a subtle image of the keyboard.  And much like the keys "backspace", "enter", and "shift", I chose to put the words on the keys to create the birthday sentiment.  It's true what they say, inspiration can come from ANYWHERE! I hope this project inspires you to try something new and unexpected.
 
 
Happy Wednesday and Happy Stamping!
 
Julie
 
 
Supplies:
Stamps - Hanging Stars, Vintage Technology, Details Framer, Life Framer and Snapshot Framer
Ink - Versamark by Tsukineko
Paper - Stampin' Up!
Tools / other - keyboard stencil, heat tool, Mister Huey's Opaque White Spray.


Wednesday, July 18, 2012

What's Up Wednesday


Hey Peeps!

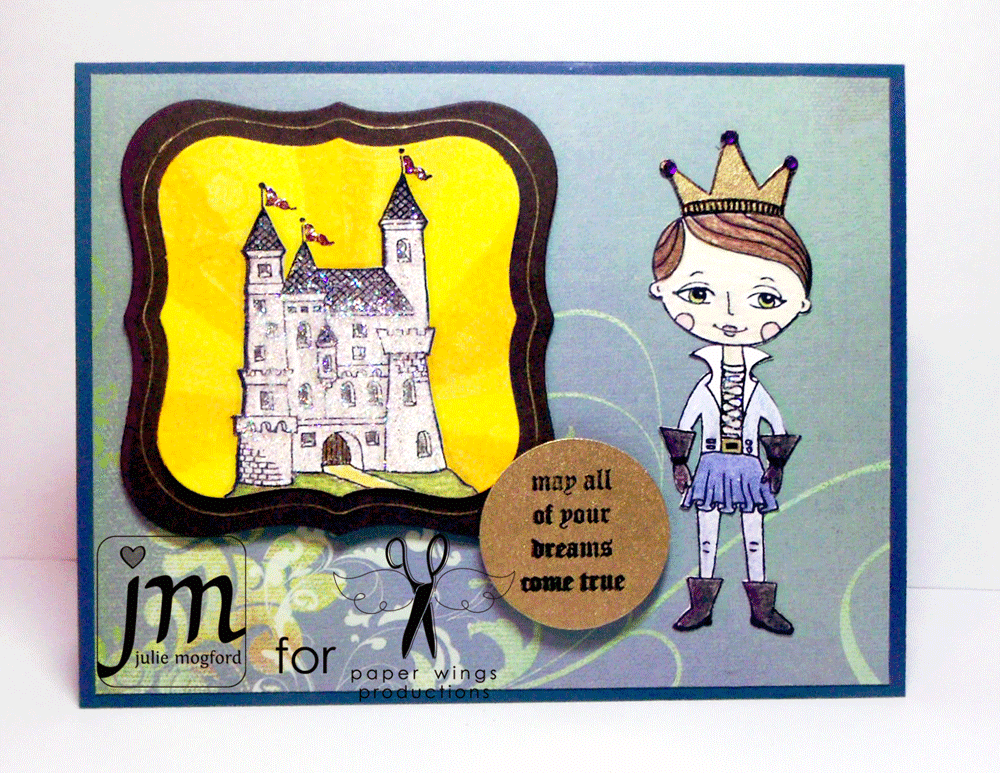
Dropping in to share a couple of cards. The first one is a fairy tale inspired card. This little prince from Handmade by Lizzie Girl is just too cute, and I really love the castle as well.  So many details on these stamps.  When I saw this castle, I just envisioned it as this gleaming, idyllic place (not unlike the fairytales of our youth) and had to give it some "stickles" treatment. 


This would be a cute birthday card for a young boy, or even a "soon to be" bride.

The Details:

1. Adhere background paper to 4.25 x 5.5 inch card base.
2. Stamp prince and castle (twice) on separate pieces of paper.
3. Color prince, paper piece gold crown, and add jewels.
4. Using Eclipse tape, I drew rays from a center point, cut the rays apart and used them as a template on one of the castle pieces for creating the sun ray background.  I used 3 different colors - yellow, orange, and a gold irridescent. Die cut this piece and a second larger piece in brown.
5.  Color second castle, fussy cut the castle leaving off the flags (they are already stamped on the first layer).  Adhere castle, color flags, and add stickles.
6. Stamp sentiment on gold paper and circle punch - adhere with foam tape.
7. Use gold pen to accent prince belt buckle and trace around label die to add detail to die cut.

I have one more card to share with you.  There is another paper wings gal with a birthday coming up next week.  Can you guess who? Happy Birthday C!


I used the Mission 004 Flight Plan as my inspiration, a few new stamps from the June release and a little creativity and came up with this fun birthday card.  I love that this is one of those cards that could be great for just about any sentiment and any color scheme! And, can you believe that the main flower, white flower and orange flower all came from the Flower Power set?  Love that!!!

The Details:

1. Adhere strip of paper to bottom of 4.25 x 5.5 inch card.
2. Stamp and cut out Lace Border stamp from yellow paper.
3. Stamp and emboss small flower stamp on textured gold paper. Adhere behind straight edge of border and then adhere both to card base.
4. Cover small tag in dictionary paper, ink paper and edges and stamp flower in orange. Cut small circle for hole and add ribbon.
5.  Use markers to color large flower directly on rubber.  Spritz with water and stamp.  Cut around flower and adhere to tag and flower with foam dots to card base.
6. Stamp sentiment in brown ink.  NOTE: I cut my sentiments apart when I want them to fit "just right".  This sentiment is from a longer stamp.
7. Add 3 brown pearls.


Thanks for dropping by the Aviary! I hope you enjoyed the projects today and hopefully they have inspired you too.  Come back soon for more stamping goodness!

Julie

Supplies for My Prince
Stamps:  Prince
Ink: Memento ink by Tsukineko in tuxedo black; Dylusions Sprays by Ranger - Lemon Zest and Squeezed Sunshine
Pattern Paper: Memory Box
Cardstock: Neenah Papers in solar white and pearlized blue cardstock and gold paper from stash
Tools: Spellbinders Nestabilities Dies, gold gel pen, circle punch
Embellishments: Stickles by Ranger - Stardust, Gold Perfect Pearls (with water for spray)


Supplies for happy birthday / Mission 004
Stamps:  Lace Border, Flower Power, Sayings and Sentiments
Ink: Colorbox Chalk Ink - Tangerine and Chestnut Roan, Distress Ink - Shabby Shutters and Peeled Paint, Stampin' Up! Craft Ink - Whisper White, Distress Markers (Wild Honey, Mustard Seed, Spiced Marmalade, Tea Dye, Walnut Stain, Shabby Shutters, Crushed Olive, Peeled Paint)
Pattern Paper: Basic Grey (yellow and green), dictionary paper, textured gold paper from stash
Cardstock: Neenah Papers in solar white
Tools: We R Memory Keepers - Cropadile (hole punch),
Embellishments: pearls and ribbon - stash, SU! Whisper White Embossing Powder

Wednesday, July 11, 2012

What's Up Wednesday: Happy Birthday!!


Hello there peeps,

What's Up?  It seems to be birthday month here at paper wings productions.  This past weekend dear Ms. Liz Allen (fine and fancy) celebrated her birthday and today is Julie's birthday!   Happy belated birthday, Lizzie!  Happy birthday, Julie!

Lately, I have been downright awful about getting out cards to my friends, but I am of the mind that later is better than never (how surprising is it to get a card 6 months after your birthday?  Makes for a long birthday celebration).

Today I am sharing with you the cards I made for Liz and Julie which I haven't given to them yet (Liz and Julie, if you don't want to see your cards here then look away).

Liz's birthday card:


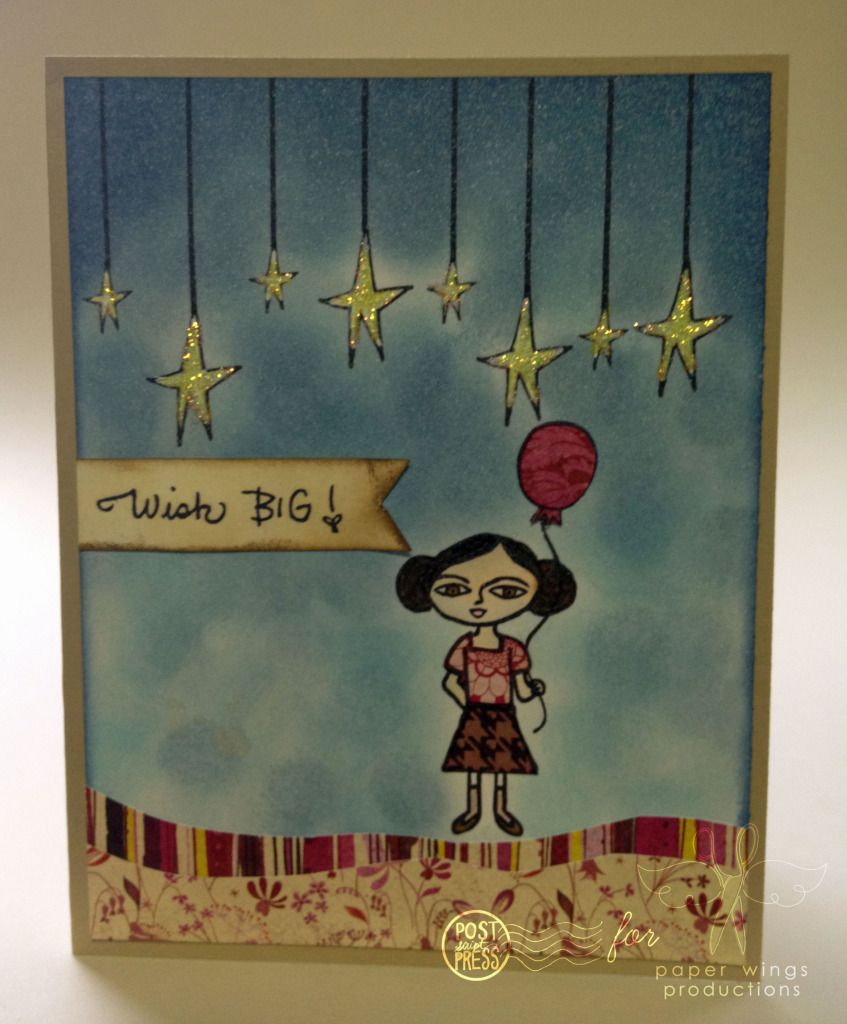
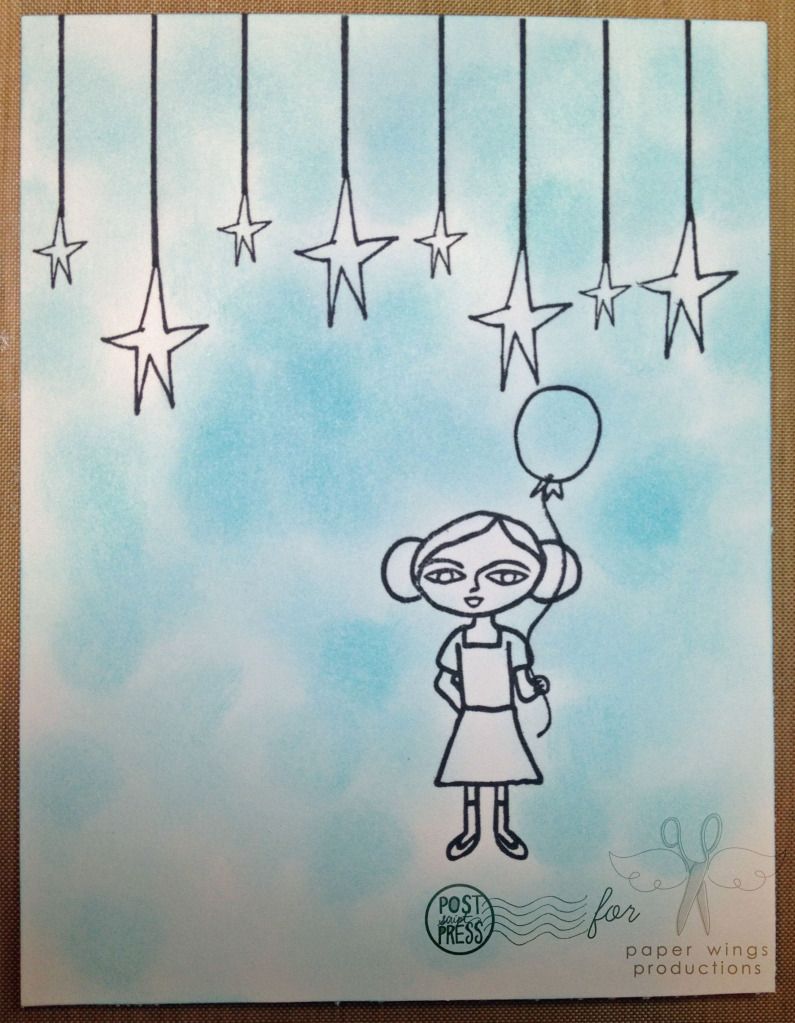
For a starting off point, I wanted to use Liz's Hanging Stars stamp set.  On a 4.5 inch x 5.5 inch piece of white cardstock, I stamped the main curving line image and then alternated between stamping the large folk star and the small folk star onto the bottom of each line with Memento ink by Tsukineko in tuxedo black.

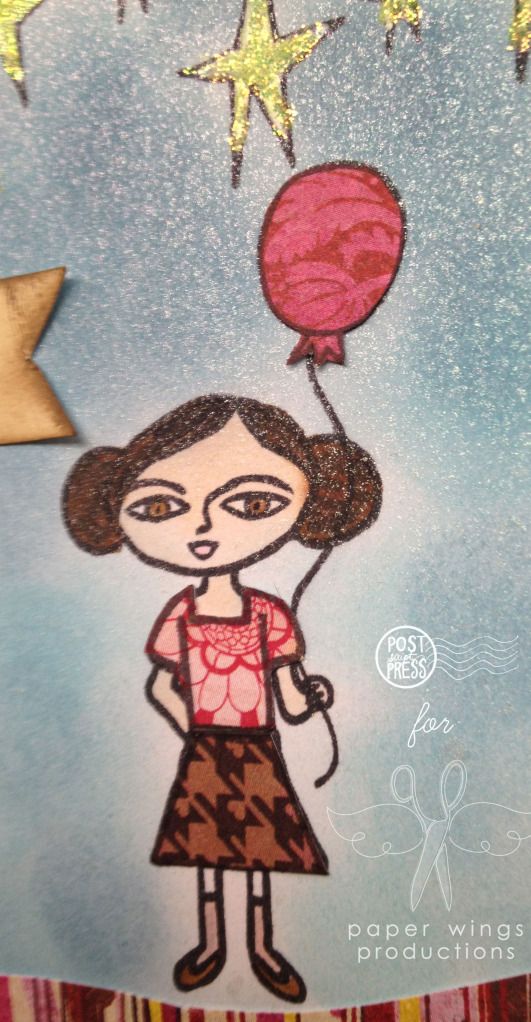
Because the card needed something or someone under the stars, I stamped little Sophie from the Sophie stamp set and added the curvy string and balloon from that set to add some birthday fun again in Memento ink.  I knew I was going to do some paper piecing over some parts of Sophie so I stamped her twice on 2 different pattern papers from Basic Grey's Kissing Booth 6x6 paper pad and Crate Paper's Paper Heart 6x6 paper pad and stamped the balloon once on another paper from the same paper pad.


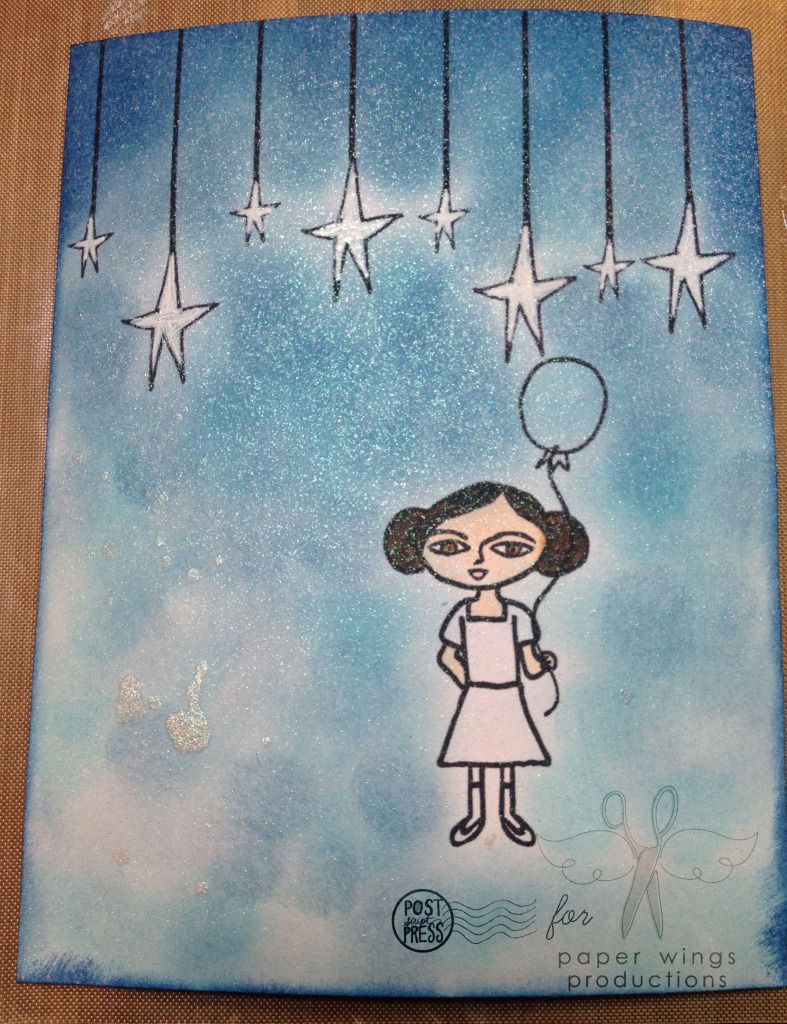
Before adhering the paper pieces I took out a sponge dauber from Tsukineko and 3 colors of Tim Holtz Distress Ink: tumbled glass, stormy sky and faded jeans.  I began with tumbled glass going over the panel in a circular motion trying to avoid the stars and most of Sophie. Next I came in with stormy sky concentrating the color to the top of the panel and adding some sporadically onto the rest of the panel.  Then I finished up with faded jeans just at the top and around the edges of the panel.  


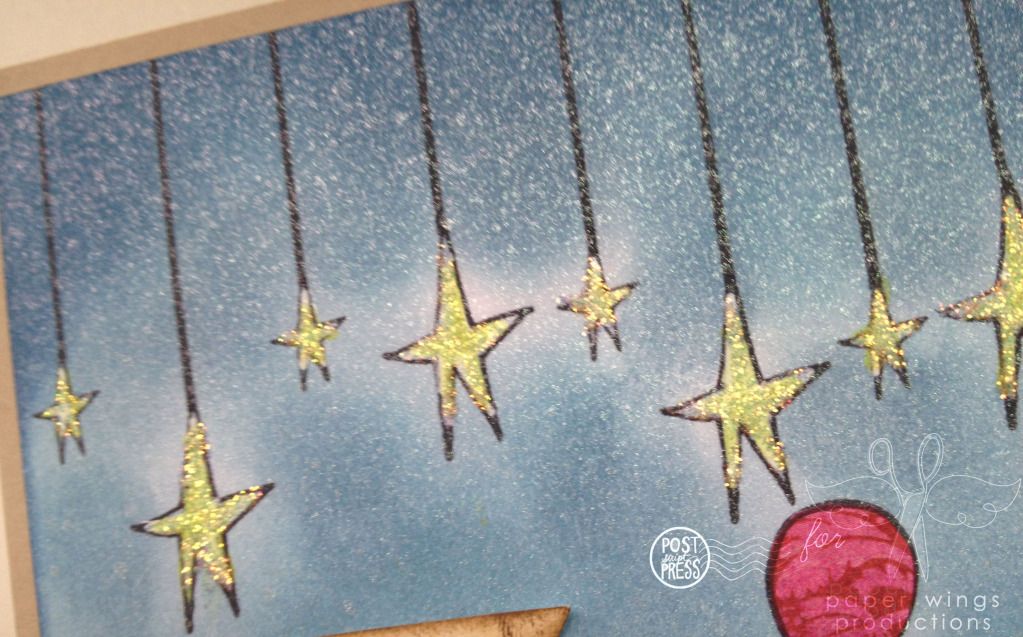
Then I sprayed iridescent spray over the entire panel.  And I colored in Sophie's skin, hair and mouth with Copic markers.  I also colored in the stars using a white Uni-ball Signo gel pen. 


I then adhered the paper pieced elements to the ballon and Sophie and finished up Sophie by coloring in her socks/tights and shoes with Copic markers again.  To the bottom of the card I added some free hand cut wavy pieces of patterned paper from the Basic Grey Kissing Booth paper pad.


I wanted to add yellow stickles to the stars (stickles are a most for anything for Ms. Liz), but oh no! I have no yellow stickles.  What to do?  I colored in the white stars with a yellow Copic marker and then used Diamond stickles over it.  Problem solved.

I added a little banner stamped from a sweet sentiment handwritten by Liz on a piece of white cardstock and then because the white was too stark I inked up the banner with another sponge dauber using Jenni Bowlin ink in malted milk and inking the edges in brown sugar.  Lastly, I adhered the panel to a kraft colored card base.  Pretty cute!

Wish big this birthday, Ms. Liz!


Stamps: Hanging Stars and Sophie
Ink: Memento ink by Tsukineko in tuxedo black; Tim Holtz Distress Ink by Ranger in tumbled glass, stormy sky and faded jeans; Jenni Bowlin by Ranger in malted milk and brown sugar
Paper: Kissing Booth 6x6 paper pad by Basic Grey; Paper Heart 6x6 paper pad by Crate Paper
Cardstock: Neenah Papers in solar white and sand
Tools: Signo gel pen in white by Uni-ball; Precision Pen by American Crafts in blackSponge dauber by Tsukineko; MONO permanent adhesive by Tombowliquid adhesive by Scotch; Copic markers
Embellishments: Stickles by Ranger in diamond; Memories Mist in iridescent


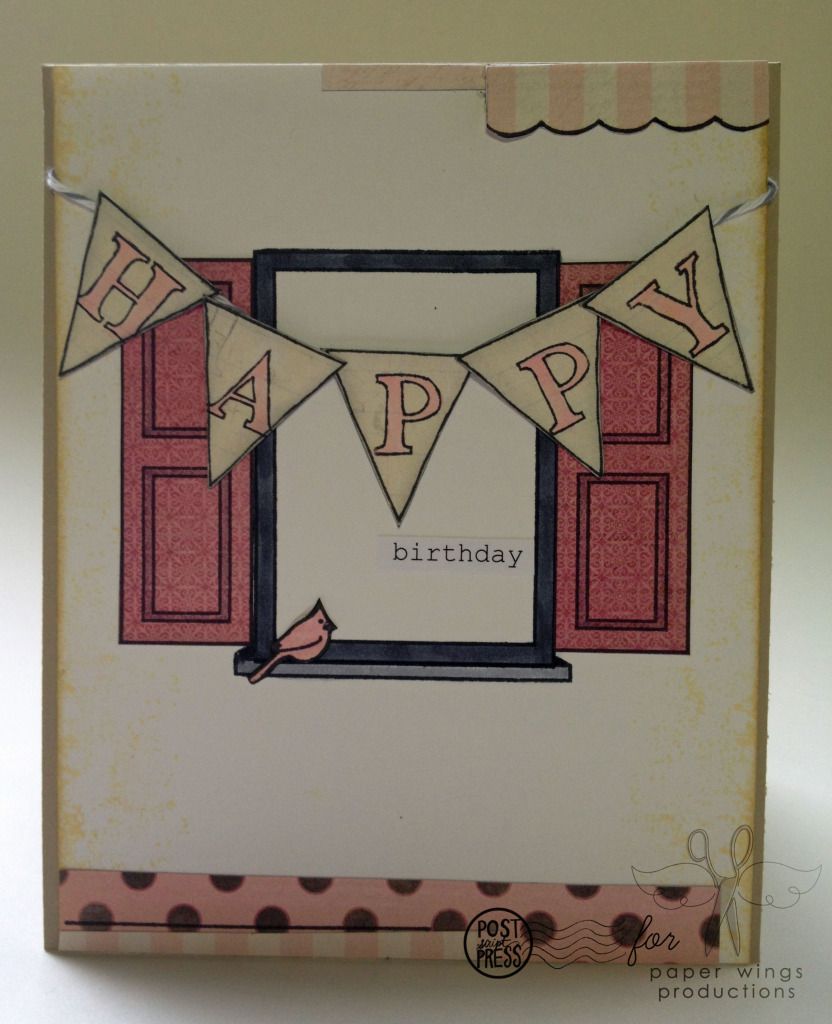
Julie's birthday card


My starting off point for Julie's card was her Window set (have you seen Julie using this stamp set in her video?  If not, check it out HERE) and I had an idea to pair it with the Happy Day set.


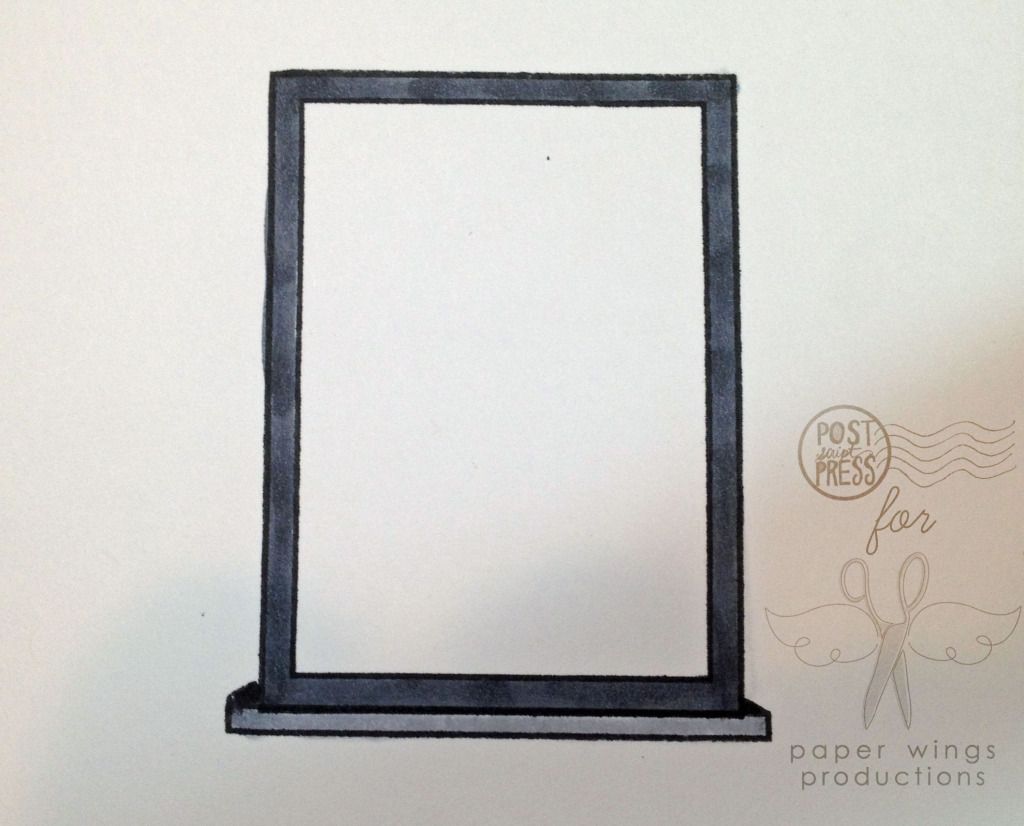
First on a 4.25 inch x 5.5 inch piece of white cardstock I stamped the main window image in upper middle part of the panel in Memento ink in tuxedo black.  I stamped the ledge image at the bottom the window and then colored it in with Copic markers.


Next using some patterned paper from Crate Paper's Paper Heart 6x6 paper pad I stamped the larger pennant from Happy Day 5 times using Memento ink in tuxedo black and cutting them each out.  On each pennant I stamped a letter from the "happy" image and colored them in with a pink Copic marker.  I did ink up the edges.
 
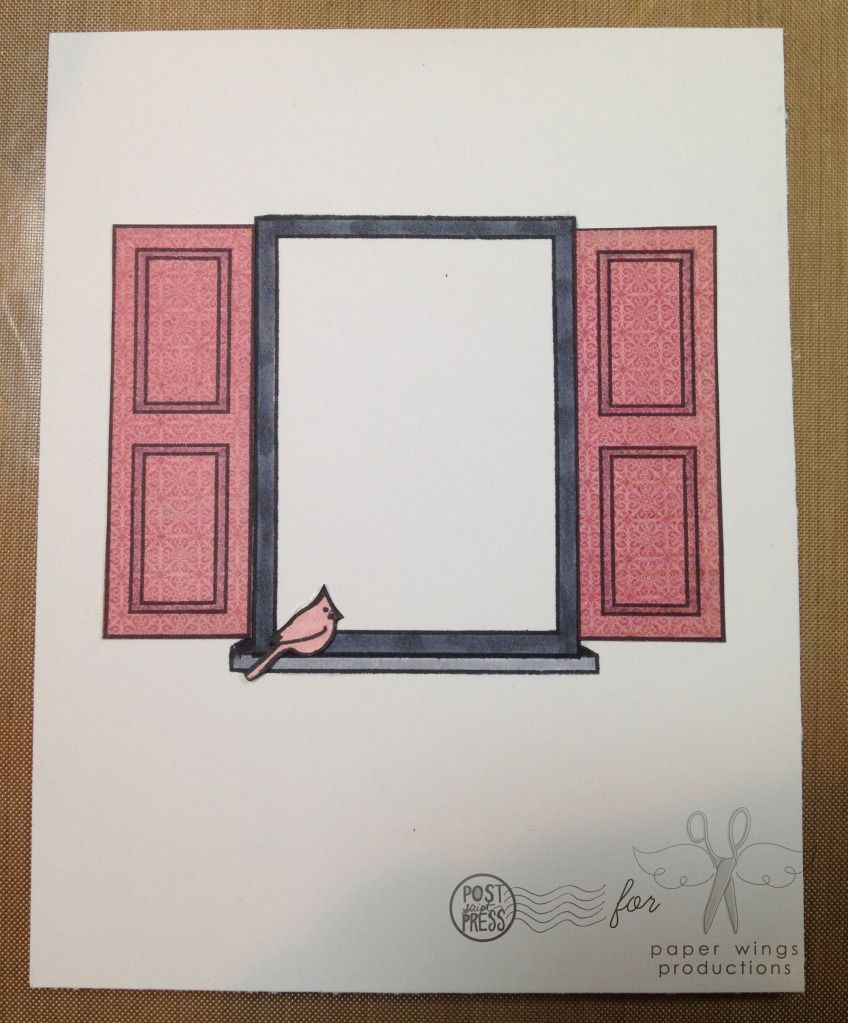
Using the My Mind's Eye Lost and Found Madison Avenue 6x6 paper pad that I received as a present for my birthday this year (thanks, Jane!),  I stamped out the shutters from Window twice and stamped the bird from the set (what a cutie!).  I cut them all out.  To cover up some of my wonky cutting on the bird I used a Precision Pen from American Crafts to edge my birdie friend and I colored him in a bit more with a pink Copic marker.  He was adhered to the ledge.  Isn't he so sweet there?


I adhered the shutters outside the window frame (I colored in part of the image with a Copic marker).  I also did some subtle stamping on the right and left edges of the panel to mimic the texture of stucco using one of the stamps from Julie's Art Textures stamp set using Jenni Bowlin's ink in malted milk.  I also edged the panel with the same ink.


Next I adhered the pennants to a piece of Divine Twine in oyster (gray and white) and adhered it all on top of the window to create a little banner.

I added a little computer generated "birthday" inside the window under the banner.


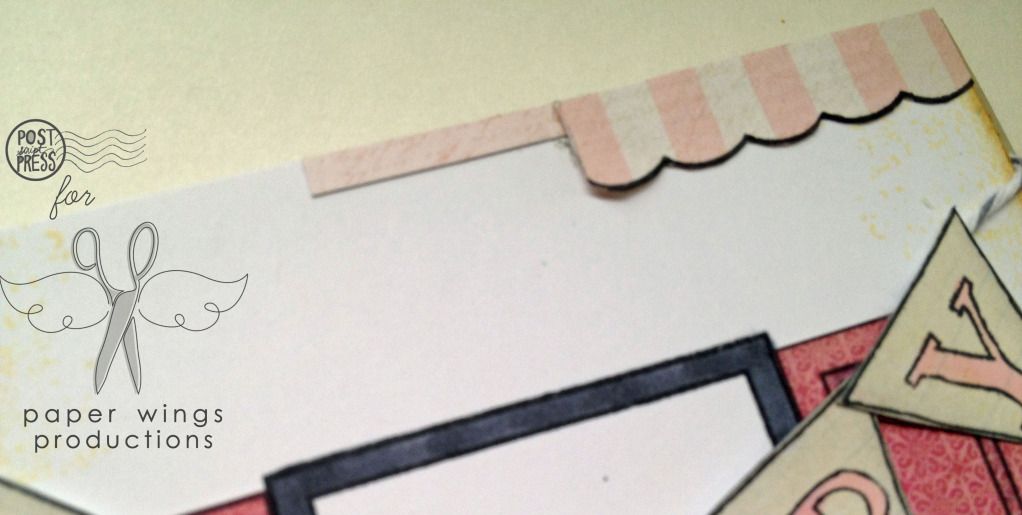
For a bit more interest I added hand cut stripes of patterned paper from the same Madison Avenue paper pad and also stamped out onto the Madison Avenue paper pad the scallop edged curtain from the Window set using Memento ink and used part of it on the top right hand corner of the card.


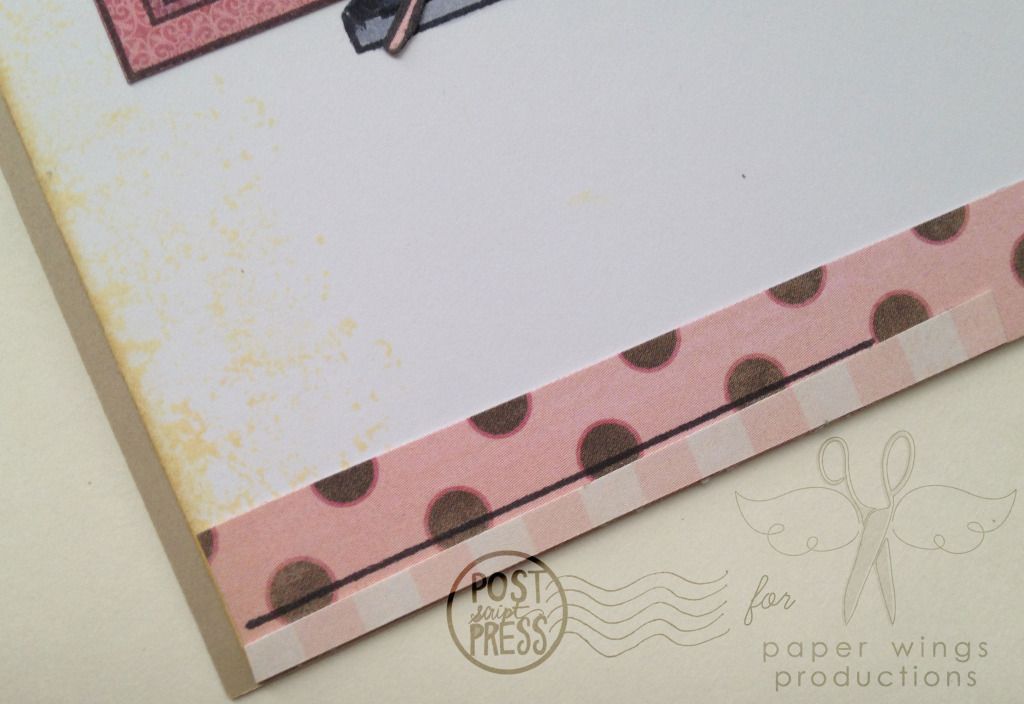
My last bit of stamping was to add the longer line from the Window set onto the bottom strips of pattern paper.  Lastly I adhered the panel to a kraft colored card base.

There you have it.  A semi-clean and pretty card for Julie.  Happy birthday, Julie!


Stamps: Art TexturesWindow and Happy Day
Ink: Memento ink by Tsukineko in tuxedo black; Tim Holtz Distress Ink by Ranger in soot black; Jenni Bowlin by Ranger in malted milk and brown sugar
Paper: Lost and Found Madison Avenue 6x6 paper pad by My Mind's Eye; Paper Heart 6x6 paper pad by Crate Paper
Cardstock: Neenah Papers in solar white and sand
Tools: Tim Holtz Ink Blending Tool by RangerMONO permanent adhesive by Tombowliquid adhesive by Scotch; Copic markers
Embellishments: Divine Twine in oyster by Whisker Graphics 


I hope you will join in us in wishing both Liz & Julie the happiest of birthdays and a fabulous year to come!

Take flight,
Shay.

P.S. Mark your calendars because Carrie's birthday is July 24th!
Related Posts Plugin for WordPress, Blogger...