Showing posts with label julie. Show all posts

Friday, November 16, 2012

Feature Friday- Advent Calendar: Part 2

Hello Peeps! 
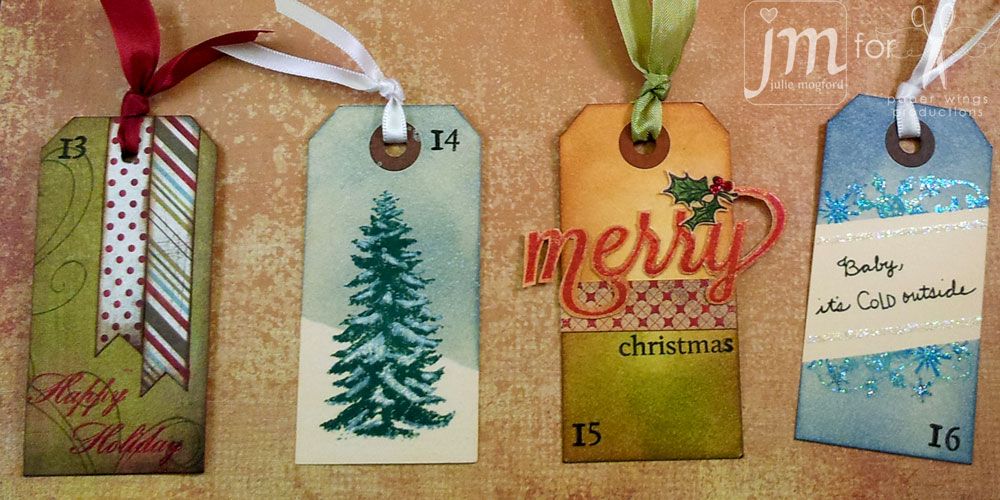
Welcome back to Part 2 of the Advent Calendar!  Today I"m sharing tag 9-16.  Since I used smaller tags for this project, I felt the smaller numbers from the Perfect Alphabet Clear set would be a better choice, and keep the focus on the image. The number 9 is from the Perfect Number Clear Set and all were stamped with Versa Fine Black Onyx.  Let's take a look at them!!
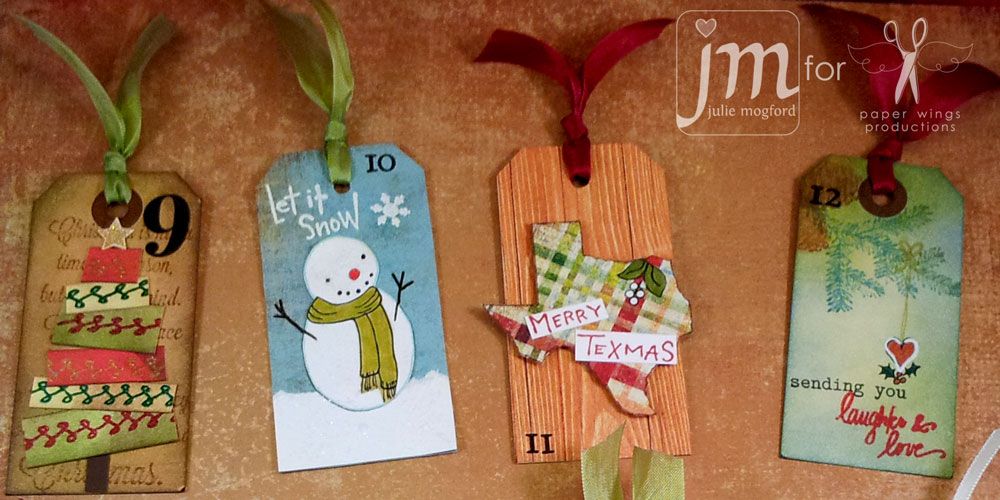


 I've been inspired by so many ideas on Pinterest, Splitcoast, and Online Card Classes Holiday Workshop.  Here are today's tags!
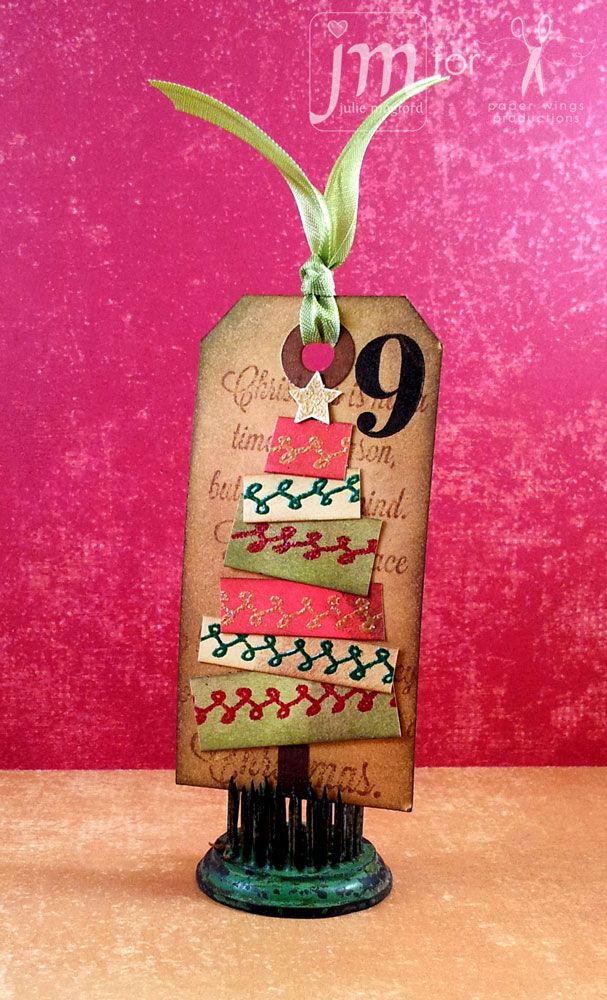


Details:  This tag features one of our Christmas Sentiments stamps in the background, and one of our border stamps from our Life Framer set. I inked cardstock in yellow, red and green, and then embossed the border stamp in a contrasting color and cut the strips to length for the tree shape.  The star is from our Hanging Stars set, and it is also embossed (Egyptian Gold-Judikens)


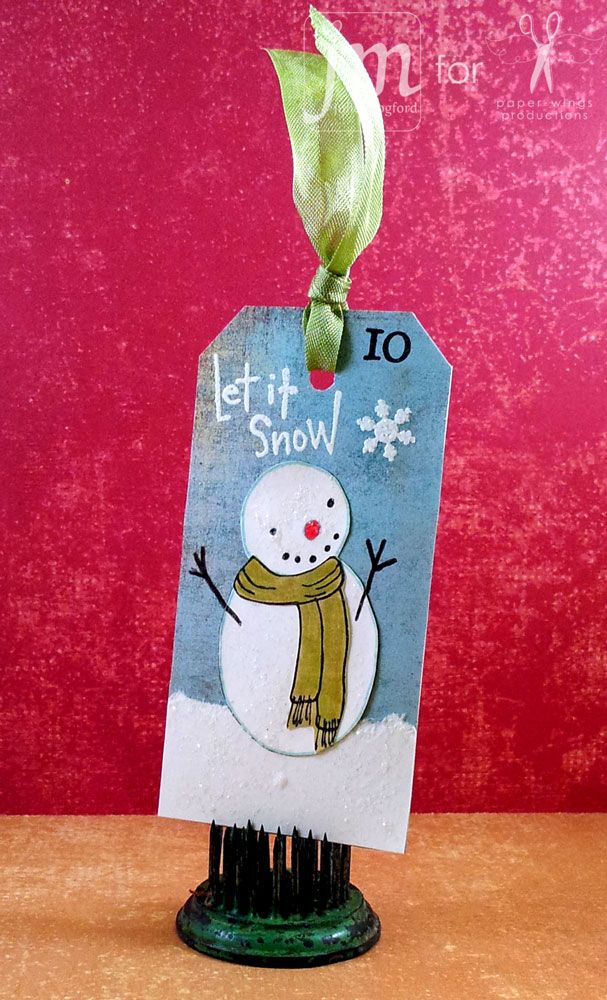
Details: Cardstock background (Basic Grey), white Neenah Cardstock with a torn edge added for snow and snowman from Snowman Love set and used the cute little scarf for this little guy.  The Let it Snow was stamped to fit the space and embossed with Stampin' Up Whisper White ep.  Since he was looking upward, I had to give him a little snowflake to watch from the Winter Mix It Up set.  And of course, I couldn't resist a little Rock Candy Distress Stickles to make the snow sparkle.


Details:  I'm a Texas gal!  So, I had to pay a little tribute to Texas!  I used the Lone Star State clear stamp and stamped it on this cute Christmas plaid paper and cut it out. I added the cute Texmas sentiment in Festive Berries distress ink. And finally, a sweet little mistletoe from the Holiday Tags clear set. The woodgrain paper is from Studio Calico.  Perfect!!
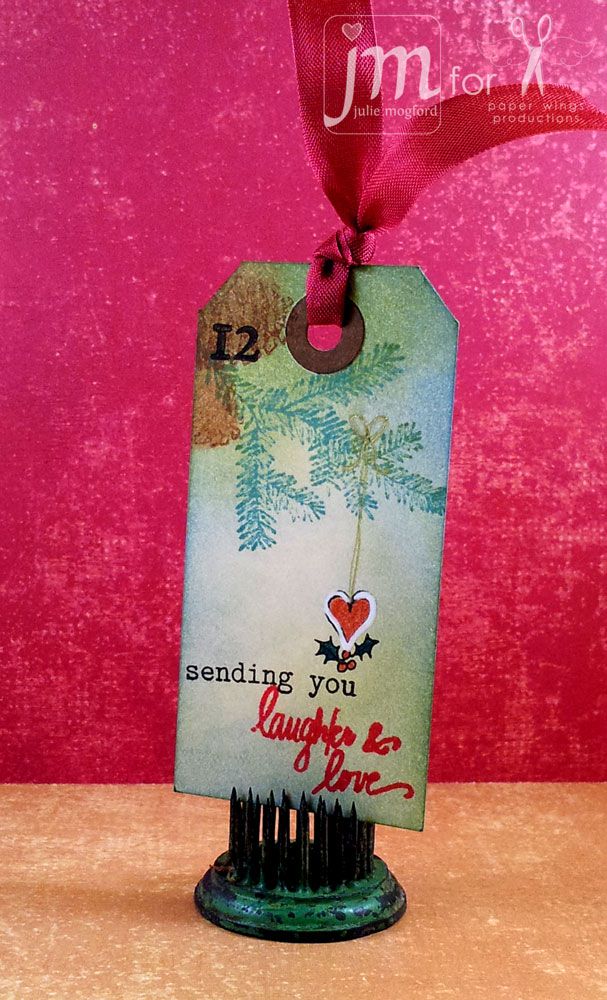


Details:  I just love this pine bough and pine cones from the Pines Cling Stamp Set. I added another element from the Holiday Tags clear set to create an ornament.  I drew the hanger and bow with a gold pen.  And, I love this sentiment from the Winter Mix It Up set.
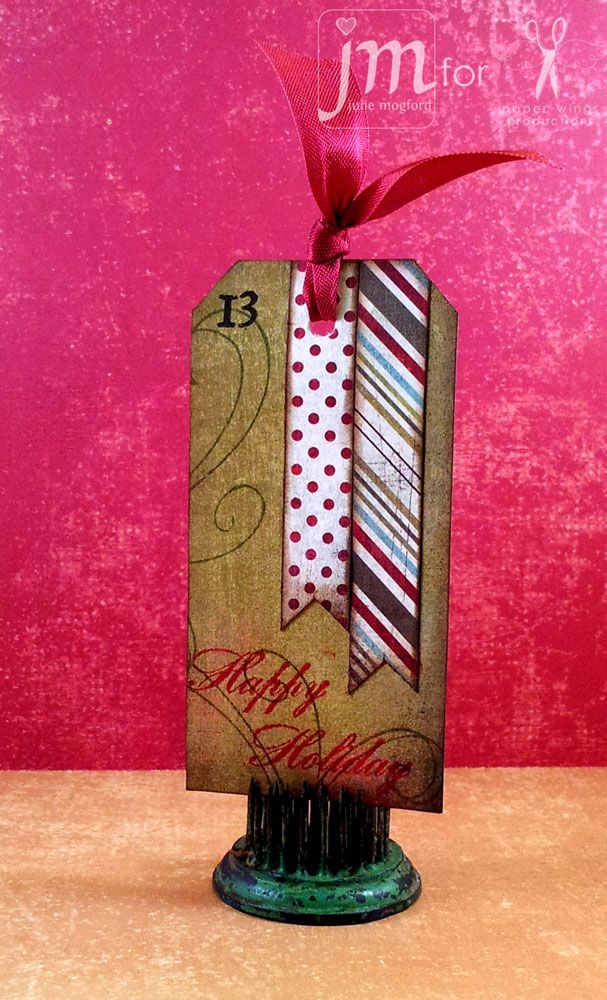


Details:  Basic Grey green paper from Figgy is accented here with Flourish Fun 2 stamp and two more strips of BG Figgy paper.  All edges are inked with Walnut Distress ink, and the Happy Holiday Script sentiment added and embossed in red! Simple and Elegant.
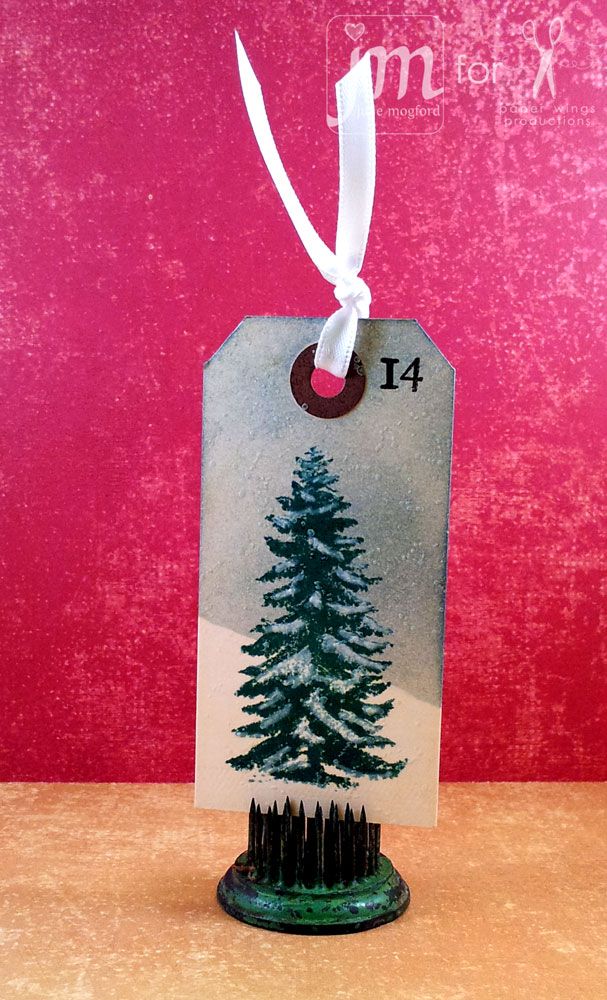


 Details: Here is another stamp from the Pines Cling Stamp Set using the large tree and I used a white pen to add snow to the tree and Frosted Lace stickles.  Although it is faint here, I used the small dot stamp from the Art Textures set to create falling snow stamped with SU! Whisper White craft ink and embossed with clear ep.  It reminds me of a trip I took to Wyoming for my first Christmas in snow.  I'll never forget that.


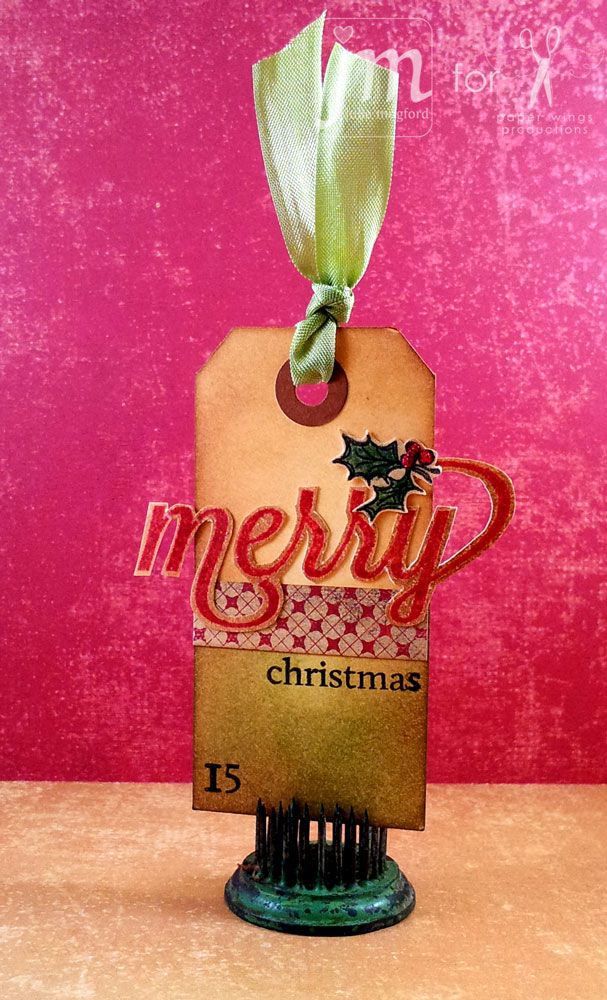
Details:  This one took a little work, but I love how it turned out.  The tag background is inked with two colors of Distress ink plus a little Walnut.  I've added a strip of paper to separate the two areas and give it some interest.  Then I used the Merry Clear stamp with Christmas in black, and merry stamped in Festive Berries on a separate brown inked tag.  I embossed merry ink clear to give it a little shine, and then trimmed the sentiment to expose the background and have the letters hang off the side. The finishing touch is the holly berries and leaves from Holiday Tags stamped and colored with Distress markers, with a touch of Barn Door distress stickles. It feels classic and delicate.
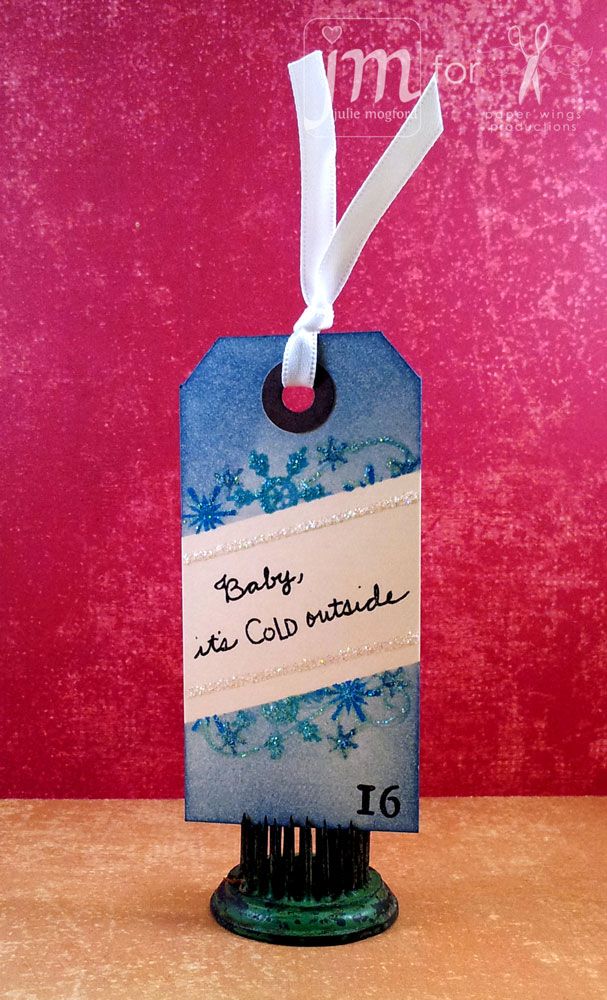


 Details:  I loved seeing this technique from Jennifer McGuire in the Online Card Classes Holiday Workshop.  First I stamped the sentiment from Snowman Love  and using a mask, I have sectioned off part of the tag and stamped a flourish and several snowflakes in a variety of blues along the edge.  Using an ink blending tool, I shaded the exposed areas of the tag.  And, to add that icy look, a touch of Diamond Stickles.  I love how this one turned out! (Flourish Fun 2 , Holiday Mix It Up, and Winter Mix It Up for the snowflakes).


Lots of festive designs here for part 2 of our Advent Calendar.  There will be one more installment of the remaining tags before the end of the month.  I hope you found something today (or several ideas) that will inspire you for your projects. As always, I'd love to see what you create!  Add your projects to our flickr group, to Pinterest, comment with a link on this post or even email pictures to us! See you soon with the final set of tags. 

"Deck the Halls!!!"
Happy Stamping!

Julie

Wednesday, October 10, 2012

What's Up Wednesday: Build A {Fall} Scene


Happy Wednesday peeps!

It's Shay here.  Have you had a chance to see all the new stamps?  There is something for everyone!  Want to see them in action?  Monday's post features a truly inspirational piece of art by Norma G.

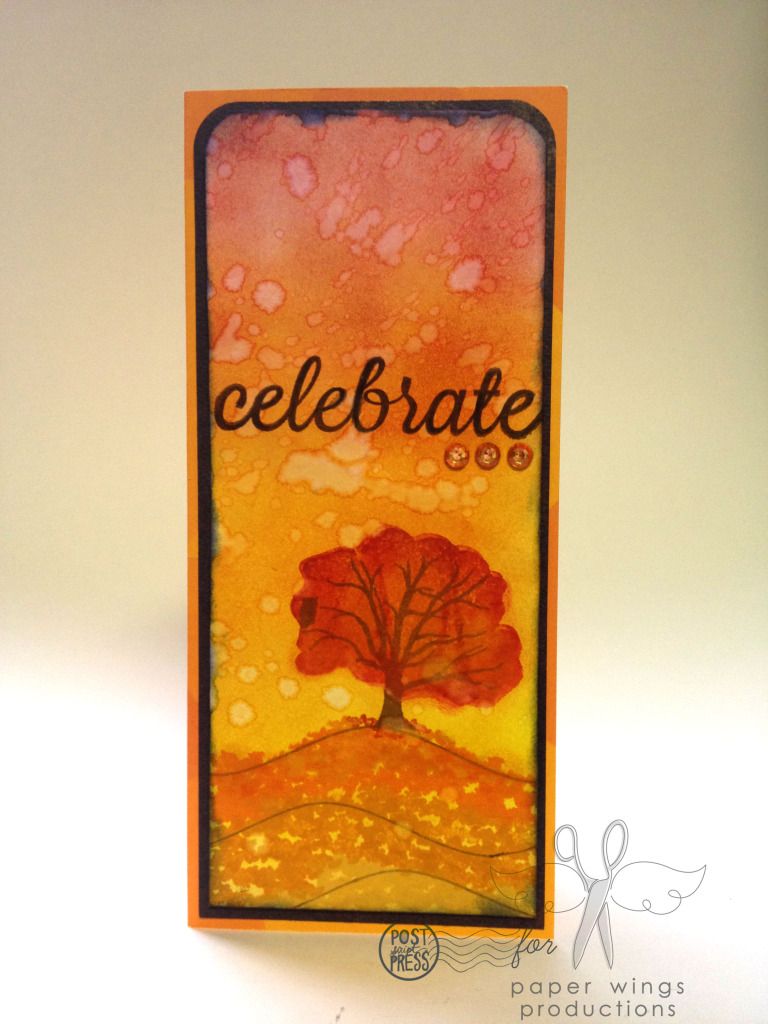
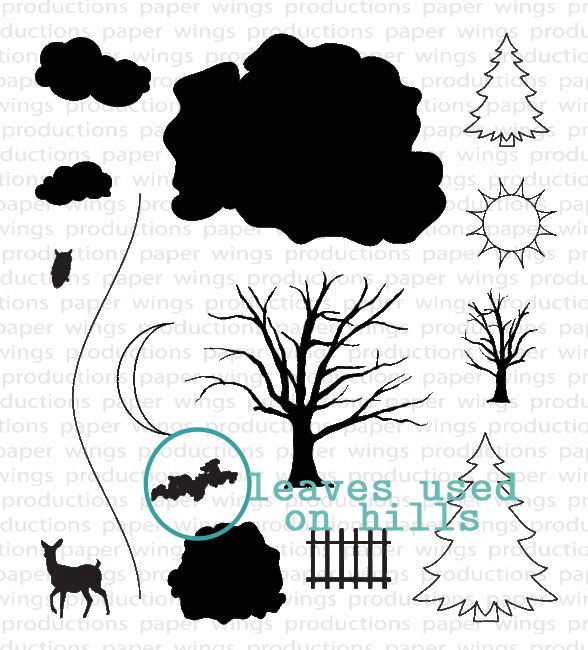
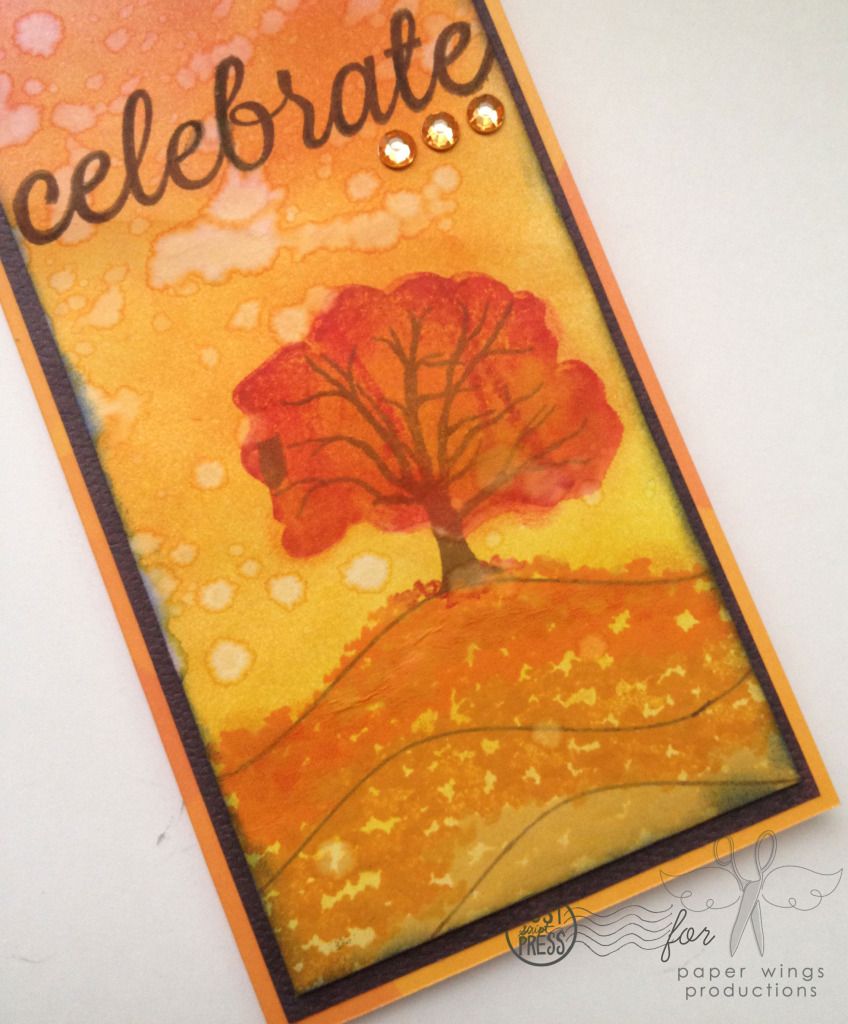
What's up today is a simple card using some really lovely new stamp sets.  Build A Scene is an amazingly versatile and fun stamp set designed by Julie Mogford.  I decided I wanted to do something with fall colors like yellow, orange and red with a little brown thrown in.


With Tim Holtz Distress Inks and my handy ink blending tool I created a background.

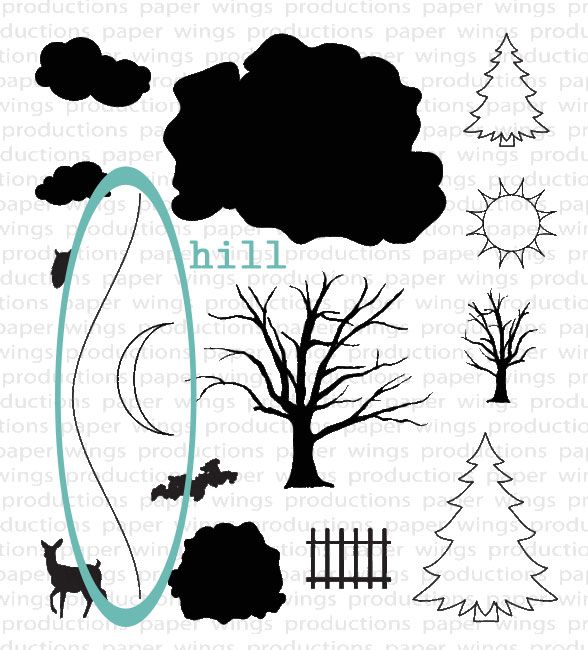
I stamped the hill in brown ink.


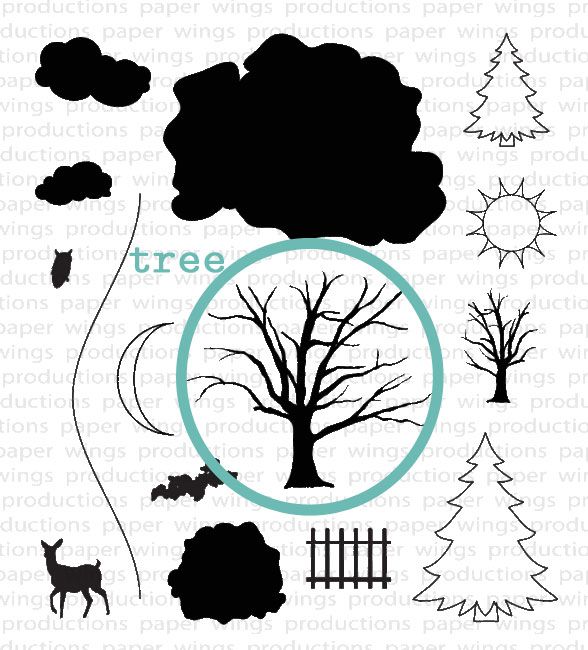
Then I stamped the larger branchy tree in brown ink.


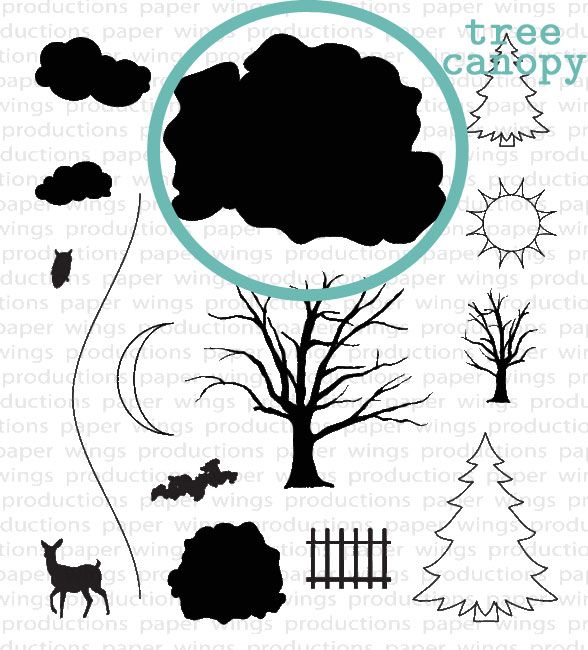
Next I used several inks sprayed with a misting of water to stamp the larger tree canopy.


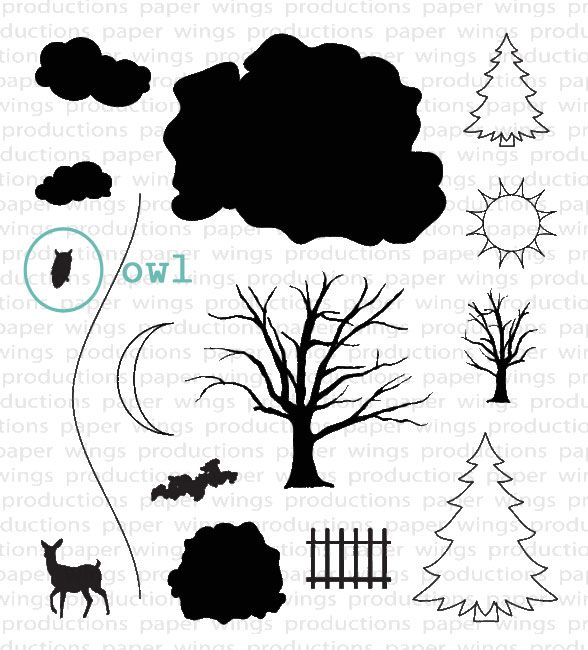
Also on the tree is a little owl.


To the background I sprinkled some water.  I love the reaction Distress Inks has to water.

To create some more color and interest to the hill I stamped more hills for dimension and then I stamped the clump of leaves from the set first in spiced marmalade on the top hill, the second hill down was wild honey and the last was scattered straw.


I stamped celebrate from Celebrate in brown ink.  Celebrate is just one of a series of stamp sets with a large flourish word and smaller words that work in conjunction with it.  Others include: Holiday, Merry, Remember, Thankful.  These stamp sets are excellent sentiment stamp sets for your cardmaking needs along with scrapbooking, tags, gift giving, journaling and mixed media.

I rounded the top edges of the panel and edged it with dark blue ink before adhering it to a piece of dark brown patterned paper.  The base of the card is a piece of orange patterned paper.

The last touch is three orange gems under the word celebrate.


I think this card could be sent to celebrate fall, celebrate Thanksgiving, an autumn birthday, an autumn wedding/anniversary, to celebrate a friendship or any number of other wonders of fall.

Build A Scene also has a coordinating Fall Add Ons set for additional images and sentiments to create seasonal scenes especially for Halloween!

I had so much fun with the Build A Scene stamp set and yet I have only scratched the surface of what can be made with this stamp set.

We would love to see what you make with this stamp set and any Paper Wings Productions stamps.  Add your projects to our flickr group, to Pinterest, comment with a link on this post or even email pictures to us!

Take flight,
Shay.

Supplies:
Stamps: Build A Scene, Celebrate
Ink: Tim Holtz Distress Ink by Ranger in spiced marmalade, scattered straw, brushed corduroy, chipped sapphire, fired brick, wild honey, barn door and mustard seed
Cardstock: Neenah
Patterned paper: My Mind's Eye and Memory Box
Other: orange jewels; Corner Chomper by We R Memory Keepers; Inkssentials Ink Blending Tool by Ranger; water; dimensional adhesive

Monday, July 23, 2012

Paper Wings Productions Video!


Hi Peeps! 

Today, we have something special to share with you.  Check out our new video done by the very talented Julie Mogford. It is a new stop motion commercial for our company!  Take a look....


Isn't it fun??  We hope you'll rate it and comment on it at You Tube, and we would love it if you would share it with your friends on all of your favorite social media.


Thanks so much for your continued support of Paper Wings Productions. And, keep checking back for more inspiration!


Take Flight!

Paper Wings Gals


Wednesday, July 11, 2012

What's Up Wednesday: Happy Birthday!!


Hello there peeps,

What's Up?  It seems to be birthday month here at paper wings productions.  This past weekend dear Ms. Liz Allen (fine and fancy) celebrated her birthday and today is Julie's birthday!   Happy belated birthday, Lizzie!  Happy birthday, Julie!

Lately, I have been downright awful about getting out cards to my friends, but I am of the mind that later is better than never (how surprising is it to get a card 6 months after your birthday?  Makes for a long birthday celebration).

Today I am sharing with you the cards I made for Liz and Julie which I haven't given to them yet (Liz and Julie, if you don't want to see your cards here then look away).
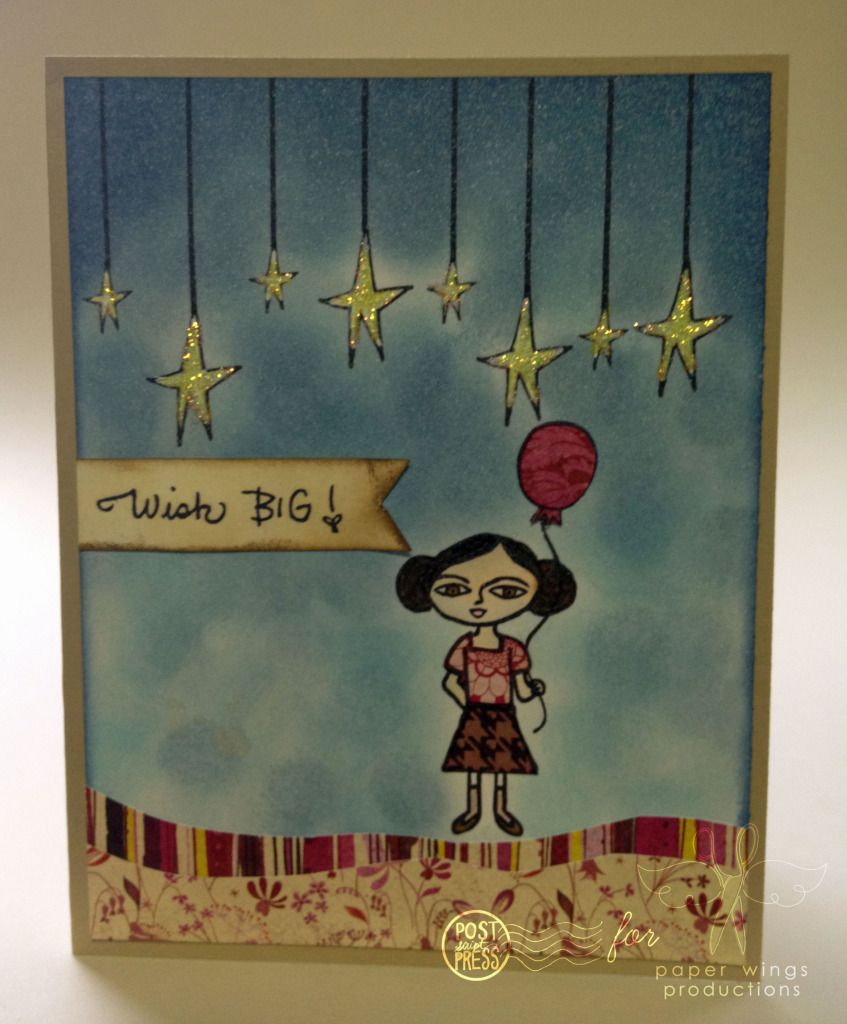
Liz's birthday card:


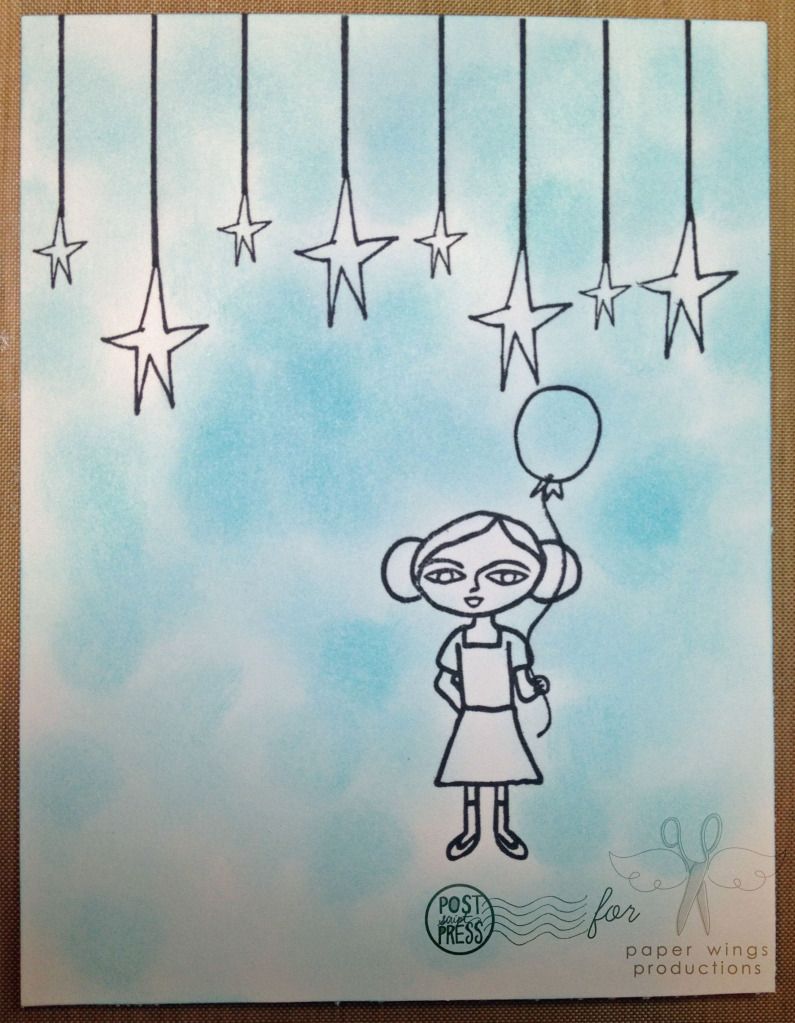
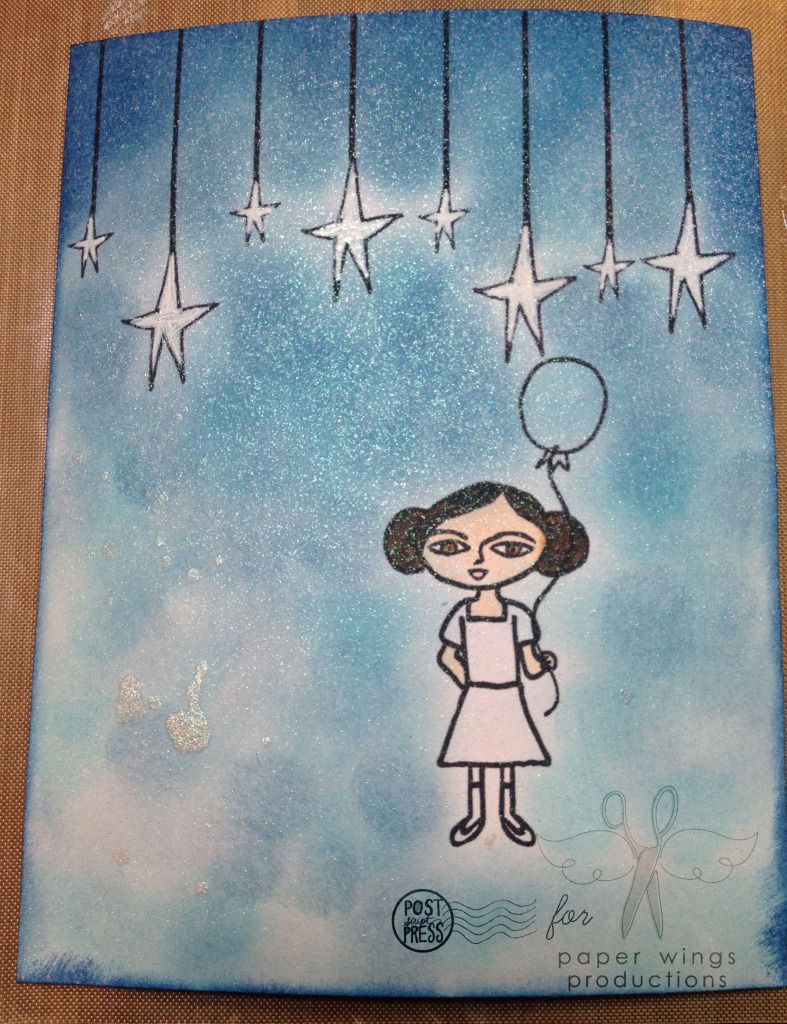
For a starting off point, I wanted to use Liz's Hanging Stars stamp set.  On a 4.5 inch x 5.5 inch piece of white cardstock, I stamped the main curving line image and then alternated between stamping the large folk star and the small folk star onto the bottom of each line with Memento ink by Tsukineko in tuxedo black.

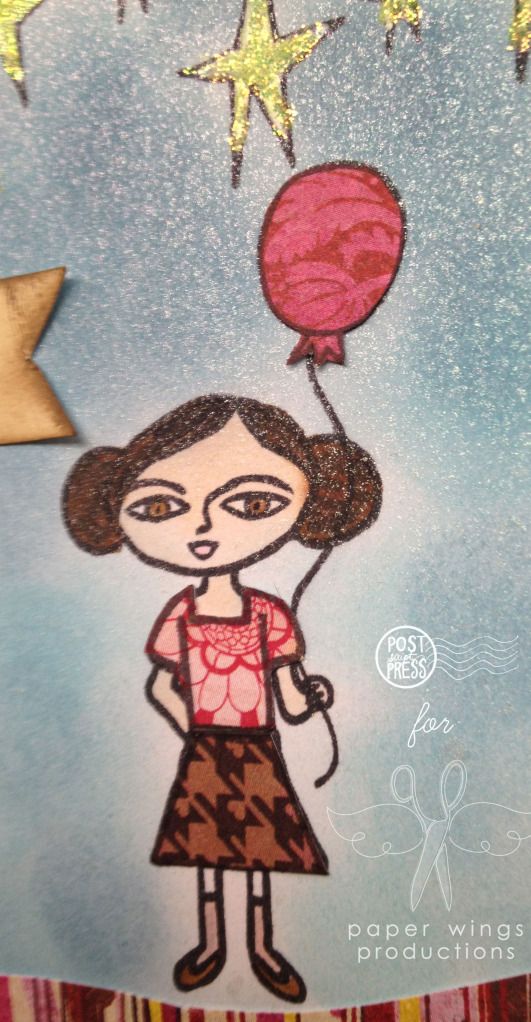
Because the card needed something or someone under the stars, I stamped little Sophie from the Sophie stamp set and added the curvy string and balloon from that set to add some birthday fun again in Memento ink.  I knew I was going to do some paper piecing over some parts of Sophie so I stamped her twice on 2 different pattern papers from Basic Grey's Kissing Booth 6x6 paper pad and Crate Paper's Paper Heart 6x6 paper pad and stamped the balloon once on another paper from the same paper pad.


Before adhering the paper pieces I took out a sponge dauber from Tsukineko and 3 colors of Tim Holtz Distress Ink: tumbled glass, stormy sky and faded jeans.  I began with tumbled glass going over the panel in a circular motion trying to avoid the stars and most of Sophie. Next I came in with stormy sky concentrating the color to the top of the panel and adding some sporadically onto the rest of the panel.  Then I finished up with faded jeans just at the top and around the edges of the panel.  


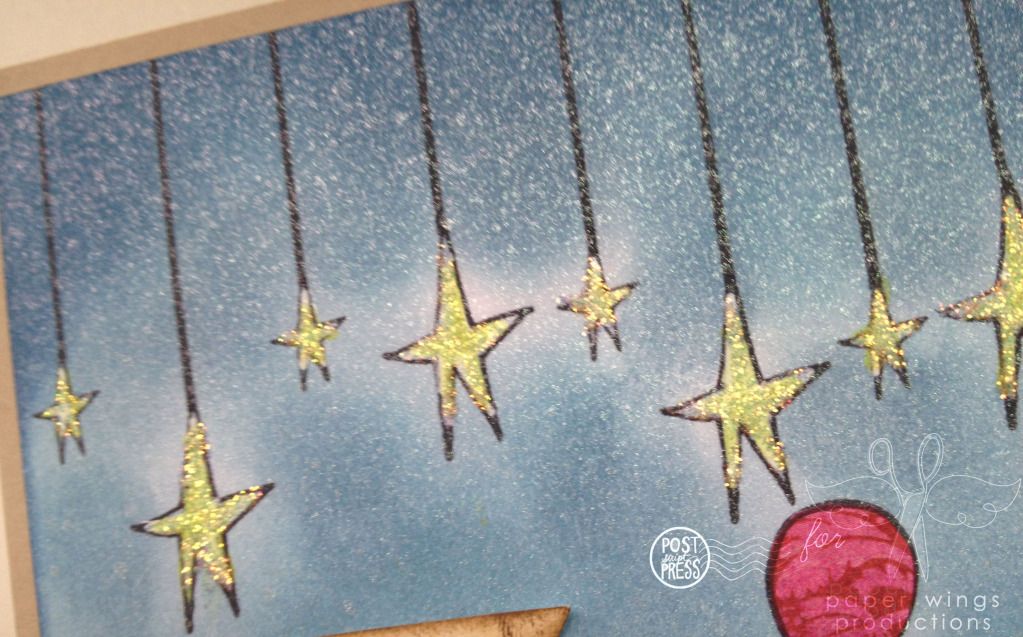
Then I sprayed iridescent spray over the entire panel.  And I colored in Sophie's skin, hair and mouth with Copic markers.  I also colored in the stars using a white Uni-ball Signo gel pen. 


I then adhered the paper pieced elements to the ballon and Sophie and finished up Sophie by coloring in her socks/tights and shoes with Copic markers again.  To the bottom of the card I added some free hand cut wavy pieces of patterned paper from the Basic Grey Kissing Booth paper pad.


I wanted to add yellow stickles to the stars (stickles are a most for anything for Ms. Liz), but oh no! I have no yellow stickles.  What to do?  I colored in the white stars with a yellow Copic marker and then used Diamond stickles over it.  Problem solved.

I added a little banner stamped from a sweet sentiment handwritten by Liz on a piece of white cardstock and then because the white was too stark I inked up the banner with another sponge dauber using Jenni Bowlin ink in malted milk and inking the edges in brown sugar.  Lastly, I adhered the panel to a kraft colored card base.  Pretty cute!

Wish big this birthday, Ms. Liz!


Stamps: Hanging Stars and Sophie
Ink: Memento ink by Tsukineko in tuxedo black; Tim Holtz Distress Ink by Ranger in tumbled glass, stormy sky and faded jeans; Jenni Bowlin by Ranger in malted milk and brown sugar
Paper: Kissing Booth 6x6 paper pad by Basic Grey; Paper Heart 6x6 paper pad by Crate Paper
Cardstock: Neenah Papers in solar white and sand
Tools: Signo gel pen in white by Uni-ball; Precision Pen by American Crafts in black; Sponge dauber by Tsukineko; MONO permanent adhesive by Tombow; liquid adhesive by Scotch; Copic markers
Embellishments: Stickles by Ranger in diamond; Memories Mist in iridescent


Julie's birthday card


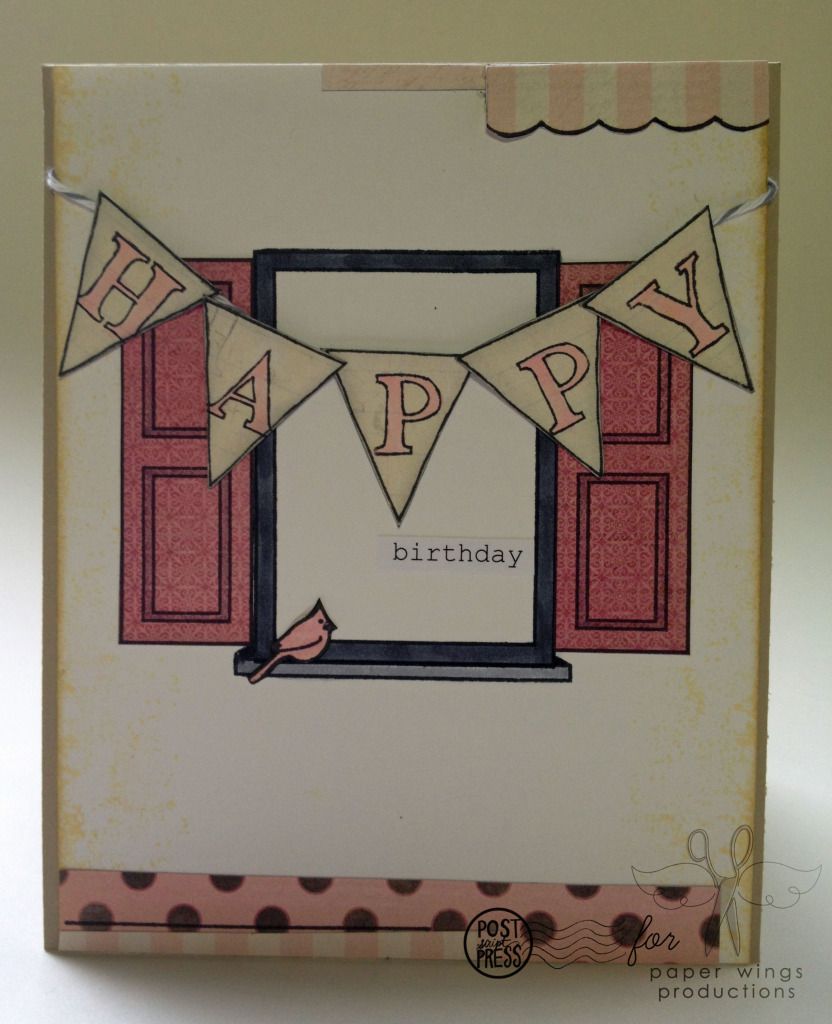
My starting off point for Julie's card was her Window set (have you seen Julie using this stamp set in her video?  If not, check it out HERE) and I had an idea to pair it with the Happy Day set.


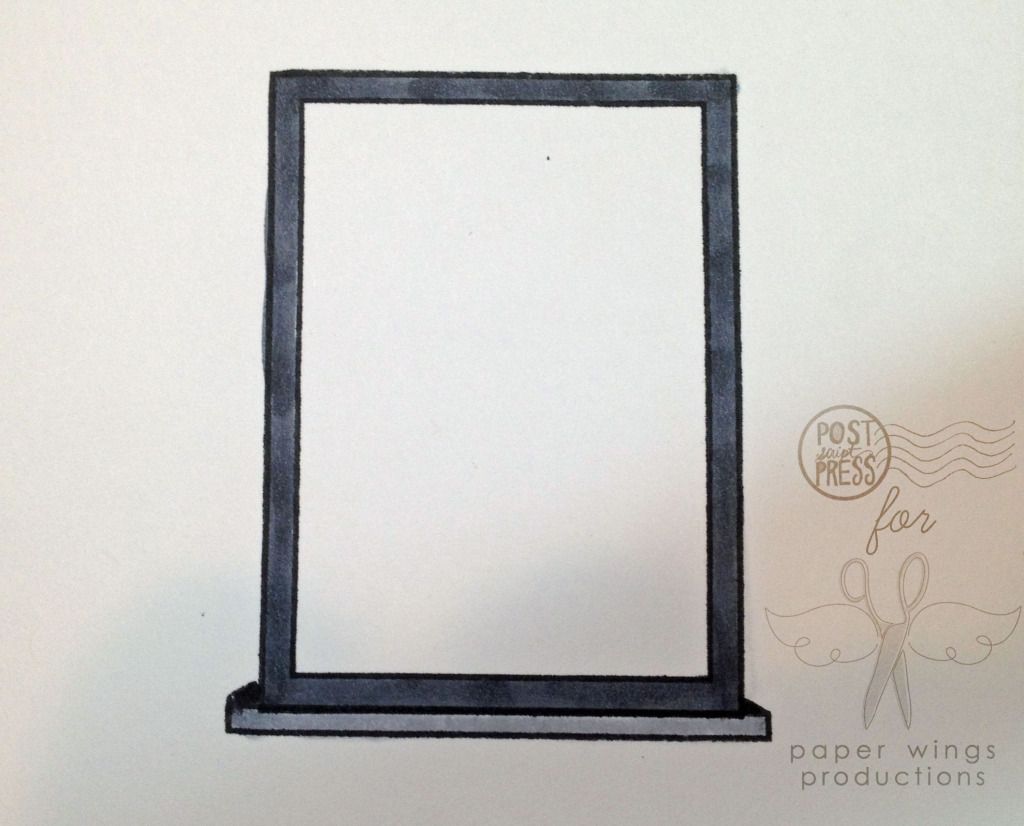
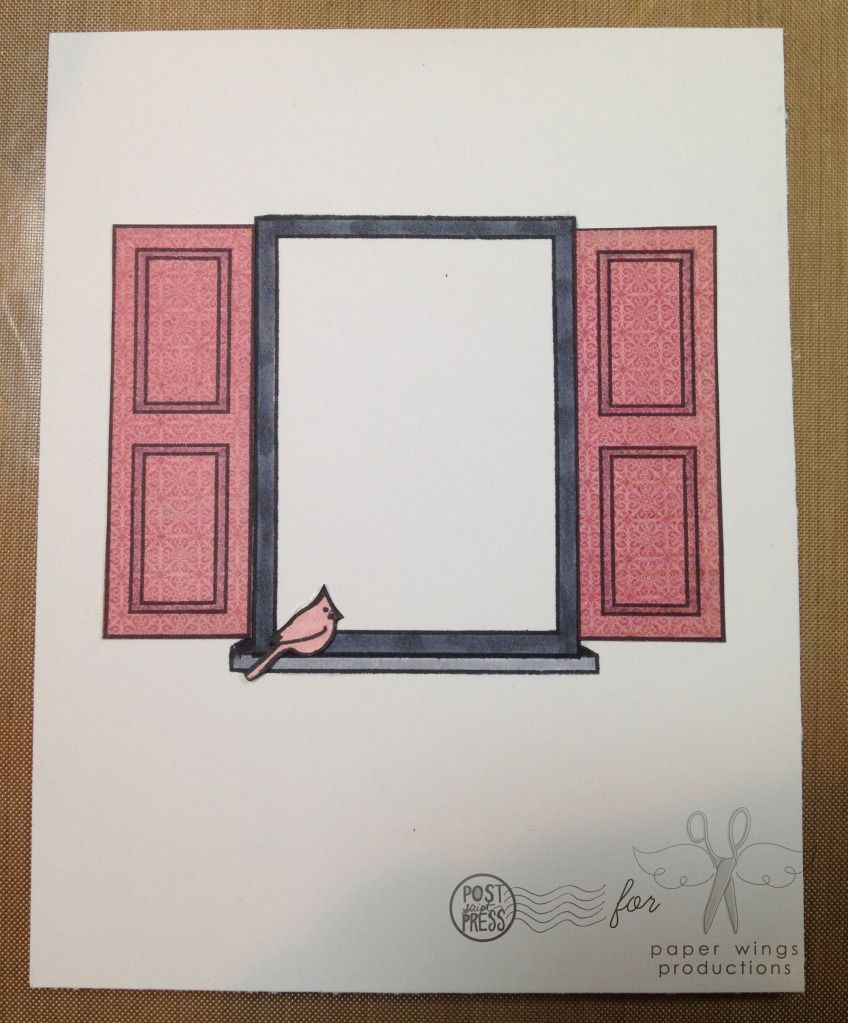
First on a 4.25 inch x 5.5 inch piece of white cardstock I stamped the main window image in upper middle part of the panel in Memento ink in tuxedo black.  I stamped the ledge image at the bottom the window and then colored it in with Copic markers.


Next using some patterned paper from Crate Paper's Paper Heart 6x6 paper pad I stamped the larger pennant from Happy Day 5 times using Memento ink in tuxedo black and cutting them each out.  On each pennant I stamped a letter from the "happy" image and colored them in with a pink Copic marker.  I did ink up the edges.
 
Using the My Mind's Eye Lost and Found Madison Avenue 6x6 paper pad that I received as a present for my birthday this year (thanks, Jane!),  I stamped out the shutters from Window twice and stamped the bird from the set (what a cutie!).  I cut them all out.  To cover up some of my wonky cutting on the bird I used a Precision Pen from American Crafts to edge my birdie friend and I colored him in a bit more with a pink Copic marker.  He was adhered to the ledge.  Isn't he so sweet there?


I adhered the shutters outside the window frame (I colored in part of the image with a Copic marker).  I also did some subtle stamping on the right and left edges of the panel to mimic the texture of stucco using one of the stamps from Julie's Art Textures stamp set using Jenni Bowlin's ink in malted milk.  I also edged the panel with the same ink.


Next I adhered the pennants to a piece of Divine Twine in oyster (gray and white) and adhered it all on top of the window to create a little banner.

I added a little computer generated "birthday" inside the window under the banner.


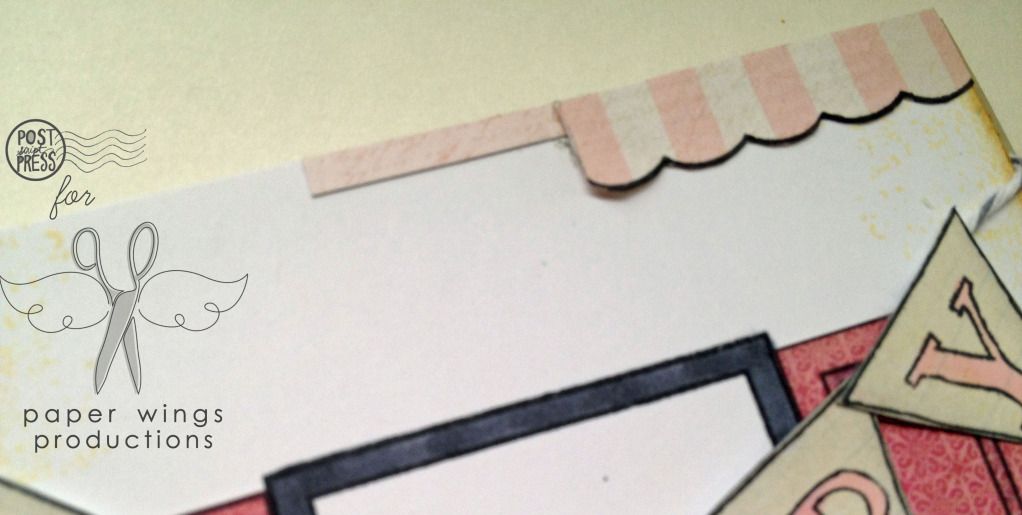
For a bit more interest I added hand cut stripes of patterned paper from the same Madison Avenue paper pad and also stamped out onto the Madison Avenue paper pad the scallop edged curtain from the Window set using Memento ink and used part of it on the top right hand corner of the card.


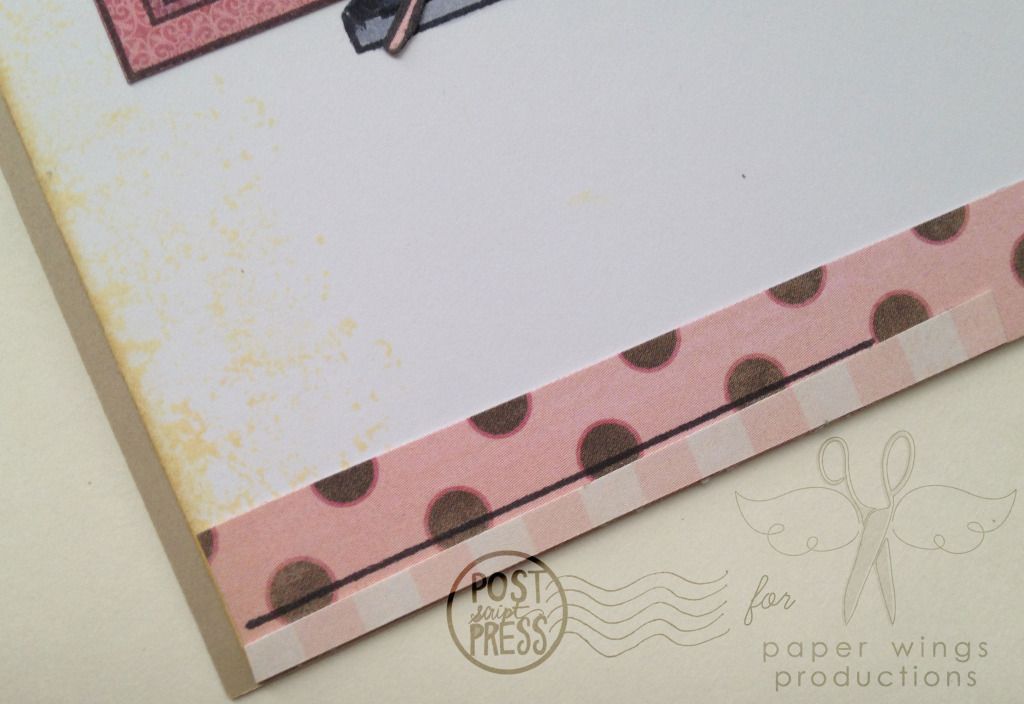
My last bit of stamping was to add the longer line from the Window set onto the bottom strips of pattern paper.  Lastly I adhered the panel to a kraft colored card base.

There you have it.  A semi-clean and pretty card for Julie.  Happy birthday, Julie!


Stamps: Art Textures, Window and Happy Day
Ink: Memento ink by Tsukineko in tuxedo black; Tim Holtz Distress Ink by Ranger in soot black; Jenni Bowlin by Ranger in malted milk and brown sugar
Paper: Lost and Found Madison Avenue 6x6 paper pad by My Mind's Eye; Paper Heart 6x6 paper pad by Crate Paper
Cardstock: Neenah Papers in solar white and sand
Tools: Tim Holtz Ink Blending Tool by Ranger; MONO permanent adhesive by Tombow; liquid adhesive by Scotch; Copic markers
Embellishments: Divine Twine in oyster by Whisker Graphics 


I hope you will join in us in wishing both Liz & Julie the happiest of birthdays and a fabulous year to come!

Take flight,
Shay.

P.S. Mark your calendars because Carrie's birthday is July 24th!

Friday, May 18, 2012

Color Combo Part II

Happy Friday peeps,

I know I am meeting this Friday with a great deal of relief.  How about you?  Are you too looking forward to the different pace of the weekend?  Planning on doing some stamping?

Today I have the second part of the yellow, aqua and coral color combo.  In this post are slightly larger projects than the cards from Wednesday.

Julie's project:


Julie made this timely (I could not resist that cheesy pun) art journal page using Flight Plan Mission 002 as a design guide.  Julie first painted the pages with white paint and then she used watercolor crayons to create the gradient yellow and coral background.  I love how she used Tim Holtz's tissue tape for the strips from the Flight Plan and that you can also see the color behind them.  The frame was cut out using her Silhouette and she colored it in with a Distress Marker (barn door)--even though the color is a red I think it could read as a very deep, rich coral.  Don't feel that the colors must match the color combo exactly...like the Flight Plan they are meant as a guide.  Some reds and pinks will be reminiscent of coral for instance. 

I am particularly taken with the punched circles that she stamped with various borders from Day Framer, Detail Framer, Life Framer and Snapshot Framer.  The days of the week are from Snapshot Framer and the date are from the Life Framer. 

How did she create those circles with perfectly coordinated colors of the stamped image and its background? Julie stamped each circle with one of the borders using Distress Inks in the following colors: tumbled glass, broken china, barn door, scattered straw.  To color in the backgrounds she took the ink pad and pressed it into her craft sheet.  She then sprayed or spritzed the ink she transferred onto her craft sheet with water (use a little water spray bottle) and used a paint brush to paint lighter shades of the color she stamped with onto the circles. 

To add some aqua (or in this instance teal) to the bottom left hand portion of her page she placed a piece of patterned paper under the gold (yellow) and red (coral) chipboard letters.

To future compliment her theme of time she stamped the clock from Melange Women 2 (I think) down the left hand side of the page.

Shay's project:


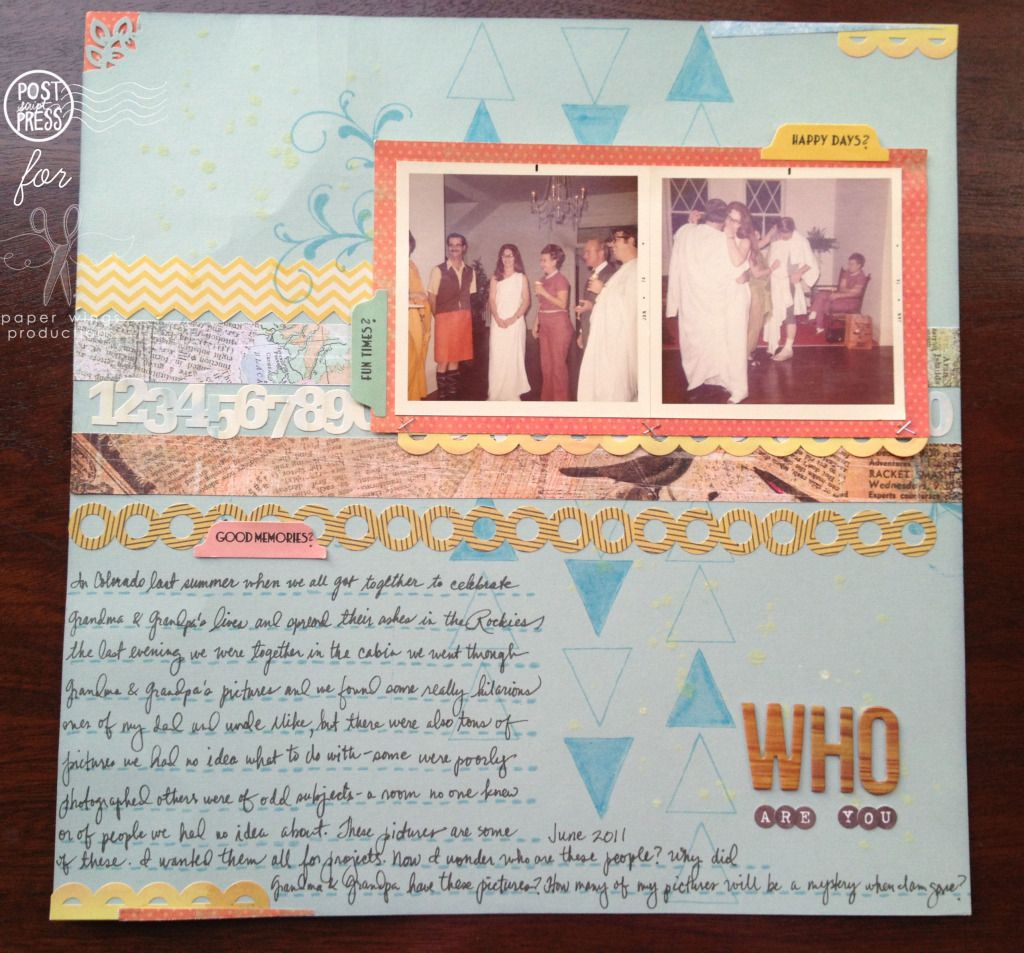
I decided to try my hand again at scrapbooking.  I haven't done a 12x12 spread in ages, but with a color combo and using the Flight Plan Mission 002 I thought I would give it a try.   The main point of this layout is the journaling because the pictures although really cool are a mystery.  Another thing that helped me to tackle something I was pretty unfamiliar with was a scrapbook kit from Studio Calico (Glee Club from September 2011 which had the right colors and elements I really liked).  I think it is always important to realize that you need not do it all.  There are all sorts of ways to help you to create like sketches (like our Flight Plans), color challenges (like our color combo) and/or ready made kits.  I also added a sticker sheet from October Afternoon which were in the right colors to pile of supplies to use along with some cream Mister Huey's (reads as a pale yellow color) which I used in the upper left hand side and lower right hand side.

In my scrapbook layout I think of stamping as the foundation.  I created lines of triangles that remind me of arrows using the large pennant from Happy Day to act as the strips from Flight Plan Mission 002, but also for movement and to direct the eye to the pictures.  I colored in a few odd triangles with an aqua colored marker.  I didn't realize until later that the triangles mimic the diamond pattern of the window in the right hand picture.  Happy accidents which no one but you has to know was unintentional...tell people you meant to do it!  I added the flourishes from Flourish Fun 1 under the upper left hand corner and lower right hand corner of the photo block for some interest and more of an organic feel after so many more angular elements.  All of my journaling was written on journal lines created from one of the border stamps from Day Framer...this border is perfect for journaling lines as you can stamp it over and over to make the line as long as you need it.

You probably noticed that my yellows, aquas and corals on this layout are a bit dusty or aged which is perfect for the older pictures whereas Julie's colors are more saturated and brighter reflecting a happy feeling.  You can always use variations on the colors to reflect your story or project. 

I hope you have the chance to play and experiment with something new or unfamiliar this weekend perhaps trying a new product, some stamps that you have been meaning to ink up, a different color combination than usual or a new technique.  We would love to see what you do!  Share with us on this post, our flickr group, Pinterest, Instagram (our user name is: paperwingsproductions), Twitter or Facebook!

Come back next week for some more Paper Wings Productions projects.

Take flight,
Shay.

Wednesday, May 16, 2012

Color Combo, Part I


Hello there peeps,

This week Julie and I bring you a few projects using the same summery color combo.  Today are a couple of cards using yellow, aqua and coral based upon Flight Plan Mission 002.

Julie's card:


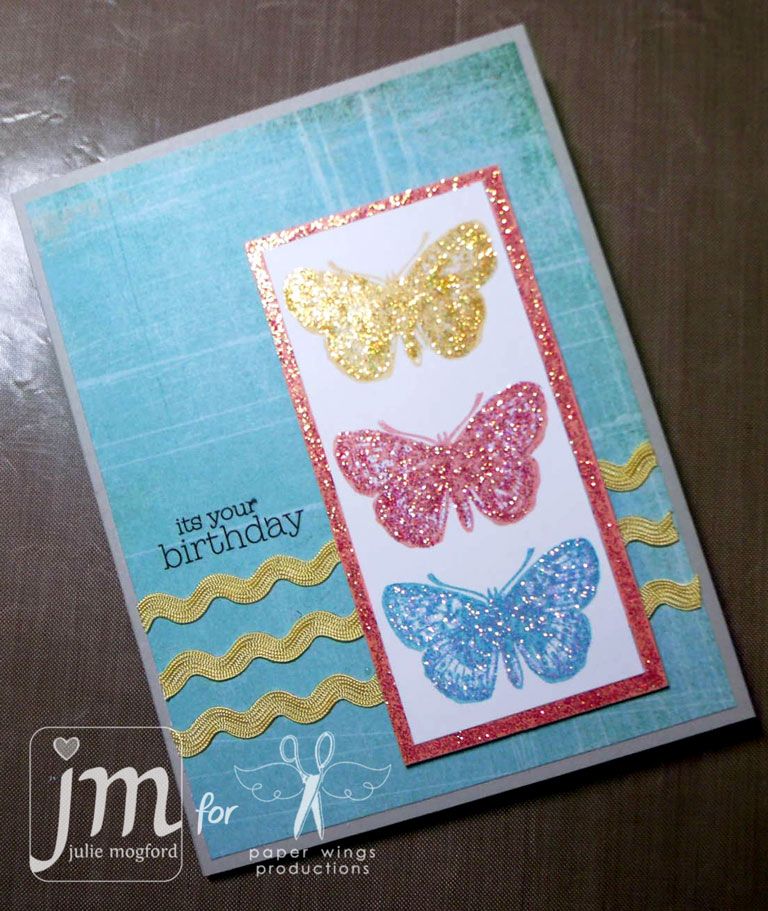
Julie made this pretty birthday card using the butterfly image from Carrie's Butterfly Panel.  Did you notice how cleverly she used the yellow ric-rac as the strips in Flight Plan Mission 002?  By stamping the single butterfly image three times in the three colors it makes a bigger impact further heightened by the use of coordinating colors of stickles.  The birthday sentiment is a rub-on from her stash.  Julie balances all the colors by using them each in the butterfly panel and then again in the rest of card.  The white panel is framed by a shimmery rectangle of coral while the ric-rac is yellow and the main background is aqua.

Shay's card:


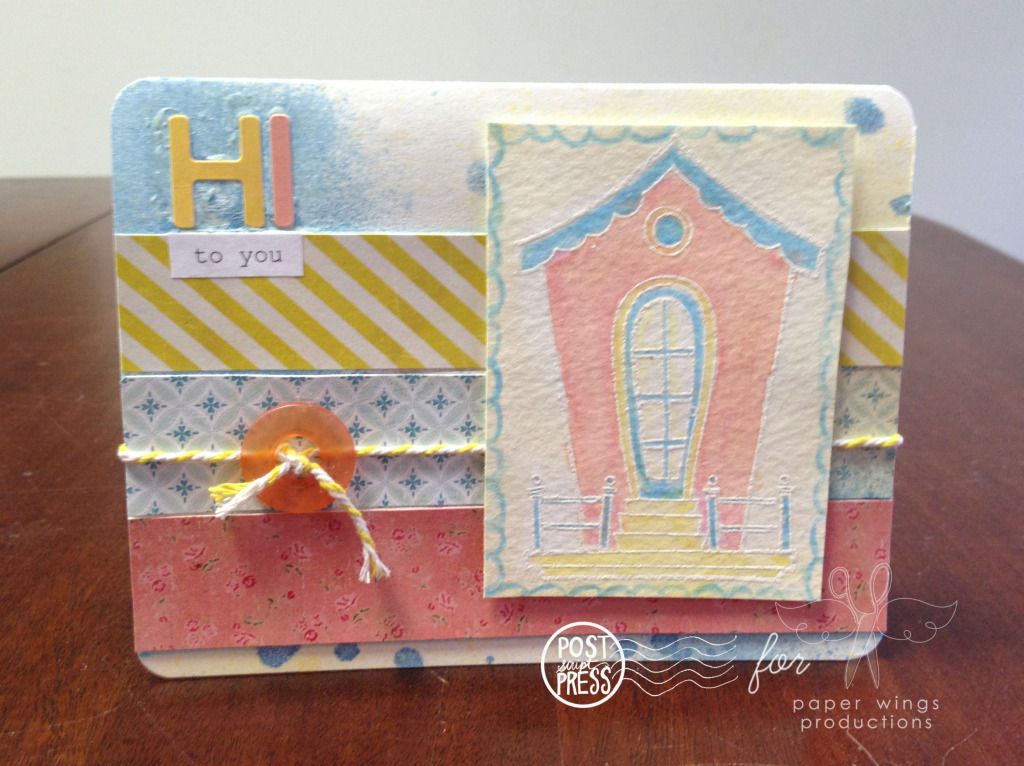
My any occasion card is a bit more chaotic busy and uses the adorable birdhouse from handmade by Lissie girl's Home Tweet Home which I heat embossed with white embossing power on a piece of watercolor paper and colored in using some new aqua markers using the color combo.  I also used three strips of patterned paper in the appropriate colors from the 6x6 paper pad (love these so much) from the Paper Heart collection by Crate Paper.  I went a little wild with teal, yellow and white sprays in the background, but I had fun and that is what stamping is all about.

We would love to see what you create with this bright and happy color combo.  Feel free to share on flickr, Pinterest, Facebook and/or here on this post.

See you again Friday with some more yellow, aqua and coral creations.

Take flight,
Shay.

Friday, May 11, 2012

Mother's Day

Happy Friday peeps,

Sometimes our best intentions are tread upon by everyday happenings and trying to get what must be done right now done or perhaps by circumstances beyond our control.  Perhaps you are now wondering what to give this Mother's Day.  Today I have an easy and customizable handmade gift and card you can give your mother or another important maternal figure in your life (including yourself!) for Mother's Day that can be done in an hour or less (or more depending on how elaborate you make it).


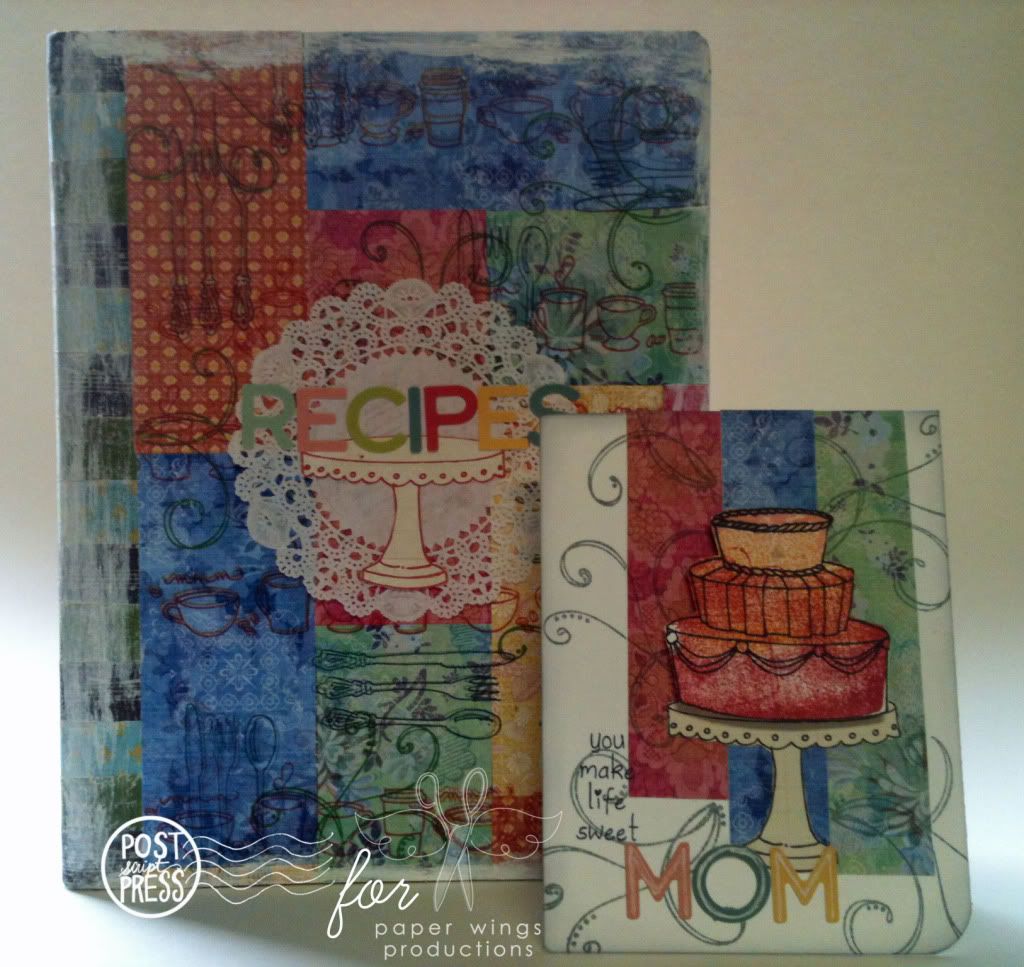
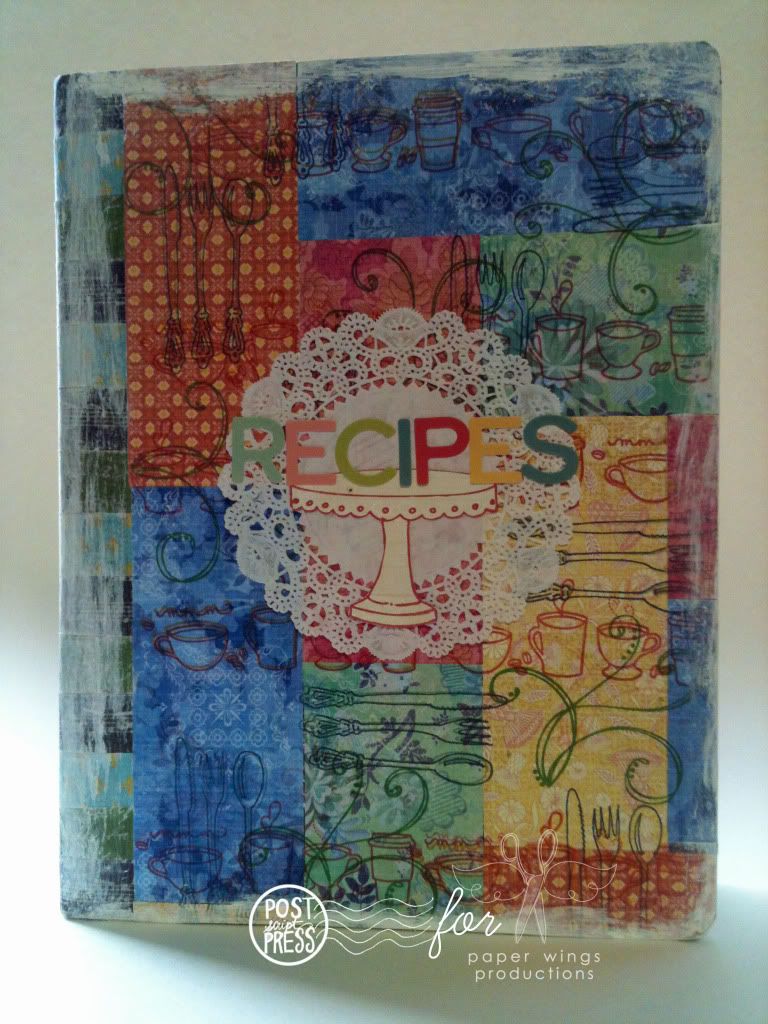
Using a simple, inexpensive and readily available composition book I customized the cover using 7Gypsies patterned tape, patterned paper, Paper Wings Productions stamps, a doily, letter stamps and gesso around the edges to mute some of the crazy color and patterns I used.  For my book I wanted to do a recipe book, but you could change it to be a goals book, travel journal, gardening book, weight loss journal, reading log, place for notes or ideas, etc. depending on what your mother, grandmother, sister, aunt, mother-in-law, friend or any other important woman in your life (likewise you could do the same thing for the men in your life too).


Because I chose to do a recipe book I chose to go with food/drink themed stamps like the coffee border in Play With Your Coffee by Julie Mogford and the silverware from Hey Cupcake by handmade by Lissie Girl.  I also added a flourish from Flourish Fun 2 for an added interest.  The cake stand is from Let's Eat Cake also by handmade by Lissie Girl.

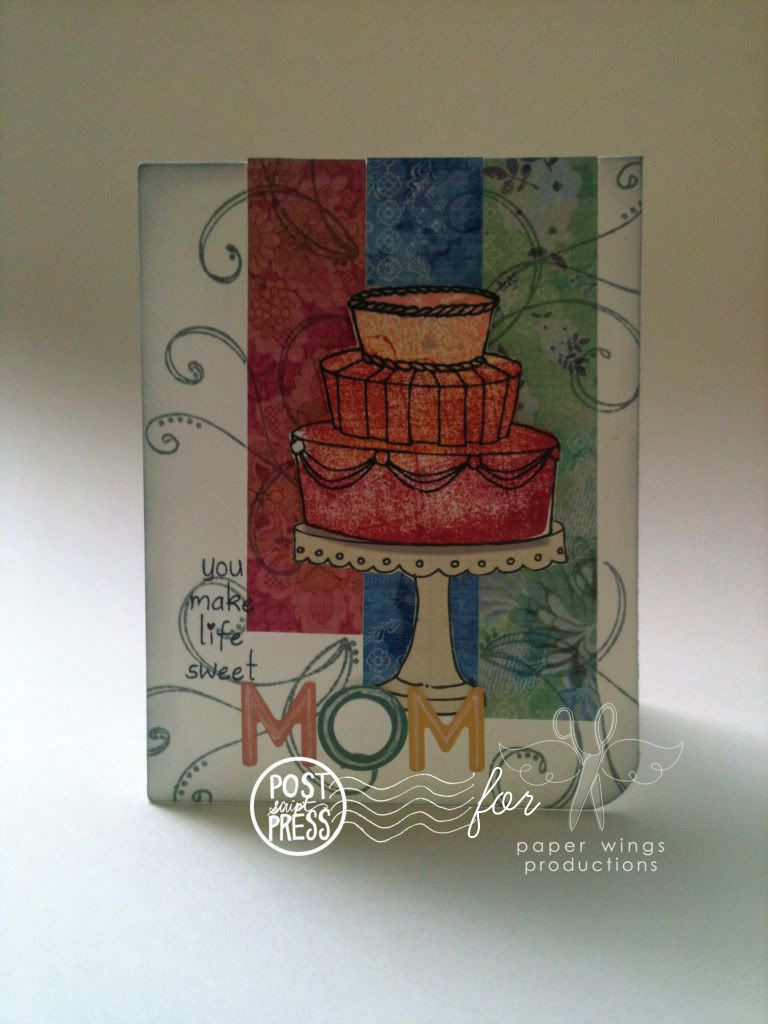
Did you notice that the accompanying card uses Flight Plan Mission 002? 


By using the Flight Plan I could take the guesswork out of coming up a layout and spend my time on the rest of the card.  For the cake I actually stamped the backside of the image using 3 colors of ink and then over-stamped it with the right side of the cake image in black.  I think it creates a cool effect.  The stamps used on this card are very similar to those used on the book to create a cohesive look: Flourish Fun 2, Let's Eat Cake and Hey Cupcake.

I hope you have a joyous Mother's Day celebrating the mothers in your life and all those mothers out there I hope you are showered with love.

Take flight,
Shay.

Friday, March 16, 2012

Show and Tell: Flourish Fun and Flourish Fun 2

Good day peeps,

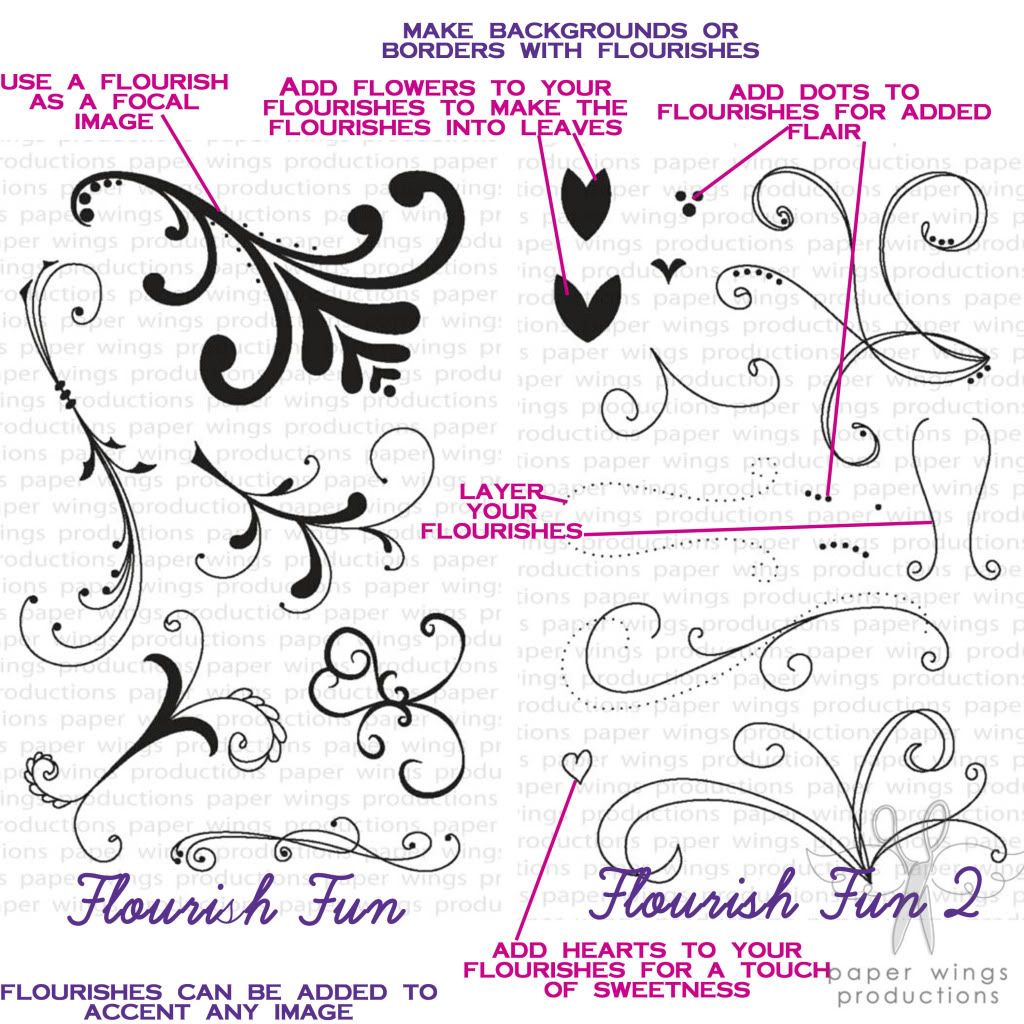
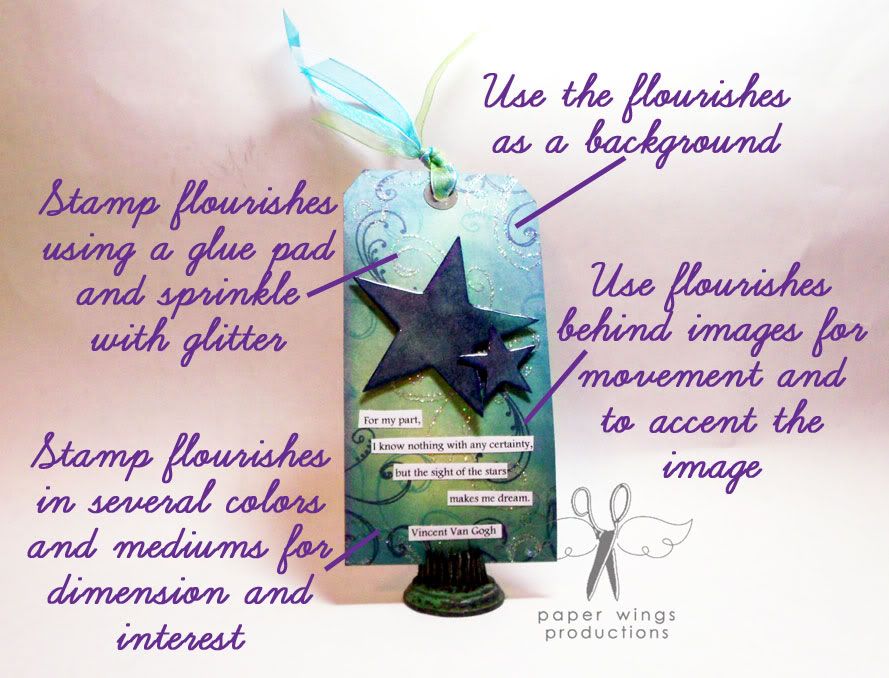
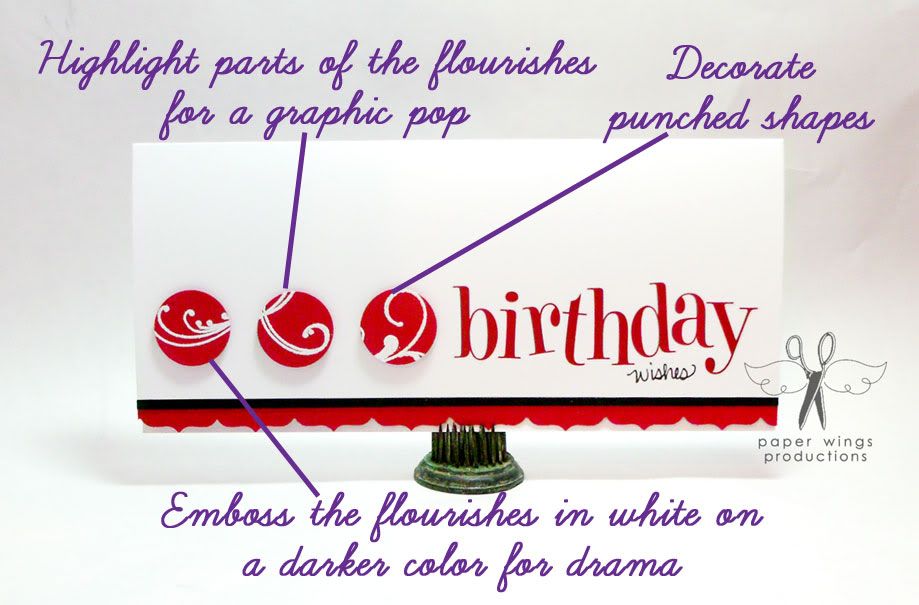
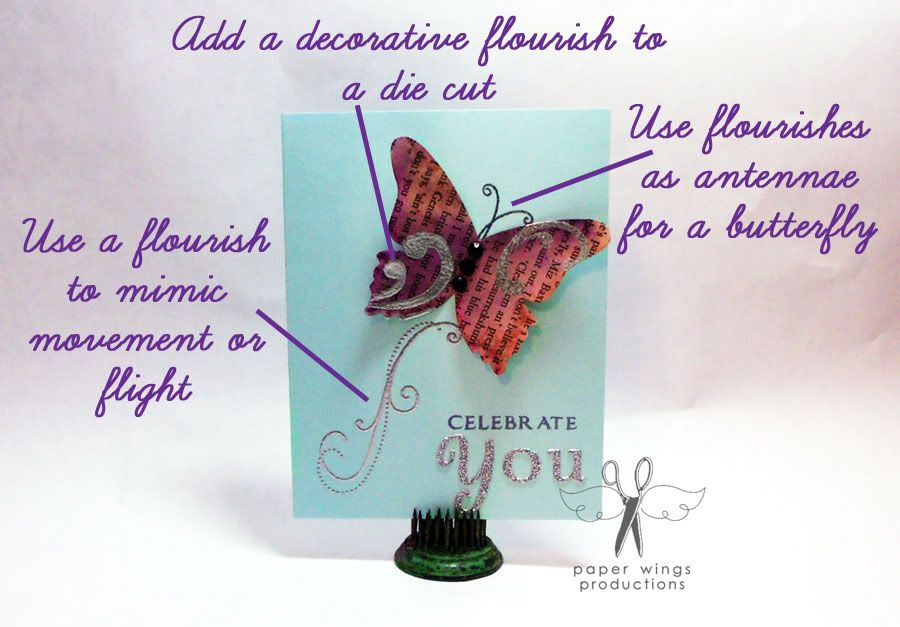
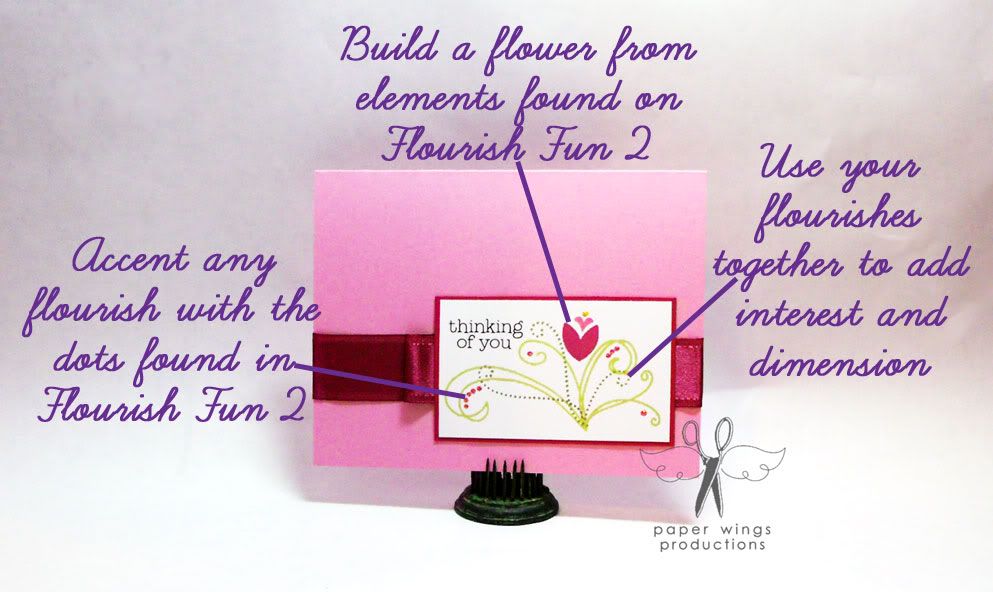
I finish up Show and Tell of Julie Mogford's stamps from our first release today with Flourish Fun and Flourish Fun 2.  I think of these stamps as workhorses as flourishes can be used in so many ways...Julie really outdid herself with her thoughtful designs.  Rather than just boring you with writing let's see the stamps in action in Julie's fantastic samples.


I hope this has encouraged you to put these flourishes to work!  Can you come up with some new ways to use Flourish Fun and Flourish Fun 2?  We would love to hear your thoughts and/or see what you have created.

Coming attractions: future installments of Show and Tell with the fabulous stamps by handmade by Lissie girl.  

Take flight,
Shay.

Thursday, March 15, 2012

Show and Tell: Whimsical Pattern Alphabet

Good morning peeps,

I am excited to do a Show and Tell for Julie Mogford's Whimsical Pattern Alphabet today.  All the samples for today's demonstration are courtesy of Julie Mogford.

In a very usable lowercase font, there are four fun alternating patterns which give any project a distinctive and playful attitude no matter what style you employ. 


I think Julie did a stellar job in showing how this alphabet can be used in all sorts of ways to give your projects a touch of whimsy.  What do you think of the Whimsical Pattern Alphabet? How would you use them?   

Take flight,
Shay.
Related Posts Plugin for WordPress, Blogger...