Showing posts with label Clip Art Sheets. Show all posts

Wednesday, November 22, 2017

Stamped Clip Art Christmas Ornaments

Stamped-Snowflake-Santa-Clip-Art-Christmas-Ornament-by-Dana-Tatar-for-Paper-Wings-Productions

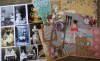
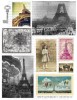
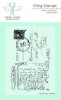
Hi friends! Dana here today sharing a fun Christmas ornament tutorial featuring Clip Art Sheets. All the Clip Art Sheets from the Paper Wings Productions Store are laser printed on high quality paper, which makes them great for image transfer techniques. I used pieces from the Itty Bitty Christmas Clip Art Sheet more simply for this project. I cut them out and sealed them with a layer of glaze for a festive focal point on some stamped snowflake ornaments.

How-to-Prime-Masonite-Snowflake-Ornaments-by-Dana-Tatar-for-Paper-Wings-Productions

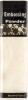
Step One: Prepare Masonite snowflake ornament blanks for stamping by applying a layer of white spray primer. Note: I chose a spray primer to quickly color the inside of the detailed cutouts on my snowflake ornaments. Gesso, acrylic paint, or embossing powder would also work for this step.

How-to-Stamp-on-Masonite-Snowflakes-by-Dana-Tatar-for-Paper-Wings-Productions

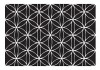
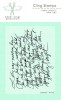
Step Two: Use the Writing Backgrounds Cling Stamp Set with red archival ink to add a script print to the snowflake ornaments bases.

Christmas-Clip-Art-Ornament-Assembly-by-Dana-Tatar-for-Paper-Wings-Productions

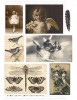
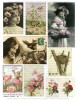
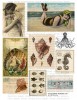
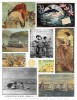
Step Three: Select several images from the clip art sheet and cut them down to size. Glue the clip art into the top layer of the ornaments.

How-to-Glaze-Clip-Art-for-Christmas-Ornaments-by-Dana-Tatar-for-Paper-Wings-Productions

Step Four: Cover the clip art images with a layer of glaze. Glue the clip art rounds onto the center of the snowflake bases.

How-to-Cut-Wire-Hangers-for-Christmas-Ornaments-by-Dana-Tatar-for-Paper-Wings-Productions

Step Five: Cut several lengths of wire. Bend and twist the wire into hangers and attach to the ornaments.

Stamped-Snowflake-Clip-Art-Christmas-Ornaments-by-Dana-Tatar-for-Paper-Wings-Productions

Step Six: Embellish the ornaments.

These ornaments look great on the tree, but they would also look fantastic as gift toppers. Be sure to visit the Paper Wings Productions Store to see the wonderful range of Christmas, Holiday, and Seasonal stamp sets.

Pin It!

Stamped-Snowflake-Christmas-Ornament-Tutorial-by-Dana-Tatar-for-Paper-Wings-Productions
Thanks for stopping by today and let your creativity take flight!

Thursday, July 24, 2014

Themed Thursday - Card Set


Hi there sweet friends. Marie Johansson here today showing you a card set made with the Tea Time July Nesting Components Mixed Media kit. Let me first tell you a bit about myself. I live in the north of Sweden with my partner and our two kids (10 & 6 years old). I have been scrapbooking since 2004 and my style has developed over the years to now days more fit under Mixed Media Scrapbooking. I love to use different mediums on my projects mixed up with various sorts of embellishments. You are very welcome to visit my blog to see more of my creations.

Both card has a brown cardstock as it´s base. I choose to use different patterned papers from the paper pad that comes with the kit. To match the cards I choose to use leftovers from one card on the other card. I also used the same ribbons, paints and gesso.


For this card I used one of the pictures from the clip art sheet. I have distressed it a bit on the edges to create texture. I don´t like my cards to flat. The ATC chipboard frame from Um Wow Studios made it´s way up on the top of the card. It´s partly covered with gesso. The Swirl stamps turned out nice stamped and embossed with white embossing powder. I have used the same techniques on the card below, gesso on the chipbard, embossing and splatters of mist and paint. It looks totally different though even though the material is the same.


After finishing my card I had some paper strips left. Instead of throwing them away, used them for a set of tags. I used the same materials on these as on the cards. 


Tuesday, March 25, 2014

Tutorial Tuesday - Packaging Tape Image Transfers


Hi Paper Wings Productions fans! Dana Tatar here today sharing a canvas album I created using some of my favorite techniques. I think that working with wet mediums and canvas is especially fun!


I drew inspiration from several of my favorite James Bond films when deciding on images and text for my pages. I used a fun image transfer technique to create transparent embellishments from the Paper Wings Productions Clip Art Sheets for my album pages that I'm excited to share with you!


To prepare the album pages, mist the canvas ATCs with water to moisten the surface of the canvas for maximum color absorption. Next, lightly mist the wet canvas ATCs with several colors of mist. Add colorful patterns to each ATC using stencils and paint. Embellish each stenciled design with dimensional paint and set aside to dry.


Cut images from the Clip Art Sheets. Place clip art images face down onto the sticky side of clear packaging tape. Press down firmly to seal.


Gently score the back of the clip art images with scissors and spray liberally with water. Let soak.


Gently rub the paper from the masking tape resulting in transparent images. Cut the images from the tape and stitch onto the canvas ATCs.


The transparent images allow the mist and paint on the background of the pages to shine through!


Use a label maker to print text for each ATC.


Tie the canvas ATCs together with a piece of Gypsy Hand Dyed Ribbon.


To cover the stitching I used to attach the clip art image transfers to the album, I stamped onto pieces of muslin with some of my favorite Background Stamps and glued them to the back of each canvas page with Liquid Stitch.

Thanks for stopping by today! We would love to see what you make with our Clip Art Sheets so add your projects to our Flickr Group or our Facebook page.


Related Posts Plugin for WordPress, Blogger...