Happy Friday peeps,
I know I am meeting this Friday with a great deal of relief. How about you? Are you too looking forward to the different pace of the weekend? Planning on doing some stamping?
Today I have the second part of the yellow, aqua and coral color combo. In this post are slightly larger projects than the cards from Wednesday.
Julie's project:
Julie made this timely (I could not resist that cheesy pun) art journal page using Flight Plan Mission 002 as a design guide. Julie first painted the pages with white paint and then she used watercolor crayons to create the gradient yellow and coral background. I love how she used Tim Holtz's tissue tape for the strips from the Flight Plan and that you can also see the color behind them. The frame was cut out using her Silhouette and she colored it in with a Distress Marker (barn door)--even though the color is a red I think it could read as a very deep, rich coral. Don't feel that the colors must match the color combo exactly...like the Flight Plan they are meant as a guide. Some reds and pinks will be reminiscent of coral for instance.
I am particularly taken with the punched circles that she stamped with various borders from Day Framer, Detail Framer, Life Framer and Snapshot Framer. The days of the week are from Snapshot Framer and the date are from the Life Framer.
How did she create those circles with perfectly coordinated colors of the stamped image and its background? Julie stamped each circle with one of the borders using Distress Inks in the following colors: tumbled glass, broken china, barn door, scattered straw. To color in the backgrounds she took the ink pad and pressed it into her craft sheet. She then sprayed or spritzed the ink she transferred onto her craft sheet with water (use a little water spray bottle) and used a paint brush to paint lighter shades of the color she stamped with onto the circles.
To add some aqua (or in this instance teal) to the bottom left hand portion of her page she placed a piece of patterned paper under the gold (yellow) and red (coral) chipboard letters.
To future compliment her theme of time she stamped the clock from Melange Women 2 (I think) down the left hand side of the page.
Shay's project:
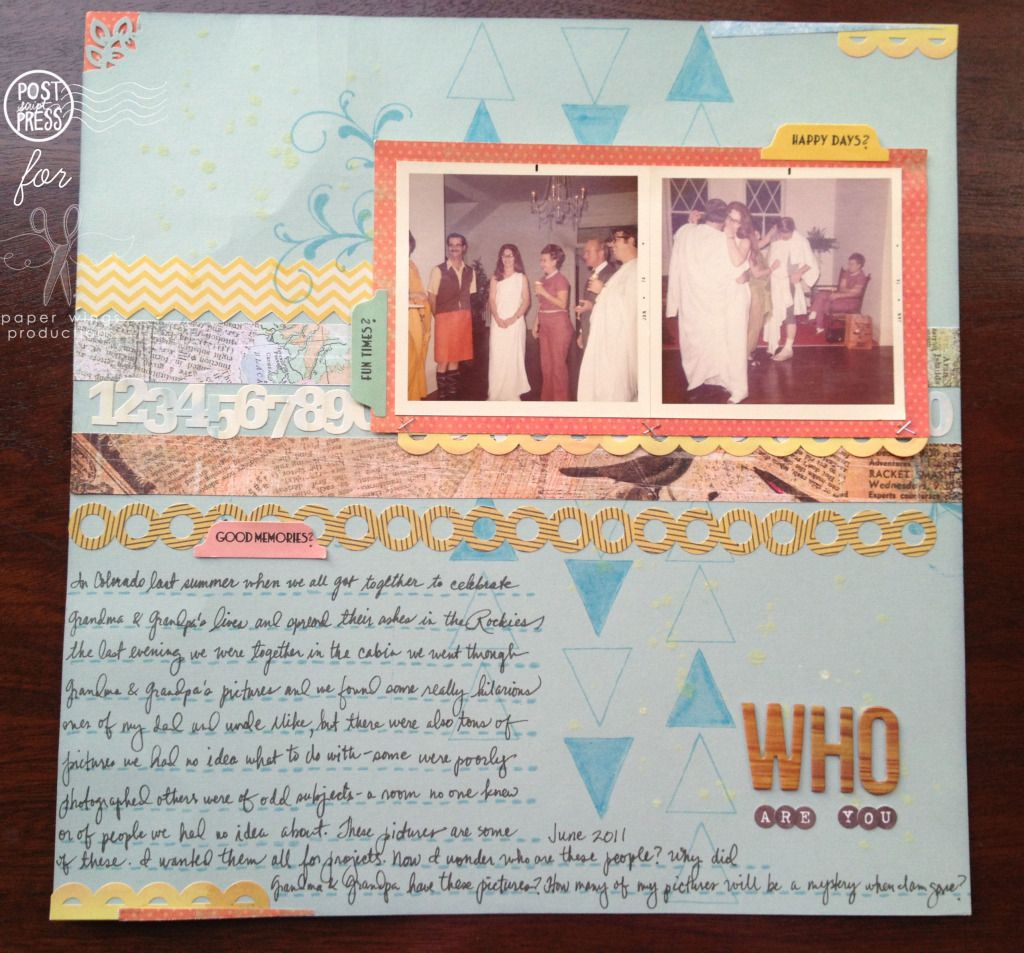
I decided to try my hand again at scrapbooking. I haven't done a 12x12 spread in ages, but with a color combo and using the Flight Plan Mission 002 I thought I would give it a try. The main point of this layout is the journaling because the pictures although really cool are a mystery. Another thing that helped me to tackle something I was pretty unfamiliar with was a scrapbook kit from Studio Calico (Glee Club from September 2011 which had the right colors and elements I really liked). I think it is always important to realize that you need not do it all. There are all sorts of ways to help you to create like sketches (like our Flight Plans), color challenges (like our color combo) and/or ready made kits. I also added a sticker sheet from October Afternoon which were in the right colors to pile of supplies to use along with some cream Mister Huey's (reads as a pale yellow color) which I used in the upper left hand side and lower right hand side.
In my scrapbook layout I think of stamping as the foundation. I created lines of triangles that remind me of arrows using the large pennant from Happy Day to act as the strips from Flight Plan Mission 002, but also for movement and to direct the eye to the pictures. I colored in a few odd triangles with an aqua colored marker. I didn't realize until later that the triangles mimic the diamond pattern of the window in the right hand picture. Happy accidents which no one but you has to know was unintentional...tell people you meant to do it! I added the flourishes from Flourish Fun 1 under the upper left hand corner and lower right hand corner of the photo block for some interest and more of an organic feel after so many more angular elements. All of my journaling was written on journal lines created from one of the border stamps from Day Framer...this border is perfect for journaling lines as you can stamp it over and over to make the line as long as you need it.
You probably noticed that my yellows, aquas and corals on this layout are a bit dusty or aged which is perfect for the older pictures whereas Julie's colors are more saturated and brighter reflecting a happy feeling. You can always use variations on the colors to reflect your story or project.
I hope you have the chance to play and experiment with something new or unfamiliar this weekend perhaps trying a new product, some stamps that you have been meaning to ink up, a different color combination than usual or a new technique. We would love to see what you do! Share with us on this post, our flickr group, Pinterest, Instagram (our user name is: paperwingsproductions), Twitter or Facebook!
Come back next week for some more Paper Wings Productions projects.
Take flight,
Shay.
Friday, May 18, 2012
Wednesday, May 16, 2012
Color Combo, Part I
Hello there peeps,
This week Julie and I bring you a few projects using the same summery color combo. Today are a couple of cards using yellow, aqua and coral based upon Flight Plan Mission 002.
Julie's card:
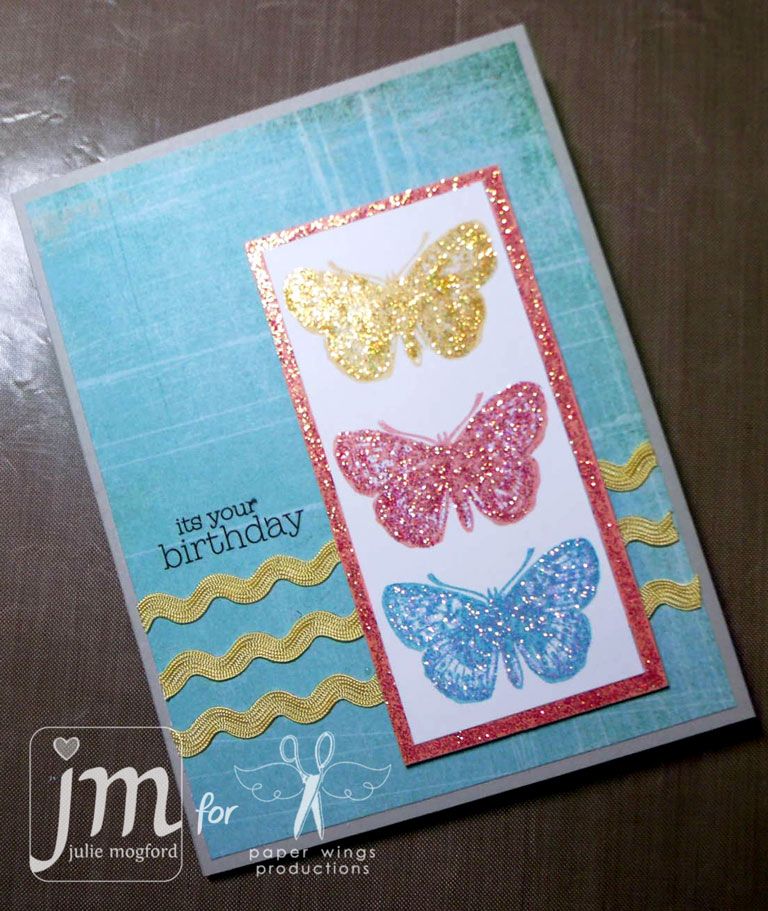
Julie made this pretty birthday card using the butterfly image from Carrie's Butterfly Panel. Did you notice how cleverly she used the yellow ric-rac as the strips in Flight Plan Mission 002? By stamping the single butterfly image three times in the three colors it makes a bigger impact further heightened by the use of coordinating colors of stickles. The birthday sentiment is a rub-on from her stash. Julie balances all the colors by using them each in the butterfly panel and then again in the rest of card. The white panel is framed by a shimmery rectangle of coral while the ric-rac is yellow and the main background is aqua.
Shay's card:

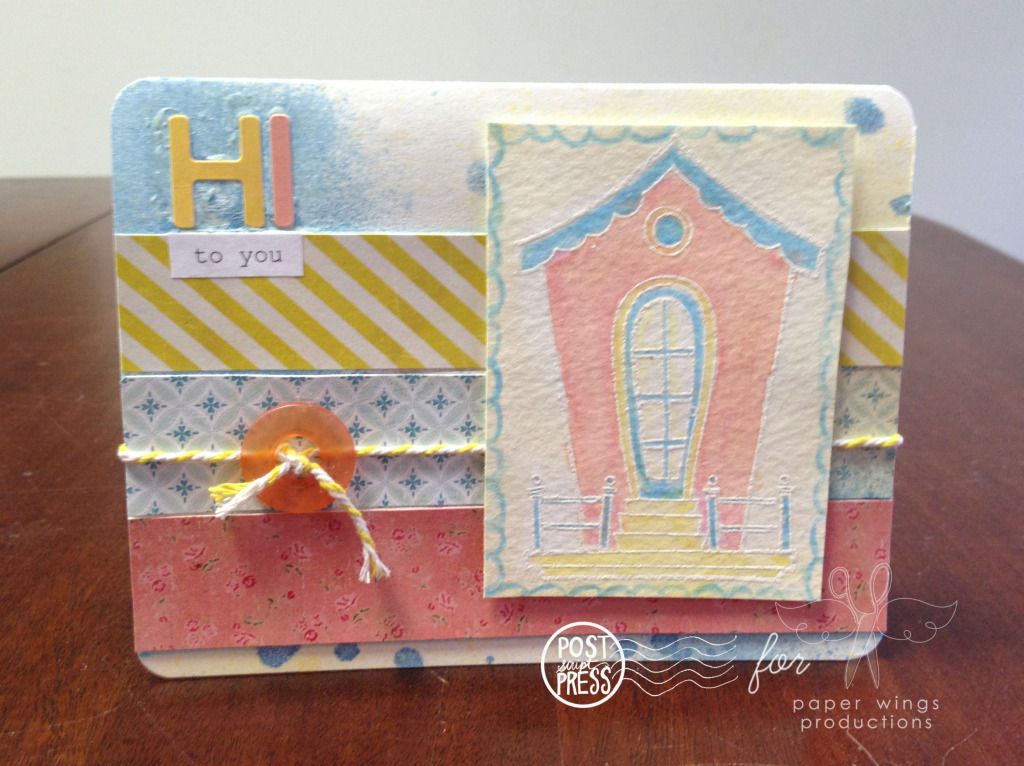
My any occasion card is a bit more
We would love to see what you create with this bright and happy color combo. Feel free to share on flickr, Pinterest, Facebook and/or here on this post.
See you again Friday with some more yellow, aqua and coral creations.
Take flight,
Shay.
Sunday, May 13, 2012
Mother's Day Part 2
Hey Peeps!!!
Hope all of you are enjoying Mother's Day. I have a few samples to share with you, and like Shay, I used the Flight Plan-Mission 002 as my guide, but there are several variations. I used images die cut using my Silhouette and stamps from various paperwings stamp sets.
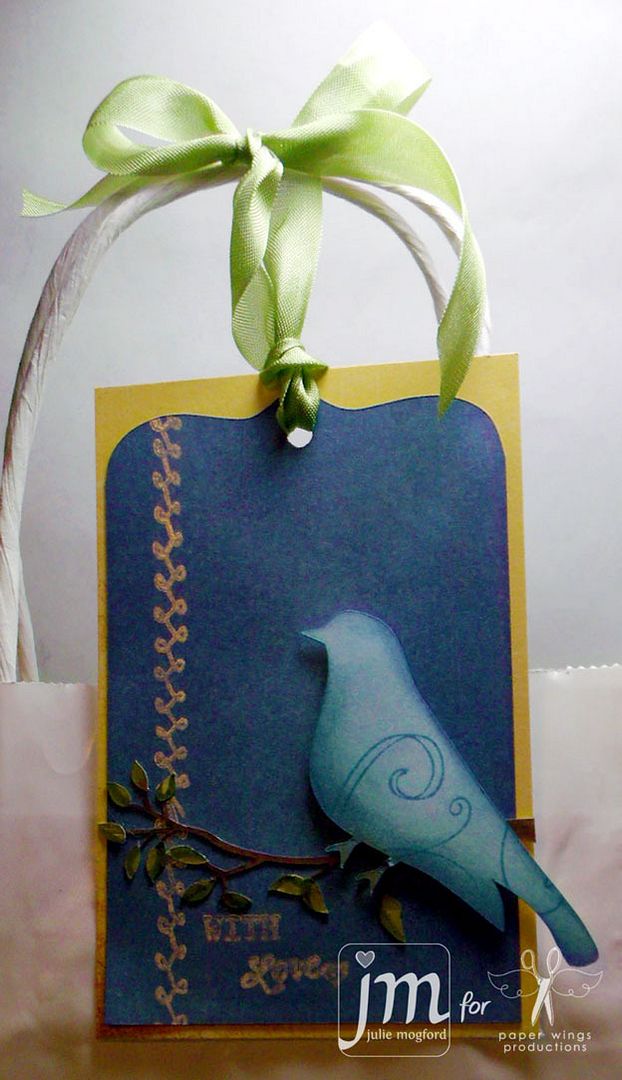
You will notice throughout these samples I have used Flourish Fun 2 stamps on the birds (and backgrounds later), and the cute border from Life Framer for accents. Here on the tag I have also added the sentiment using words from the Snapshot Framer set.
Hope all of you are enjoying Mother's Day. I have a few samples to share with you, and like Shay, I used the Flight Plan-Mission 002 as my guide, but there are several variations. I used images die cut using my Silhouette and stamps from various paperwings stamp sets.
You will notice throughout these samples I have used Flourish Fun 2 stamps on the birds (and backgrounds later), and the cute border from Life Framer for accents. Here on the tag I have also added the sentiment using words from the Snapshot Framer set.
I like having these gift bags on hand, and using the same elements resized, I have turned plain into cute and clever. This time, I have three green grosgrain ribbons representing the vertical stripes from the Flight Plan, and the image is the bird and branch. For the sentiment, I used words from the Banner set from Handmade by Lissie Girl, and the frame from the Details Framer set. These Framers sets are so great. There are so many elements packed into each of these sets and they can be used on so many projects - Ms. Shay really worked some magic on these. I keep them on my desk AT ALL TIMES. :)
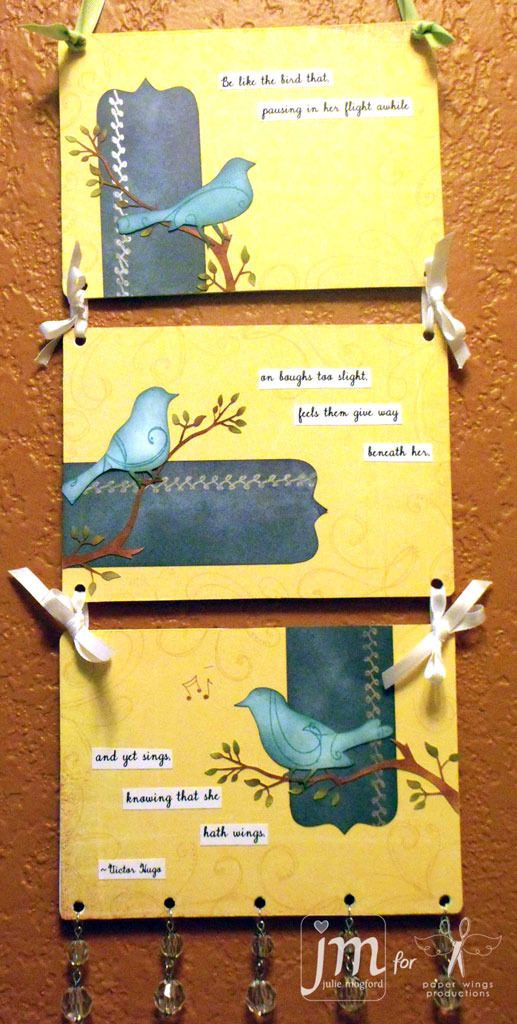
And finally - the gift. A wall decor item using more of the birds and a few items from my stash of goodies. On each panel, you can see the Flight Plan, but I chose to flip it several times to give it some interest. That is a great way to take one of our templates and make it your own.
We hope you are inspired by the samples here at the Aviary, and would love to see your take on the Flight Plan - Mission 002. Be sure to post them on the Paper Wings Flickr Group and enter for a chance to win!
Keep Stamping Peeps!
Julie
Friday, May 11, 2012
Mother's Day
Happy Friday peeps,
Sometimes our best intentions are tread upon by everyday happenings and trying to get what must be done right now done or perhaps by circumstances beyond our control. Perhaps you are now wondering what to give this Mother's Day. Today I have an easy and customizable handmade gift and card you can give your mother or another important maternal figure in your life (including yourself!) for Mother's Day that can be done in an hour or less (or more depending on how elaborate you make it).
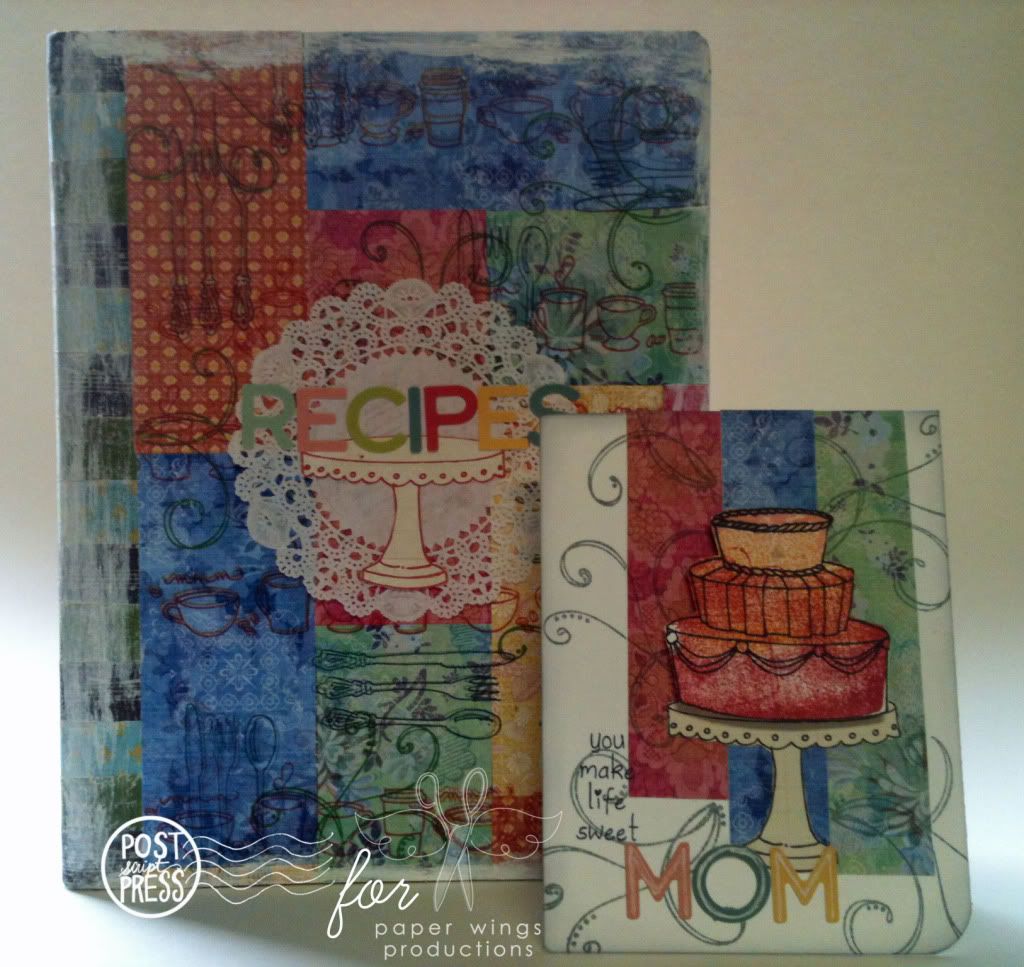
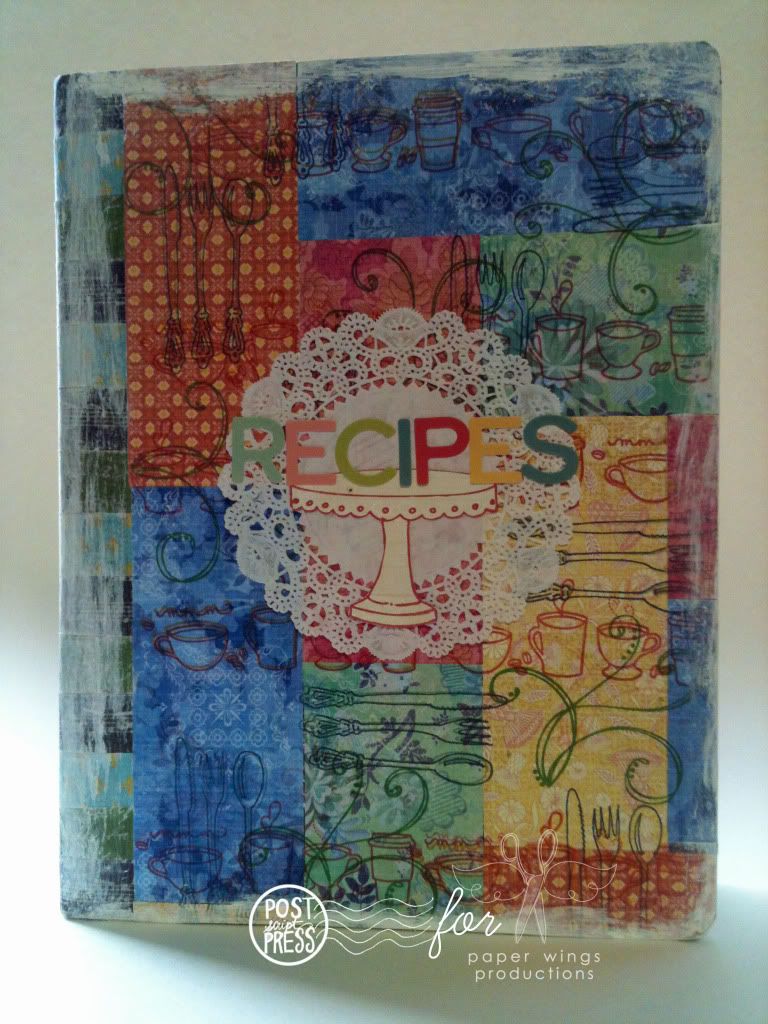
Using a simple, inexpensive and readily available composition book I customized the cover using 7Gypsies patterned tape, patterned paper, Paper Wings Productions stamps, a doily, letter stamps and gesso around the edges to mute some of the crazy color and patterns I used. For my book I wanted to do a recipe book, but you could change it to be a goals book, travel journal, gardening book, weight loss journal, reading log, place for notes or ideas, etc. depending on what your mother, grandmother, sister, aunt, mother-in-law, friend or any other important woman in your life (likewise you could do the same thing for the men in your life too).
Sometimes our best intentions are tread upon by everyday happenings and trying to get what must be done right now done or perhaps by circumstances beyond our control. Perhaps you are now wondering what to give this Mother's Day. Today I have an easy and customizable handmade gift and card you can give your mother or another important maternal figure in your life (including yourself!) for Mother's Day that can be done in an hour or less (or more depending on how elaborate you make it).
Using a simple, inexpensive and readily available composition book I customized the cover using 7Gypsies patterned tape, patterned paper, Paper Wings Productions stamps, a doily, letter stamps and gesso around the edges to mute some of the crazy color and patterns I used. For my book I wanted to do a recipe book, but you could change it to be a goals book, travel journal, gardening book, weight loss journal, reading log, place for notes or ideas, etc. depending on what your mother, grandmother, sister, aunt, mother-in-law, friend or any other important woman in your life (likewise you could do the same thing for the men in your life too).
Because I chose to do a recipe book I chose to go with food/drink themed stamps like the coffee border in Play With Your Coffee by Julie Mogford and the silverware from Hey Cupcake by handmade by Lissie Girl. I also added a flourish from Flourish Fun 2 for an added interest. The cake stand is from Let's Eat Cake also by handmade by Lissie Girl.
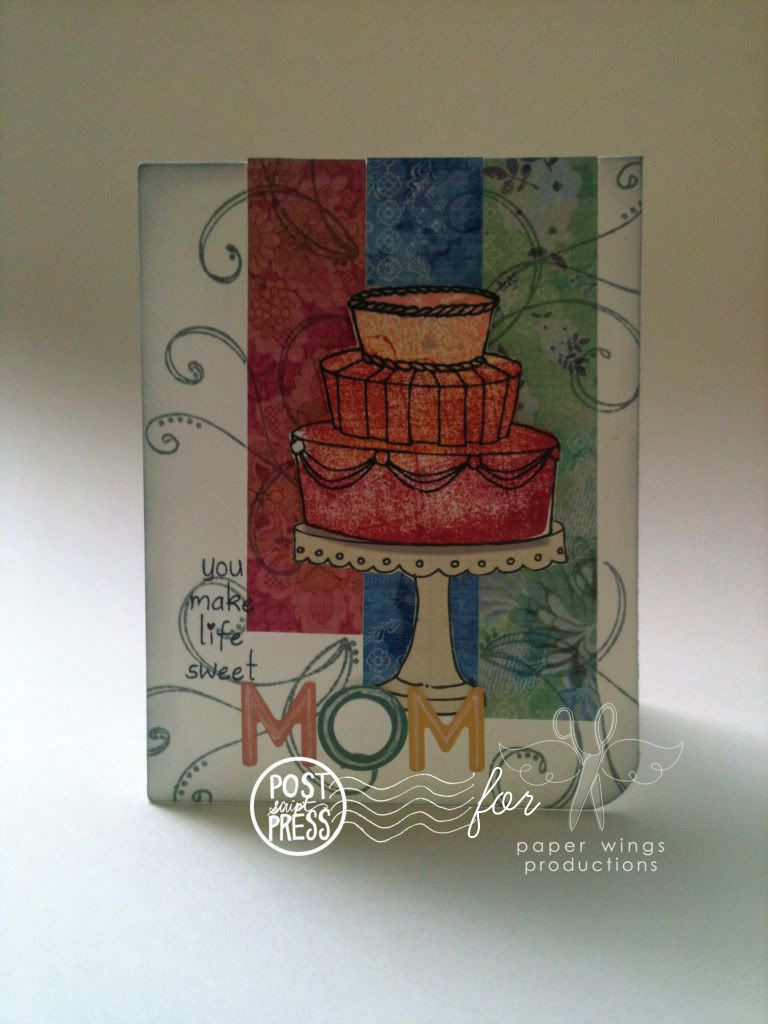
Did you notice that the accompanying card uses Flight Plan Mission 002?
By using the Flight Plan I could take the guesswork out of coming up a layout and spend my time on the rest of the card. For the cake I actually stamped the backside of the image using 3 colors of ink and then over-stamped it with the right side of the cake image in black. I think it creates a cool effect. The stamps used on this card are very similar to those used on the book to create a cohesive look: Flourish Fun 2, Let's Eat Cake and Hey Cupcake.
I hope you have a joyous Mother's Day celebrating the mothers in your life and all those mothers out there I hope you are showered with love.
Take flight,
Shay.
Friday, May 4, 2012
Monthly paper wings productions class at Stamp Antonio
Join us tomorrow at Stamp Antonio Arts for our monthly Paper Wings Productions workshop. This month we will be constructing a bracelet that has shrink plastic charms that are done in a unique manner that makes them look like glass. Call 210-764-7900 to sign up.
Flight Plan: Mission 002
Hello peeps!
It's Julie again! I can't believe it is already May, can you? April went by so fast. The Paper Wings gals really enjoyed looking at the submissions for April and can't wait to see what this month's Flight Plan will inspire you to create. Are you ready? Here we go...
It is a guide of sorts to get your project started by giving you some guidelines to follow, but in our case, we hope your creativity will interpret these plans into amazing and clever new creations. We’d love to see your finished pieces, so we have set up a Flickr gallery where you can share your submissions with us. So, put on those paper wings and get ready to take flight!
Your Mission:
- Share a picture of your project on our Flickr group. Make sure to tag it using this code: FP002. If your picture is not tagged we will not know it has been entered into the challenge.
- You have until Thursday, May 31, 2012 at 11:59 p.m. central time to post your entries.
- Enter as many times as you wish before the deadline.
- We will choose a winner to receive their wings and a stamp set of their choice.
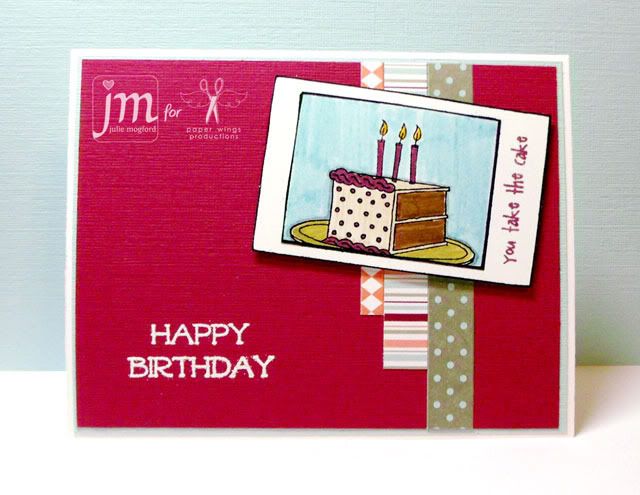
Julie's Sample: This time I chose to use a literal translation of the Flight Plan. The Snapshot Framer and Let's Eat Cake sets made quick work of this clean and simple birthday card. I like this style, and with a few color changes, would be a perfect card for the birthday guy in your life.
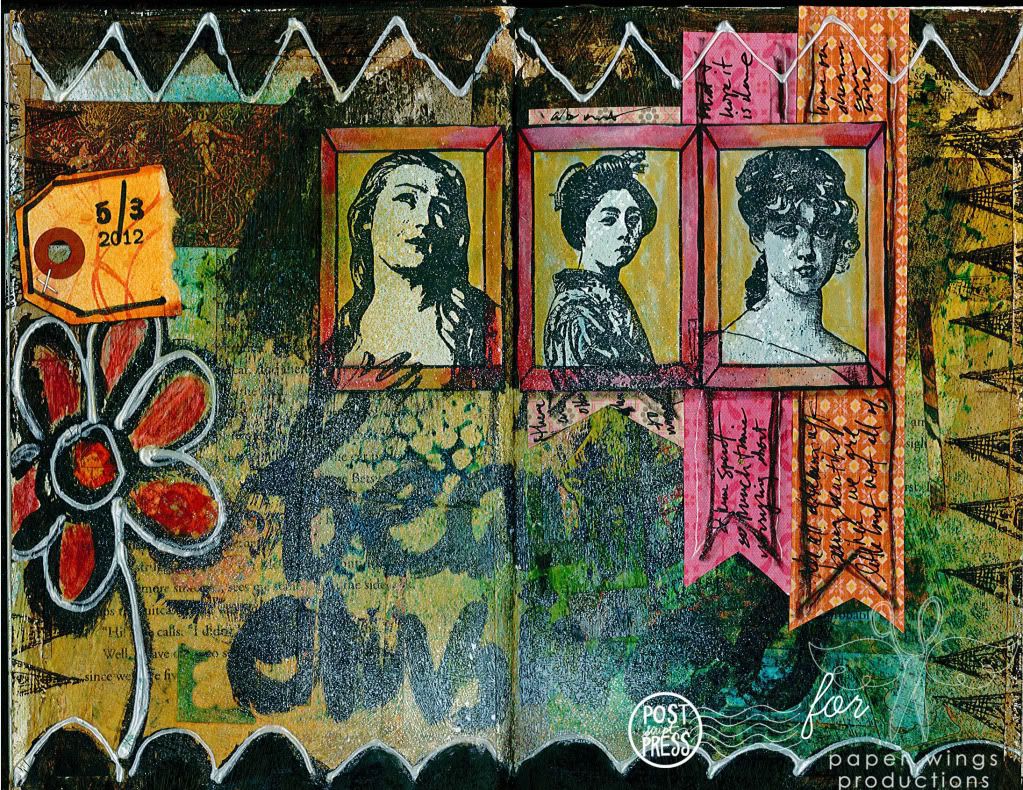
Shay's Sample: My interpretation is pretty literal too as an art journal page. I decided to use three framed ladies to created the large block and used pattern paper strips behind the framed ladies for journaling. I was able to use a few stamp sets...one was a leftover scrap from my first canvas. Waste not, want not! Stamp sets used: Melange Women (this one I use a lot), Geishas, Melange 4 -Architecture (I used the fairie panel and the tip of the pointed building on the left and right hand edges--fun find), Flourish Fun 2 (as background on the little tag) and Life Framer (the frame image, but also the numbers and year on the little tag).
We look forward to seeing your creations!
Happy Stamping!
Julie
We look forward to seeing your creations!
Happy Stamping!
Julie
Tuesday, May 1, 2012
Flight Plan: Mission 001 winners
Hello Peeps!
We are proud to announce the winners for the April submissions! These projects were so great!
Zenda and Jill, please contact Shay at shay@paperwingsproductions.com with the name of your choice of stamp set. Congratulations!
Hope to see you all for Mission 002 later this week!
Happy Stamping!
Julie
We are proud to announce the winners for the April submissions! These projects were so great!
This first winner is Zenda Weaver! For her project, she has used stamps from both the Milagros and Muertos sets. I love the addition of the wings to the Frida image. Bold, dramatic, striking color choices which reminds me of Frida herself. Nice!
Our second winner is from Jill, aka collected mess, and she has used the borders and sentiments from the Details Framers set in such a unique way. The repetition of the scallop border in a variety of colors makes a very clever and fun background. And if you look closely, you will also see the x border used to accent the letters in LOVE. What a fun tag!
Zenda and Jill, please contact Shay at shay@paperwingsproductions.com with the name of your choice of stamp set. Congratulations!
Hope to see you all for Mission 002 later this week!
Happy Stamping!
Julie
Subscribe to:
Posts (Atom)