Showing posts with label play with your coffee. Show all posts

Wednesday, December 27, 2017

sending you warm wishes

Hello! Ashley here today I'm sending you warm wishes - because I need them myself. It's 5 degrees here today and it literally hurts to go outside.


For this "warm wishes" card, I used two stamp sets: Play with your Coffee and Winter Mix it Up. I adore this little border of coffee cups in the Play with your Coffee stamp set. So cute!

I used distress ink + watercoloring for the background. I heat embossed my stamp and my sentiment. Here is a close up of the stamping:

Thanks so much for looking! I hope you're all staying warm!

Wednesday, November 29, 2017

cocoa warms the heart

Hi everyone! Ashley here today sharing a cup of warm cocoa! 

I made this card using the Play with your Coffee and Frothy Concoctions stamp sets. 

The first thing I did was run my background through my Grand Calibur. I chose this layered heart embossing folder because I knew my sentiment would be 'cocoa warms the heart' from the Frothy Concoctions stamp set and I wanted a play on words. Next I watercolored the background with distress inks.


I stamped my coffee cup from the Play with Your Coffe stamp set onto patterned paper and fussy cut it. I stamped some marshmallows on white cardstock and fussy cut those before adding them to my cup with foam adhesive.


Then I used foam adhesive to place my cup of cocoa on my embossed heart background.


Thanks for looking!

Tuesday, January 19, 2016

Coffee makes everything better

Hello friends. Larissa here with a card I made using Playing with you Coffee stamp set.

I started off by stamping one of the coffee cups from the set onto a piece of 110 lb white cardstock.
I then colored the cup using Copic markers. I used BG000, BG13, BG14, BG72, E31, E33.
I then cut the cup out using a pair of detail scissors.


 I found some pattern paper in my stash that matched pretty well. I cut two piece of pattern paper and then matted them both.


The sentiment is from the same set.

I hope you enjoyed my post today. Be sure to check back to see what the rest of the Design Team has created for you. 

Have a wonderful day.

Larissa
Muffins and Lace

Thursday, December 17, 2015

A Coffee Christmas

Hello friends. Larissa here today with a little different spin on a Christmas card. I used the stamp set Play with your Coffee.

I stamped the the cups on top of each other and colored them using my Copic markers. 
I used: G02, YG09, G07, G28, R24, R27, R29, R46, E55, E23. 

I stamped the Merry Christmas sentiment from the set Say It Winter Greetings 


To finish off the card front I added a few red and green sequins. 

I hope you enjoyed my post today. 

Have a wonderful day and rest of your week. 

Larissa

Thursday, November 5, 2015

Warm Winter Wishes


Hello friends. Larissa here with a warm winter wishes card for you today.  I am actually using 3 different stamp sets for this card.
I stamped the cups "Playing with your coffee" on a piece of kraft cardstock and colored them using Spectrum Noir markers.
I then stamped each cup with a different stamped image from the "Holiday Add Ons" set.


For the sentiment I used the stamp set "Say it Winter Greetings" and heat embossed it with white embossing powder. 

For the inside of the card I added another cup also colored with Spectrum Noir markers and left it blank to be able to write a note if I wanted. 


I hope you enjoyed my card today. Have a wonderful day friends. 


Tuesday, September 29, 2015

A Latte Love...

Happy Tuesday all! Pam here today to share another fun project using Paper Wings Productions fantastic stamps!
Fall is here in New England and there is a crispness in the air-great fall days for hiking and of course my favorite lattes!
So I thought I would create a project this week using the Frothy Concoctions stamp set:


To create this card I did a lot of stamping,fussy cutting and paper piecing-giving each portion of the latte cup some texture. White woven paper was used for the lid, cork for the sleeve and patterned paper for the cup itself. 


This is one of two fabulous coffee themed sets from PWP, the other is Play With Your Coffee - be sure to check them out online at the store!
Nothing like coming in from a cool fall walk outside and having a yummy latte!
Thanks for joining me again this week and be sure to check back often for more DT inspiration with the PWP stamps!

Wednesday, January 21, 2015

Stamped Fabric Tutorial

Hey everyone, Katie here! Today I wanted to share with you this stamped fabric I made! I made a bunch of hand printed fabrics like this for my Mom for Christmas (she's a quilter!) and they turned out so awesome, I wanted to show you how I made them.


I used the Tea time stamp set and the Play with your Coffee stamp set to create this tea themed fabric.

You'll need fabric paint (or a good ink that is permanent on fabric), a stamp, acrylic block and a palette.


1. Spread out a little fabric paint onto your palette and press your stamp into it like you would an ink pad.


2. Stamp your design onto your fabric just like you would paper!


I started by stamping my largest stamp (the big teacup) a few times around my fabric, and then filling the blank areas in with smaller stamps.


Thanks for stopping by, remember- let your creativity take flight!

Tuesday, June 24, 2014

Tutorial Tuesday

*****To join our June Challenge: Chipboard and/or Wood Veneers, CLICK HERE*****


Hey guys, Katie here! Happy Tuesday! It's tutorial Tuesday here at PWP so I wanted to show you how I stitched my stamp design on this card. I used my favorite Play with your Coffee stamp set that I use so often.


1. Stamp your design onto your piece of paper, I used the Play with your Coffee stamp set. I used a tag that I added watercolor to. I also colored in my design with watercolor pencils.


2. Use a small awl or embroidery needle and punch equally spaced holes along the stamped lines. I also used an embroidery mat that helps your holes come out clean (by Amy Tangerine).


3. Use a needle and embroidery thread to stitch through your holes. If you're new to hand stitching, here's a great resource for learning the basic stitches.


When I was creating my card, I chose a fun piece of patterned paper and then stamped the flower from the Sacred Geometry stamp set onto the background. After that, I just added my stitched tag and some bling!

We love to see what you have created with the Paper Wings Productions products so please tag us on Facebook or Instagram and you can always up load your projects to our Flickr gallery.  Have a wonderful day and remember to let your creativity take flight!

Wednesday, June 18, 2014

What's Up Wednesday

*****To join our June Challenge: Chipboard and/or Wood Veneers, CLICK HERE*****


Hi guys, Katie here for What's Up Wednesday!


Today I wanted to share with you these 2 cards I made using my *favorite* Paper Wings Productions stamp- the Play with your Coffee stamp. I did a post here back in January sharing some cards I made with this stamp, which you can see here.

For these 2 cards, I wanted to stick to a certain color scheme, so I found this one on pinterest. The cup of tea on it is perfect, right? I love the color scheme and I tried to use only those colors on my cards.
I used the borders from the Snapshot Framer stamp set to create a "surface" to stamp my cups onto to, almost like a table.


Thanks for stopping by! While you're here, take a minute to read some of the other posts by the design team and enter our current monthly challenge!


Thursday, January 23, 2014

Themed Thursday: Coffee and Tea Cards


Hey, it's Katie from Punk Projects! I just got the awesome Play with your Coffee stamp set and the Frothy Concoctions stamp set so for today's Themed Thursday I am featuring Coffee and Tea themed cards.

For my cards I used the coffee stamps, but I also used supplies from the January Nesting Components Kit. I loved the Cosmo Cricket paper pad included in the kit, it worked perfectly for making the card bases. I also used the pretty Lace stamp in from the kit on a couple of these cards. I love how it looks like vintage lace.


First up are my Tea themed cards. To turn the coffee cups into tea cups all you have to do is add a tea bag tag. On one of the cards I just doodled a little tag, but on the other I made a paper tag and attached it with twine so it's 3D.

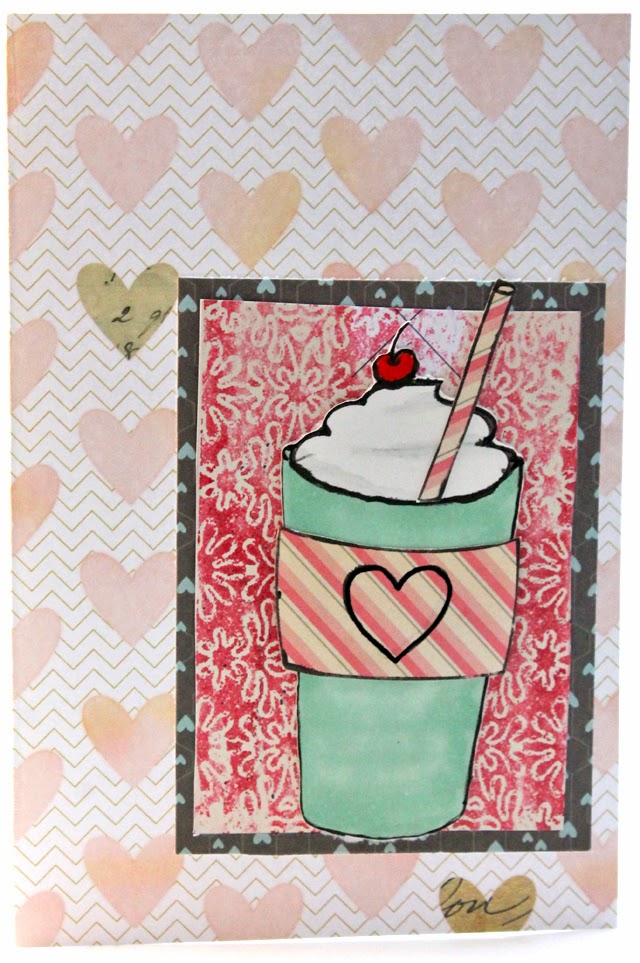
Here are my 2 Coffee themed cards: I used a coffee cup on one, but for the other I chose to have fun with the frappuccino cup. I stamped the cozy and the straw on patterned paper and added them on for fun texture. I love the different add-ons for that stamp.


Are you more of a coffee lover or tea lover? I, personally, am all about the Tea!
While you're here, be sure to check out some of the other creative projects on the blog like Norma's beautiful Wooden Plaque, Dana's Creative Girl Card, Cathi's Vintage Clip Art Cards, and Erica's Lovely Layout.

We would love to see what you make with Paper Wings Productions Stamps so add your projects to our Flickr Group or our Facebook page. You can also find Paper Wings Productions on PinterestTwitter and YouTube

Wednesday, March 13, 2013

Celebrating You


Hello Everyone! It's Amber here sharing a card featuring the Play With Your Coffee Clear Stamp Set and the Lets Eat Cake Clear Stamp Set.


I decided to keep it clean and simple today. I started by stamping the coffee cup onto a square piece of white cardstock and a scrap piece of patterned paper. While I had the ink out I also stamped the steam onto a scrap piece of vellum and stamped my sentiment onto a pink piece of die cut cardstock.  I colored the coffee and then paper pieced the coffee cup adding the stamped piece of vellum under my patterned paper. After that I cut and distressed a piece of buttercup cardstock, matted my image, stitched around the edges, and then added my sentiment to the right side.

Supplies: Cardstock- White, Pink, Buttercup / Patterned Paper- Studio Calico Country Side Collection / Paper Wings Productions Clear Stamps Sets- Play With Your Coffee & Lets Eat Cake / Staz-On Ink Pad- Jet Black / CTMH Marker- Bamboo / Sizziz  Die Cut- Tags / Sulky Thread- Light Teal / Vellum / White String/ CTMH Edge Distresser


Related Posts Plugin for WordPress, Blogger...