Showing posts with label June mixed media kit. Show all posts

Wednesday, October 23, 2013

What's Up Wednesday: Vintage Fairy Cards


Hello! Cathi here over in Ireland!!
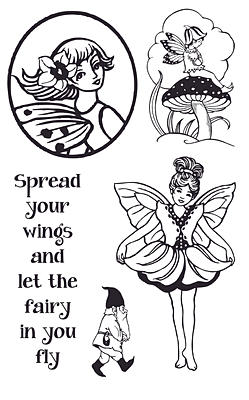
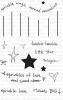
For my What's Up Wednesday post I want to showcase two new stamp sets:
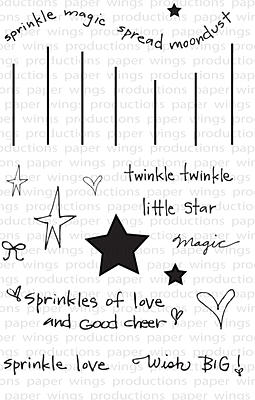


If you know me, you know I love all things vintage, so I had to make some vintage cards. I challenged myself to use things only from my Paper Wings Productions Nesting Components kits as well! Luckily the June Nesting Component Kit came full of gorgeous Pink Paislee Hope Chest goodies, including the 6x6 papers that I used here!


My first card I did uses an image from the Fairies Clear Stamp Set. I stamped it onto the Hope Chest paper and colored it in with Chipped Sapphire and Old Paper Distress Inks. The glittery stars and the sentiment came from the Hanging Stars Clear Stamp Set. I used a gorgeous Prima vine that came from my September Nesting Component Kit. I finished it off with some Martha Stewart small butterfly punches.


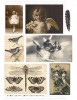
I love using vintage images, so I just had to take one from the Winged Things Clip Art Sheet, this little fairy girl is just perfect for the sentiment I took from the Fairies Clear Stamp Set. The velvet ribbon is from the April Nesting Component Kit, which has sold out! I used my sparkly embossing powder to emboss the edges of the vintage image for a great antique touch.

Thanks so much for looking, I hope my cards have inspired you to look into the gorgeous stamp sets, vintage images and mixed media kits Paper Wings Productions stock.

There are a lot of gorgeous Halloween projects being posted on the Paper Wings blog this month, here is a vintage card I made earlier this month with Paper Wings Stamps and images, more details here.


Norma has done a great Halloween Tag and Dias de los Muertos Layout!


Hope you come visit the Paper Wings Productions shop and check out the kits and stamps!!


Tuesday, July 23, 2013

Tutorial Tuesday - Embossed Foil


Hi! Dana here today sharing a quick and easy way to add dimension and color to your projects. I created the card with the July Nesting Components Mixed Media Kit. If you love the sand, sun and surf, you're going to want to pick up this kit! I feel home when I'm on the beach, and that was my inspiration for my project.

My favorite items in this kit are the metallic accents from the Pink Paislee Luxe Circles and Rub-Ons and the Lindy's Stamp Gang Madonna Robe Blue Gold Two-Toned Embossing Powder. I thought it would be fun to play up the metallic elements in the kit so I embossed a piece of aluminum and added color with the Madonna Robe Blue Gold Two-Toned Embossing Powder.


Step One: Add watermark ink directly to the inside of the embossing folder, slip the piece of aluminum inside the folder and run the folder through an embossing machine. Remove the aluminum from the folder, sprinkle with embossing powder and heat to set. Note: If you are using an aluminum sheet, the metal will become very hot upon heating, so please be careful! Depending on which side of the embossing folder carried the watermark ink, either the embossed or debossed area will be colored.


Here is what my piece of aluminum looked like after embossing.


Step Two: Using the Seaside Cling Stamp Set from the July Kit, stamp the sentiment onto a piece of cardstock. Punch the sentiment from the cardstock with a shaped frame die. Apply ink to the sentiment using a sponge dauber and the metal die as a guide.


Step Three: Select a piece of patterned paper for the card base, I'm using a piece 6x6 cardstock from the Pink Paislee Hope Chest Collection that I had leftover from my June Nesting Components Kit, and randomly apply circles and stars from the Pink Paislee Luxe Rub-Ons Set.


Step Four: Assemble the base of the card. Add some chipboard pieces from the Pink Paislee Luxe Circles Set across the center of the card.


Step Five: Add an image from the By The Sea Clip Art Sheet, the stamped sentiment from Step Two and other embellishments to finish the card.

Thanks so much for stopping by today! You can pick up the July Kit, as well as the previous June Kit that I used for this project, from the Paper Wings Productions Store while supplies last!


Monday, July 1, 2013

Mixed Media Monday - Mystic Assemblage Piece with Dana

Hi PWP fans! Dana here today sharing a fun assemblage piece I created with the July Nesting Components Mixed Media Kit. If you love the sand, sun and surf, you're going to want to pick up this kit! I feel home when I'm on the beach, and that was my inspiration for my project.


My favorite items in this kit are the metallic accents from the Pink Paislee Luxe Circles and Rub-Ons and the Lindy's Stamp Gang Madonna Robe Blue Gold Two-Toned Embossing Powder.


Like all Nesting Components Mixed Media Kits, a fabulous Paper Wings Products Stamp Set is part of the kit! The Seaside Cling Stamp Set is beach themed and features a gorgeous script quote. I used a portion of that stamp on my piece.


I created my own embellishments with glass beads and images from the clip art sheet. I built up layers of circle elements with the Pink Paislee Luxe Circles and gold circle rub-ons from the Pink Pailsee Luxe Rub-On Set. I also used the Studio Calico Huey's Circles Mask and Prima Glitter Gems from previous kits.


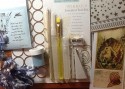
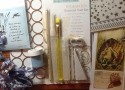
I mixed up my own mist using a Gelato and the Misting Bottle from the Faber-Castell Essential Tool Kit from the kit.

One of my favorite features of the PWP Kits is how well they all work together. I started this project with a piece of cardboard packaging and leftover supplies from my April, May and June Mixed Media Kits.


I was thrilled to find a Faber-Castell Essential Tool Kit in the July Kit! These tools came in handy for this project in a big way! I primed my cardboard with a light coat of Gesso, which I had leftover from the April Kit. I then added circles using the Mr. Huey's Mask and some cloud rub-ons, leftovers from the April Kit, and a piece of torn patterned paper from the Pink Paislee Hope Chest collection, from the June Kit, for a pop of color.


I used the foam wedge from the tool kit to apply VersaMark ink to random places around the edge of the cardboard and then sprinkled the Lindy's Embossing Powder from the kit over the ink. Applying heat to the powder reveals the fantastic two-toned finish! To create the mist, I cut a small portion from the Gelato and used a palette knife to blend the Gelato with warm water until I had a smooth mixture, which I then transferred to the misting bottle from the tool kit.


I used the Background Writings Cling Stamp Set and the Memento ink from the June Kit to add script to several areas on my background.


I added color to the canvas bird from the May Kit with a Gelato and the water brush from the tool kit. Once that was dry I added a layer of Stickles, which was leftover from the April Kit. I created some fun embellishments with clip art images and glass beads. I simply applied a small amount of Glossy Accents over the clip art images, pressed the glass beads over the images, and once dry, trimmed the excess paper from each bead.


My favorite part of every project is adding the embellishments and finishing touches! Everything shown to the left of my cardboard piece are items from the July Kit. Supplies from past kits and my personal stash are to the right of my cardboard piece. I added supplies from both piles to finish my piece.


Thanks so much for stopping by today! You can pick up the July Kit, as well as the previous kits that I used for this project, from the Paper Wings Productions Store while supplies last! Be sure to visit us again this week for Amber's What's Up Wednesday post and join the PWP Team on Friday for our monthly Blog Hop!


Tuesday, June 25, 2013

Tutorial Tue - Stamping & Embossing with Gelatos

Happy Tuesday Paper Wings fans!!  Norma here with you today to share a fun stamping and embossing technique using gelatos.   So get comfortable and let's create together!!


I hope you'll give this fun technique a try.  Here's another look at the finished tag:

Be sure to watch the video to see how I created this textured background!

I used the June Nesting Components kit to finish out my tag.

I believe there are still a couple kits left so pick yours up before they're gone!

Thanks so much for stopping by today.  Have a Beautiful day!!!

Friday, June 21, 2013

Feature Friday - June Nesting Components ATCs

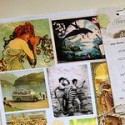
TGIF! Dana here sharing one last project with the June Nesting Components Mixed Media Kit. I had some fun with the clip art sheet and created a set of vacation themed artist trading cards.


I had some manila ATCs and gesso left over from my April Kit. After cutting some clip art images from the sheet and adhering them to ATCs, I applied a light coat of gesso to the pictures to help make individual images pop.


I added clouds to each image with the Cloudy Cling Stamp Set and the Rich Cocoa Memento ink. I then highlighted the edges of each ATC with Distress Ink.


I embellished each ATC with the twine, label stickers, journal cards and alphabet stickers from the kit.

The June Nesting Components Mixed Media Kit is still available from the Paper Wings Productions Store! It's perfect for all your Summer crafting! 

Here's another look at the other projects that I created with this kit:


If this is your first time visiting this week, be sure to check out Amber's Armed and Dangerous Layout and Tara's Hope Card. Thanks for visiting us today! We would love to see what you create with Paper wings Productions stamps. Show us on our Pinterest page, our Facebook page or our Flickr gallery. You can also leave a comment with a link to your project.


Related Posts Plugin for WordPress, Blogger...