Showing posts with label Paris Clear Stamp Set. Show all posts

Friday, August 29, 2014

Featured Friday: One stamp set, Two ways!


Hey there Paper Wings Productions fans! I am glad you stopped in today. It's Kristie here again to share with you a little something'-somthin'!  I hope you find it fun and are eager to try it for yourself!


Today for Featured Friday I am doing a bit of a twist... ONE stamp set, TWO ways BUT with water-colour as the medium. 

So it's kind of technique-y but also shows you what you can do with just one stamp set! Sometimes we feel like we have to have a TON of stamps, but you just need stamps you LOVE and you can have loads of fun! 


The stamp set I am featuring today is the lovely Paris Clear stamp set.


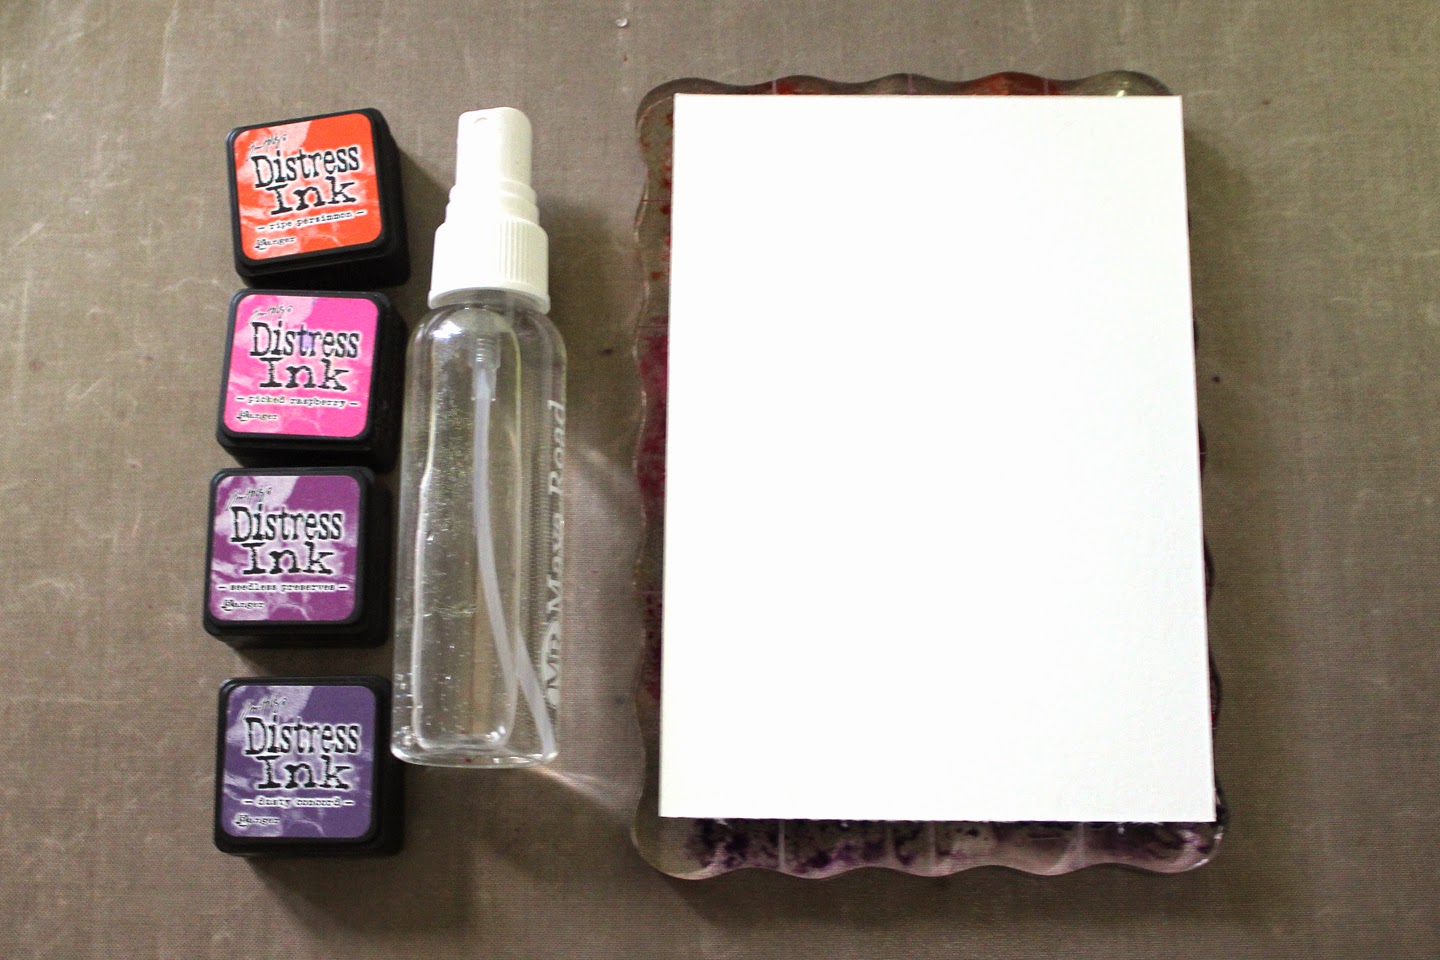
For my first card, I pulled out this old large stamp block that has some grid lines etched into it. 


Using Distress Inks, I rubbed my colours on my block and then spritzed it like crazy-crazy with some water:


I laid down a piece of water-colour paper over the top of the ink and let it soak in. It's really helpful to put a towel or a scrap piece of paper over the top of it to help you press the paper into the ink without making a terrible mess, but then again, that's kind of the fun part isn't it ; )

When I pulled up my paper...Voila!! It left this great colour but also a grid patter from my stamp block! It's like two textures in one go, which I love!


I embossed the Eiffel Tower image with black embossing powder


And now you get to see the crazy part of me... I usually line up my sentiment on my block and then stamp it a few times. First I want to be sure there isn't anything on my image (lint..dirt.. chocolate ;).
I want it to be a crisp image, but also straight! I have this big grid paper pad I use to stamp on. I line up the lines on my block to the lines on the pad and then see if the sentiment comes out and then adjust accordingly.
Ever since I started doing this I have saved myself a lot of crooked stamping! I love the paper pad also because it gives a little cushion, so I get a good impression every time. I just picked one up at my local stationary/book store for $2. I HIGHLY recommend it!


And that's it! You could really crank these babies out if you needed a lot and have SO much fun blending the inks. In fact, I made quite a few panels cause I love it so much! I rounded the corners of my panel and popped it up on a white card base and my card was born!


So with my first card finished I wanted to show you another way to use this stamp set with watercolors. It's definitely the most traditional way... by actually painting! (Gasp!) 
I used a little masking technique to create a scene for this card. 

First I stamped my chairs:


Then after creating a "chair mask" with a post-it note and placing it over the stamped chair image, I then stamped the window image overlapping the mask.


And this is my favourite part....when you remove the mask, you can see my little Paris scene! (Can you hear the music? It's like a Woody Allen movie!  ; )


Now, I'm not a water-colour-er by any stretch, but I wanted to show you a little step by step of how I watercolored my scene. I started with the neutrals and moved on to the brighter colours and detail. I added some shimmer to my little window flowers to give it some oomph... Also notice the shadow under the table and chairs. This adds some weight to the scene to help ground it. Now my chairs aren't floating on my card!


I finished off with some embellishments. I spritzed a doily with some grey spray mist. Added some crinkled silk ribbon and a hat pin. I found this fun striped vellum at my craft store and used it to mat my watercolored image.


And that's it! Two cards made with just one AMAZING stamp set! It's such a fun set to use. I keep grabbing for it again and again! So what do you think (did you make it this far? It's a long one!) Do you love to water-colour? Does it intimidate you (as it did me, for a while?) Sometimes you just have to jump in and enjoy it! I would love to hear from you so drop me a line in the comments! I would love to come pay you a visit.


Thanks so much for stopping in today!
xoxo
k


Thursday, April 18, 2013

Themed Thursday - Texture and the April Mixed Media Kit


Hi PWP fans! Dana here today with you sharing a themed post all about texture and the fabulous April Mixed Media Kit. The mask, rub-ons, clip art, Textural Accents and Paper Wings Productions Stamps found in the kit make adding layers of texture to your projects easy and fun!


If you'd like a closer look at the April Kit, Carrie put together a great video showcasing the contents, which feature a Paris theme. You can find the video HERE.


The kit comes with blank artist trading cards, which is a great size to experiment with new techniques and mediums. I started this card by covering it with a pretty patterned paper and one of the clip art photos from the kit. I then added some cloud rub-ons to the photo and a postal stamp from the Royal Melange Set to the top right-hand corner of the card. Both of these items are included in the kit!The "Paris" stamp is part of the Paris Clear Stamp Set.


I mixed some ink into the Gel Medium from the Textural Accents Set to create the rich brown color and spread it over the Huey's Circles Mask to add a textured pattern to the card. I highlighted the Eiffel Tower with some Star Dust Stickles (also in the kit!) to finish the card.


I started this second ATC the same as the first, with patterned paper and an image from the clip art sheet. I then added several layers of clear embossing powder. 


While the final layer of embossing powder was still hot, I pressed two stamps from the Royal Melange Stamp Set into the powder. To keep the stamps from sticking to the card, coat them with watermark ink before you press them into the melted powder. 


I chilled the card in the freezer for a couple of minutes and then bent the card in several places to crack the surface. I mixed Glaze from the Textural Accents Set with some brown ink and brushed it over the surface of the card to highlight the stamped impressions and cracks and to give the card an aged look.

Thanks so much for stopping by today! I hope I have inspired you! You can pick up the April Mixed Media Kit from the Paper Wings Productions Store. There are also a couple March Mixed Media Kits available! If you missed Tara's Technique Tuesday post from this week, scroll down to learn how to add texture to your projects using a crayon resist!

We would love to see what you make with Paper Wings Productions Stamps! Add your projects to our Flickr Group, to Pinterest, to our facebook page or leave a comment on any blog post with a link to your project.


Tuesday, April 2, 2013

Stamping with Pearl-Ex

Hello, Norma here with you today!  Hey did you see the new April Mixed Media kit that was released yesterday?!  Well in case you missed it, here is the link: April in Paris, go check it out.

Today I have a quick little video tutorial to share with you on stamping with Pearl-Ex Pigment Powders.  I love using these beautiful powders in my art projects so I thought it would be fun to show you how you could use them with your stamps.


If you use Pearl-Ex on a project and you really want it to last, make sure to spray it with hair spray or Fixatif to help protect the pigment over time.  I also wanted to mention that Pearl-Ex is not archival safe so if you'd like to use it for scrapbooking, then you'd wanna spray it with a product like Preserve It by Krylon to protect your layout.

 Thanks for joining me today & Have a Beautiful Day!!


Thursday, March 21, 2013

Themed Thursday - Paris Clear Stamp Set

Happy Thursday to you all! Dana here today sharing a pair of artist trading cards that I created with the Paris Clear Stamp Set. If you're looking for some fun French-themed stamps that have a lot of great detail, this set is for you!


I started with a piece of watercolor paper. I stamped the images onto my paper using VersaFine ink, to capture all the fine details of the stamps. Next, I embossed the images with clear embossing powder by carefully stamping over the images again with VersaMark ink, sprinkling with clear embossing powder, and setting with heat. The clear embossing powder protected the stamped images while I added layers of color to the paper and also kept a small area around the image white, which helps the images pop from the background.


I added the script text to this card with the Background Writings Cling Stamp Set. I wanted a faint impression, so after inking the stamp, I pressed it onto another piece of paper to remove some of the ink before I stamped onto my card. I finished this card with a sentiment from the Paris Clear Stamp Set and a brad.


I added the script text to this card with the second stamp from the Background Writings Cling Stamp Set, using the same method as above for a faint impression. I used the decorative border stamp, also from the Paris Clear Stamp Set, along the bottom of this card. I finished this card with a sentiment from the Paris Clear Stamp Set, a flower and some ribbon.

Thanks so much for stopping by! I hope I have inspired you today!  If you're interested in purchasing some of these fabulous stamps, visit the Paper Wings Productions Store to browse the full collection of stamps and kits.

Supplies: ATC Base: Ranger; Watercolor Paper: GCD Studios; Stamps: Paper Wings Productions; Ink: Ranger, Tsukineko; Embossing Powder: Tsukineko; Mist: Ranger; Flower: Petaloo: Ribbon: Offray; Other: Brad
 

Related Posts Plugin for WordPress, Blogger...