Showing posts with label Stamped. Show all posts

Friday, August 7, 2015

Hello Hello


 Hello PWP fans!  Its Amber here with you today sharing another card featuring one of the Geisha girls from the Geishas Cling Stamp Set and a sentiment stamp from the Vintage Technology Clear Stamp Set. I had lots of fun creating this one. Below I have a step by step tutorial for you to check out.


Step 1. Pick two different coordinating patterned papers. I used a polka dotted paper for the top half and a dark watercolored piece for the bottom half. The top half is larger then the bottom half. 


Step 2. Cut the patterned paper to fit the card base. 


Step 3. Stamp your image and sentiment onto another piece of coordinating patterned paper. I used a pink patterned paper and stamped my images in a blue ink that matched the other patterned papers.


Step 4. Cut out your image and sentiments. I also cut out a little banner to add to the top of my card.


Step 5. Lay out your images, staple your banner to the top left, staple the two hello sentiments to the bottom left, and add some matching ribbon. After you card is assembled add some stitching around the outside edges. You can see a close up below. 


I hope you enjoyed my card today! This will be my last post for Paper Wings Productions. I've had so much fun creating for the blog. Thank you for letting me be apart of your team Carrie.
Supplies:  Cardstock- White / Patterened Paper- Basic Grays Fresh Cuts Collection / Paper Wings Productions Cling Stamp Set- Geisha's / Paper Wings Productions Clear Stamp Set- Vintage Technology / Versa Color Ink Pad- Blue /  Lime Green Ribbon- Fancy Pants / Sulky Thread- White

Wednesday, June 10, 2015

With Thanks


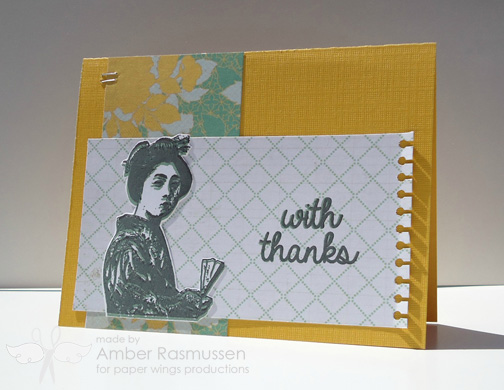
Hello PWP fans! Its Amber here with you today sharing another card featuring one of the Geisha's from the Geishas Cling Stamp Set. This set is quickly becoming another one of my favorites. I started with some colorful floral patterned paper from Crate Paper and used that as my inspiration. I really loved the teal/green color in the patterned paper so I found a matching ink and stamped the Geisha image in it. I then stamped over the same image with some black ink to give it a two toned effect. After my image dried I cut it out and adhered it to my second piece of pattered paper. Using the two same ink colors I stamped my "with thanks" sentiment from the Say It- Thanks Clear Stamp Set to the right side of the geisha. 


Above is a closer look at the stamped geisha and sentiment. Thanks for visiting and don't forget to check back in later this week for Carries Design Team announcement. 
Supplies: Cardstock- Yellow / Patterned Paper- Crate Paper & Lilly Bee Designs / Paper Wings Productions Cling Stamp Set- Geishas / Paper Wings Productions Clear Stamp Set- Say It -Thanks / Versa Color Ink Pad- / CTMH Ink Pad- Black / Stapler / Hole Punch 

Friday, May 29, 2015

You Are Special


Hello PWP fans! Amber here, and I'm super excited to be here sharing my colorful Geisha card with you today. This one has lots of color and stamping. I started by stamping my card base with the large paisley image from the Vintage Melange cling stamp set in black. After I had my card base stamped I pulled out some white cardstock and cut a small square for stamping. I created the background behind my geisha image by blending three different colored inks. I just took the ink pads and swiped them across the white cardstock to get the blended look above. You could also achieve this look with some ink and an ink dabber or some watercolors. To finish off my vertical panel I  added a small strip of  pink cardstock to the top of my stamped piece and a larger piece of pink cardstock to the bottom. I also stamped some text in black to the upper and bottom pink cardstock strips along with a "you are special" sentiment and some twine.


Above is a closer look at the stamped geisha with the blended background. I hope you enjoyed my card today. Thanks for visiting and don't forget to check out Paper Wings Productions current Design Team Call! Please submit your applications by June 1st to Carrie at paperwingsproductions@hotmail.com.
Supplies: Cardstock- White, Neon Purple, & Pink / Paper Wings Productions Cling Stamp Sets- Vintage Melange, Text, & Geisha's  / Paper Wings Productions Clear Stamp Set- Dragonfly Fairy / CTMH Ink Pad-Black / Versa Color Ink Pads- Helitrope, Hyacinth, & Boysenberry / WeR Memory Keepers Twine-Black

Friday, November 21, 2014

Featured Friday: Christmas Cards


Hello everyone! It's Amber here with this weeks Feature Friday post. I have two fun little Christmas cards to share today.


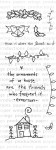
The first Christmas card I have to share features Paper Wings Productions Holiday Add Ons Clear Stamp Set. I have a few step by step pictures below showing how I put this colorful card together.
 

I started by stamping the cute little house onto a square piece of  patterned paper and  then I stamped the
"Home Is Where The Heart Is" sentiment onto a little tag.


Next I gathered all the little embellishments and the large acrylic die cut that I wanted to use for my card front and added them to my stamped pieces.


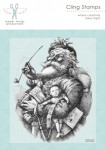
Above is a close up of my stamped and layered embellishments all put together. I also created a second little Christmas card to share today. You can check it out below. I used Paper Wing Productions Vintage Santa Cling stamp, a die cut tag from Studio Calico, a sentiment sticker, one acrylic snowflake, and two little snowflake buttons to create this one.


I hope you enjoyed my two Christmas cards today! Thanks for visiting! Don't forget we would love to see what you make with Paper Wings Productions Stamps so add your projects to our Flickr Group,to Pinterest, or leave a comment with a link to your project. You can also check out our Facebook Page and You Tube Page for daily inspiration.


Supplies: Cardstock- Studio Calico All Bundled Up Collection / Paper Wings Productions Clear Stamp Set- Holiday Add Ons / Paper Wings Productions Cling Stamp Set- Vintage Santa / CTMH Ink Pads- Black & Topiary / Sentiment Sticker- Chic Tags / Felt Snowflake & Acrylic Die Cut - Little Yellow Bicycle / Tags- Studio Calico All Bundled Up Collection / Acrylic Snowflake- Heddi Swapp / Snowflake Buttons / Twine & Button String


Thursday, October 23, 2014

Themed Thursday-Halloween


Hello everyone! It's Amber here with this weeks Themed Thursday post! Today I have a Halloween tag and a matching treat box along with some inspiration from a few of the other DT members to share.


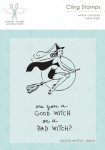
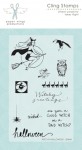
I started by die cutting a large tag out of some patterned paper. Than I stamped and colored my broom riding witch, added a black border with some stitching, and attached it to my large patterned paper tag. For my little box I printed and traced this treat box pattern from Paper Crafts onto some patterned paper, cut it out and assembled it. After I had my little treat box assembled I added some mini strips of tissue paper that I cut by hand to the inside and added my little stamped tag to the front of the box. I stamped the "are you a GOOD WITCH or a BAD WITCH?" sentiment onto the little tag and then added a little strip of matching patterned paper to the bottom half of it before attaching it to my treat box. You can see a close up of the box below.


I hope you enjoyed my little Halloween tag and treat box today. Since Halloween is just around the corner I thought I would also share a few of the design teams latest Halloween projects. Check them out below!


Wednesday Dana shared this fantastic Halloween Hodgepodge mini album. She used this months Nesting Components Mixed Media Kit along with a few other bits and pieces from previously released Nesting Components Kits. You can check out her entire post HERE.


Friday guest designer Kathleen shared three different Halloween cards she created with this months Nesting Components Mixed Media Kit. You can check out how she created these wonderful cards HERE.

Thanks for visiting! Don't forget we would love to see what you make with Paper Wings Productions Stamps so add your projects to our Flickr Group,to Pinterest, or leave a comment with a link to your project. You can also check out our Facebook Page and You Tube Page for daily inspiration.

Supplies: Cardstock- White & Black / Patterned Paper- Glitz Designs & Canvas Corp / Paper Wings Productions Cling Stamp Set- Witchy Halloween / CTMH Ink Pad- Black / Chalk Colored Pencils / Paper Crafts Pattern-  Treat Box / Sizzix Tag Die / Sulky Thread- Black / Sewing Machine


Thursday, September 11, 2014

Tag Trio


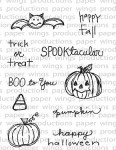
Hello everyone! It's Amber here with this weeks Themed Thursday post.With Summer ending soon I've had Fall & Halloween on the brain lately. So today I'm sharing a trio of tags I created with two different PWP stamp sets, Little Halloween and Text.


To create each tag, I stamped my PWP Fall/Halloween images onto three different white die cut tags. I then colored my images with some colorful Close To My Heart markers, adding water to blend. For a soft and subtle background, I inked up one of the text cling stamps and lightly stamped it across my images. To finish I added a vellum tag over each stamped tag and stamped my sentiments. Below is a close up of each tag.


These tags are super easy to make and could easily be made in batches. Thanks for visiting! Don't forget we would love to see what you make with Paper Wings Productions Stamps so add your projects to our Flickr Group,to Pinterest, or leave a comment with a link to your project. You can also check out our Facebook Page and You Tube Page for daily inspiration.


Supplies: Cardstock- White / Paper Wings Productions Clear Stamp Set- Little Halloween  / Paper Wings Productions Cling Stamp Set- Text / Staz-On Ink Pad- Jet Black / CTMH Ink Pads- Bamboo & Grey Flannel / CTMH Markers / Tag Die- Sizzix / Vellum / White String


Thursday, August 21, 2014

Themed Thursday- Halloween Tags


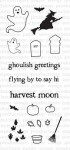
Hello PWP fans! It's Amber here with you today with this weeks Themed Thursday Post. My theme today is Halloween Tags and I've made two very similar tags to share with you. Both of my tags were created with Paper Wings Productions Text & Witchy Halloween Cling Stamp Sets and Paper Wings Productions Fall Add Ons & Banner Day Clear Stamp Set that we have available in our online store.


Both of my tags are almost identical, I just changed up the sentiment and some of the smaller images. Below are a few step by step photos of my process.


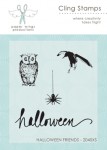
I started my tag by stamping one of the text stamps in some black ink onto my tag base. After I had the text stamped in black I added some black ink splatters, a sentiment, and some smaller images to the bottom right and top left of my tag. For the tag above I used the "Flying By To Say Hi" sentiment and the cute little bat from the Fall Add Ons Clear Stamp Set. For the second tag I used the "Witchy Greetings" sentiment and the little crow from the Witchy Halloween Cling Stamp Set.


After I had both of my tag bases stamped I added some black stitching all around the edges. Then I stamped and cut out two broom riding witches from the Witchy Halloween Cling Stamp Set and two banners from the Banner Day Clear Stamp Set. After I had them stamped and cut I layered the broom riding witch over the banner, added some black thread behind the two, and I then added a few large and small black sequins. You can check out a close up below.


Thanks for visiting! Don't forget we would love to see what you make with Paper Wings Productions Stamps so add your projects to our Flickr Group,to Pinterest, or leave a comment with a link to your project. You can also check out our Facebook Page and You Tube Page for daily inspiration.

Supplies: Cardstock- Kraft & Black / Paper Wings Productions Cling Stamp Sets- Text & Witchy Halloween / Paper Wings Productions Clear Stamp Sets- Fall Add Ons & Banner Day / CTMH Ink Pad- Black / Sequins- Black / Black Button String / Sulky Thread- Black / Sewing Machine


Monday, June 16, 2014

Mini Album-Sea Notes


Hello everyone! It's Amber here today sharing a fun little canvas mini album for this weeks Mixed Media Monday. A few months ago Dana shared this fabulous little Bird Canvas Mini Album and I just loved it. So I thought it would be fun to create one of my vary own with a few different stamp sets from the PWP Shop.


I started by taking the mini album apart and laying each page flat onto an old piece of cardboard. After I had all my pages laid out I took two different Close To My Heart Ink Refills and added a few drops to my spray bottle that had some water in it. I mixed the colors in the water bottle and then randomly sprayed each of my pages. After all my pages were completely dry I added my stamping and embellishments.


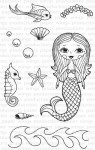
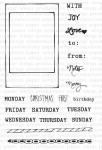
For the front page of my little mini album I used the little mermaid from the Sea Melange Cling Stamp Set and the Sunburst Pattern Clear Stamp Set for my background. After I had my images stamped I added a little label that I stamped with "Notes" from the Snapshot Framer Clear Stamp Set and attached it with some washi tape and a staple.


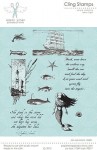
For the second page of my mini album I just stamped the wonderful quote "She stood in the storm and when the wind did not blow her away she adjusted her sails" from the Sea Melange Cling Stamp Set. It's a little hard to see but I also added some background stamping with the Scared Geometry Clear Stamp Set. 


For the third page of my mini album I stamped the ship in black and added some washi tape and a little heat embellishment.


For the forth page of my mini album I took this cute little frame from Elle's Studio Love You More Collection and added a little photo and journaling to it. I also added some background stamping to this page as well but its really hard to see in this photo.


For the fifth page of my mini album I stamped the quote "Hark, now hear the sailors cry. Smell the sea and feel the sky. Let your soul and spirit fly into the mystic." from the Sea Melange Cling Stamp Set.


For the last page of my min album I took a few of the little fish from the Sea Melange Cling Stamp Set and randomly stamped them across my page. The little air bubbles are from the Mermaid Clear Stamp Set, I thought it would be cute to make it look like they were under the sea. Thanks for joining me today and I hope you enjoyed my little mini album today!
Supplies: Classic Label Canvas Album- Maya Road / Paper Wings Productions Cling Stamp Set-  Sea Melange / Paper Wings Productions Clear Stamp Sets- Mermaid, Snapshot Framer, Sunburst Pattern, Sacred Geometry / CTMH Ink Pads- Black / CTMH Ink Refills- Ocean & Breeze / Embellishments & Photo Frame- Elle's Studio Love More Bits & Pieces Collection / Black Marker / Washi Tape / Staple Gun


Related Posts Plugin for WordPress, Blogger...