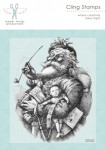
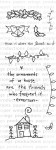
Showing posts with label holiday add ons. Show all posts

Wednesday, December 20, 2017

Stocking Stuffies


Hi friends! Dana here today sharing a fun tutorial for stocking stuffer animals that I created for my daughters. My crafty time is definitely short this holiday season, so I started with a Craft-Tastic Design Your Own Stuffies kit from Ann Williams Group. I purchased this kit from Zulily, but you can find these kits in the craft sections of several major big box stores. These super-cute pre-sewn felt and plastic paper stuffies are ready to design and were a real time-saver.

Pre-Sewn Stuffie from Craft-Tastic DYO Stuffies Kit

Here are the two stuffies I started with. I know that with my limited sewing skills I could not have stitched these pieces together myself. I was happy to skip the assembly step and start designing with stamps!

How to stamp on a plastic paper stuffie by Dana Tatar for Paper Wings Productions

I designed a cat on the larger stuffie. I used the product examples from the box as a guide to draw the nose with a black marker. Then I used stamps and black archival ink to finish the rest of the design. The Sacred Geometry Clear Stamp Set and the Single Dot Border Clear Stamp Set together made a great eye! I used the Scallop Border Clear Stamp Set and the holly from the Holiday Add-Ons Clear Stamp Set to add a festive pair of pants.

How to color a stamped plastic paper stuffie by Dana Tatar for Paper Wings Productions

Next, I added color with Faber-Castell Gelatos, Pitt Artist Pens, and Stamper's Big Brush Pens. I added a small heart to the right side of this stuffie with the Easter Cling Stamp Set.

How to fill a stamped plastic paper stuffie by Dana Tatar for Paper Wings Productions

I used the Easter Cling Stamp Set again to stamp a rabbit face onto the second stuffie. The happy Band-Aid is part of the Under the Weather Cling Stamp Set. I created the striped pants with the Straight Journaling Lines Clear Stamp Set. Once both stuffies were stamped and colored, I filled them with the polyester stuffing that was included in the kit.

Stamped and Colored Stocking Stuffies for Christmas by Dana Tatar for Paper Wings Productions

I know my girls will love finding these stuffies in their stockings! Thanks for stopping by today!

Pin it!


Stamped and Colored Stocking Stuffies for Christmas Tutorial by Dana Tatar for Paper Wings Productions

Tuesday, November 7, 2017

Cocoa Warms the Heart

Before we begin today's post, we want to congratulate Sande on winning our blog hop giveaway!  Please contact us at info@paperwingsproductions.com for instructions on how to claim your prize.  Thank you to everyone who participated!
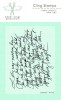
Hello friends, Larissa here with you today with a few fun Christmas coffee cards. You know me and these fun coffee stamps. I love using them and making different things with them. This past week I have seen a lot of my friends enjoying their expensive morning coffee's in a cut new holiday cup and it gave me an idea. I pulled out two different Christmas stamps and my favorite coffee stamp and got busy. I ended up with not one, not two but three new cards.

I stamped the cup 3 times and then stamped 2 lids and one of the frothy lids. I colored the first card with Prismacolor Pencils after I stamped the Santa in the middle.


One the second card I stamped Believe down the cup and added a little set of bells. I colored the whipped cream image using Red and Green Copic markers and topped it glitter. 


For the 3rd and final card, I stamped Santa's Sleigh and Dear Santa on the cup and colored in the cup using Prismacolor Pencils. 


I adhered all the card fronts to white card bases and added Nuvo drops to finish them off.
I hoped you enjoyed my cards today. Have a wonderful day friends.


For these cards I used:

Paper Wings Productions Stamps

Other Supplies Used:
White Cardstock
Versafine Onyx Black Ink
Hot Cherry Ink
Garden Green Ink
Prismacolor Pencils
Copic Markers
Velum
Gold and Silver Glitter Cardstock
Pattern Paper
Nuvo Drops
Spectrum Noir Clear Sparkle Pen
White JellyRoll Pen
Nuvo Liquid Adhesive

Thursday, December 3, 2015

Merry Christmas

Hello friends. Larissa back with you today. I used a few different stamp sets for this card. Being from San Antonio I thought this was a perfect card for me to send to some of my out of state friends.

I used:
Say it Winter Greetings Clear Stamp Set 
San Antonio Clear Stamp Set 


I stamped the image of the Alamo on the card first and masked it off. I then stamped the San Antonio skyline stamp behind it both of these stamps are from the San Antonio set.  I left the mask on the Alamo and Stamped the two trees from the Build A Scene set. To finish off the trees I took the small light set from Holiday Ad Ons and stamped them across each one. I colored the images using Copic markers.

The greeting is two different sets as well. The Merry Christmas is from the Say it Winder Greetings set and then the "From the Alamo City" came from the San Antonio set. It actually says greetings from the Alamo city. I just cut off the word "greetings".


To finish off the card from I added a few red sequins and matted it on a piece of red cardstock and then adhered it to a white card base, 


I have already stamped a few more of these card fronts to get in the mail. This is a perfect "from San Antonio" card.


Thank you for stopping my today. Don't forget to check back to see what the amazing design team girls create for you.


Have a wonderful day friends.

Larissa
Muffins and Lace 


Thursday, November 5, 2015

Warm Winter Wishes


Hello friends. Larissa here with a warm winter wishes card for you today.  I am actually using 3 different stamp sets for this card.
I stamped the cups "Playing with your coffee" on a piece of kraft cardstock and colored them using Spectrum Noir markers.
I then stamped each cup with a different stamped image from the "Holiday Add Ons" set.


For the sentiment I used the stamp set "Say it Winter Greetings" and heat embossed it with white embossing powder. 

For the inside of the card I added another cup also colored with Spectrum Noir markers and left it blank to be able to write a note if I wanted. 


I hope you enjoyed my card today. Have a wonderful day friends. 


Sunday, December 21, 2014

Spotlight Sunday: Dana's December Daily - Part 2


Hi Paper Wings fans! Dana here today sharing a peek inside the December Daily album that I put together using the Natural Nesting Components Mixed Media Kit. I shared how I created this album last month in this Tutorial Tuesday Post. I dressed up the inside of this album with die-cuts from the Well Dressed Nesting Components Mixed Media Kit and chipboard and clip art from the Vintage Christmas Nesting Components Mixed Media Kit.


I have days 1 through 18 finished, which beats my 2013 effort by several days! I'm planning on finishing my album this year! The fantastic selection of PWP Christmas Stamps has me motivated to complete the last couple pages as there are several stamps that are perfect for the remaining dates!


The pockets of this canvas portfolio are perfect for storing holiday cards. I have room for more cards in the rear pocket.


Several of the pages in this album are made from patterned paper, which isn't the best surface for journaling. The selection of die-cuts in the Well Dressed Kit and the tags in the Natural Kit are perfect for recording memories.


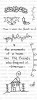
I used the Holiday Add Ons Clear Stamp Set on several die-cuts. The sentiments and tiny festive images are wonderful for small spaces.


The Merry Clear Stamp Set fits perfectly on the tags from the Natural Kit.


I used the Holiday Add Ons Clear Stamp Set to add the house to the floral die-cut. It is the perfect complement to the photo of my daughter's gingerbread house on the opposite page.


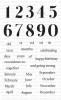
I used the Perfect Numbers Clear Stamp Set to stamp the date onto most of the pages of this album. The Uniball White Pen was great for adding journaling to the darker pieces of cardstock.

If you're working on a December Daily album, you'll also want to check out how Katie uses stamps in her December Daily Post. We'd love it if you found the time to join our December Holiday Challenge!

Thanks for stopping by today!


Friday, November 21, 2014

Featured Friday: Christmas Cards


Hello everyone! It's Amber here with this weeks Feature Friday post. I have two fun little Christmas cards to share today.


The first Christmas card I have to share features Paper Wings Productions Holiday Add Ons Clear Stamp Set. I have a few step by step pictures below showing how I put this colorful card together.
 

I started by stamping the cute little house onto a square piece of  patterned paper and  then I stamped the
"Home Is Where The Heart Is" sentiment onto a little tag.


Next I gathered all the little embellishments and the large acrylic die cut that I wanted to use for my card front and added them to my stamped pieces.


Above is a close up of my stamped and layered embellishments all put together. I also created a second little Christmas card to share today. You can check it out below. I used Paper Wing Productions Vintage Santa Cling stamp, a die cut tag from Studio Calico, a sentiment sticker, one acrylic snowflake, and two little snowflake buttons to create this one.


I hope you enjoyed my two Christmas cards today! Thanks for visiting! Don't forget we would love to see what you make with Paper Wings Productions Stamps so add your projects to our Flickr Group,to Pinterest, or leave a comment with a link to your project. You can also check out our Facebook Page and You Tube Page for daily inspiration.


Supplies: Cardstock- Studio Calico All Bundled Up Collection / Paper Wings Productions Clear Stamp Set- Holiday Add Ons / Paper Wings Productions Cling Stamp Set- Vintage Santa / CTMH Ink Pads- Black & Topiary / Sentiment Sticker- Chic Tags / Felt Snowflake & Acrylic Die Cut - Little Yellow Bicycle / Tags- Studio Calico All Bundled Up Collection / Acrylic Snowflake- Heddi Swapp / Snowflake Buttons / Twine & Button String


Related Posts Plugin for WordPress, Blogger...