Showing posts with label flower power. Show all posts

Wednesday, March 28, 2018

Easter tags!

Hi PWP friends! Ashley here today sharing two Easter tags I made for our niece and nephew. I've attached these onto their Easter treat bags :) One is pink and girlie and the other is blue and brown for a boy, but I used the Easter cling stamp set for both tags!

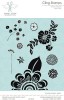
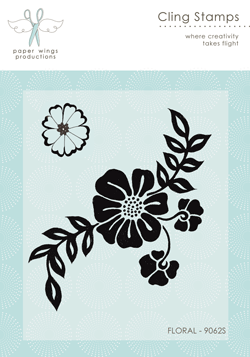
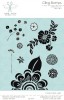
For my girlie Easter tag, I added some flowers from the Flower Power cling stamp set. I heat embossed the images onto my tag and then just used some misting + the packaging technique to add some color to the background. The "Easter blessings" sentiment is from the Easter cling stamp set.


With my boy Easter tag, I basically did the same thing. I used one of the bunny stamps from the Easter cling stamp set and heat embossed him with brown embossing powder. I added the sentiment from the same stamp set in blue embossing powder. Then I used some blue mist + the packaging technique for added color and texture to the background.

Thanks for looking!

Tuesday, May 20, 2014

Winged Things Tag

*****Join our May Challenge: ANYTHING GOES, HERE*****


Hey there PWP Fans, Norma here with you today for Tutorial Tuesday!


Today I'm going to show you how to create a beautiful layered tag.  This "winged things" tag is filled with beautiful texture and custom made flowers using PWP stamps.


I started out by stamping one of this month's featured stamp sets, Half Flower.   (You can pick up this stamp for just $4.50 this month!)


Next I added my background color using a variety of Lindy's inks.  I love the way they shimmer in the light.


I continued adding to the background using the Mini Flowers stamp set (only $3.00 this month).


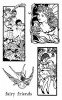
The focal image I'm using is from the Fairy Friends stamp set.  I used Prismacolor pencils to color them.


I wanted to elevate the image so I layered scraps of cardboard til I got the height that I wanted.


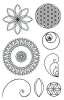
I created custom satin flowers using the Sacred Geometry and Single Flowers stamp set (only $3.00 this month).  I stamped them onto satin fabric using Stazon.


 Next I cut them out and dyed them with Lindy's inks.


To assemble the flowers, I simply polked a whole in the center of each flower and then layered them.  I'm using earrings in the center to hold them together and attach them to the tag.  Once they were assemble, I used my heat gun to dry and shape the flowers.


I used the Leaf Border and Text Cling stamp sets to create a stem.


I embellished the tag with a heart doily tucked behind my fairy friends, ribbon, a heart charm, butterfly and a sentiment.  I love all of the bright colors, dimension, shimmer and whimsy of this sweet little tag.  I hope I've inspired you to use your stamps to create gorgeous custom flowers for your projects.  Thank you so much for joining me today and don't forget to enter the May Challenge: Anything Goes!!


Thursday, May 8, 2014

Throwback Thursday - Flower Power

*****TO JOIN OUR MAY CHALLENGE CLICK HERE*****


Today we are featuring some samples made with our Stamp(s) of the Month.  For the month of May only, these sets are 40% off!  No coupon is needed, just click here to start shopping!  

Here are our featured stamps of the month:


Wednesday, August 14, 2013

Creative Playtime!


Hello & Welcome to all of the new PWP followers!!  Norma here with you today to share the results of my last creative session.  Summer has been real busy for me and I've been spending most of my time with my family.  So I was really craving a little creative playtime.  I dug into my stash of Paper Wings goodness and created this art journal page:


Whenever I get new stamps, I like to stamp them in my art journal just to get a feel for them and that's exactly what this page was full of when I started.

 
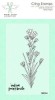
Here is a look at my art journal page when I started.  It was stamped with the beautiful Wildflowers sentiment, "there's always hope" up top and "indian paintbrush" down on the bottom.  There was also random stenciling all over the page.


I covered the doodled heart with a mask, then stamped the flower from the Flower Power stamp set using Tim Holtz Distress Markers.  I embossed the flowers to seal in the color so that I could continue to add layers of colors on top of the distress inks.


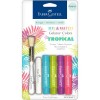
I added color with Faber-Castell Gelatos.  All I did was scribble with the gelato and then used a wet brush to blend the color out.


I colored in the Indian Paintbrush flower with Prismacolor pencils and then darkened my doodles with black India ink.


To add more color, I pulled out the stencil from the Aug Nesting Components kit and Dylusions ink.


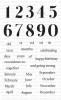
I continued to build layers using the Perfect Numbers stamp set and rubons from the May Nesting Components kit.


This beautiful little lady is also from the May Nesting Components kit.


To finish it off, I added some of the smaller flowers from the Flower Power stamp set.  I love that I was able to mix so many wonderful Paper Wings products into this one page. 


 Have you visited the online store lately?!  Carrie has added new items like the gelatos I used on this project.  You should really go check it out ;D

Thanks so much for stopping by & have a beautiful day!!!


Related Posts Plugin for WordPress, Blogger...