Showing posts with label flowers. Show all posts

Wednesday, October 29, 2014

RockFairy by Agnieszka Bellaidea


Hi!
It's  Agnieszka Bellaidea  again!
Last time I was showing you my layout and card on the 13th, today I have a new scrapbook page.


My style is  a mix of shabby and romantic with a touch of mixed media. I like to use stencils with gesso and modeling paste, mists and of course stamps.


I have already another set of favorite stamps, you can see I used it over and over around the "door" under my photo.
is not going to be put away. I have already some new ideas how to use it.


Stamping with distressed ink gives impression the stamp is part of paper design.
My butterfly in the right corner was stamped and embossed to match my page and colors.


Below you can see how nice can look a little corner stamp from the very same set.


If you would like to see how I design my pages here are 3 steps , all papers by Bo Bunny.


I have to add I really like the way all set of stamps are packed.
I tend to keep my stamps in original packages so this is important to me.
Thank you so much for looking,can not wait to show you my next projects, I hope you will visit me on my blog too.
Thank you again for inviting me to GD for you!
Agnieszka Bellaidea


<!-- inlinkz code start -->

<div class="_InLinkzPMDiv"><table width="95%" border=0 cellspacing=0 cellpadding=2><tr><td style="vertical-align:top"><div style="display:table-cell;text-align: center;float:left; height:189px"><div style="display:table-cell;vertical-align:middle;width:107px;height:104px"><a title="Frames and Flourishes Cling Stamp Set" rel="nofollow" target=_blank href="http://lm.inlinkz.com/go.php?i=425296&c=117696"><img border=0 class=_inlinkzI src="http://lm.inlinkz.com/thumbs/20130906/32055/100/1378467669.53.jpg"></a></div><div style="overflow:hidden;width:107px;line-height:1.1; text-align:center;vertical-align:bottom;"><a title="Frames and Flourishes Cling Stamp Set" rel="nofollow" target=_blank href="http://lm.inlinkz.com/go.php?i=425296&c=117696">Frames and Flourishes Cling Stamp Set<BR></a></div></div></td></tr></table></div><div><a class=_LMLogo target=_blank rel='nofollow' style='font: normal normal normal 10px/normal arial;color: #BBB; text-decoration: none;' href='http://new.inlinkz.com/pm.php?utm_source=prdlist&utm_medium=widget_o&utm_campaign=powered'>InLinkz.com</a></div>

<!-- inlinkz code end -->


Tuesday, May 20, 2014

Winged Things Tag

*****Join our May Challenge: ANYTHING GOES, HERE*****


Hey there PWP Fans, Norma here with you today for Tutorial Tuesday!


Today I'm going to show you how to create a beautiful layered tag.  This "winged things" tag is filled with beautiful texture and custom made flowers using PWP stamps.


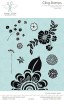
I started out by stamping one of this month's featured stamp sets, Half Flower.   (You can pick up this stamp for just $4.50 this month!)


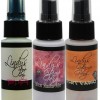
Next I added my background color using a variety of Lindy's inks.  I love the way they shimmer in the light.


I continued adding to the background using the Mini Flowers stamp set (only $3.00 this month).


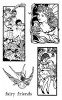
The focal image I'm using is from the Fairy Friends stamp set.  I used Prismacolor pencils to color them.


I wanted to elevate the image so I layered scraps of cardboard til I got the height that I wanted.


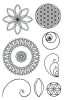
I created custom satin flowers using the Sacred Geometry and Single Flowers stamp set (only $3.00 this month).  I stamped them onto satin fabric using Stazon.


 Next I cut them out and dyed them with Lindy's inks.


To assemble the flowers, I simply polked a whole in the center of each flower and then layered them.  I'm using earrings in the center to hold them together and attach them to the tag.  Once they were assemble, I used my heat gun to dry and shape the flowers.


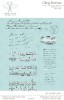
I used the Leaf Border and Text Cling stamp sets to create a stem.


I embellished the tag with a heart doily tucked behind my fairy friends, ribbon, a heart charm, butterfly and a sentiment.  I love all of the bright colors, dimension, shimmer and whimsy of this sweet little tag.  I hope I've inspired you to use your stamps to create gorgeous custom flowers for your projects.  Thank you so much for joining me today and don't forget to enter the May Challenge: Anything Goes!!


Wednesday, April 30, 2014

Hey ya'll - art journal page


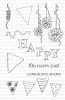
Hello, hello PWP fans, Norma here with you today!  What's been up for me lately is the Southern Sayings Stamp set.  I just got this set and I've already used four of the six sentiments.   Today I'm using "hey ya'll" from the set.  I'm also using the Triangle Border and the Happy Day stamp sets.  


I started with a blue and green background and added the backing of used joint tape.  (nothing goes to waste around here)  Next I added tiny flowers with molding paste and a Finnabair Prima stencil.  Then I cut down the backing from the stencil packaging and added a triangle border.  


This cutie is from the Vintage Cuties clip art sheet.  I'm using the back of a picture frame to hold the image in place.


I found this beautiful bling frame in my stash.  It adds the perfect touch to my focal image.


To compete my design, I added flowers from my stash and Pink Paislee Cottage Farms Paper Goods from the May Nestings Components kit.  My sentiment "hey ya'll" is from the Southern Sayings stamp set.


I strayed all of the flowers with Lindy's Spray ink for a little shimmer.


Finally, I added "oh happy day" to the top and a die cut pencil just for fun.


Be sure to join us on Friday for our design team blog hop!


The Nani ke Ola designers will be joining us as we celebrate friendship.  It's gonna fun and filled with tons of inspirations; stop by!!  See you on Friday :D

Have a Wonderful Day!!


Tuesday, January 21, 2014

What a Wonderful World

Norma here with you today!!  It's been awhile since I've done a video so that's what I'm sharing today.  I had fun altering this wooden plaque with some of the newly release stamps, the Creative Girl Mixed Media kit and some of my favorite sets.  


So are you ready to create with me!!


Here is a complete list of the supplies I used:

Wooden Plaque
Paper Wings Producitons Creative Girl Mixed Media Kit
Golden Fluid Acrylic Paints: Pyrrole Red & Green Gold
Golden Molding Paste
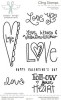
Paper Wings Productions Stamp Sets: Follow Your Heart, Spring Cling, Text Melange & Triangle Border
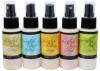
Lindy's Inks: Moonlit Berry, Kissin Kenickie Coral, Cocklebells Corrals & Sea Mint Green
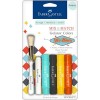
Faber Castel - Gelatos: Blood Orange & Margarita Mix, PITT Artist Pen Big Brush: Deep Scarlet & Black 
BIC Wite-Out
Beacon 3-in-1
Modge Podge: Matte
White Gel Pen & Signo Uniball: Black

If you have any questions regarding the techniques I used on this project, please don't hesitate to ask.  Thanks so much for joining me today & have a beautiful day!!


Related Posts Plugin for WordPress, Blogger...