Showing posts with label build a scene. Show all posts

Thursday, December 3, 2015

Merry Christmas

Hello friends. Larissa back with you today. I used a few different stamp sets for this card. Being from San Antonio I thought this was a perfect card for me to send to some of my out of state friends.

I used:
Say it Winter Greetings Clear Stamp Set 
San Antonio Clear Stamp Set 


I stamped the image of the Alamo on the card first and masked it off. I then stamped the San Antonio skyline stamp behind it both of these stamps are from the San Antonio set.  I left the mask on the Alamo and Stamped the two trees from the Build A Scene set. To finish off the trees I took the small light set from Holiday Ad Ons and stamped them across each one. I colored the images using Copic markers.

The greeting is two different sets as well. The Merry Christmas is from the Say it Winder Greetings set and then the "From the Alamo City" came from the San Antonio set. It actually says greetings from the Alamo city. I just cut off the word "greetings".


To finish off the card from I added a few red sequins and matted it on a piece of red cardstock and then adhered it to a white card base, 


I have already stamped a few more of these card fronts to get in the mail. This is a perfect "from San Antonio" card.


Thank you for stopping my today. Don't forget to check back to see what the amazing design team girls create for you.


Have a wonderful day friends.

Larissa
Muffins and Lace 


Thursday, November 13, 2014

Themed Thursday- FALL


Hey guys, Happy Thursday! Katie here today for Themed Thursday! I used the theme fall for my projects. The weather has been pretty nice here lately so I was inspired!


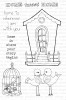
For my first card I used these stamps: Build A Scene, Home Tweet Home, Swirl, and Fall Add Ons. I stamped them all onto a piece of card stock to create this Autumn-y scene and then colored them with copic markers.


For my second card, I stamped a bunch of leaves from the Fall Add Ons stamp onto a piece of cardstock and cut it out into a label shape on my Spellbinders machine then layered it with other embellishments on to the card.


Wednesday, October 29, 2014

RockFairy by Agnieszka Bellaidea


Hi!
It's  Agnieszka Bellaidea  again!
Last time I was showing you my layout and card on the 13th, today I have a new scrapbook page.


My style is  a mix of shabby and romantic with a touch of mixed media. I like to use stencils with gesso and modeling paste, mists and of course stamps.


I have already another set of favorite stamps, you can see I used it over and over around the "door" under my photo.
is not going to be put away. I have already some new ideas how to use it.


Stamping with distressed ink gives impression the stamp is part of paper design.
My butterfly in the right corner was stamped and embossed to match my page and colors.


Below you can see how nice can look a little corner stamp from the very same set.


If you would like to see how I design my pages here are 3 steps , all papers by Bo Bunny.


I have to add I really like the way all set of stamps are packed.
I tend to keep my stamps in original packages so this is important to me.
Thank you so much for looking,can not wait to show you my next projects, I hope you will visit me on my blog too.
Thank you again for inviting me to GD for you!
Agnieszka Bellaidea


<!-- inlinkz code start -->

<div class="_InLinkzPMDiv"><table width="95%" border=0 cellspacing=0 cellpadding=2><tr><td style="vertical-align:top"><div style="display:table-cell;text-align: center;float:left; height:189px"><div style="display:table-cell;vertical-align:middle;width:107px;height:104px"><a title="Frames and Flourishes Cling Stamp Set" rel="nofollow" target=_blank href="http://lm.inlinkz.com/go.php?i=425296&c=117696"><img border=0 class=_inlinkzI src="http://lm.inlinkz.com/thumbs/20130906/32055/100/1378467669.53.jpg"></a></div><div style="overflow:hidden;width:107px;line-height:1.1; text-align:center;vertical-align:bottom;"><a title="Frames and Flourishes Cling Stamp Set" rel="nofollow" target=_blank href="http://lm.inlinkz.com/go.php?i=425296&c=117696">Frames and Flourishes Cling Stamp Set<BR></a></div></div></td></tr></table></div><div><a class=_LMLogo target=_blank rel='nofollow' style='font: normal normal normal 10px/normal arial;color: #BBB; text-decoration: none;' href='http://new.inlinkz.com/pm.php?utm_source=prdlist&utm_medium=widget_o&utm_campaign=powered'>InLinkz.com</a></div>

<!-- inlinkz code end -->


Tuesday, April 22, 2014

Tutorial Tuesday- Stamping on Vellum

*****Join our April Challenge: GET INKY, HERE***** 

Hi, Katie here! Happy Earth Day! Are you doing anything to celebrate? I have a pretty good sized garden that I planted, so I made this cute garden journal to write down and keep track of my harvest this year.

It's Tutorial Tuesday, so I'm also showing you how I made/colored the stamped vellum embellishments on my cover.

Supplies: Vellum, Ink, Stamps, Prismacolor Markers

1. Stamp your designs onto vellum and let them dry.

2. Cut out your designs. Use your markers to color the back of your stamped images. Why the back? Depending on the ink you used to stamp with, your markers could smear the design and since it's vellum, your color will show through.

After you're done coloring, just flip them back over and use them to embellish! The cool thing about prismamarkers is that you can blend colors together (like Copics) when you're coloring your stamped images.

The Build a Scene stamp set and the Leaf Border stamp set are both perfect for Earth Day crafting!

While you're here, be sure to check out some of the other inspiring posts on the blog! Also, if you make any projects using PWP stamps, please share them on our facebook page!


Monday, March 17, 2014

Mixed Media Monday- Lucky Stars Art Journal

*****To join our March Challenge: CELEBRATE, CLICK HERE*****


Happy Saint Patrick's Day everyone! Katie here for today's Mixed Media Monday post!
For today's project, I'm documenting how lucky I am and since it is Saint Patty's Day, I decided to use pretty much all green on my art journal page.


I didn't make this a tutorial, but I wanted to show you my process for creating this page. I started by sticking down an adhesive piece of canvas to my page and sketching out my design. I glued on a piece of book paper onto my face to add interest and also glued on gelli printed circles.


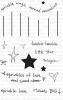
After I drew/colored in my face I placed a mask over her and stamped the background using the fun stars from the Hanging Stars stamps set. I love that there are different sizes of stars in that set, as well as different styles.


After stamping the stars, I colored the page with green Mister Huey spray and went around the gelli circles using acrylic silk paint.

Have you been think that the shape of the speech bubble looks a little familiar?  It could be because it's actually the tree leaves from the Build A Scene stamp set. I stamped it with white gesso and it looks like a speech bubble to me!


My fellow design team members have been posting some pretty inspiring stuff lately. check out these posts-


Wednesday, November 20, 2013

What's Up Wednesday: Katie's Christmas Card


Hi everyone! Katie here sharing a cute Christmas card and a fun way to use washi tape in your stamping! I'm excited for Christmas, not only am I making cards to send out to friends and family but I'm also donating cards to charity so I'm making a lot of Christmas cards this year.

I wanted to show you guys how I used washi tape to color my stamped designs on this card. For my card I used both the Build a Scene stamp set and the Snapshot Framer stamp set.


1. Stamp your design onto white cardstock. White works best since you're layering patterned tape over it. I used the festive trees from the Build a Scene stamp set.

2. Place a strip of washi tape across your stamped design.


3. Repeat until you've covered your stamped design. You could use all the same color of washi tape, but I really liked the mix-matched look of using multiple patterns.


4. Take your craft knife and lightly cut around the inside of your stamped design. Washi tape is very thin so you don't have to apply much pressure to cut through it which is good because you don't want to cut through your paper.


5. After you have your gone around your design with the knife, peel away the washi tape from the outside.


6. Now you have easily colored your stamped designs with washi tape! I love this technique, It's a great use for the popular washi tape! I personally have a whole basket full of different patterned tapes and I love finding new ways to use them.


The PWP design team has posted some really awesome projects lately that I definitely recommend checking out-
Dana made a wonderful project using the November Nesting Components Kit.
Erica has a fun Tool Technique video!

If you make a project with Paper Wings Productions stamps please share it! You can link your projects to the Facebook page, the flickr group, or comment a link to your projects on this post! You can see all the Paper Wings Productions Rubber Cling Stamps here.


Related Posts Plugin for WordPress, Blogger...