Showing posts with label day framer. Show all posts

Thursday, August 8, 2013

Themed Thursday: Vintage Technology


Hello there peeps!  It's Shay here.  For today's Themed Thursday I was inspired by our recent Vintage Design Team Blog Hop.  A little side tracking here: I strenuously suggest checking out this month's Blog Hop if you have not already for awesome projects and to welcome our new design team members, Cathi and Irit.  Don't forget to also check out Irit's deco-riffic project in her very first post here on The Aviary and Dana's glorious tutorial and altered box

As a departure from my own blog hop project, I wanted to do a more colorful spin on vintage. 
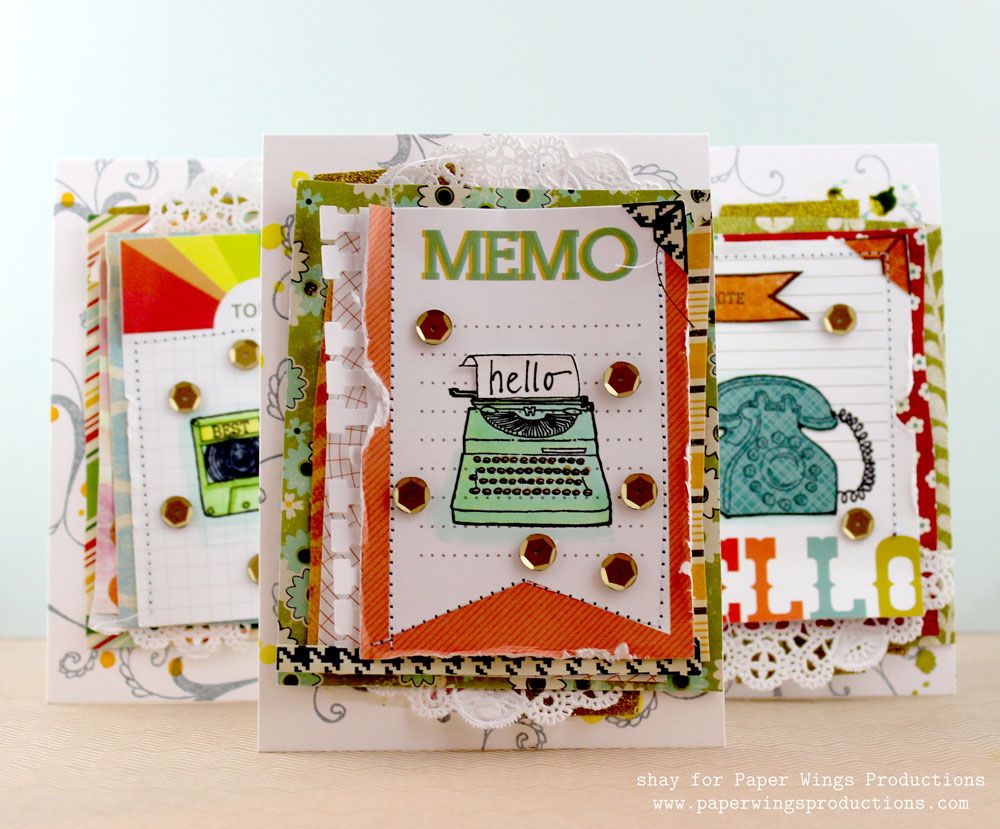

I pulled out my well loved Vintage Technology stamp set and some other stamp sets like Flourish Fun 1, Day Framer, Life Framer and Tabs & Banners, some journaling cards, lots of patterned paper and a few other items. 

Card No. 1
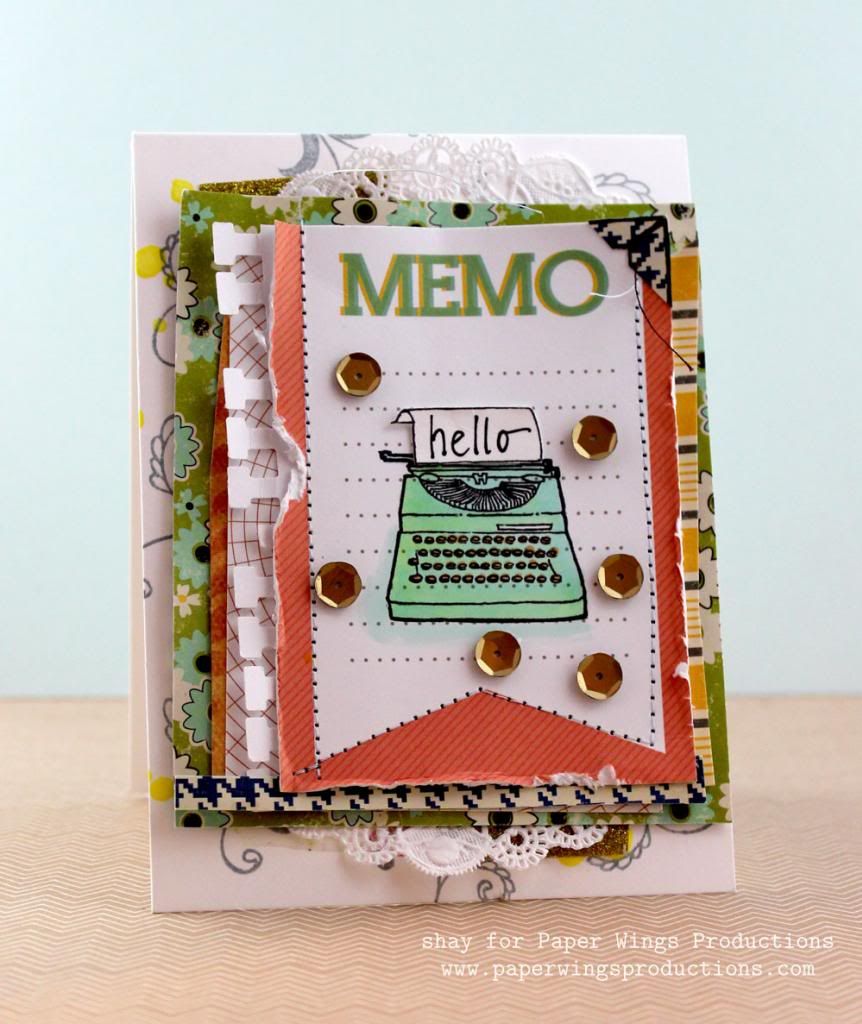

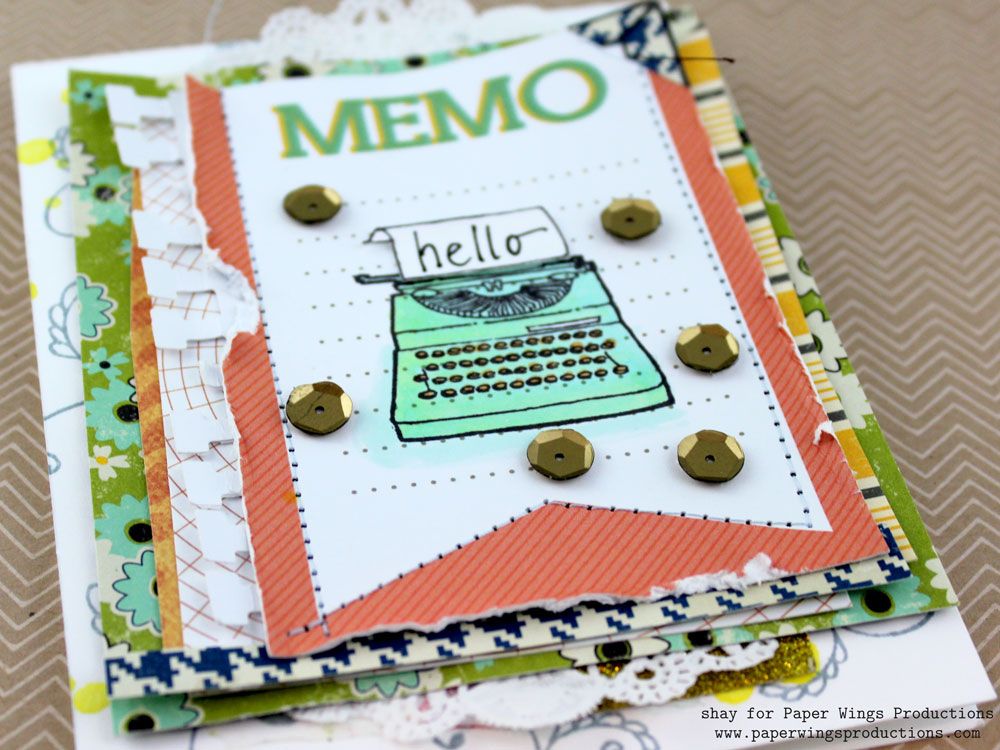
The focal point of the card is a journal card I stamped the typewriter from Vintage Technology upon in black ink and colored in with Copics.  The sheet of paper also from Vintage Technology I stamped in black ink and wrote in the "hello" and attached to the typewriter.  I added a few haphazard layers of paper, another journaling card and punched cardstock.  I made sure to adhere the larger pieces only in the center.  I sewed the layers together following the banner shape of the journaling card.  I made sure to curl up the edges and distress the edges of the journaling card.  The photo corner is actually a corner of the Life Framer frame stamped onto patterned paper and trimmed.

I added bits of doily and glitter tape.  I adhered these layers to a white cardstock base that I stamped with Flourish Fun 1 in grey ink and sprinkled some drops of yellow mist.  Last I added some matte gold sequins.


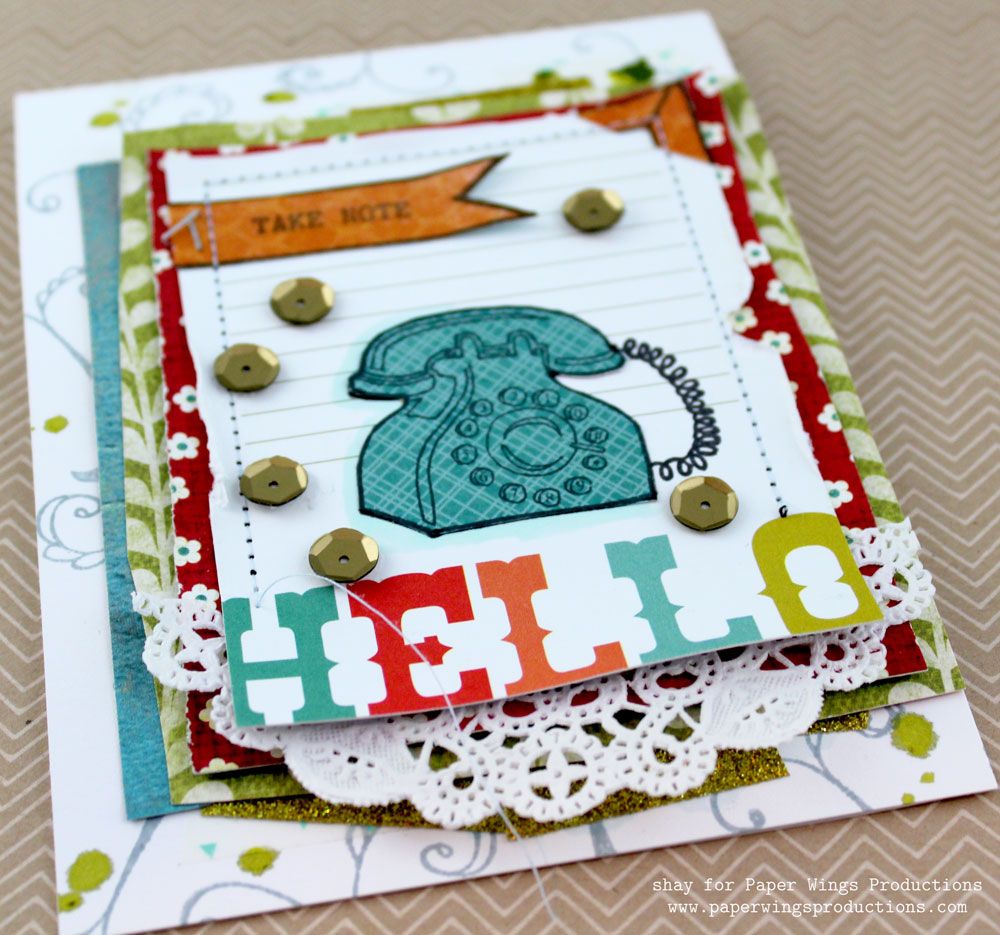
Card No. 2


The focal point of the card is a journal card I stamped the telephone from Vintage Technology onto in black ink and then added a teal paper pieced telephone without the telephone wire onto the telephone stamped directly upon the journaling card.  I stamped the double ended banner on orange patterned paper and cut off one end.  On the banner I stamped "take note" from Day Framer.  I adhered the banner with the Tiny Attacher.  I added a few haphazard layers of paper.  I made sure to adhere the larger pieces only in the center.  I sewed the layers together.  I made sure to curl up the edges and distress the edges of the journaling card.  The photo corner is actually a corner of the Life Framer frame stamped onto patterned paper and trimmed.

I added bits of doily, washi and glitter tape.  I adhered these layers to a white cardstock base that I stamped with Flourish Fun 1 in grey ink and sprinkled some drops of green mist.  Last I added some matte gold sequins.

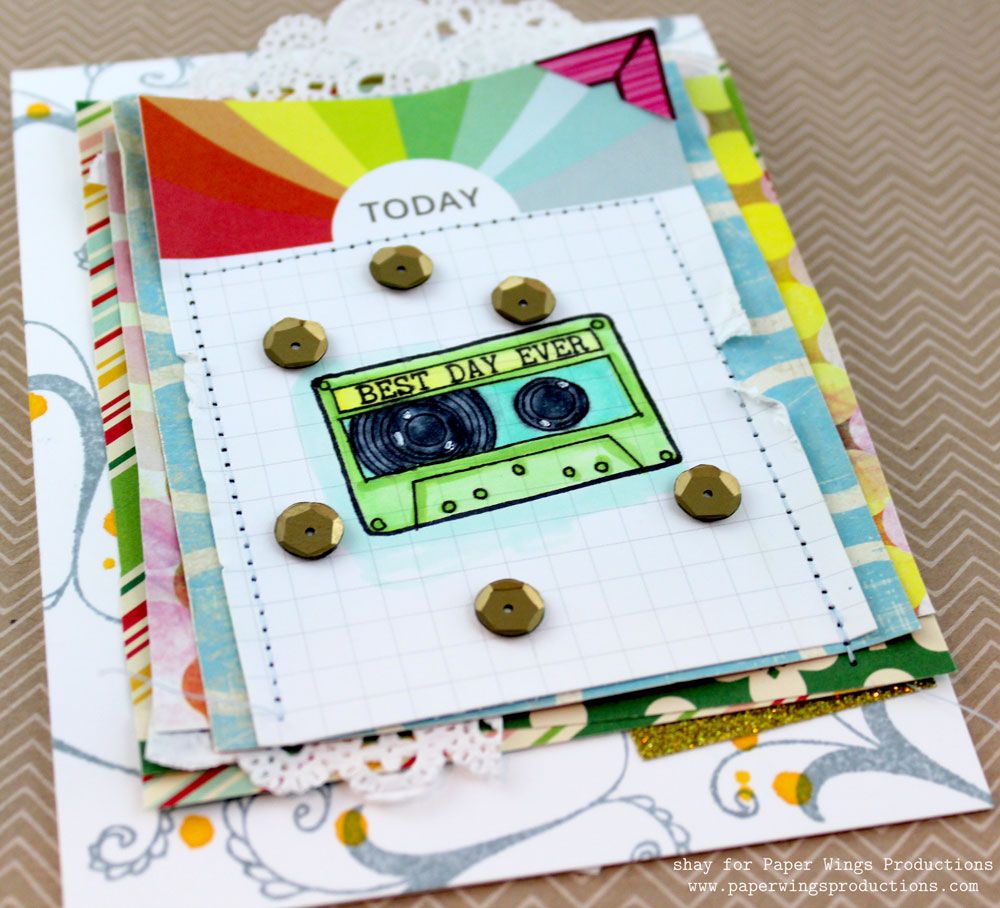
Card No. 3 (the 1970's card according to my sister)


The focal point of the card is a journal card I stamped the cassette tape from Vintage Technology upon in black ink and colored in with Copics and a little highlights using a Uniball white pen.  The "best day ever" is from the Day Framer and happily fits perfectly on the cassette.  I added a few haphazard layers of paper.  I made sure to adhere the larger pieces only in the center.  I sewed the layers together.  I made sure to curl up the edges and distress the edges of the journaling card.  The photo corner is actually a corner of the Life Framer frame stamped onto patterned paper and trimmed.

I added bits of doily and glitter tape.  I adhered these layers to a white cardstock base that I stamped with Flourish Fun 1 in grey ink and sprinkled some drops of orange mist.  Last I added some matte gold sequins.

You can use any sort of scraps of patterned paper or paper pads to change up the look of these sort of cards like I have done here.  If you are anything like me you have so much lovely patterned paper that this would be a great way to use it and be bold with your choices of pattern and color.  Also fun would be to just decorate journaling cards for scrapbooking and/or Project Life without making them into cards.

I hope you have enjoyed today's Themed Thursday.

We would *love* to see what you make with Paper Wings Productions stamps. Add your projects to Facebook, our flickr group, to Pinterest, comment with a link on this post or even email pictures to us!

Take flight,
Shay.

Supplies:
Stamps:

Ink: Memento in tuxedo black, Tsukineko; weather vane, Jenni Bowlin by Ranger
Journaling cards: Studio Calico
Cardstock: solar white, Neenah Paper
Patterned paper: enchanting "sisters" crazy daisy/blue without you from Just Dreamy 2 collection, My Mind's Eye; lucky me "sisters" forever rings from Abbey Road collection, My Mind's Eye; bloom & grow "bloom" vines from Bloom & Grow collection, My Mind's Eye; chicken pox from June Bug collection, Basic Grey; woolworths from Hometown collection, October Afternoon; canning jar from Modern Homemaker collection, October Afternoon; no. 2 pencil from Schoolhouse collection, October Afternoon; sketchbook 6x6 paper pad, Amy Tangerine/American Crafts
Other: colorless blender (0), cool gray no. 3 (C3), cool gray no. 7 (C7), cool shadow (BG10), moon white (BG11), mignonette (YG11), chartreuse (YG13), barium yellow (Y00), canary yellow (Y02) and loquat (YR12), Copic; black precision pen, American Crafts; signo white pen, Uniball; notebook border punch, Fiskars; sewing machine, Brother; buttercup, doris and sherbert Mister Huey's Color Mists, Studio Calico; 4" doilies, Hobby Lobby; matte gold sequins, Studio Calico; sunflower glitter tape, American Crafts; washi

Friday, September 28, 2012

Feature Friday: Falling for Fall


Happy, happy Friday peeps!

It's Shay here and I am delighted to bring you some cards for the autumn season.  I am so happy that the weather is downright pleasant after the heat of summer and I am anticipating all this season brings including autumn crafting.

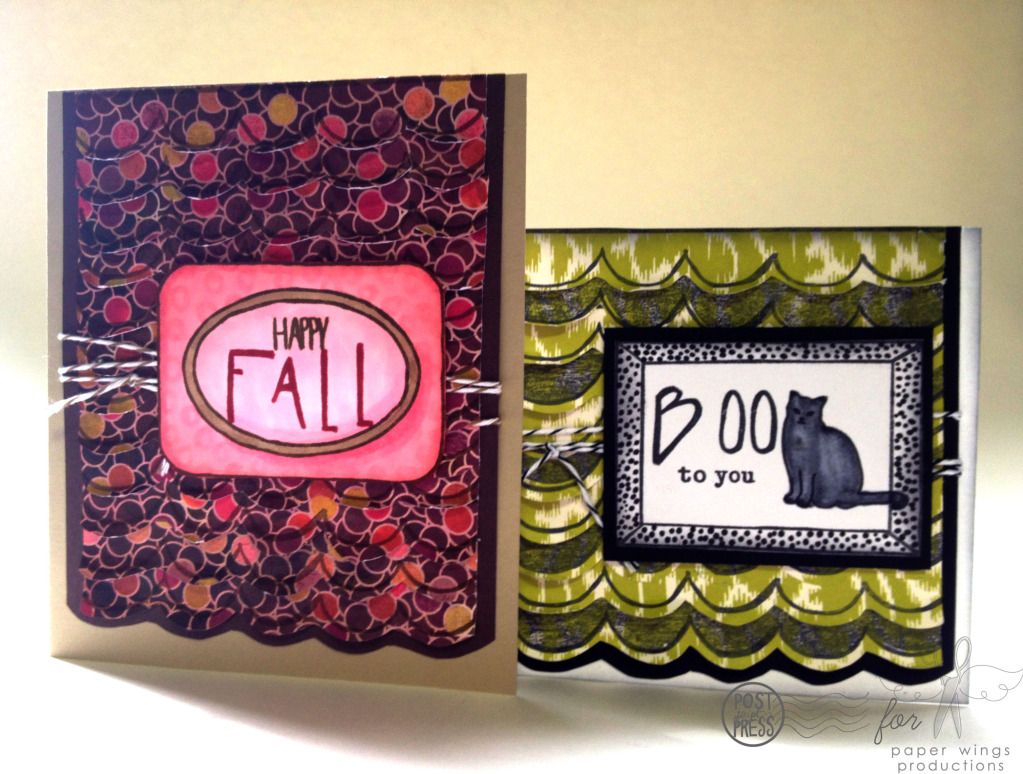
I made two cards that are very similar, but by changing up the colors, sentiments and some of the images they have their own character.


Using the same stamp set, Scallop Border, I made the background for two cards with a different look by using different patterned paper.  All of the border stamps (Double DotLaceLeafLinesScallopSingle DotTriangle and Zig Zag) come with two stamps: an outline and solid that work together or can be used separately.  Another fun feature of the border stamps are that they can be lined up so you are able to stamp the entire length of a 6" x 6", 8" x 8" 8.5" x 11", 12" x 12" page or even larger surfaces.

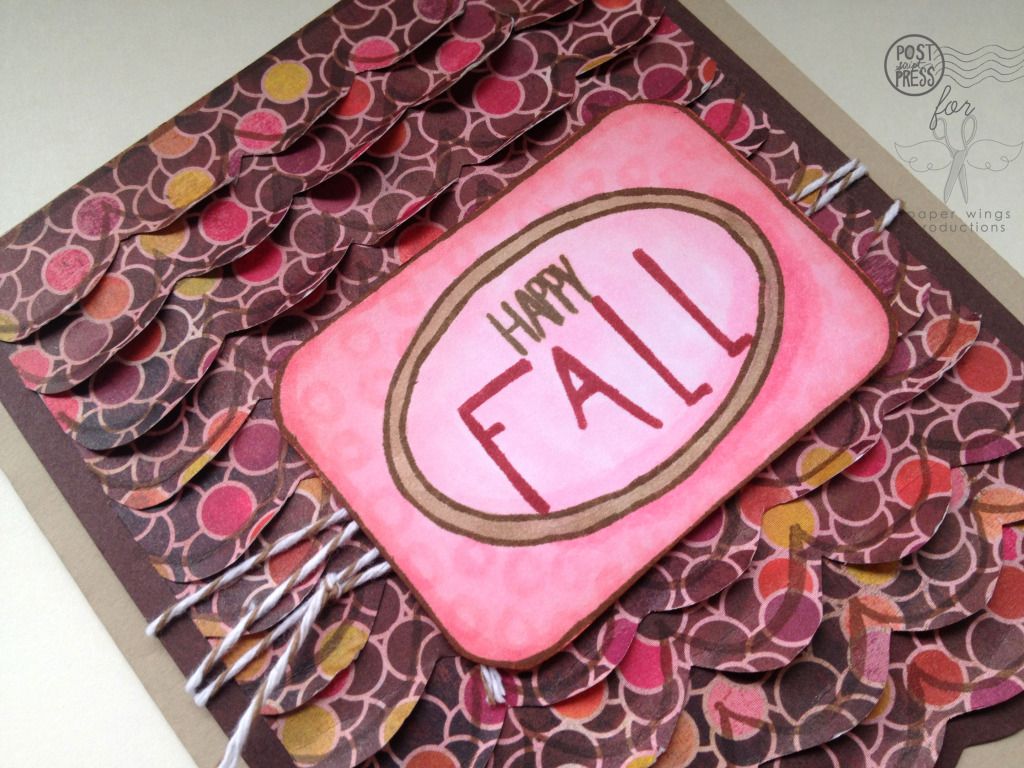
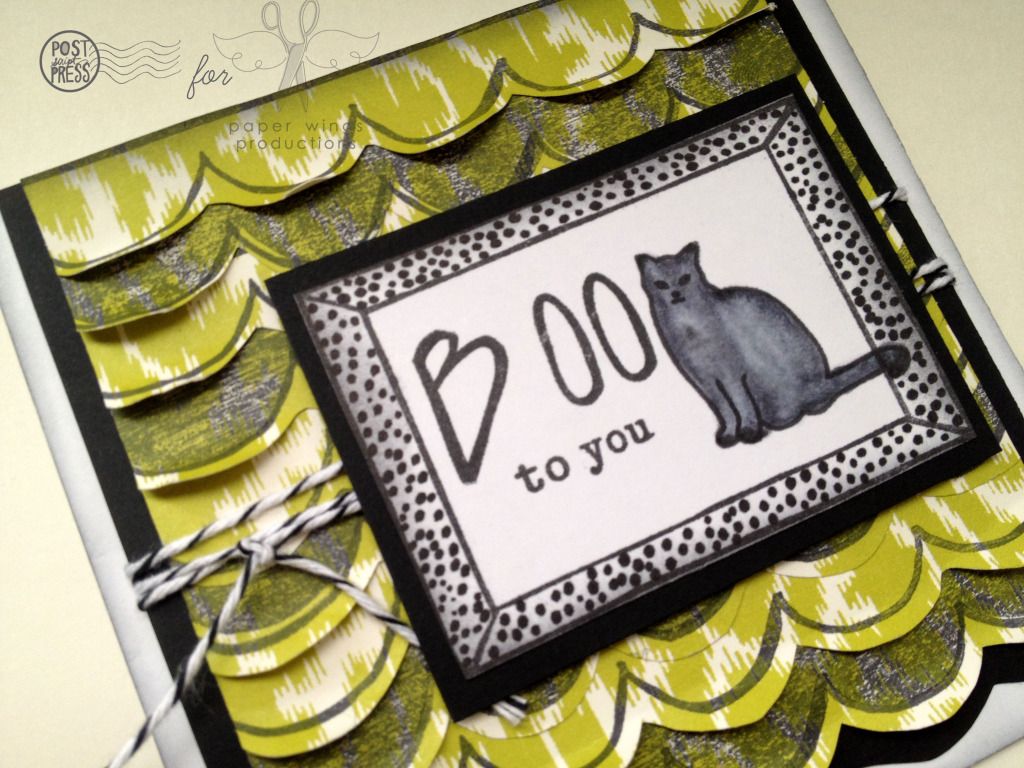
For these cards I simply stamped the scallop outline many times on patterned paper and cut them out and adhered them together (one under the other for a tiered effect) into a panel.  I cut the left and right sides for straight edges. I then adhered all the scallops to a piece of cardstock with the bottom cut into a scallop design.  For the Halloween card I also stamped an equal amount of scallops with the solid scallop in black ink and adhered them alternately.

For interest and dimension I curled up the edges of the scallops.

The sentiments are framed by the frame image in Day Framer for the fall card and the frame image in Life Framer for the Halloween card.  I added dots or circles to both frames using Copic markers.  You can also use patterned paper, paint them in, doodle in designs to decorate your frames...really the possibilities are as varied as the colors in the sky.


Funky Alphabet is perfect for sentiments during autumn (especially Halloween) and I spelled out "boo" and "fall" using them.  The "Happy" is from the fall card is from Details Framer and "to" from the Halloween card is from Snapshot Framer and "you" from the Halloween card is from Day Framer.  The cute cat is from the Window stamp set.


You could use the idea of this tiered scallop background for scrapbook layouts, tags, gift bags, mixed media projects among a few things.  Try one of the other borders for a completely different look.  Embellish with punched images, jewels, leaves, feathers, flowers, ribbons, fabric, lace, pearls, sequins, die cuts and the like to really make it your own.

We would love to see what you are crafting as the weather cools this fall.  Add your projects to our flickr group, to Pinterest, comment with a link on this post or even email pictures to us!

And be sure to stay tuned for our upcoming release for some great autumn and winter stamps to add to your Paper Wings Productions stamp collection!

Take flight,
Shay.

Stamps: Day Framer, Details Framer, Life Framer, Snapshot Framer, Scallop Border, Funky Alphabet, Window
Inks: Memento by Tsukineko in tuxedo black; Jenni Bowlin for Ranger in brown sugar and chili powder; Tim Holtz Distress Ink in black soot
Cardstock: white, Georgia-Pacific; black and kraft, Neenah; chocolate chip, Stampin' Up!
Patterned Paper: Anna Griffin and Basic Grey
Other: twine by Divine Twine; Copic Markers; dimensional adhesive, Stampin' Up!


Friday, June 1, 2012

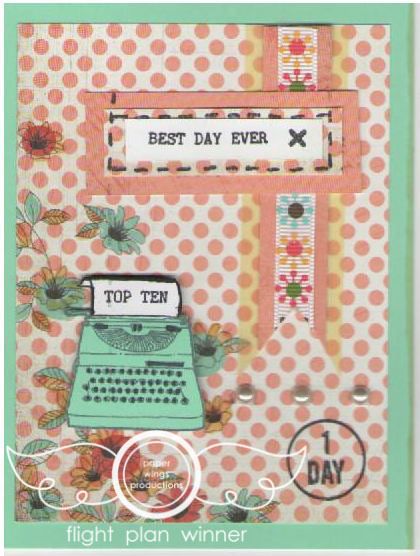
Flight Plan: Mission 002 Winner!

Hello Peeps!

We are so excited to share our May Flight Plan winning submission!  This beautiful card is by Mindy Miller. You can see more of her great projects at her blog.


This is a great interpretation of Mission 002.  I love the color combo, and also the use of a variety of our stamps too!  Mindy used Vintage Technology and Day Framer stamps and came up with a very unique, retro card.  We really love it!

Mindy, please contact Shay at shay@paperwingsproductions.com with the name of your choice of stamp set. Congratulations!


Happy Stamping!
Julie

Friday, May 18, 2012

Color Combo Part II

Happy Friday peeps,

I know I am meeting this Friday with a great deal of relief.  How about you?  Are you too looking forward to the different pace of the weekend?  Planning on doing some stamping?

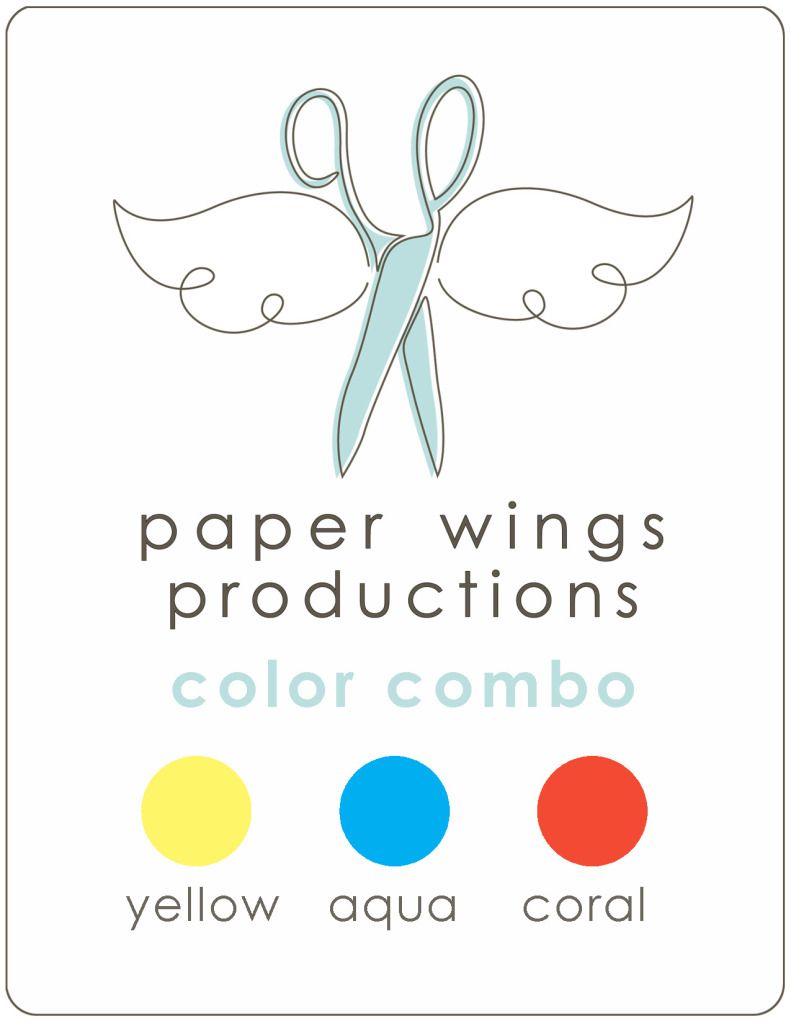
Today I have the second part of the yellow, aqua and coral color combo.  In this post are slightly larger projects than the cards from Wednesday.

Julie's project:


Julie made this timely (I could not resist that cheesy pun) art journal page using Flight Plan Mission 002 as a design guide.  Julie first painted the pages with white paint and then she used watercolor crayons to create the gradient yellow and coral background.  I love how she used Tim Holtz's tissue tape for the strips from the Flight Plan and that you can also see the color behind them.  The frame was cut out using her Silhouette and she colored it in with a Distress Marker (barn door)--even though the color is a red I think it could read as a very deep, rich coral.  Don't feel that the colors must match the color combo exactly...like the Flight Plan they are meant as a guide.  Some reds and pinks will be reminiscent of coral for instance. 

I am particularly taken with the punched circles that she stamped with various borders from Day Framer, Detail Framer, Life Framer and Snapshot Framer.  The days of the week are from Snapshot Framer and the date are from the Life Framer

How did she create those circles with perfectly coordinated colors of the stamped image and its background? Julie stamped each circle with one of the borders using Distress Inks in the following colors: tumbled glass, broken china, barn door, scattered straw.  To color in the backgrounds she took the ink pad and pressed it into her craft sheet.  She then sprayed or spritzed the ink she transferred onto her craft sheet with water (use a little water spray bottle) and used a paint brush to paint lighter shades of the color she stamped with onto the circles. 

To add some aqua (or in this instance teal) to the bottom left hand portion of her page she placed a piece of patterned paper under the gold (yellow) and red (coral) chipboard letters.

To future compliment her theme of time she stamped the clock from Melange Women 2 (I think) down the left hand side of the page.

Shay's project:


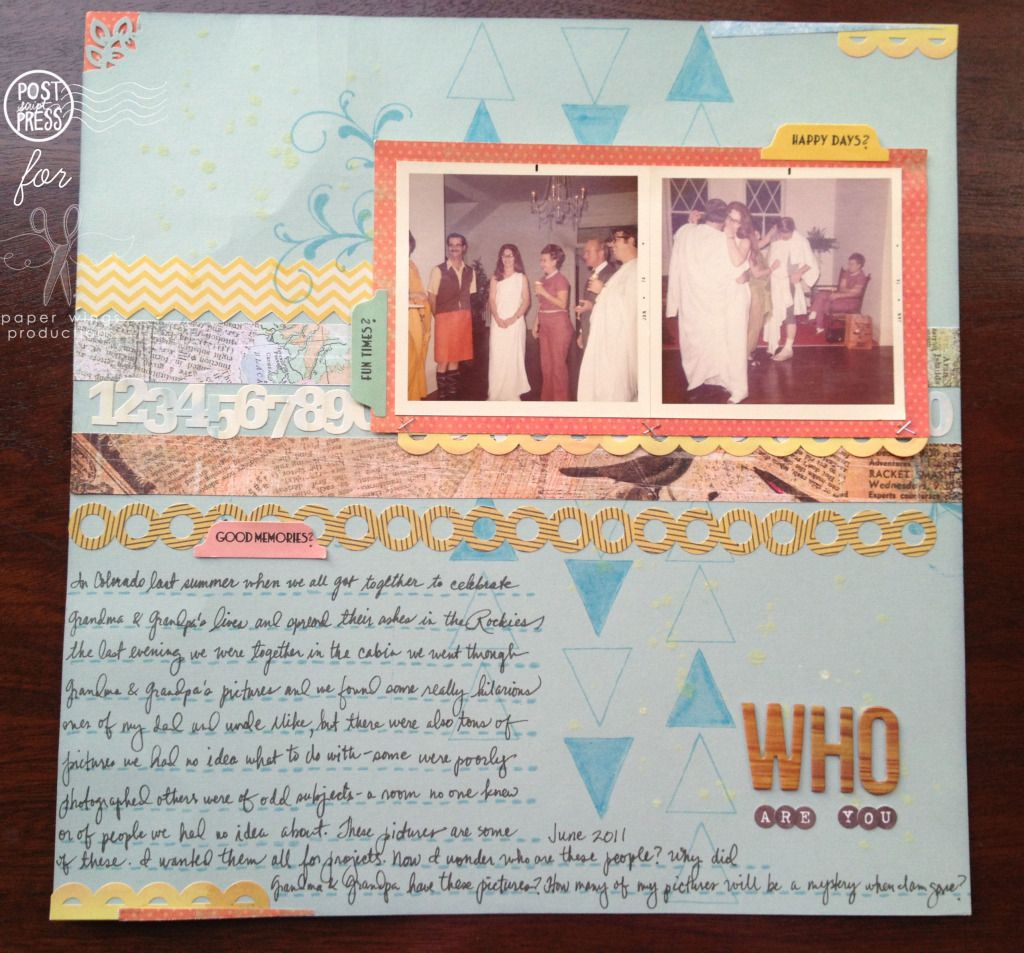
I decided to try my hand again at scrapbooking.  I haven't done a 12x12 spread in ages, but with a color combo and using the Flight Plan Mission 002 I thought I would give it a try.   The main point of this layout is the journaling because the pictures although really cool are a mystery.  Another thing that helped me to tackle something I was pretty unfamiliar with was a scrapbook kit from Studio Calico (Glee Club from September 2011 which had the right colors and elements I really liked).  I think it is always important to realize that you need not do it all.  There are all sorts of ways to help you to create like sketches (like our Flight Plans), color challenges (like our color combo) and/or ready made kits.  I also added a sticker sheet from October Afternoon which were in the right colors to pile of supplies to use along with some cream Mister Huey's (reads as a pale yellow color) which I used in the upper left hand side and lower right hand side.

In my scrapbook layout I think of stamping as the foundation.  I created lines of triangles that remind me of arrows using the large pennant from Happy Day to act as the strips from Flight Plan Mission 002, but also for movement and to direct the eye to the pictures.  I colored in a few odd triangles with an aqua colored marker.  I didn't realize until later that the triangles mimic the diamond pattern of the window in the right hand picture.  Happy accidents which no one but you has to know was unintentional...tell people you meant to do it!  I added the flourishes from Flourish Fun 1 under the upper left hand corner and lower right hand corner of the photo block for some interest and more of an organic feel after so many more angular elements.  All of my journaling was written on journal lines created from one of the border stamps from Day Framer...this border is perfect for journaling lines as you can stamp it over and over to make the line as long as you need it.

You probably noticed that my yellows, aquas and corals on this layout are a bit dusty or aged which is perfect for the older pictures whereas Julie's colors are more saturated and brighter reflecting a happy feeling.  You can always use variations on the colors to reflect your story or project. 

I hope you have the chance to play and experiment with something new or unfamiliar this weekend perhaps trying a new product, some stamps that you have been meaning to ink up, a different color combination than usual or a new technique.  We would love to see what you do!  Share with us on this post, our flickr group, Pinterest, Instagram (our user name is: paperwingsproductions), Twitter or Facebook!

Come back next week for some more Paper Wings Productions projects.

Take flight,
Shay.

Thursday, April 26, 2012

Fiesta!

Good day peeps,

We are in the thick of Fiesta here in San Antonio.  We have a slew of stamps to celebrate this festive and joyous time.  How about some inspiration for your art and crafting using Paper Wings Productions stamps?

First up is a fun card by Carrie using Mexican Folk Art, Day Framer and Life Framer that you could send your friends during Fiesta or to invite them to a Fiesta themed celebration:


Next up is a terrific tag by Julie using the Happy Day and Deep in the Heart of Texas stamp sets.  It would be fun to hang a set of Fiesta themed tags in your house to celebrate.

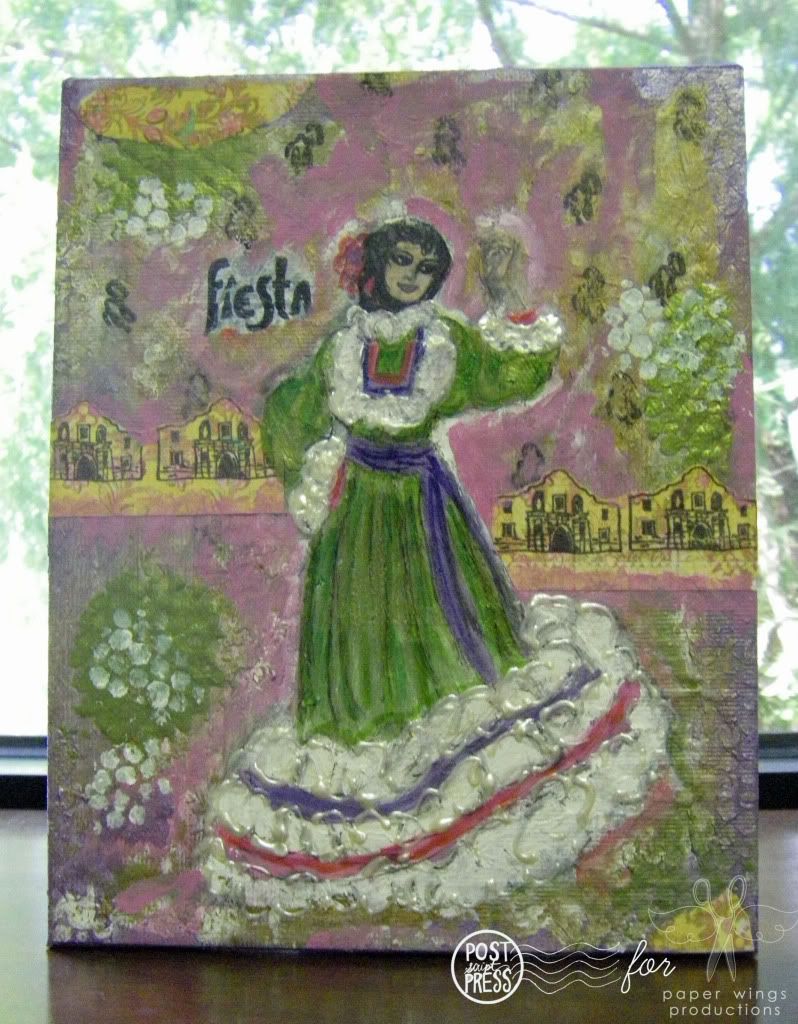
Next up is my attempt at a canvas with a Fiesta dancer.  I used the Deep in the Heart of Texas and Melange 3 stamp sets.


Enjoy a bright and colorful Fiesta!

AND remember to upload your Flight Plan creations...we would love to see you do a Fiesta themed piece of art using the Flight Plan as inspiration.  For more details on the Flight Plan challenge go HERE.  You could win a free stamp set of your choice!

Take flight,
Shay.

Friday, April 13, 2012

Introduction to Liz Allen

Dear peeps,

If you haven't already encountered Liz Allen of Fine & Fancy, you are in for a treat.  Liz Allen is a woman of boundless talent and heart.  She makes life sparkle with prettiness and happy thoughts.  She is also a master at making art that is uniquely her own and dazzling.  She's a warm and giving teacher with a wealth of knowledge and experience with stamping and other arts and crafts.  We are lucky enough to have her as our special designer, our Artist in Flight.  You are going to love her, just as we do! 

How would you like to learn more about Ms. Liz?  Here are her answers to the 10 Things Questionnaire. Her answers are in black:

One of your favorite books from childhood?
The Little House on the Prairie Series…I used to check them out over and over from the library at my elementary school. J

Two trends that you will never stop loving no matter how wrong?
I will always love urban, shabby and eclectic…I love to mix the old and the new.

Three of your roles in life?
Sister*Aunt*Friend

Four of your favorite art tools?
1) Needle and Thread, 2) ALL my coloring mediums like Caran d’ache crayons, acrylic paint, Prisma pencils and gamsol, dye ink, etc., 3) my fingers because they are the ABSOLUTE PERFECT tool to paint, smudge, tear, hold, pinch, tie, and dotdotdot, and 4) of course anything sparkly.

Five places you want to visit?
The Swiss Alps, The Amalfi Coast, Bali, Paris, and Australia

Six sources of inspiration?
TOO many to list because I get inspiration from EVERYWHERE and EVERYONE

Seven people that you wish to thank?
YIKES!!!  I am not so good with numbers so I will list some of the many many people that have made an impact on my life.  First of all, I would like to thank God. Everything that I am and have is because of His love, grace, and sacrifice. Next, I would like to thank my Mom and Dad…they were the absolute GREATEST parents ever and made sure that my sisters and I had the very BEST of everything…dancing, swimming, ballet, clarinet, piano lessons, nice clothes to wear, ALWAYS a hot meal on the table, and the list goes on and on. And of course I can’t forget my sisters, my brothers-n-law and my wonderful nephews…IN a word they are just plain AWESOME. I also have my aunt and her sons and their wives (which are really more brothers and sisters than cousins) that have been extra special family members. AND lastly but NOT leastly are my friends. I TRULY have the BEST friends IN THE WORLD. I have lived in many places, but not a day goes by that I don’t have a happy memory of a friend, or a family member or SOMEONE that has changed by life. I am truly blessed…

Eight totally random bits of information:
1.           Do you like silence, listen to music or watch something as you create?
Depends on what I’m working on…but if it is music, the louder the better (hahah)
2.           Do you cook?
LoveLoveLove to cook AND bake and try new recipes. And I love it even better if it tastes good (hahah)---Guinea Pigs WANTED to try new recipes!!!
3.           Velma, Fred, Daphne, Shaggy or Scooby?
That would be Scooby…if only because he has a cool name.
4.           If you could have a superpower, what would it be?
I wish I could have the power to help everyone that needs help and put a smile on their face and help them to know AND believe that there is ALWAYS someone who loves them and is glad that they are around.
5.           A book you would like to live in?
I would want to be Ms. Scarlett in Gone With the Wind so I could have a 19 inch waist and wear all of her pretty dresses.
6.           How many pets?
None, just my adopted BFF (Brown Furry Friend) Jake who belongs to my sister Penny. He gives UNCONDITIONAL love and loves me just the way I am.
7.           What talent do you wish you had?
Singing of course (but that doesn’t stop me from singing at the top of my lungs when I am in the car…(alone to protect the innocent ;)
8.           Who do you wish would decorate your house?
I LOVE to decorate myself but if I could get help and the sky was the limit I would pick Genevieve Gorder or Candice Olsen to decorate and David Bromstedt to paint me one of him fabulous pieces of art.

Nine items on or in your desk/worktable?
EVERYTHING! You name it and it is on my table. My studio is a work/disaster in progress so I surround myself with all my little art toys that make me so happy.

Ten colors you could not live without?
I am a VERY monochromatic kind of gal but I do love aqua, any shade of green and pink, vanilla, chocolate brown, white, black, crimson red, pale butter yellow, Kraft brown, and periwinkle blue. (Okay, so maybe I can’t count…)

Now you now just a smidgen about me…Hope to get to know all of you better tooooooo!!!    XoXo liz

Let's give you a shimmering wisp of what Liz has made with Paper Wings Productions stamps. 

This tag she whipped up at my make and take table during the Launch Party in March.  She awed us all with how with some simple supplies like ink, colored pencils and stickles, Paper Wings Productions stamps and her cleverness she created this beauty complete with a window to another layer.  Yes, that is her own handwriting and yes, we will be seeing more of it. ;-)

Stamps used: Flourish Fun, Let's Eat Cake, Milagros and Day Framer

Be sure to check back for more posts featuring the delightful art of Liz Allen.  You haven't seen anything yet! 

Take flight,
Shay.
Related Posts Plugin for WordPress, Blogger...