Showing posts with label home tweet home. Show all posts

Thursday, March 31, 2016

Home Tweet Home

Hello friends. Larissa here today with a Home Tweet Home card for you.
I am using the stamp set Home Tweet Home clear set .


I stamped the images on a piece of white cardstock and colored them using Copic markers. I used B00, B02, B21, B23, E000, E00, E01, BG000, and RV4.
I adhered the card front on a piece of blue cardstock as a mat and then on a gray card base.
I wrapped a piece of ivory and gold twine around the side of the card to finish it off.

This would be a perfect set to make a wedding card as well. 


Have a wonderful day friends.

Larissa Pittman 

Thursday, November 13, 2014

Themed Thursday- FALL


Hey guys, Happy Thursday! Katie here today for Themed Thursday! I used the theme fall for my projects. The weather has been pretty nice here lately so I was inspired!


For my first card I used these stamps: Build A Scene, Home Tweet Home, Swirl, and Fall Add Ons. I stamped them all onto a piece of card stock to create this Autumn-y scene and then colored them with copic markers.


For my second card, I stamped a bunch of leaves from the Fall Add Ons stamp onto a piece of cardstock and cut it out into a label shape on my Spellbinders machine then layered it with other embellishments on to the card.


Tuesday, September 9, 2014

Tutorial Tuesday- Neon Patterns

Hi everyone, Katie here for Tutorial Tuesday! Today's card is very bright and colorful! I used Imagine Crafts/Tsukineko Neon inks.


Before I tell you more about my card, I want to congratulate the winner of our blog hop giveaway.  Our winner is number #14-

Amazing hop love all those purples !!!!
Nikki, please contact Carrie at paperwingsproductions@hotmail.com for instructions on how to claim your prize.  Thank you to everyone for joining us!!


I used 3 different stamp sets for this card, Home Tweet Home, Funky Lowercase Alphabet and the new Sacred Geometry 2 stamps! I love the new designs in the Sacred Geometry stamp set, especially the triangle, which I used on this card to create that fun multi colored background.

Here's how I did it-
Ink up your stamp with one color and starting on the top edge of your paper, stamp your pattern.


Clean your stamp and then ink it with a second color and stamp it just below your first row. This works really well with shapes like triangles.


Repeat until you've covered your paper, switching colors as you go.


That's it! You have a fun new background to use on your cards, layouts, journal pages, etc! To finish my card, I stamped my sentiment using the Funky Lowercase Alphabet and also stamped the house from the Home Tweet Home stamp set onto white card stock, cut it out and glued it on.


If you haven't seen the new Sacred Geometry 2 stamps, check those out here! If you're looking for more tutorials, last week Erica shared a fun tutorial with alcohol inks.


Wednesday, May 28, 2014

Families Are Forever

*****Join our May Challenge: ANYTHING GOES, HERE*****


Hello everyone! It's Amber here with this weeks Whats Up Wednesday post.
I thought it would be fun to share a fun family themed card today since Memorial Day was just a few days ago. I hope you all had a wonderful weekend with your loved ones. I had a great time with family and friends this weekend. I especially enjoyed the hamburgers, hot dogs, corn on the cob, and delicious watermelon. 


If your stopping by for the first time this week you might want to check out Katie's fabulous Scrapbook Saturday post along with Norma's wonderful Mixed Media post from Monday. Katie shared a delightful little mini album that she created as a graduation gift for here sister. You can check it out HERE. Norma shared a fabulous mixed media layout that she created using the leftovers from several Nesting Components kits. You can check it out HERE. You can also find the current Nesting Component Kit HERE along with a few of the past kits.


This cute little image and sentiment are from the Paper Wings Productions Home Tweet Home Clear Stamp Set. I used the large family portrait image as the main focal point and I add the "Families Are Forever" sentiment to a little die cut tag along with some ribbon to my card front. Thanks for visiting! Don't forget we would love to see what you make with Paper Wings Productions Stamps so add your projects to our Flickr Group,to Pinterest, or leave a comment with a link to your project. You can also check out our Facebook Page and You Tube Page for daily inspiration.
Supplies: Cardstock- White & Tan / Patterned Paper- Elle's Studio / Paper Wings Productions Clear Stamp Set- Home Tweet Home / Staz- On Ink Pad- Jet Black / CTMH Markers / Sizzix Die- Tags / Yellow Ribbon- Offray / Sulky Thread- Black / Sewing Machine 


Friday, February 8, 2013

Feature Friday: An Old Fashioned Valentine

Happy, happy Friday!

It's Shay here.  There has been some truly fabulous projects this week so I recommend first scrolling down to see them all before you return to this post.  I can wait.

Welcome back!  Are the design team talented or what?

Today I have some cuties for you.  What is better than miniature little Valentines?  Okay, winning the lottery to name one thing, but do you recall being a little lady or gent at school and giving and receiving Valentines?  I thought it was better than apple pie and I still love them so I thought why not make some with my awesome Paper Wings Productions stamps?

I created three of these little darlings...honestly I could have made dozens with the ideas swimming in my head. 


I used a nifty new die I bought that is a mini pocket to be the sleeve for my little Valentine cards.  The sleeve measures 2.5" x 3.8" while the cards are approximately 2 3/8" x 3 5/8".

Card No. 1:


This is the true romantic card set.  I inked up the Damask from Backgrounds or Damask using pink and red inks that I then spritzed with water and stamped upon the heart and the outside of the sleeve.  Under the heart is music from the Text Melange or Music in grey ink. I love these essential stamp sets...they work for nearly any theme and project.  I added the amor banner from Milagros which I stamped in red and colored in with Copic markers.  I added a heart and dots (remnants from the XOXO border on the sleeve).  I finished the card with some washi.  The sleeve is decorated with washi, XOXO, pink and white bakers twine and a heart.  The final touch is the little ticket/label from Tabs and Banners stamped with "for you" from Sophie.

Card No. 2:


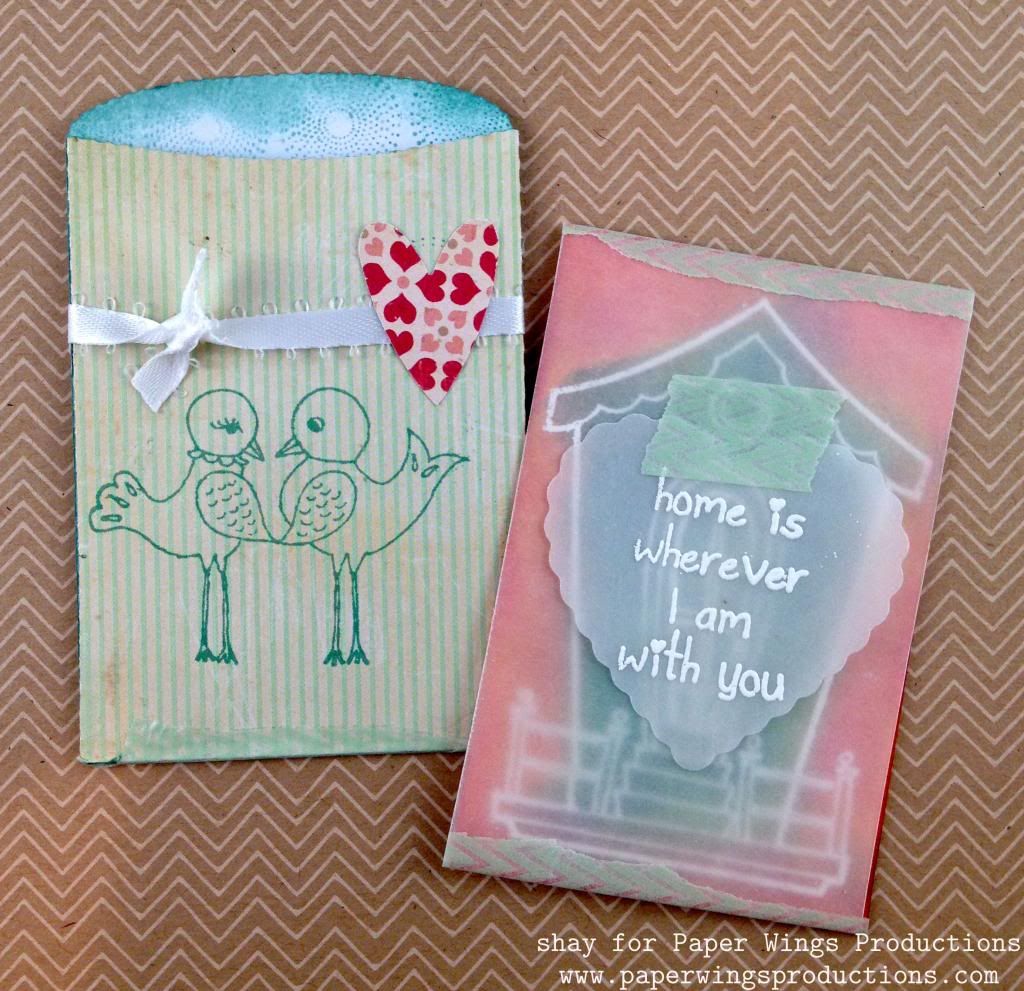
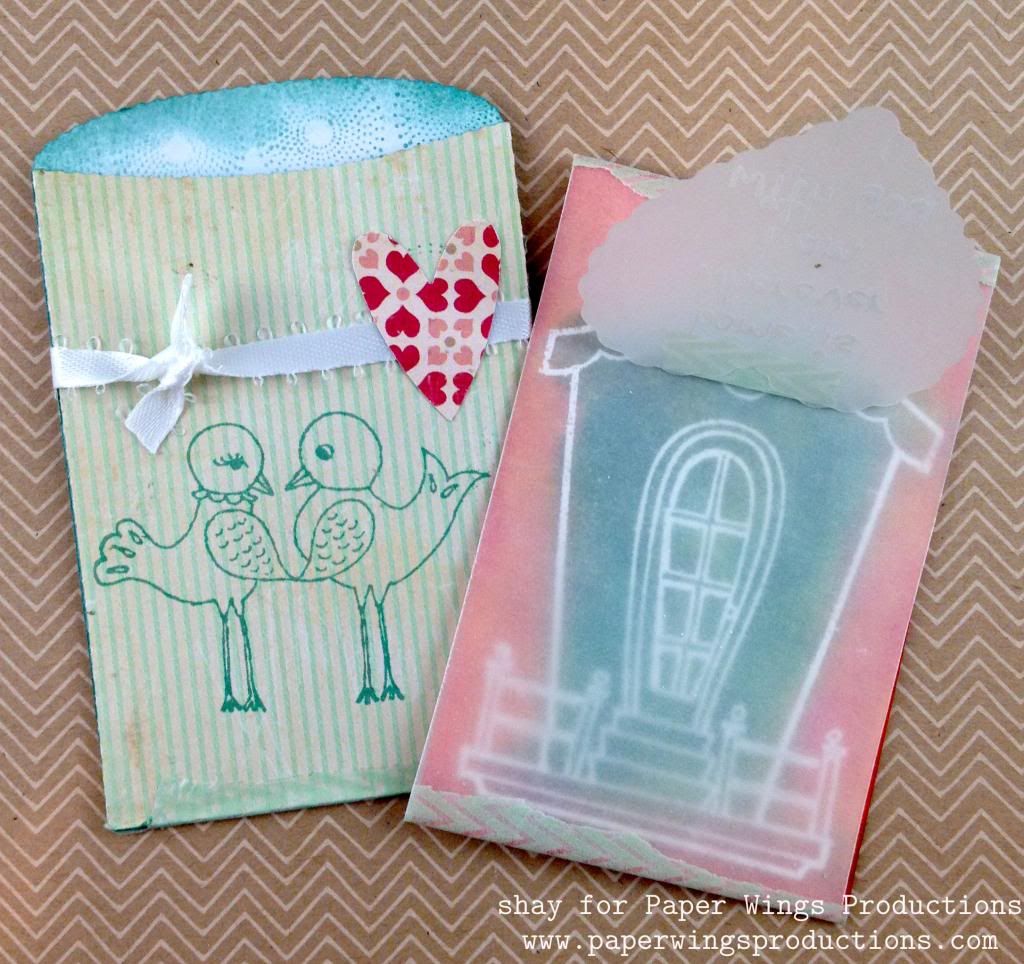
Here's the sweet card set.  The card is stamped with the birdhouse from Home Tweet Home using VersaMark and embossed with white embossing powder.  Then I colored in the image using Distress Inks.  I chose some unusual and bright colors which I then softened by adding a layer of vellum.  I added another layer of vellum with a scallop heart die cut which I embossed with white embossing powder using a sweet sentiment from Home Tweet Home.  How adorable is this stamp set?  I adhered all the vellum with washi.

Here is a look at the house under the vellum heart:


The inside of the sleeve is decorated with the circles from Backgrounds or Circles and I also inked the edges.  The outside of the sleeve is stamped with the love birds from Home Tweet Home, tied with a white ribbon and finished with a heart.

Card No. 3:


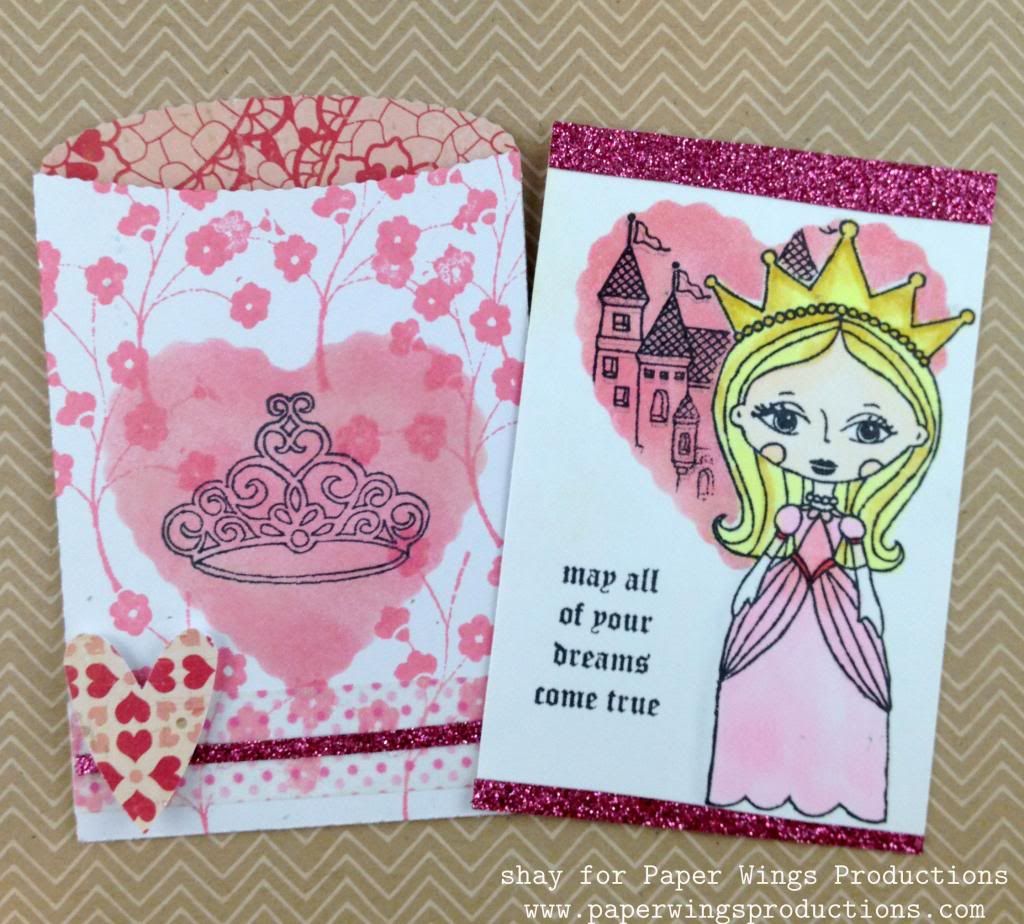
The card for your inner princess or the little princess in your life.  Using Princess I stamped and colored her in with Copic markers.  I then masked her off and used a reverse mask of the scalloped heart to ink in the area behind her and stamp the castle from Prince.  The sentiment is also from Prince.  These are truly charming and lovely stamps and so perfect for children's Valentines.  I finished the card with pink glitter fabric tape.  The sleeve is also decorated with a reverse heart mask that I stamped the crown from Princess on.  Over that I stamped the sprig of flowers from Flower Power or Mini Flowers.  This is finished off with washi, fabric tape and a heart.

What fun these would be to make with your children, grandchildren, nieces, nephews, godchild or with the kids at heart in your life!  They would have so much fun making them and so proud to give them out too.  On the back of the cards is plenty of room for a little handwritten note.  Another alternative is to pack these little sweeties in a lunch for school or work.

The possibilities of which Paper Wings Productions stamps to use and how to use them are endless.  I thought Sophie, Louise, Marcel or Luc would be fun to use not to mention the Prince.  You could easily use Paris or London.  Vintage Technology or Play with Your Coffee would be fabulous too.  That is just off the top of my head! 

Another really cool thing about these little card and sleeve duo are that they are still small enough to fit in a Project Life 3x4 pocket which is a lovely thing for anyone doing Project Life.

I hope you feel inspired to ink up your Paper Wings Productions stamps!  There is still time for Valentine's Day. 

We would *love* to see what you make with Paper Wings Productions stamps. Add your projects to Facebook, our flickr group, to Pinterest, comment with a link on this post or even email pictures to us!

Take flight,
Shay.

Supplies:
Stamps:


Cardstock: Georgia Pacific
Ink: tuxedo black Memento and VersaMark, Tsukineko; chewing gum, cough syrup and weather vane, Jenni Bowlin for Ranger; fired brick, worn lipstick, tattered rose, scattered straw, wild honey, iced spruce and evergreen bough, Tim Holtz Distress Ink by Ranger
Patterned Paper: Paper Heart 12x12 paper pad, Crate Paper; Dilly Dally "Hello" Flannel from Miss Caroline collection, My Mind's Eye
Other: vellum; heart punch, Stampin' Up!; washi, various; fabric tape; white ribbon, Offray; opaque white embossing powder, JudiKins; nesting scallop hearts dies, Lifestyle Crafts/QuicKutz; mini pocket die, Lifestyle Crafts/QuicKutz; XOXO border die, Papertrey Ink; Cuttlebug, Provo Craft; Copic markers; pink and white baker's twine


Sunday, June 3, 2012

Flight Plan: Mission 003


Hello peeps!

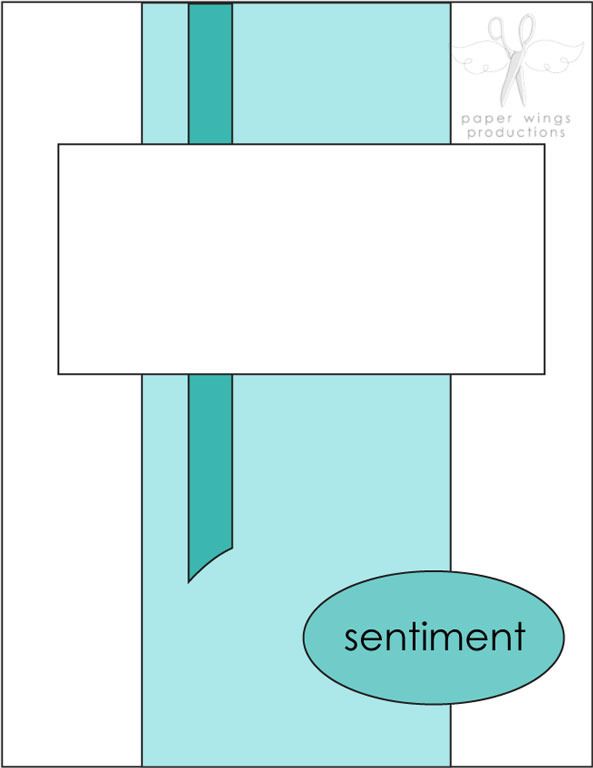
It's Julie here with a new Flight Plan!  Are you ready for Mission 003?   It's June and I don't know about you, but things always seem to get busy in June - weddings, showers, Father's day, family summer gatherings - and I usually make more cards and projects this time of year than any other.  I can't wait to see your projects, and I am especially excited about the samples you will make when the new stamps are released!!!  The Paper Wings gals really love looking at your projects, but we want to see more.  How about inviting a friend to join you in this challenge?  That would be a fun weekend project!   Here is our sample for Mission 003.


What is a Flight Plan?


It is a guide of sorts to get your project started by giving you some guidelines to follow, but in our case, we hope your creativity will interpret these plans into amazing and clever new creations. We’d love to see your finished pieces, so we have set up a Flickr gallery where you can share your submissions with us. So, put on those paper wings and get ready to take flight!


Your Mission:
Create a project (card, ATC, tag, scrapbook layout, multi-media piece, etc.) using paper wings productions stamps with the Flight Plan as your guide.

  • Share a picture of your project on our Flickr group. Make sure to tag it using this code: FP003. If your picture is not tagged we will not know it has been entered into the challenge.
  • You have until  Saturday, June 30, 2012 at 11:59 p.m. central time to post your entries.
  • Enter as many times as you wish before the deadline.
  • We will choose a winner to receive their wings and a stamp set of their choice.
Shay's card


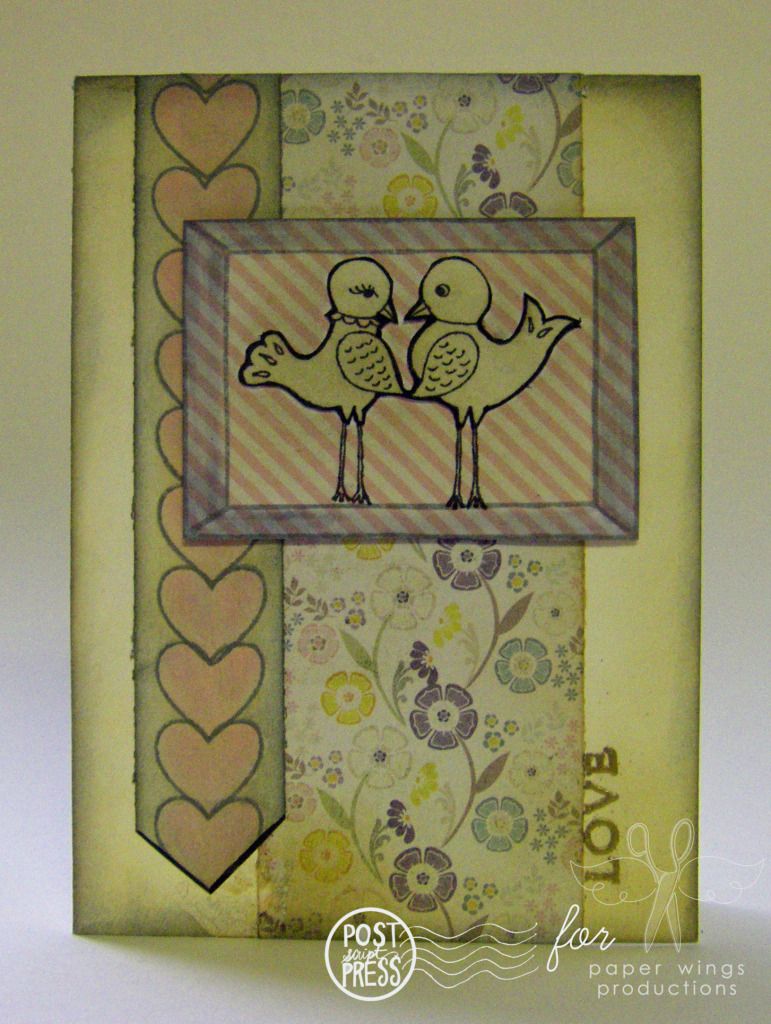
To begin with I wanted to try a card using the Flight Plan.  I decided to go with a love theme using the love birds from Home Tweet Home framed by the frame image from the Life Framer set.  The line of hearts was created using the heart from Frothy Concoctions (I so wanted to use that heart that I based the whole card around it).  Lastly I embossed the word love from Banner in gold using Tsukineko's Versamark ink.


Julie's Card


I chose to be very literal with the Flight Plan this time (but as you know from our other samples, you certainly don't have to). The coffee border stamp from Play With Your Coffee works nicely for the rectangle portion of the FP, and I grabbed the Happy Birthday sentiment from Let's Eat Cake.  I wanted to use my new Aquamarkers on this card, so I stamped it on watercolor paper with Memento ink from Tsukineko because once it is dry, it is waterproof - perfect for watercoloring.  I love this polka dot and found all of these pattern papers in my scrap pile.  This card came together in a flash!


We hope you like the new Flight Plan and we look forward to seeing your creations!

Paper Wings Gals

Related Posts Plugin for WordPress, Blogger...