Showing posts with label Mr. Huey's Mist. Show all posts

Saturday, August 23, 2014

Scrapbook Saturday!


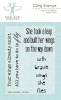
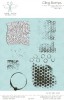
Hey everyone! It's Ashley here with a guest post for Scrapbook Saturday! I have a 12x12 page to share today using the Art Textures stamp set, Mr Huey's Shine mist, gold foil wing embellishments, and the With Wings stamp set.

I really wanted to use the With Wings stamp set but the sentiment I wanted to use said "with brave wings she flies" so it was not going to work. No problem. I just masked the 's' in she and made the stamp work for my page!


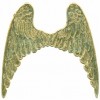
The gold wings were something I really wanted to use with the With Wings stamp set; obviously they were made for each other! The gold foil didn't coordinate with my page so I altered them. I sanded the top layer of the wings to scuff them up a bit and then heat embossed with a layer of white embossing powder. Before the white layer was cool and dry, I added a layer of the fired brick embossing powder. This time I let the wings completely cool and then I added a second layer of fired brick. Since it was distress embossing powder, the wings have great dimension, some of the white layer shows through, and you can still see all their detail. I love how they look on this page!
On my patterned papers, I misted Mister Huey's Shine in a few places. I grabbed my Art Textures cling stamp set and started to build some dimension. I mixed gesso with the Shine spray and stamped the smaller circles. You can use your heating tool to help this dry more quickly. With the chicken wire stamp, I heat embossed with white and fired brick. Then I mixed more Shine mist into my gesso/Shine combo and stamped the large circles. Lastly I added some heat embossed smaller circles in fired brick.
Finally I can share my whole page...

I've linked up my products below. Thanks so much for stopping by today and thanks to the PWP girls and Carrie for having me this month! It's been a blast! :)


Friday, September 27, 2013

Feature Friday:With Some Sparkle

Happy Friday everyone!  Erica here to share with you this weeks Feature Friday and I have chosen to feature the cling mount stamp set With Some Sparkle.  If you like glitter and shine then this stamp set is definitely for you!  It is great for all types of projects and today I am using it along with products from my stash and the Paper Wings Productions Shop.  This year is going by so quickly and soon I will need to start my journal for 2014!  So I pulled a blank journal I had in my stash and began to create my cover using this fabulous stamp set With Some Sparkle.  My journal had a great chipboard cover that was nice and thick and already had a hexagon pattern etched into it.  So I pulled out a handful of mists, inks and paint and went to town decorating my cover.  After I had a layer of color mists down I chose one of my glimmer mist and sprayed the whole cover to add some extra sparkle!  You can find a great selection of mists and inks the PWP shop HERE!  Next I took one of our great background stamps, inked it up with some black ink, stamped once on scrap paper and then again on my journal for a lighter effect.  I did this in a few random places on my journal.  Once that was done I grabbed a stencil and some white ink and created some circles, once again in random places.  We have some great STENCILS in our shop and they are just screaming your name!  If you are have never used them before they are a lot of fun!  Check out this great post from Norma using stencils  HERE.  Once my white ink was dry it was time to start stamping!  I stamped out the fabulous tiara image in the bottom left of my journal in black ink and added a rhinestone to the center of the tiara!


Next I stamped one of the great sayings in this stamp set on top of the circles I had just added to my journal cover! 


I love this saying and it is the perfect title for my 2014 journal!  I then took two more sentiments from the set and masked off the stamps leaving just the word SPARKLE and stamped them out on my cover! 


  I added a few embellishments some washi tape and outlined a few of the hexagons and colored some in with Gelatos from the PWP Shop.  Once I had everything down I took my white color mist and added a few droplets and called it done...well sort of.  I am sure as the time goes on things will slowly be added to my cover but for now this is my finished project!


Thanks so much for joining me today and as always I appreciate your comments very much!  Please visit us and share your creations using Paper Wings Productions products on our FACEBOOK page, PINTEREST, FLICKER GROUP and we are also on INSTAGRAM so tag us @paperwingsproductions and use #paperwingsproductions!

Saturday, August 24, 2013

Scrapbook Saturday - August Nesting Components Layout

Hi Paper Wings fans! Dana here today sharing a layout that I created with the August Nesting Components Mixed Media Kit. I not only used the kit supplies, but also part of the packaging.


The sturdy piece of chipboard that helps protect the kit contents during mailing is approximately 8.5x11 and made a create base for my layout! I used the Circle Background Cling Stamp to add a fun pattern to the chipboard base.


I added some script with my favorite Writing Background Cling Stamp.


I added color to the background with Distress Ink, Mr. Huey's Mist and the Art Textures Cling Stamp Set. The brown dot pattern is one of the art texture stamps and a great way to fill out color splatter patterns in a more predictable way!


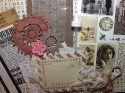
I added several layers of patterned envelope pieces under my photo. The Tim Holtz Rub-On package contains a variety of sizes, many of which are perfect for use on photograhps.


I used a Tim Holtz Rub-On for the title, which I accented with a torn piece of Kaisercraft wrapping paper and another of my favorite Art Texture stamps.

Thanks so much for stopping by today! Have a great weekend.
~Dana


Related Posts Plugin for WordPress, Blogger...