Showing posts with label feature friday. Show all posts

Friday, September 19, 2014

Feature Friday - My Favorite Background Stamp


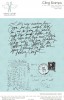
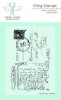
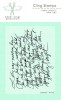
PWP feature friday writing background stamps, mixed media tags created by www.serendipitystudiobycw.blogspot.com

Hi Paper Wings friends!  This is Carmen from Serendipity Studio and I've been so lucky to be invited to guest post a couple of times this month. For this first post I wanted to share with you my favorite background stamp from Paper Wings Productions, the Writing Backgrounds cling stamp set.


This stamp set is definitely my go to stamps for creating dimension and character in my backgrounds whether it's on cards, ATC's, canvas or on tags.


I started off with 2, #8 tags and applied Tim Holtz Distress Stains to the background.  On the blue tag I used Stencil Girls S058 Circles stencil with tinted modeling paste.  As you can see the stamps go easily over textured surfaces also.

PWP feature friday writing background stamp, mixed media tags, created by www.serendipitystudiobycw.blogspot.com

I added another layer on this tag with Distress Inks and Stencil Girls stencil S006.  The post card stamp is still very visible.

PWP feature friday writing background stamp, mixed media tags created by www.serendipitystudiobycw.blogspot.com

One trick I've learned for making tag ribbons is taking some seam binding, opening it up, spritzing it with water and then some spray ink.  I used DecoArt's Media Line Mister in purple.

PWP feature friday writing background, DecoArt Media Line Mister, tag ribbon, created by www.serendipitystudiobycw.blogspot.com

I finished off the tags by adding components from the September Well Dressed Nesting Components, Mixed Media Kit.  If you'd like to see more inspiration using this wonderful kit, Click Here and check out Amanda's amazing folio!

PWP feature friday writing background, mixed media tags, created by www.serendipitystudiobycw.blogspot.com


PWP feature friday writing background stamp, mixed media tags created by www.serendipitystudiobycw.blogspot.com

Don't you just love the versatility and effect of this stamp set?  Paper Wings also has a great set of stamps for this month, Click Here for the Stamp of the Month.

I hope you enjoyed visiting with me today and it gave you some inspiration.  We would love for you to share one of your projects at the Paper Wings Productions monthly challenge.  The challenge for September is using ribbon/twine.  Link up your project by September 29th for your chance to win a $20 gift certificate for the Paper Wings Productions online store.

Have a great weekend and I'll be back on 9/29 for some more inspiration!


Friday, August 15, 2014

Feature Friday-Sayings and Sentiments

*****To join our August Anything Goes Challenge Click Here*****


Happy Friday Paper Wings fans!!  Erica here with you today to bring you this week Feature Friday post and this week I am featuring the fabulous stamp set Saying and Sentiments!


The Sayings and Sentiments stamp is is available in the Paper Wings Productions shop and includes 12 red rubber stamps!


I created 3 cards for you today showcasing a few different sentiments from this stamp set.  The August 2014 Nesting Components Kit came with a handful of card bases so I pulled 3 of them out along with some of the papers I had left from the July Nesting Components kit.  I also used some ribbon from my stash along with some circle punches and dies to create my cards.  My first card is very simple but I still love how it turned out.  I punched out a circle in the lower right corner and then stamped the sentiment inside the circle.  I added a scallop frame to the circle and also added some ribbon to complete this card.


For my next card I decided to add some texture to the card base using an embossing folder.  Once it was embossed I punched out some circles using my circle punch and a few different pattern papers from the July kit.   I adhered the circles all over my card letting some go off the edges.  I cut off the excess with my scissors and then added my sentiment.


My last card uses the last piece of 6x6 paper from the July kit and a few strips of pattern paper.  I covered the card base with this beautiful paper and distressed the card base edges with some Tim Holtz Vintage Photo Distress Ink.  I die cut a stitched circle and then punched a 2 more circle to layer on top.  I stamped out the thanks sentiment onto the cream cardstock and also sponged some distress ink around the edges.  To finish this card off I added some seam binding and some May Arts twine.


Thank you so much for joining us today!  I hope you enjoyed my cards using the stamp set Sayings and Sentiments!  This is one of my favorite sentiments stamps from the Paper Wings Productions shop!  To purchase your own set click here!  We also have a couple August and July Nesting Components kit for purchase!  You can find them HERE in the Paper Wings Productions shop.  We would love to see what you are creating with the Paper Wings Productions products!  Link up to our August Anything Goes challenge, post your projects to our Facebook page or our Flickr Gallery and always remember to let your creativity take flight!

Friday, May 16, 2014

Enjoy The Little Things


***** Join our May "Anything Goes" Challenge HERE *****


Hello everyone! It's Amber here with this weeks Feature Friday Post. Today I am sharing this colorful double stamped card. I used one of the images from the Vintage Domino Melange Cling Stamp Set. If your a regular PWP follower then you know this is one of my favorite sets and I have been using it a lot lately. I can't seem to help myself, so I hope you don't mind me sharing another card. Below is a quick little tutorial on my process for double stamping.


I started by choosing an image and two different colored  ink pads that coordinated with my patterned paper. I used Versa Color's  Peony and Sage for my image.


First I stamped my image in Peony onto a white piece of cardstock. I usually like to stamp the darker color first and then add the lighter color over the top.


Then I inked up the same image in Sage and stamped it directly over the first image. You can see in the photo above that the Sage ink lightened up the Peony ink but the two colors still blended nicely together. You might want to try combining different colors and double stamping the image a few different times onto a scrap piece of paper first before trying it on your cardstock,  it can be a little tricky lining the image up.


Thanks for visiting! Don't forget we would love to see what you make with Paper Wings Productions Stamps so add your projects to our Flickr Group, to Pinterest, or leave a comment with a link to your project. You can also check out our Facebook Page and You Tube Page for daily inspiration.
Supplies: Cardstock- White, Sage, Peony / Patterned Paper- Heidi Swapp's Mixed Company Collection / Paper Wings Productions Cling Stamp Set- Vintage Domino Melange / Versa Color Ink Pads- Sage & Peony / Selky Thread- Sage / Sewing Machine 

Friday, April 18, 2014

Feature Friday

*****Join our April Challenge: GET INKY, HERE***** 

Happy Friday Paper Wings Productions fans!!  Erica here with you today for Feature Friday and I am excited to bring you a project I am currently working on using the April Nesting Components Kit!
I decided to create a mini album to hold my 2014 Easter memories!  Today I am sharing the cover of my album since Easter is on Sunday!  I will share the inside pages on my next post!  Now to be totally honest when I opened up myApril Kit I had no idea what I was going to create so I pushed it aside for a couple days.  A few days later I pulled it out again and starting laying everything out and then the wheels in my head started turning and I began cutting, gluing and creating this album!  I think I need to start setting up my camera when I create to show you all my process!  I started with the chipboard pieces that are actually pieces of the packaging in the kit. I cut it down as the base of my album and adhered the muslin fabric included in the kit to the chipboard.  I then took a variety of Lindy's Stamp Gang mists and splattered around my cover and also added some stamping(which ends up getting covered up).  Next I took a few strips of the music note paper and adhered to the cover with mod podge and then added one of the vintage clip art images also included in this kit and tucked one of the Ranger tags that came in the March Nesting Components Kit behind the clip art.  Once it was dry I added the gold trim and the wired bow trim to the side and added a cluster of flowers from the kit.  The tiny gold eggs were created using the stamp set Single Dot Border that comes in the kit.  The circle outline reminded me of Easter eggs so that is what I created using a glassine bag and some glitter.
I inked up the stamp with VersaMark and then stamped onto the glassine bag and used some simple stick which is a very sticky embossing powder when heated.
After I heat the simple stick I added this beautiful glass glitter that is also included in this months kit and then hit it with my heat tool once more to help the glitter set.
 All that is left to do is cut them out and you have glittered Easter eggs ready for any project!  Here is a look at my completed mini album cover and a peek at the inside.


Thank you so much for joining me today and I hope I have inspired you to get a little creative today!  Mini albums are so fun to create and I just love to have fun and get a little messy with them!  They are perfect for holding memories and to document special events!  This month our April Challenge is Get Inky  and I hope you will join us in for your chance to win a $20.00 gift certificate to the Paper Wings Productions shop!  We are also holding a Guest Designer Call till May 9 you can check out the details HERE!  For more inky inspiration head on over to Katie's Whats Up Wednesday post HERE!  Enjoy your day and remember to let your creativity take flight!

Friday, March 21, 2014

Feature Friday- Lyrics Cling Stamp

*****To join our March Challenge: CELEBRATE, CLICK HERE*****
 

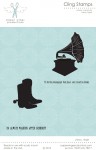
 Hello everyone! It's Amber here today to share two cards I created with Paper Wings Productions Lyrics Cling Stamp Set for this weeks Feature Friday post. I used the large cling set that has both of the stamps but you can also find two smaller stamp sets  in the shop HERE, one has the phonograph image and the other has the walking boots. For the first card I used the phonograph image with its matching sentiment. I think this is my favorite one, love the sentiment and I had fun going outside of my comfort zone by using a cheetah patterned paper and matching it with a bright pink.


For the second card I used the walking boots image with its matching sentiment. This one is fun and different because of the leopard printed patterned paper. I didn't go too crazy with this one, I used a neutral colored  ink and ribbon to go along with the patterned paper.


Thanks for visiting today and don't forget we would love to see what you make with Paper Wings Productions Stamps so add your projects to our Flickr Group, to Pinterest, or leave a comment with a link to your project. You can also check out our Facebook Page and You Tube Page for daily inspiration.

Supplies: Cardstock- Cream / Patterned Paper- Crate Papers On Trend Collection / Paper Wings Productions Cling Stamp Set- Lyrics / Versa Color Ink Pads- Charcoal & Umber / Ribbon- Pink & Creme / Favorite Findings Buttons- Pink /  Sulky Thread- Cream & Black / Sewing Machine


Friday, February 21, 2014

Featured Friday- Mixed Media Mini Album

*****To join our February Challenge: Anything Goes, CLICK HERE*****


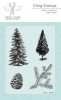
Hey guys! Katie here today for Feature Friday! Today I wanted to share with you a mixed media mini album I made using pictures from our most recent camping trip. I used the Pines Cling Stamp Set which work so perfectly for camping and outdoorsy photos.


I wanted to use lots of color and texture so there is a lot of mixed media going on. I went over a stencil with matte medium on all of my pages for texture than went over them with Gelatos and Silks acrylic Glaze. I also used some of the Lindy's Mists that came in the Creative Girl Nesting Components kit.
And of course, I did a lot of stamping with the Pines stamps.


Here is a peek at all of my pages:


There have been a lot of inspiring posts here on the blog lately. I hope you'll check some of them out!

Friday, November 8, 2013

Hello- Feature Friday


Hello Everyone and Happy Friday! It's Amber here with this weeks Feature Friday Post! Do you have any fun weekend plans? We’d love to hear them! I know most of you are already in Holiday mode, I know I am and its only the beginning of November but I thought it would be fun to share something a little different then a Fall/Thanksgiving themed card! I’m super excited to bring you a cheery card to brighten up your Friday!


For today’s card I used Paper Wings Productions Vintage Technology clear stamp set along with some water colored pencils. I really love the pretty combination of light purple and yellow so I used that as my color combo today.


The close up above shows how I water colored the typewriter with some light purple and yellow water colored pencils. You can also see the Hello sentiment I stamped onto the paper that is sticking out of the typewriter a little better. Thanks for visiting!
Supplies: Cardstock- White, Yellow, Purple / Patterned Paper- DCWV / Paper Wings Productions Clear Stamp Set- Vintage Technology / Staz-On Ink Pad- Jet Black / CTMH Ink Pad- Buttercup / Water Color Pencils / Mini Yellow Buttons- CTMH / Large Purple Button- Colorbok / Sulky Thread- White / Sewing Machine

Related Posts Plugin for WordPress, Blogger...