Showing posts with label Circles Background Stamp. Show all posts

Friday, September 9, 2016

Bee Beautiful Mini Book W/ Video Tutorials

I am in a mini book phase, they are so fun to make and just a chance to try fun techniques and get my hands all paint covered!!!


My inspiration for this mini book was bees, I kept seeing a bee/bug and I thought Bee Beautiful, would be wonderful for a title and then I went with the theme of yellow and black.  From there it just took on a life of its own.  I used a ton of Tattered Angels paints and mists along with some various mediums with stencils from The Crafter's Workshop.  I then added in some fun background stamps from Paper Wings Productions to help enhance the feel of the book.  

 
Here is the first video which is filled with the cutting of the pages, mists, painting, stenciling, stamping, and a fun technique with the EZ Steam II material and glitter, embossing powder, and flower soft to add a great dimension and texture to the page.
From here I added in a few pictures of my little girl form this year, not many just there is room for more as the year goes along.  I also added in some fun bling, brads, and other little gems from Eyelet Outlet to enhance the entire effect.  I did not want to cover the pages up too much, I love the effect I got from all the mists, stamps, and stencils.
Here are some close up shots of some of the pages.


Supplies Used
Raw Fabric/Paper Materials - Rebekah Meier Kit
Lace & Pearls -  Rebekah Meier Kit
Paints/Mists - Tattered Angels
Mediums  - Prima & Faber-Castell & Ranger
Stencils - TCW
Thread - Coats & Clarke
Sequins
Beads - Crafts Etc
Washi Tape - Eyelet Outlet
Brads - Eyelet Outlet
Gem/Bling - Eyelet Outlet
Flowers - Eyelet Outlet
Chipboard - Creative Embellishments
Dies  - Spellbinders - Heartfelt Creations
Embossing Powder - Stampin Up
Mica - Imagination Creations
Flower Soft - Flower Soft
Glitter - Martha Stewart & Prima
Stamps - Paper Wings Productions
Ink - Prima
Brushes - Prima
Heat Gun - Marvy
Glue - Beacon

Tuesday, February 25, 2014

Tutorial Tuesday - MOO-ve Over ATCs!


Hi Paper Wings fans! Dana here today sharing a fun alternative to the artist trading card, the moo card. Moo cards originated as a fresh alternative to the traditional business card and were quickly adopted by artists as a fun was to share small pieces of art. The NEW Vintage Domino Melange and Vintage Melange Stamp Sets are the perfect size to dress up a moo card, which has a size requirement of 2.8 cm x 7 cm. The Vintage Melange Stamp Set is our new release for February, and is available from the Paper Wings Productions Store for 15% off all month long!


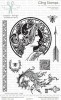
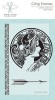
These lovely ladies are part of the Vintage Domino Melange Stamp Set. I framed them with the border stamp from the Vintage Melange Stamp Set. I embossed the images onto moo cards primed with gesso and stamped with the Circle Background Stamp. I colored the images with Gelatos. This is the second set I created, the first set is more dramatic.


I have a thing for vintage ladies and was thrilled to see the NEW Vintage Ladies Domino Cling Stamp Set! I created this set of moo cards in a couple simple steps.


I first cut pieces of patterned paper to size, 2.8 cm x 7 cm.


I then embossed the patterned paper with the beautiful fractal stamp from the Vintage Melange Cling Stamp Set using Lindy's Stamp Gang Jack-O-Lantern Embossing Powder.


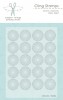
I then added a subtle pattern to each card with the Circle Background Cling Stamp.


I stamped the vintage ladies onto a piece of vintage book paper using archival ink, cut them out and then sealed them to the moo cards using gel medium.


I embellished each card with Tim Holtz metal stickers and rub-ons that I had leftover from past Nesting Components Mixed Media Kits.


I finished each card with some acrylic paint for a fun pop of color.

I hope you'll try creating some moo cards! They're a lot of fun. If you want to challenge yourself and work in an ever smaller area, check out Cathi's Altered Dominoes. We would love to see what you make with these, or any, Paper Wings Productions Stamps, so add your projects to our Flickr Group or our Facebook page.

Thanks for stopping by today!


Tuesday, October 15, 2013

Tutorial Tuesday

Hello Paper Wings Fans!!  Erica here today for this weeks Tutorial Tuesday.  This week I have a video to share with you showing you how to heat emboss using some tags from my stash and some fabulous chipboard from our PWP Shop.  I know a lot of you out there already know how to heat emboss but there are some that still have not heard of it or tried it yet so I thought I would share a video to show how simple and fun it really is!  Take a look...

I just can not get enough of the Circles Background Stamp I seem to use it on all my projects!  It is definitely a must have stamp!  Once I was done with all the heat embossing I went ahead and embellished my tag adding a beautiful Butterfly Chipboard piece from the PWP Shop.  I also heat embossed this piece and added glitter for some sparkle!   And here is a look at my finished tag! 


I hope you enjoyed my tutorial and that it inspires you to get out your embossing powders, inks and sprays and get a little messy!  If you are looking for some great products to work with make sure you head on over to the Paper Wings Productions shop and check out all the fabulous products available.  Also if you are looking for other ways to heat emboss please check out Norma's tutorial HERE!  Thanks so much for stopping today!  Make sure to visit us on FACEBOOK and share your creations with us in our FLICKR gallery!   
Friday, September 27, 2013

Feature Friday:With Some Sparkle

Happy Friday everyone!  Erica here to share with you this weeks Feature Friday and I have chosen to feature the cling mount stamp set With Some Sparkle.  If you like glitter and shine then this stamp set is definitely for you!  It is great for all types of projects and today I am using it along with products from my stash and the Paper Wings Productions Shop.  This year is going by so quickly and soon I will need to start my journal for 2014!  So I pulled a blank journal I had in my stash and began to create my cover using this fabulous stamp set With Some Sparkle.  My journal had a great chipboard cover that was nice and thick and already had a hexagon pattern etched into it.  So I pulled out a handful of mists, inks and paint and went to town decorating my cover.  After I had a layer of color mists down I chose one of my glimmer mist and sprayed the whole cover to add some extra sparkle!  You can find a great selection of mists and inks the PWP shop HERE!  Next I took one of our great background stamps, inked it up with some black ink, stamped once on scrap paper and then again on my journal for a lighter effect.  I did this in a few random places on my journal.  Once that was done I grabbed a stencil and some white ink and created some circles, once again in random places.  We have some great STENCILS in our shop and they are just screaming your name!  If you are have never used them before they are a lot of fun!  Check out this great post from Norma using stencils  HERE.  Once my white ink was dry it was time to start stamping!  I stamped out the fabulous tiara image in the bottom left of my journal in black ink and added a rhinestone to the center of the tiara!


Next I stamped one of the great sayings in this stamp set on top of the circles I had just added to my journal cover! 


I love this saying and it is the perfect title for my 2014 journal!  I then took two more sentiments from the set and masked off the stamps leaving just the word SPARKLE and stamped them out on my cover! 


  I added a few embellishments some washi tape and outlined a few of the hexagons and colored some in with Gelatos from the PWP Shop.  Once I had everything down I took my white color mist and added a few droplets and called it done...well sort of.  I am sure as the time goes on things will slowly be added to my cover but for now this is my finished project!


Thanks so much for joining me today and as always I appreciate your comments very much!  Please visit us and share your creations using Paper Wings Productions products on our FACEBOOK page, PINTEREST, FLICKER GROUP and we are also on INSTAGRAM so tag us @paperwingsproductions and use #paperwingsproductions!

Saturday, August 24, 2013

Scrapbook Saturday - August Nesting Components Layout

Hi Paper Wings fans! Dana here today sharing a layout that I created with the August Nesting Components Mixed Media Kit. I not only used the kit supplies, but also part of the packaging.


The sturdy piece of chipboard that helps protect the kit contents during mailing is approximately 8.5x11 and made a create base for my layout! I used the Circle Background Cling Stamp to add a fun pattern to the chipboard base.


I added some script with my favorite Writing Background Cling Stamp.


I added color to the background with Distress Ink, Mr. Huey's Mist and the Art Textures Cling Stamp Set. The brown dot pattern is one of the art texture stamps and a great way to fill out color splatter patterns in a more predictable way!


I added several layers of patterned envelope pieces under my photo. The Tim Holtz Rub-On package contains a variety of sizes, many of which are perfect for use on photograhps.


I used a Tim Holtz Rub-On for the title, which I accented with a torn piece of Kaisercraft wrapping paper and another of my favorite Art Texture stamps.

Thanks so much for stopping by today! Have a great weekend.
~Dana


Related Posts Plugin for WordPress, Blogger...