Tuesday, June 11, 2013

Tutorial Tuesday: Border Stamps for Dad

Hello there peeps!

It's Shay here.  Did you enjoy this month's Summer Fun blog hop?  I sure did.  I thought the design team did an amazing job.  If you haven't had a chance to check out the projects, I strongly recommend hopping along.

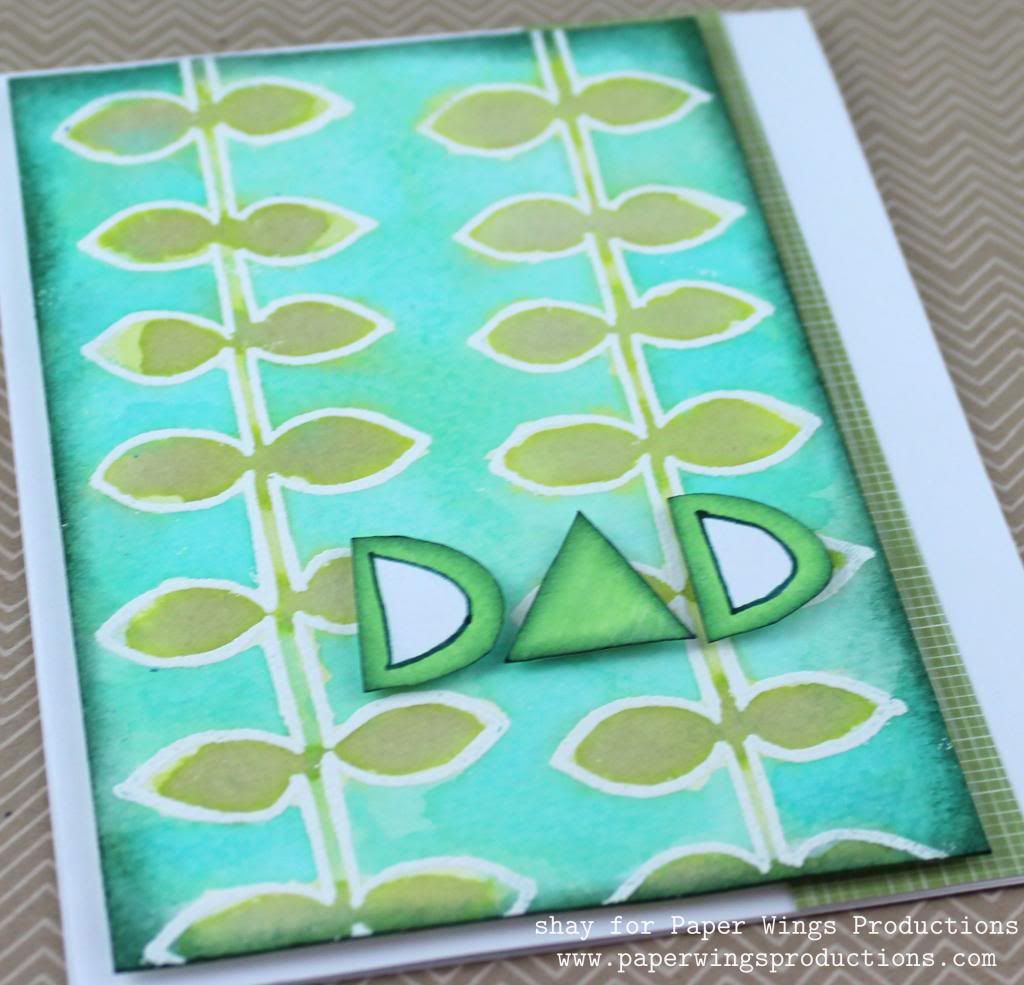
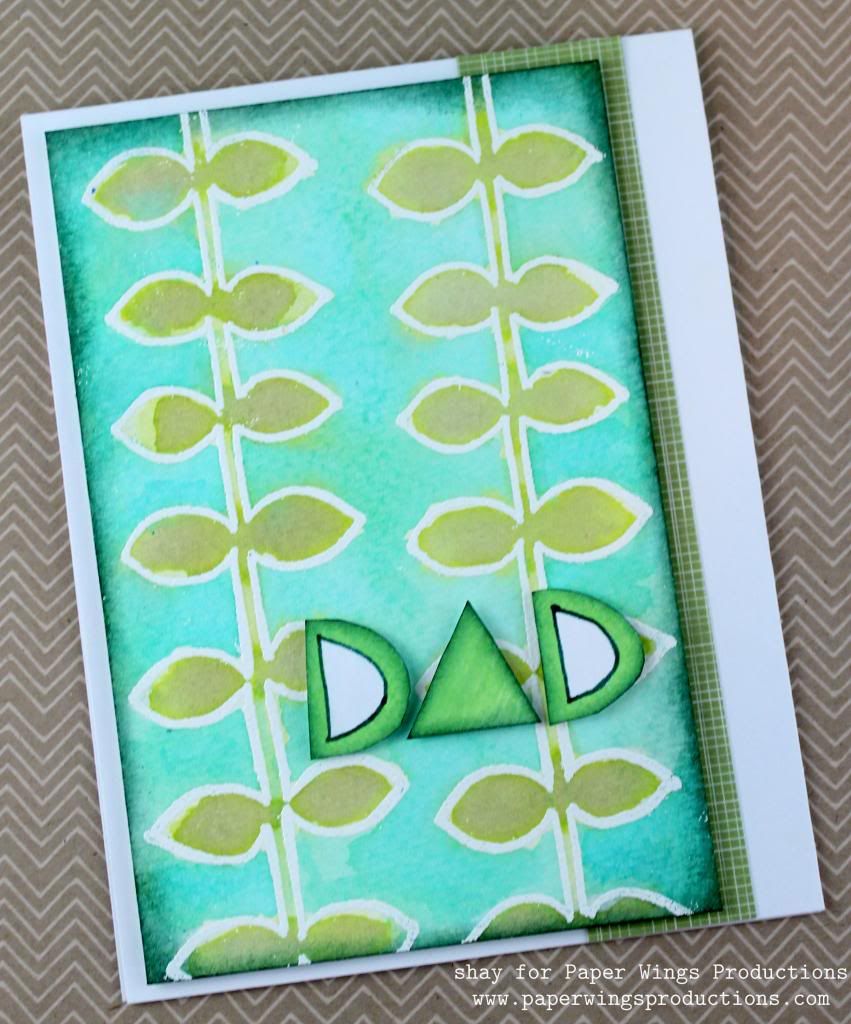
Today I have a simple tutorial on using the border stamps to create two cards dedicated to the dads in our lives.

I was looking at two of the borders: lace border stamp and triangle border stamp and I saw something interesting.  Let's see if you can figure out what I saw too.
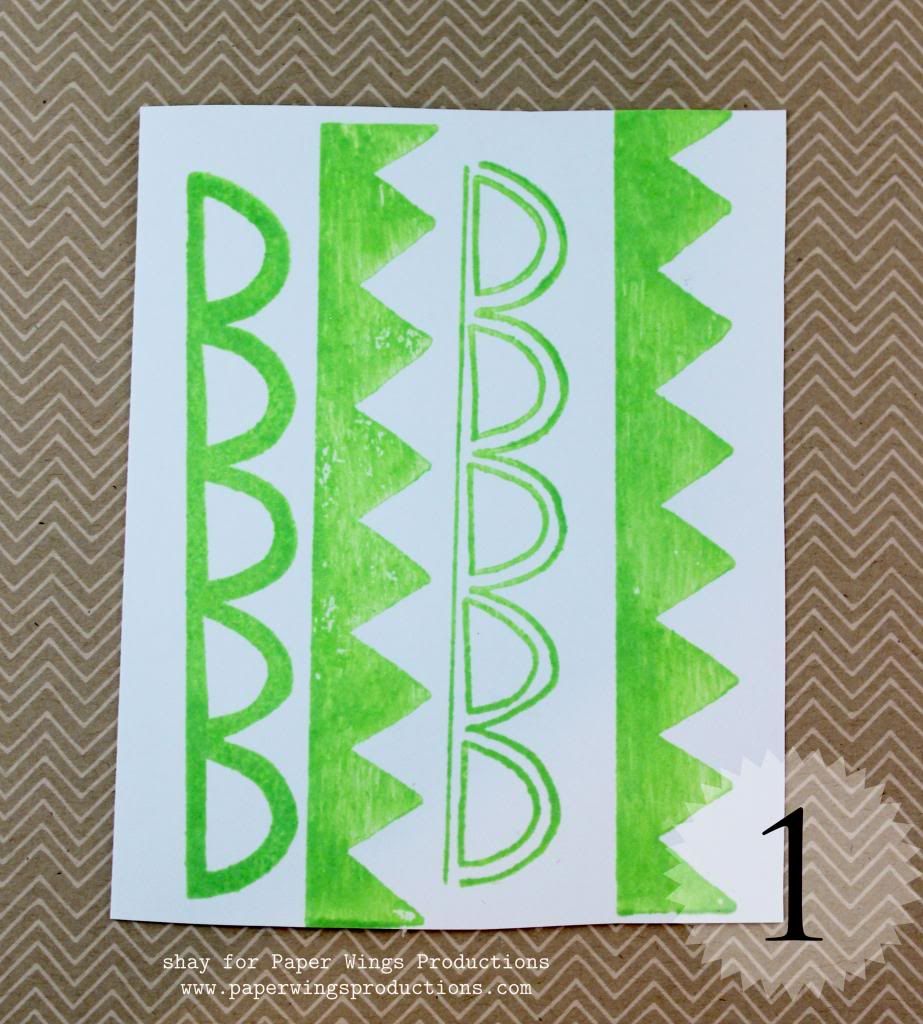

1. Stamp borders.
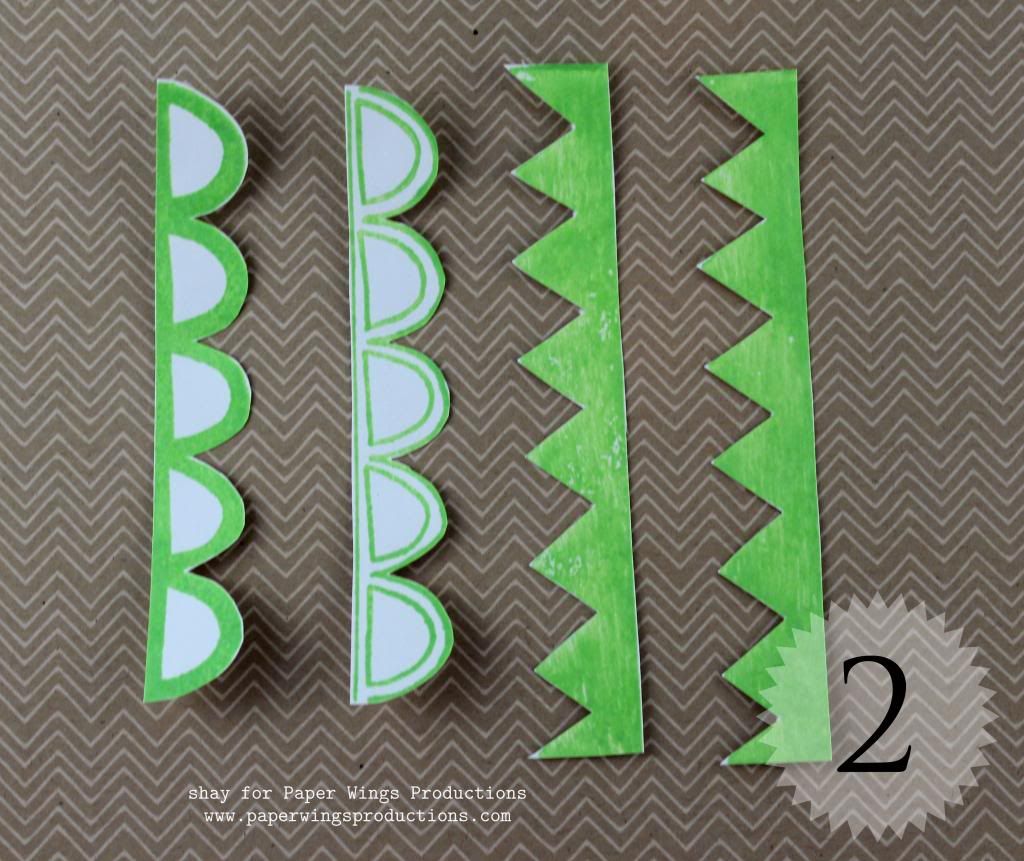

2. Cut out borders.
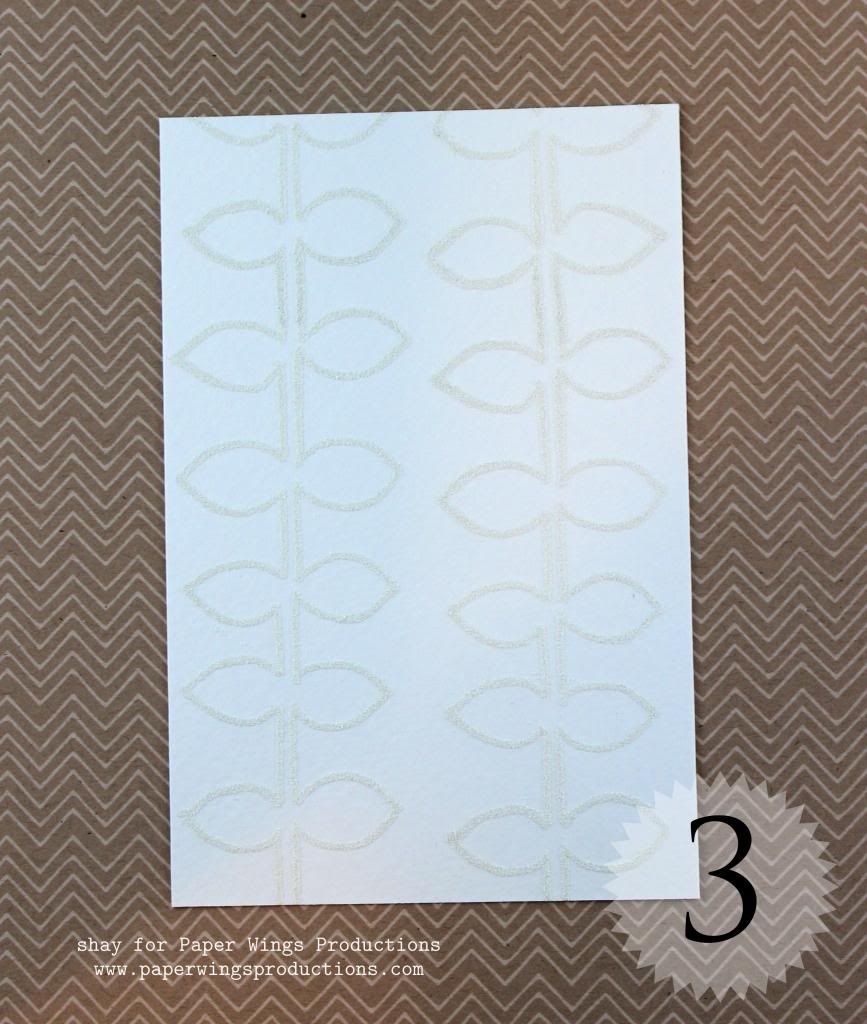

3. On watercolor paper stamp border with Versamark.


4. Heat emboss border with white embossing powder.
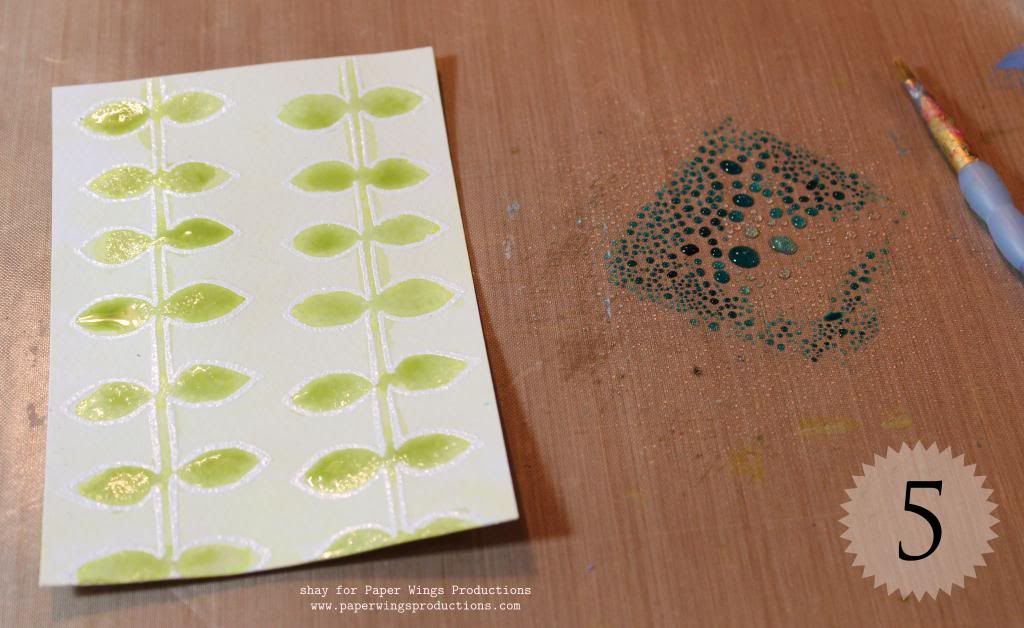

5. Add water to Distress Ink.  I smeared the ink pad onto my craft sheet.  Paint in the image.  You can lighten the image by dabbing it with a paper towel and/or adding water.
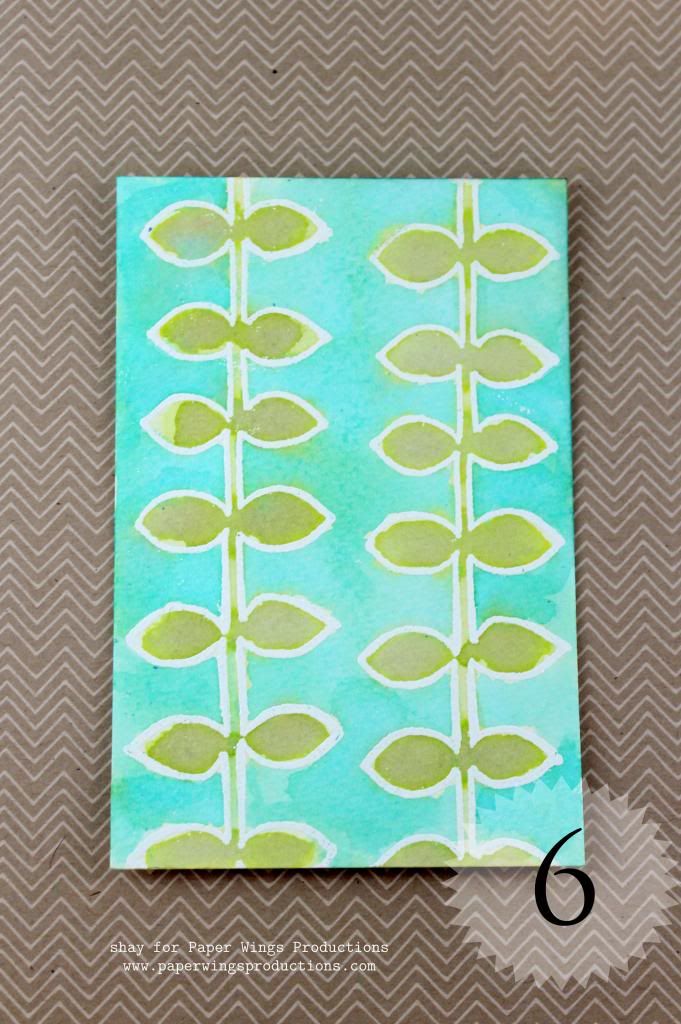

6. By using watercolor paper, you can add as much color and water as you desire to get the look you want.

Did you guess how I used the lace border stamp and triangle border stamp?   Now you can see if you were right.

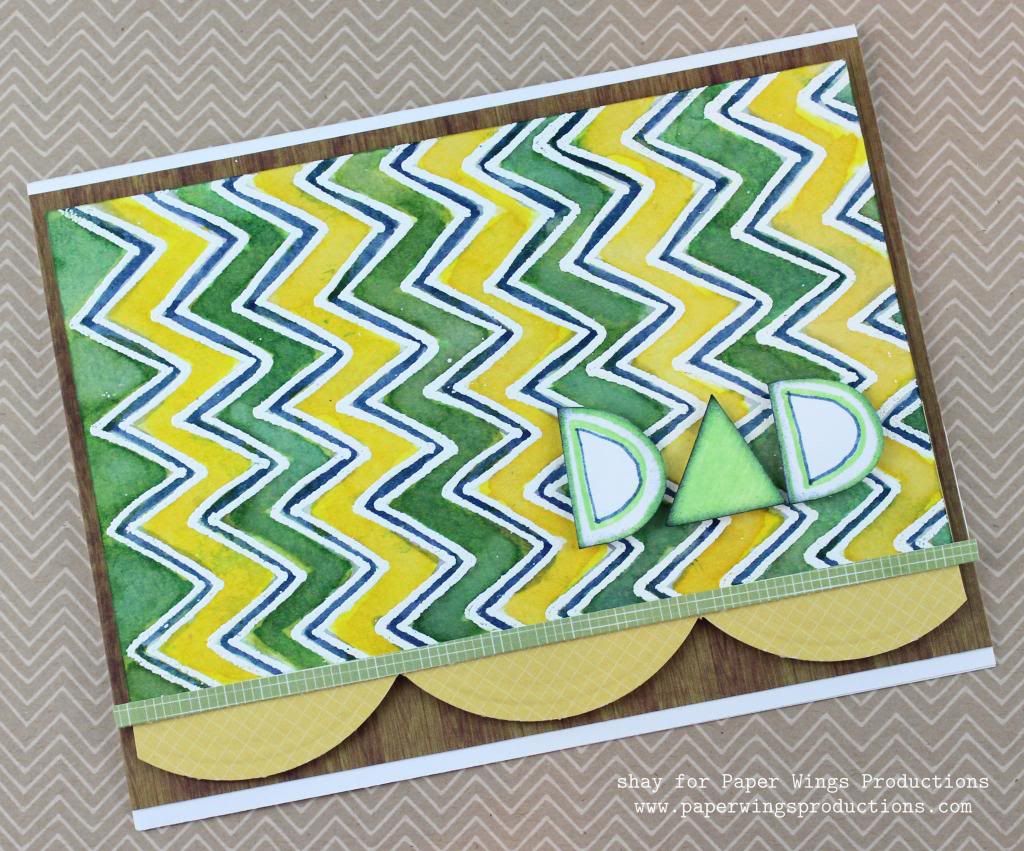
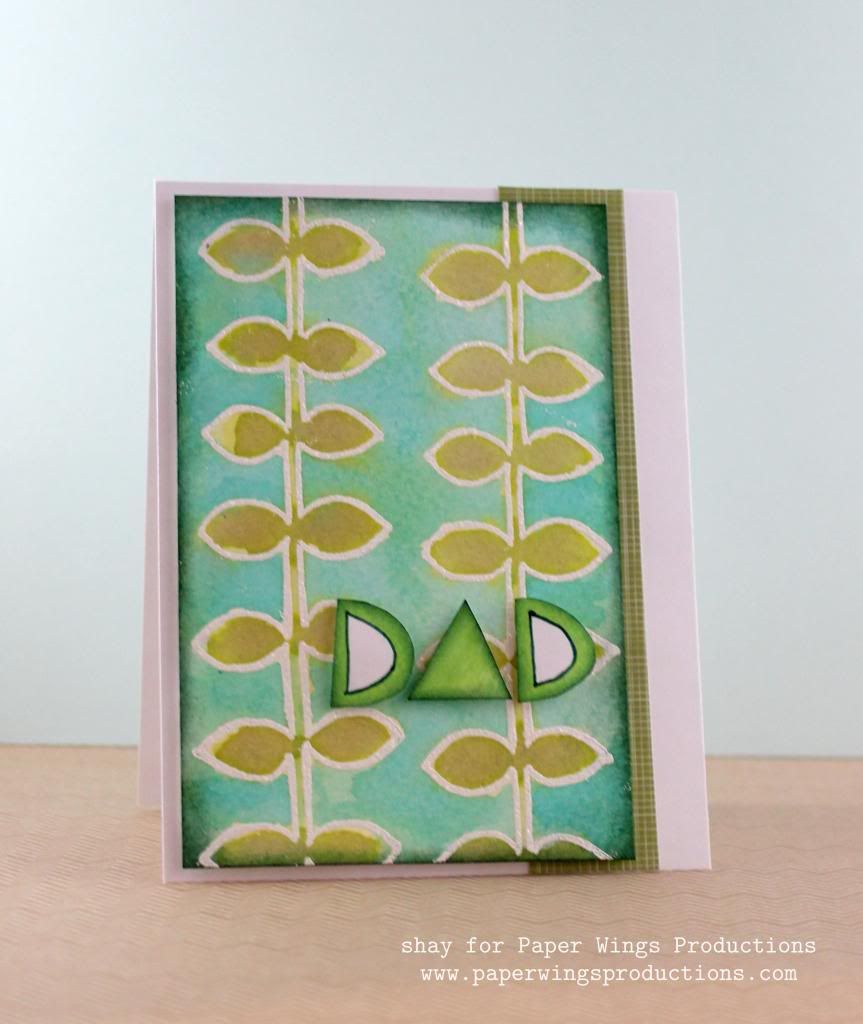
7. The card.   The lace border stamp looked like d's to me while the triangle border looked like a's.  So I cut out individual scallops and triangles to spell out "dad".  I edged the letters with ink and used a marker to add some definition.  The leaf panel was edged with dark green ink.  I adhered the dad and leaf panel with dimensional adhesive.  Under the leaf panel is a strip of patterned paper on a white card base.


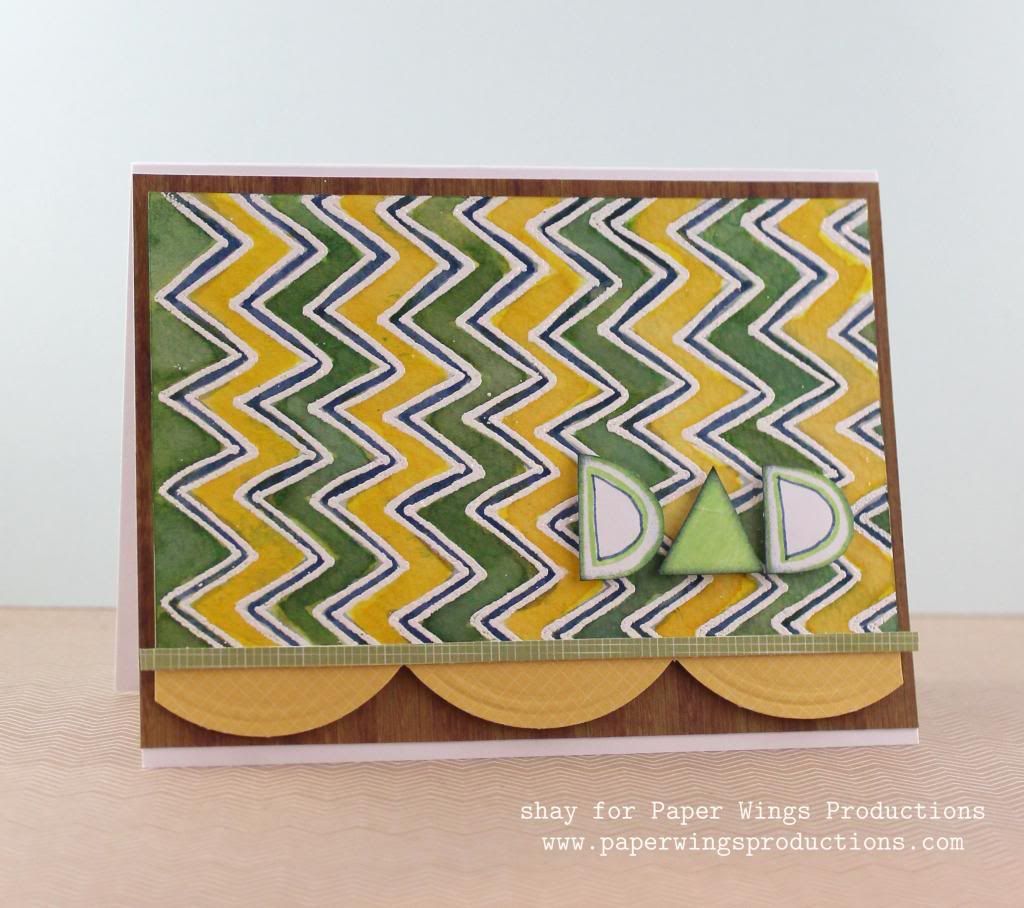
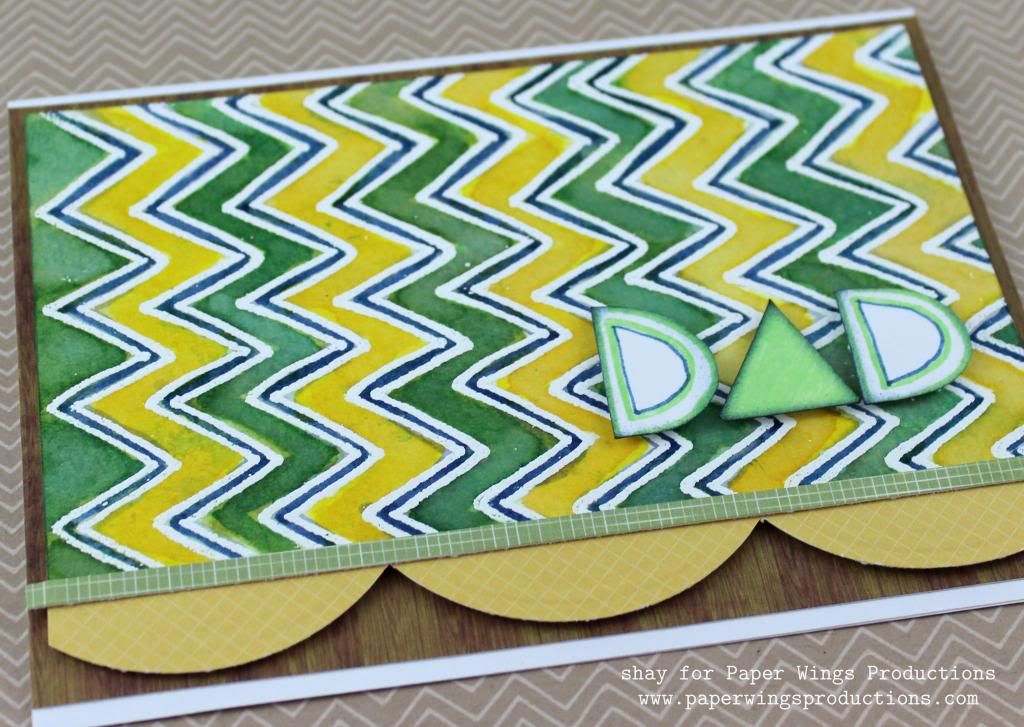
And here is another groovy 70's vibe card using the same elements but featuring the zig zag border stamp:


That's it from me today.  I hope you have a brilliant week and have a fantastic father's day weekend celebrating the father figures in your life.

We would *love* to see what you make with Paper Wings Productions stamps. Add your projects to Facebook, our flickr group, to Pinterest, comment with a link on this post or even email pictures to us!

Take flight,
Shay.

Supplies:
Stamps:


Ink: Versamark, Tsukineko; green hills, Hero Arts Shadow Ink; squeezed lemonade, mustard seed, dried marigold, shabby shutters, peeled paint, pine needles, peacock feathers and chipped sapphire, Tim Holtz Distress Ink by Ranger
Cardstock: white, Georgia Pacific
Paper: watercolor cold press 400 series 140 lb., Strathmore
Patterned paper: Snippets 6x6 paper pad, Studio Calico; Color Me Happy 6x6 paper pad, Glitz
Other: opaque white embossing powder, JudiKins; embossing heat gun; Inkssentials ink blending tool, Ranger; faded jeans and pine needles, Tim Holtz Distress Markers by Ranger; non-stick craft sheet, Ranger

Friday, June 7, 2013

Summer Fun Blog Hop!!


Happy Friday Everyone and WELCOME to the June Paper Wings Production Design Team Blog Hop & Giveaway!  This month we're celebrating the beginning of summer and sharing some blog candy with one lucky follower!  There will also be some blog candy along the way so keep an eye out for that!


 For a chance to win all you need to do is: be a follower, visit each of the participating designer's blogs and leave them some love.  Then make sure to come back and leave us a comment telling us you completed the hop.  To increase your chances of winning:  like our Facebook page and/or invite your friends to the hop.  Be sure to leave a separate comment for each of your additional entries.  We will announce the winner here at The Aviary on Tuesday, June 11, 2013.

So let the good times roll!!  Grab some coffee, tea or whatever else you'd like and get comfortable!  You first stop in the hop is at Shay's blog - Verdigris Hall

***Here is the complete line up just in case you get lost along the way***

***then come back here to leave a comment http://paper-wings-productions.blogspot.com/***

THANK YOU SO MUCH FOR JOINING US, ENJOY THE HOP!!!

Wednesday, June 5, 2013

What's Up Wednesday - 12x6 Layout with the June Nesting Components


Hi PWP fans! Dana here today sharing a fun layout that I created with the fabulous June Nesting Components Mixed Media Kit. The kit features the gorgeous Pink Paislee Hope Chest collection and contains an entire 6x6 paper pad! I love making layouts and had fun shaking up the size, making a 12x6 layout with the kit components.


Several of the patterned papers from the paper pad sport designs featuring tape so I incorporated masking tape into my design, using it to hold two pieces of 6x6 paper together to form the base of my page.


I used the Cloudy Cling Stamp Set and Memento Rich Cocoa ink (both included in the kit!) to add the clouds to this clip art image. I built up lots of layers under the photo with patterned paper, product packaging and Paper Goods. The fun sentiment is part of the Label Stickers set.


I trimmed the legs from the chipboard birds to make it look like they were flying across the page. I added some random stamping around the edge of the page with the Writings Backgrounds Cling Stamp Set, a perfect complement to the subtle script and postage patterns printed on the patterned papers.

Thanks so much for stopping by today! You can read all about the kit contents and see more photos of the kit along with several projects in this post. Pick up your limited edition June Nesting Components Mixed Media Kit from the Paper Wings Productions Store while you still can! Be sure to visit us again on Friday for the June Blog Hop!


Monday, June 3, 2013

Enjoy the Journey

Happy Mixed Media Monday to ya, Norma here with you today!!


I really love painting so I decided to take the beautiful new June Nesting Components kit and paint it up!!


This is an 11" x 14" canvas and everything on it came from my Nesting Components kit except for the canvas, paints and oil pastels.


I started out by adhering several sheets of the Hope Chest papers then I drew the outline of my focal image. 


With the base done, I turned my focus to building up texture with paints, inks and oil pastels.  When working on a project like this, keep in mind that there are no rules.  The amount of layers you apply is totally up to you, so add a much or as little as you'd like.


I used a few of the paper goods tags for added texture and drew the flowers on with oil pastels.


I had a little transfer fun with one of the clip are images.


These sweet little family of birds needed somewhere to perch :D


Oh and the star of my piece!!  Her hat and dress are paper pieced with more of the Hope Chest sheets.  I also used the stamps for more texture.


Even the sides got a little PWP stamping love!!


Thank you so much for joining me today and remember to 
"Enjoy the Journey"!!

Click HERE pick up this gorgeous new kit before they're all gone :D

Saturday, June 1, 2013

June Nesting Component Mixed Media Kit


Hi there everyone!  Can you believe it's another new month?  That means we have a *NEW* Nesting Components Mixed Media Kit.  Take a look at the new kit and some fun projects that Norma and Dana made with the kit.  You can purchase the kit by clicking here.


The June Nesting Components Mixed Media Kit contains:

  • Summer themed Clip Art Sheet
  • Pink Paislee Hope Chest 6x6 paper pad
  • Pink Paislee Hope Chest Label Stickers
  • Pink Paislee Hope Chest Journal Cards
  • Pink Paislee Hope Chest Paper Goods
  • Studio Calico Alphabet Sticker Sheet
  • Memento Ink Pad - Rich Cocoa
  • Laser cut wooden birds
  • Metal bird charm
  • Brown and light green baker's twine
  • Sunshine on a Cloudy Day cling rubber stamp set
retail value over $40, our price $32

How about some close up pictures...


Here's a video of Norma opening the kit.


 Our blog hop that she mentions in the video is next Friday June 7.  She will be giving away the prize here on her blog.

Here are some projects by our design team.

project by Dana

tag by Norma

There will be more projects featured here on the Aviary this week so please check back!  Don't wait to purchase the kit, they are limited edition!  You can purchase one here.

Have a great weekend and enjoy the flight!

Carrie

Thursday, May 30, 2013

Themed Thursday - Mixed Media Inspiration


Hello Everyone!!  I hope you all are having a fabulous day and a wonderful week.  Today I wanted to share an inspiration board with you that showcases this month's Nesting Components kit.


All of these wonderful projects were made from the same kit.  Can you believe that?!  Well it's true, lol!!  Do you see that gorgeous layout on the top right hand side?  Here's a closer look!


This stunning layout was created by Cathi Smith O'Neill of Celtic Knots.  Here is a link to her post so you can leave her some bloggie love: Celtic Knots. 

May 2013 Mixed Media Kit

To pick up your own kit, visit PWP Online Store.  Then share your creation with us on Facebook just like Cathi!  

Thanks so much for stopping by today!  Have a Beautiful Day!!


Tuesday, May 28, 2013

Tutorial Tuesday: Stamped Flower


Hello everyone! It's Amber here to share this quick and fun flower tutorial. See the pink flower with the stamping on the smaller card below, that's the flower I will be showing you how to make today.                   
         

 Below you will find the seven steps I used to create the pink stamped flower. I know seven steps seems like a lot but it really is easy.


Step1. Die cut or punch five circles out of colored pattered paper or cardstock


Step 2. Stamp all five layers with a background stamp. I used a background stamp from the Text Cling Stamp Set.


 Step 3. Fold and wrinkle each layer and then carefully unfold all five layers.


Step 4. Take a large paper piercer or anything else that is sharp and make a hole in the middle of all five layers for a brad.


Step 6. Add a colored brad to the center then layer by layer fold and wrinkle the paper around the brad. This is what will give the flower a fuller look when finished.


Step 7. Unfold the five layers as desired until you are happy with the finished flower.

Its really as easy as that. There are many things you can do with this flower technique like adding more layers for a fuller flower, you could just use patterned paper instead of stamping, you could distress the edges, emboss the layers, or you could make a smaller or larger flower. I hope you enjoyed my tutorial today and Thanks for visiting!. We would love to see what you make with Paper Wings Productions Stamps so add your projects to our Flickr Group, to Pinterest, or leave a comment with a link to your project.

Supplies: Cardstock- White & Blue / Patterned Paper- CTMH / Paper Wings Productions Cling and Clear Stamps- Text,Artsy To The Bone, Happy Day / Versa Color Ink Pad- Hyacinth / Circle Die Cut- Sizzix / Ribbon- The Ribbon Boutique / Brad- Orange / Large Paper Piercer / Sulky Thread- Light Purple


Related Posts Plugin for WordPress, Blogger...