Showing posts with label bird panel. Show all posts

Wednesday, April 18, 2018

Stamped Mail Art Envelopes for National Letter Writing Month


Stamped Mail Art Envelopes

Hi friends! Dana here today sharing a set of mail art envelopes that I stamped up for National Letter Writing Month. I have a thing for handwriting, so I really appreciate it when I receive a letter or card in the mail. I have a box full of handwritten letters and cards that I have saved over the years. This is all that I have left from some of my relatives. I thought it would be fun to celebrate National Letter Writing Month by sending some love through the mail in a pretty stamped envelope. The selection of stamps in the Paper Wings Productions Store is amazing, and you're sure to find a great design for any recipient. I chose some of my favorite stamp sets for this project.

Colofully Colored Stamped Fibonacci Sprial Mail Art Envelope

Whenever I get stuck with design, I like to go back to the basics. The Sacred Geometry 2 Clear Stamp Set has classic patterns that are super fun to work with. I chose the Fibonacci Spiral stamp for this envelope. I stamped up the left side of the envelope using black archival ink and then colored in the shapes with Distress Markers. I added a bit of decoration to the edge of the geometric design with the Lace Border Outline Clear Stamp.

Stamped Globe with White Clouds on Kraft Mail Art Envelope

I wanted to use a kraft envelope specifically with a white gel pen. I just love how the white ink really pops off the paper for a 3D-like effect. I used the Earth and Sky Mélange Cling Stamp Set to decorate the top half of this envelope. I added an address box using the inner frame of the polaroid stamp from the Snapshot Framer Clear Stamp Set.

Colorful Stamped Bird Panel Mail Art Envelope

I had to use a stamp featuring something with wings for my last design. The Bird Panel Clear Stamp Set is so beautiful and is an easy way to add a pretty scene using just one stamp. I used the Snapshot Framer Clear Stamp Set again to add an address spot, but this time I used the larger outer frame. After inking up the entire stamp, I removed the ink from the smaller frame using a wet wipe, and then stamped only the larger frame onto the envelope.

Thanks for stopping by today! I hope I have inspired you to send a friend or loved one some happy mail this month.

Pin It!

Colorfully Colored and Stamped Mail Art Envelopes for National Letter Writing Month


Tuesday, April 26, 2016

Little Adventurous Bird

Hi everyone, Steph Ackerman here today.

I've used the Bird Panel clear stamp set.  This set has 9 stamps and I've used 6 of them on my card.  I wanted to focus on the phrase so I stamped it on a tag, then added several different birds along the edges before matting it with coral cardstock.


On the background I also stamped an assortment of birds to give the paper a little more dimension.  I then matted the panel on cardstock to finish off my card.  The tag was adhered with foam adhesives for dimension and ribbons added to the tag.


Thanks for stopping by today.

Steph


Friday, July 17, 2015

Little Adventurous Bird

Hi everyone, Steph Ackerman here today with my first post for Paper Wings Productions.  I chose to use a wonderful stamp set called the Bird Panel.  This clear stamp set includes 9 stamps.


I chose to use the sentiment as the focal point of this card.  Once I stamped the sentiment, I die cut into an oval and had room to stamp several birds around the sentiment.


I thought this stamp worked really well with my paper selection.  I finished by stamping a few more birds directly on the pattern paper.

Thanks for stopping by.
 
Steph - my blog
 

Saturday, June 14, 2014

Scrapbook Saturday - For The Birds Mixed Media Layout


Hi Paper Wings fans! Dana here with you today sharing a layout that I created with the For The Birds Mixed Media Kit. I also used the NEW Bird Beauty Cling Stamp Set. You can pick up this fantastic stamp set for 15% off this month! Several of the sentiments in this stamp set were just perfect for documenting my skydiving adventure.


I started with the white piece of cardboard from the kit and created a bird patterned mixed media background with some of my favorite mediums. I first colored the background with Gelatos. I then added birds using the stencil and Golden Light Molding Paste from the kit.


I colored the birds with Gelatos, watercolor pencils and Stamper's Big Brush Pens. I used the Art Textures Cling Stamp Set to add the subtle dot pattern to the body of the birds.


I added a glittery wing to this bird using the bird stencil from the kit and Iced Enamels Relique Glitz Gold Embossing Enamel. I added the small circle pattern with the Single Dot Border Clear Stamp Set. The "adventurous" sentiment is part of the Bird Panel Clear Stamp Set. The For The Birds Mixed Media Kit comes with your choice of one of our gorgeous Bird Panel stamp sets!


The sentiment shown here is part of the NEW Bird Beauty Cling Stamp Set. The designs under the sentiment are made with the Art Textures Cling Stamp Set and the Ledger Journaling Lines Clear Stamp.


I used a White Stamper's Big Brush Pen and the Cloudy Cling Stamp Set to add a fluffy white cloud to my photo.


Thanks so much for stopping by today! If this is your first visit to the blog this week, you're going to want to check out Carrie's Bird Themed Configurations Box and Norma's Mixed Media Assemblage Tutorial. Also, we'd love to have your join our June Chipboard/Wood Veneer Challenge. CLICK HERE for all the details.

Monday, October 21, 2013

Mixed media Mondays : Easy made bookmarks


Hello my dear crafty friends! This is my Mixed media Mondays  post made for PWP blog and it's totally Light Mixed Media  that  means  you can do it in an easy way with our gorgeous PWP stamps, some mists and a very short crafting time. So how about to make some quick and lovely projects that take 10 to 15 minutes only? We really are short of the time and sometimes this is an only spare crafting time we have. And then, how about   some really useful project? 
I love to read. I really finish a book a week and I never have a nice bookmark to use. So today we are going to make a couple of lovely and quick bookmarks using our lovely PWP vertical stamps.

First I  stamped an Owl panel  and  a Bird  Panel vertical stamp over white cardstock with clear embossing ink and heat embossed it with Black EP. Then I picked a bunch of  mists and just made some misting over the stamped images.


I decided to make the Owl in greens- blues, with a touch of yellow and the Bird in red- orange and yellow tones. I used a wet baby wipe to spread the colors and then added a bit of shimmery paint over the flowers and leaves and made a shiny painted moon .
The last step was to make black cardstock  long tags, to add some buttons and to tie a tassel/fabric bow.


Both tags were made pretty flat as we want to use them as our bookmarks. 


And now it's your turn! Go to PWP shop, grab  some vertical stamps and made the similar projects for you or as a lovely quick gift.
 And now for the product list:


Saturday, September 21, 2013

Scrapbook Saturday : By the Sea


Hello my dear crafty friends and welcome to my Scrapbooking Saturday!


Irit is here and this is my first scrapbooking page made with our gorgeous PWP stamps and sure not the last!
So this is my so called " Clean and Simple" page: a lot of white space with light Mixed Media coverage and not too much patterned paper after all.


I used my dear grandsons photo cut out (the background was not a good fit for the colors , so you can cut the image out and to arrange it as you wish over the background cluster.
I used some, not much, LYB paper, stickers and die cuts and mostly made then random background strips. I also added some old and forgotten plastic self adhesive mesh in two colors.Then I added three cut outs form PWP gorgeous By the Sea  clip art sheets: Post card, Boats and even some shells, but those are  not much seen after the title added over.
And then stamped the rest of the background. And I stamped a lot.
You can see background stamping all over the centre of my page made with Punchinella set and Textures set.
Then I added kind of waves using Journaling  set scalloped border . More spots   were stamped down to the lower left corner with  Textures set. And some faux stitching in red with another stamp from Journaling set.
Next I stamped some birds using Bird Panel set on the upper part. And even added a sun from Build a Scene set.

Here is a closer look to the cluster center and our lovely clip art.


Now is was journaling time and I used this Journaling set to make my stamped journaling over LYB spots.
Then I added  some more word stamps on the lower corner cluster, using THIS AND THAT  and MEMORIES stamps.
 And as I always try to add some  never used products, I added a lot of gold micro beads to simulate to sand.
I really like the outcome of this page and hope you like it too.
See you soon with more PWP  inspiration!


Friday, July 27, 2012

Feature Friday: Hanging Stars

Hello there peeps!

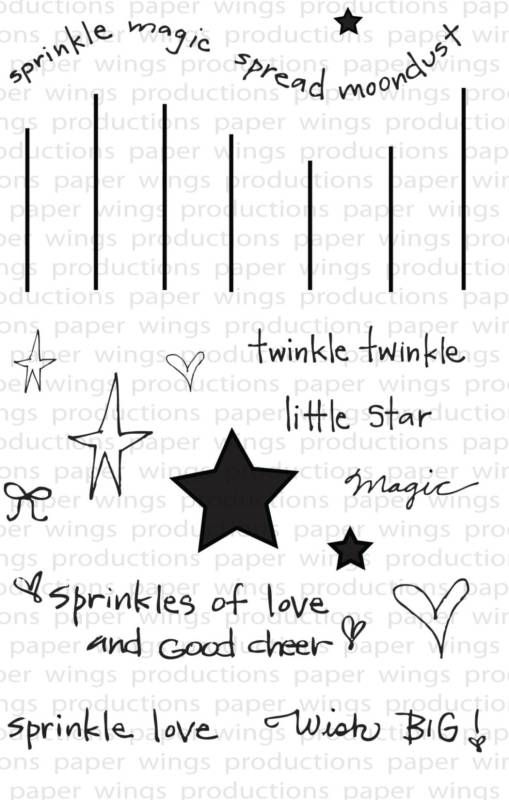
Today we feature the delightful Hanging Stars set by Liz Allen of Fine & Fancy.  Full of sparkle and charm just like Miss Lizzie herself, this set can be added to so many of your projects.  This stamp set can be used to celebrate the special people in your lives, everyday moments or special occasions like 4th of July, birth of child, congratulations, birthdays, anniversaries, Halloween, the winter holidays or just as a pick me up for someone.  Add the Hanging Stars to your tags, cards, gifts. ATCs or mixed media projects.


How about we see some tags by Liz and Julie?


The Stars Danced by Liz Allen


Details:

1. Use distress inks and ink blending tool to lightly cover the surface of tag with blue, green and purple inks.

2. Stamp flourish from Flourish Fun 1 on the top and near bottom of the tag.  Hand draw lines from top Flourish at varying heights.  Stamp or draw stars at the bottom of each line.  Stamp or draw a bow on top of each star.

3.  Write or stamp a sentiment.

4. Tear off bottom edge of tag.  Ink all edges with ink blender tool and distress ink.  Add Stickles to the bottom edge and to all the stars.

5. Tie on some tulle!

Supplies for The Stars Danced Tag
Stamps: Hanging Stars, Flourish Fun 1
Ink: Memento in tuxedo black, Tsukineko; Tim Holtz Distress Inks by Ranger 
Paper: Tag
Tools: Ink Blending Tool (Ranger); black pen
Embellishments:  Stickles by Ranger; tulle


Sprinkles of Love Tag by Liz Allen


 Details:

1. Stamp flourish from Flourish Fun 2 on the top.  Hand draw lines from top Flourish at varying heights.  Stamp hearts at the bottom of each line.  Color in hearts with colored pencils.  Stamp a bow on top of each heart.


2. Stamp a sentiment.  Color in areas of background with a white colored pencil.

3. Add Stickles to all the hearts and bows.

4. Draw circles around border or stamp a border.


Supplies for Sprinkle Love Tag
Stamps: Hanging Stars, Flourish Fun 2
Ink: black ink
Paper: kraft
Tools: colored pencils; black pen; Tim Holtz Distress Marker by Ranger in picket fence
Embellishments: Stickles by Ranger


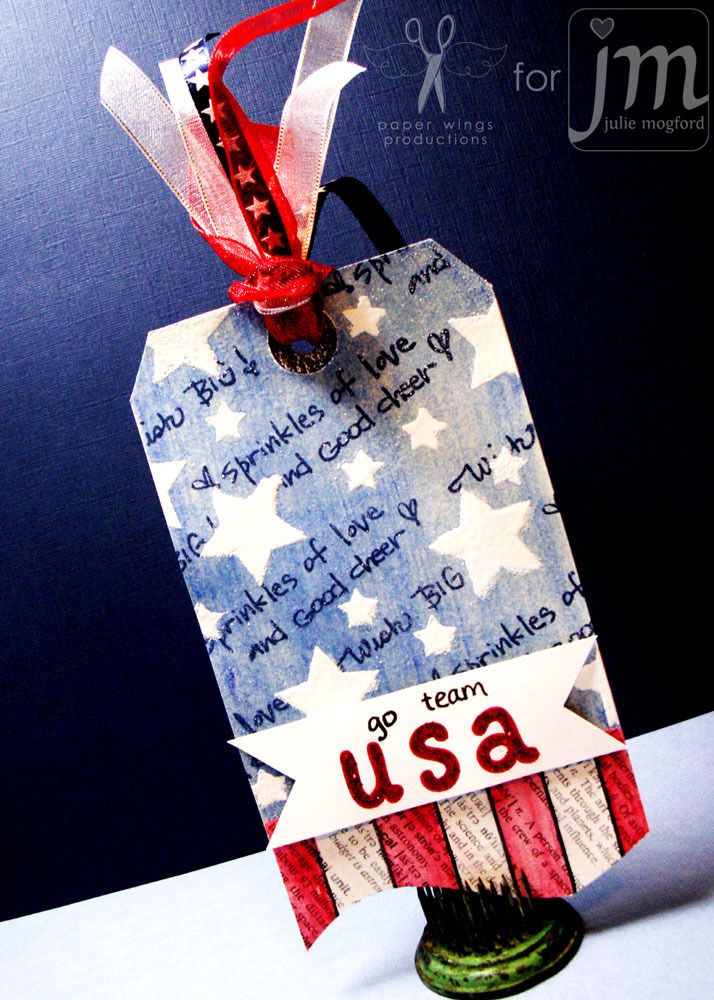
Team USA tag by Julie Mogford


We're ready for the Olympics at my house and I thought a USA inspired tag would be fun.  The Hanging Stars set had some great elements for me to use on this tag and I really like the curved bottom.  Go USA!!!

Details:
1. Cover top two-thirds of tag with blue watercolor crayon, and then use paintbrush with water to blend out the color.
2. Stamp sentiments from Hanging Stars set diagonally in darker blue ink.
3. Stamps stars with white craft ink and emboss with white embossing powder.
4. Stamp staggered lines on text paper. Use red watercolor crayon as before to create red stripe. Adhere to tag and trim tag in same shape as staggered lines.
5. Spray shimmer mist on tag and blot dry. The water could react with background, and in this case, I didn’t want it to.
6. Stamp USA letters from Whimsical Solid Alpha in red ink and write “go team” above. Cut banner slits and adhere to tag with foam tape. Use red stickles to accent USA.
7. Add fun ribbon.
Supplies for Team USA tag 
Stamps: Hanging Stars, Whimsical Solid Alphabet
Ink: Archival Black by Ranger, Color Box Chalk Ink in Warm Red and Blue Iris, Stampin' Up! Craft ink in Whisper White
Paper: dictionary paper, manila tag
Tools: heatgun, Faber Castell Pitt Artist Pen, Caran D'ache Watercolor Crayons, Stampin' Up dimensionals
Embellishments: Stampin' Up! Whisper White embossing powder, Radiant Rain Shimmer Mist in Pearl Gold by Luminarte, Glitz Stickles by Ranger in Ruby Slippers

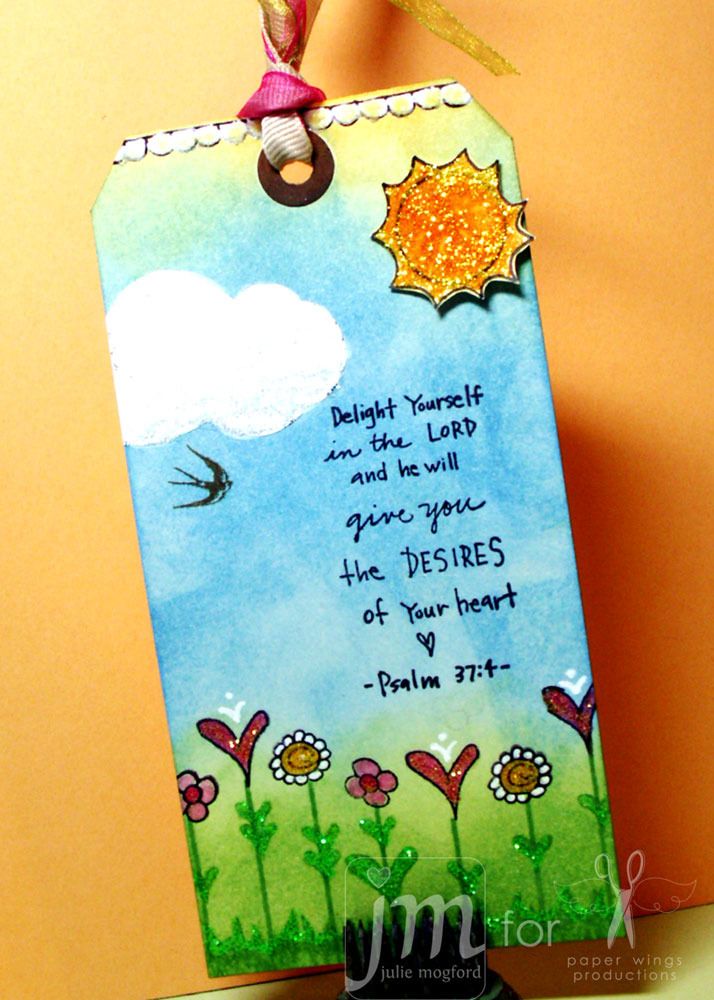
Delight in the Lord tag by Julie Mogford


This tag was inspired by the designer herself, Miss Lizzie Allen.  To me this looks like something she might make.   I did of course have to do a little bit of stickles work.  Although you might not be able to detect it from this photo, but stickles are just about everywhere here.  The top scallop, sun, cloud, flowers, leaves and even the grass.  The sentiment is from our Scripture set, which is also designed by Liz.  I love this happy tag! 

Details:

1. Using an ink blending tool, add colors to create a sky and grass background. 
2. With same green ink, stamp staggered lines from Hanging Stars set at the bottom to create flower stems.  Using the small folk star, stamp repeatedly at the bottom of tag to create a grass effect.  Use the folk hearts to create leaves for flowers.

3. Stamp large hearts and flowers from the Louise set on the stems using black archival ink.  Press ink pads on non-stick surface to pool ink and use a brush and water to color in areas for grass, leaves and flowers.  Use white gel pen to accent flowers.
4. Cut cloud shape from text paper, adhere to tag and add white paint to dull text a bit.  Draw and cut sun shape from yellow scrap paper. Add to tag with foam tape.
5. Stamp scallop border from Louise set at top of tag and add a flying bird from the Bird Panel set. Color inside scallops with white paint or white gel pen.  Stamp sentiment from Scriptures set above flowers in black ink.
6. Use glitter to accent elements of tag.
Supplies for Delight in the Lord tag 
Stamps: Hanging Stars, Scriptures, Louise, Bird Panel
Ink: Archival Black by Ranger, Distress Ink (Ranger) in Vintage Photo, Wild Honey, Pickled Raspberry, Mowed Lawn, Salty Ocean
Paper: dictionary, scrap yellow
Tools: Ink Blending Tool (Ranger), Signo gel pen, paintbrush, stampin up dimensionals
Embellishments:  White craft paint and Stickles (Ranger) in Distress Rock Candy, Baby Blue, Firefly, Orange Peel, Yellow, and Fruit Punch


You can also see Hanging Stars being used HERE, HERE and HERE.  I hope you are inspired to add some sparkle and love on your projects too!


Come and join us for another great pwp event, tomorrow at Scrapbook N' More in New Braunfels.  We will have a trunk show, demos, and a FREE make & take project.  It's from 11-4, hope to see you there!


Thank you for joining us today.

The Paper Wings Gals.
Related Posts Plugin for WordPress, Blogger...