Showing posts with label double dot border. Show all posts

Tuesday, July 22, 2014

Tutorial Tuesday - Encaustic Wax


Hi Paper Wings Fans! Dana here today sharing an encaustic wax tutorial. I'm still experimenting with this new medium so please keep that in mind! Today I'm going to share some techniques that work for me, as well as my mistakes, and how to avoid them.


I used the Purple Cows Melt Tool, interchangeable tips and encaustic wax for the projects I'm sharing today. I also used a heat gun.


I cut several small pieces of cardboard (from my Nesting Components Kit) and primed them with gesso. I did experiment with pieces cut from a cardboard box and was not happy with the way the wax settled on the ridged surface.


Once the gesso was dry, I melted clear wax onto a piece of cardboard, spread the wax around to cover the entire piece of cardboard and then heated the wax with my heat gun to fuse and smooth the layer of wax. Note: Apply heat just until the surface of your project is shiny. Overheating the wax will cause the wax to run off your project.


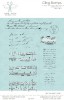
I stamped an image from the Text Melange Cling Stamp Set onto a piece of white tissue paper using black Archival Ink.


I then placed the tissue paper onto my piece and melted a layer of clear wax over the top. The tissue paper blends with the wax for a seamless finish. Again, I used my heat gun to smooth and fuse the second layer of wax. Why not stamp directly onto the first layer of wax? I'm still a beginner and need much more practice to create a wax layer that is smooth enough to stamp onto and produce a crisp image. Until that time, tissue paper works great!


I changed the tip on my heat tool and selected a gold colored wax to add a colored edge to my piece.


I added a rub-on sentiment, which I then sealed with a small amount of clear wax.


I finished this piece with a set of Gold Foil Wings.


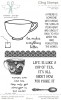
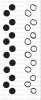
I created a second piece using the same techniques as above. I selected several stamps from the NEW Tea Time Cling Stamp Set, some small circles from the Double Dot Border Clear Stamp Set and some washi tape from the Tea Time Nesting Components Mixed Media Kit.


Everything was going well until I started adding color. Note the difference in the evenness of the wax in this photo compared to the finished piece. I overheated the wax when fusing the colored layer and then added more clear wax over the top to try to even out several areas. I made things much worse and smeared the yellow wax, which resulted in a "dirty" finish.

My advice is to add the colored layers last and do not try to go back over a finished piece. It is easy to overheat the wax when fusing layers, so keep the heat gun several inches above the project. Do not direct the heat onto any one area too long to avoid creating wells in the wax. Also, if adding layers of stamped tissue paper, overheating the wax will cause the tissue paper to slide around, smearing the image.

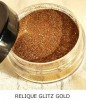
Since I was not able to repair the finish on this piece I decided to try adding some sparkle with a bit of Relique Glitz Gold Iced Enamels. If you work quickly, you can add glitter or other sparkly bits into the warm wax!

A big thanks if you made it to the end of this post! I'd love to continue my journey with encaustic wax and share my results with you. If you'd like me to try encaustic wax with a specific technique or on a different surface please leave me a note in the comments section.

Stick around awhile and check out Katie's Tea Time Mini Album and Amber's Christmas in July Card. There is still time to join our July Emboss It Challenge. CLICK HERE for all the details.


Wednesday, June 19, 2013

What's Up Wednesday - Hope in Colorado!


Hi everyone!  Tara C. here with a What's Up Wednesday post.  The big news around here has been the Black Forest Fire in Colorado.  This has hit super close to home for us.  We are 12 miles from the fire and about 4-5 miles from the closest evacuation area.  Lots of friends have been evacuated and sadly, many have lost their homes and everything they own. On a more happy note, the fire is almost completely out today!


This would be a perfect little card to go along with a care basket for the evacuees, filled with things they may have been too rushed to grab when they left home.  I knew this sentiment would be perfect  because the burn area looks like total devastation and when you lose your home you feel as if everything is gone. The bright colors and cheery sun will bring some light into someone's life.


For this sweet little collage I used a few different Paper Wings Productions stamp sets.  The Backgrounds set was used on the background, the large cloud and the sentiment banner.  The Double Dot Border set was used on the small clouds and the sun and sentiment are from the Earth and Sky set. I marked black "stitches" around the clouds and added some fun red rickrack and a few shiny white sequins.


The inside shows more of the background stamp, another sun and more happy clouds!

Thanks for visiting us today!  We would love to see what you create with Paper wings Productions stamps.  Show us on our Pinterest page, our Facebook page or our Flickr gallery.  You can also leave a comment with a link to your project.

The Paper Wings supplies used:

Tuesday, January 8, 2013

Tutorial Tuesday - Border Clear Stamp Sets


Greetings peeps!

First, let me start with a big THANK YOU to all of you who participated in our first blog hop!  We hope you all enjoyed all of the projects from our designers, I know I did!  I can't wait to do it again next month!  Congratulations to  LORI APGAR for winning the $25 gift certificate to our online store.  Lori please contact us at info@paperwingsproductions.com for instructions on how to claim your prize.

You may have noticed that we are on a different blog schedule this week.  We have decided to shake things up in the new year and add some new blog days.  Today we have our first Tutorial Tuesday!  I have been excited to add this new feature and have been giving a lot of thought to what I might possibly show you.  Unfortunately, my family has passed around the flu since the day after Christmas.  Yes, that's right...we have had the flu germs in my house for TWO WEEKS!  I was the last to catch it and I still feel a bit dopey, so please bear with me!  I have decided to keep it simple today and show you how to use one of my favorite stamp lines from our collection.

Our clear border stamp sets come with a solid and an outline.  The two stamps are meant to compliment each other and work with each other, but not meant as a perfect match up.  They are supposed to be slightly off, which if you stamp like I do, this is perfect!  ;)

Let me show you how easy they are to use.  I am going to stamp the Double Dot Border across a shipping tag.  I am starting with some distress ink pads, a tag, a mini mister spray bottle, and a non stick craft sheet.

Rub the ink pad directly on the craft sheet, spray with water, and swipe the tag across the craft sheet.


 Dry with a heat tool or just set aside.
 I am going to stamp with the solid Double Dot Border first.  ***Please look at my stamp!  See how "dirty" it is?  I view rubber stamps as a TOOL to be used!  I sometimes read about folks who think you should only use certain inks with clear stamps and how delicate they are...NOT!  I was super picky when having our clear stamps made. They are tough, durable, and fantastic tools!  I have used my stamps with every kind of ink, gesso, acrylic paints...you name it.  They always stamp beautifully and clean up fine with soap and water.  We WANT you to USE our stamps!  Don't be afraid!  When they are "dirty" it just means they are being used.***
 Since they are made from a clear material, they are easy to see through.  It doesn't take much effort to line them up.  Don't over think it, just stamp.


 Next, I will stamp the outline Double Dot border with a darker ink.


 Remember, they are made to be slightly "off".  No need to try and get it perfect.


 For a finishing touch, I inked the edges of the tag with the same color as the outline.


 Now it's ready for a focal image!  Wouldn't this be great in your art journal, or greeting card, or scrapbook page layout, or....

Thanks for visiting with us today!
Enjoy the flight!
Carrie


Products used in this post:

Friday, August 24, 2012

Feature Friday: Framing a Scene

Happy Friday peeps!

Summer may be waning, but the fun here at The Aviary sure is not.  Have you seen Norma G.'s beautiful mixed media notebook tutorial Monday or Julie's pretty card Wednesday with great ideas on how to make multiples of one card?

Today, I thought I would challenge myself by building several scenes using our Framer (Day Framer, Details Framer, Life Framer and Snapshot Framer--I chose to use the Life Framer and Snapshot Framer) and Window sets.

After you stamp out your frame on cardstock there are several ways to build the scene within a frame:


  1. Masking.  You can create a mask of your frame using a masking product or a piece of computer paper with repositionable tape. 
  2. Cut Out Scene.  You would stamp your scene inside your frame not worrying about stamping over the frame and simply cut out the inside of the frame and place it on another (clean) stamped image of your frame.
  3. Cover Frame.  Similar to the previous option, you would stamp your scene inside your frame not worrying about stamping over frame and the cover the outside frame with another (clean) stamped and cut out image of your frame.
Whichever way you prefer, make several scenes using stamps like London, Paris, Royal Melange, Luc, Louise, Marcel and Sophie.

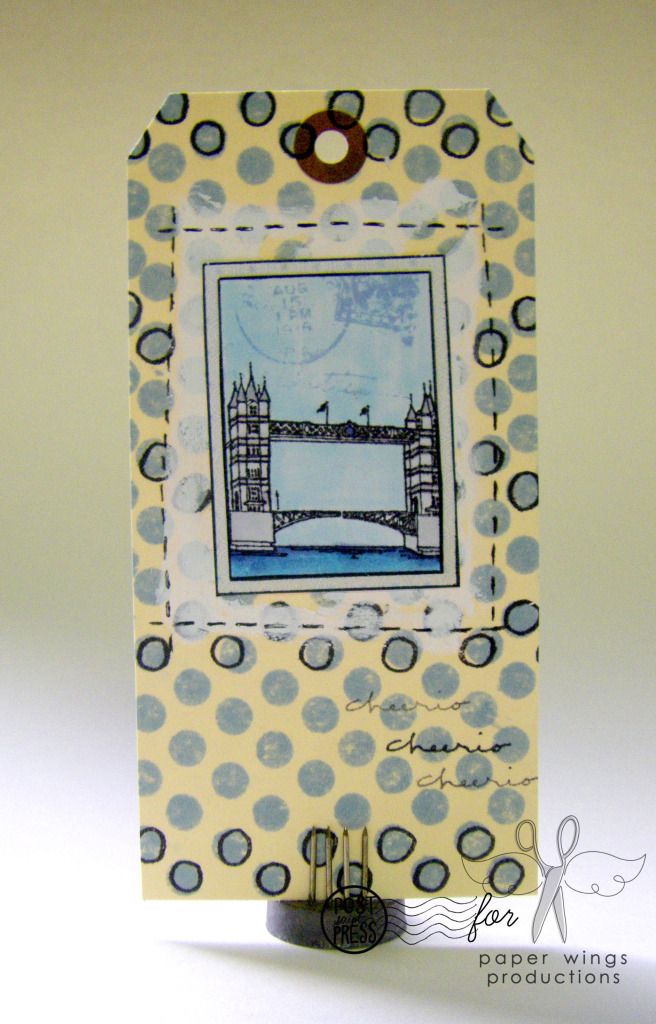
Now you can add your scenes to all sorts of things.  Place them on a stamped tag:


Stamps used: WindowLondon and Writing Backgrounds on scene; Double Dot Border and London on background.

1. Stamp scene, color in with Copic markers and cut out inner rectangle.  Adhere inner rectangle to another window image stamped upon patterned paper.  Cut out.

2. Stamp solid Double Dot Border in blue to cover a tag.  Stamp outline Double Dot Border over a few of the solid Double Dot Border in black.

3. Paint a block of gesso where framed scene will be placed.  Outline with dash marks made with black pen.  Adhere framed scene to tag.  Stamp sentiment three times.


Create a simple card (or card set):


Stamps used: Life FramerParisSophie and Text Melange on scene/heart; Lace Border on card base

1. Stamp scene and color in with Copic markers.  Stamp and cut out frame from patterned paper.  Adhere patterned paper frame over scene and cut out.

2. Stamp heart and color in with Copic markers.  In grey ink stamp Text Melange over heart.  Stamp sentiment from Sophie.  Cut out and add to frame.

3.  Stamp solid Lace Border in blue on card base.  Stamp over solid Lace Border with outline Lace Border in black.

4. Adhere frame to card base.


Find a way to use some scraps by adding your framed scene as a focal image:


Stamps used: Snapshot FramerRoyal Melange and Text Melange on scene; Hanging Stars and Marcel on Snapshot FramerBackgrounds on background

1. Mask outer frame.  Stamp scene and color in with Copic markers (I did a little masking of the king on this one). Remove mask.  Stamp sentiment from Marcel.  Stamp star from Hanging Stars with yellow and orange inks.

2.  I found two pieces of scraps (or leftovers) to create an interesting background that I adhered onto the card base.  The dark blue embossed background comes from my Mermaid project).  The other was a piece of patterned paper that I had punched a lot of stars for my Once Upon a Time project--for this I merely cut a strip from that.

3. Adhere framed scene to card with dimensional adhesive.


We would love to see your take on framed scenes.  Please post them to our flickr group or on Pinterest.

Have a weekend full of fun!

Take flight,
Shay.

Stamps: Backgrounds, Double Dot Border, Hanging Stars, Lace Border, Life Framer, London, Marcel, Paris, Royal Melange, Snapshot Frame, Sophie, Text MelangeWindow and Writing Backgrounds
Ink: Memento in tuxedo black, Tsukineko; Jenni Bowlin for Ranger in Chicken Feed, Lemon Drop, Soap Powder and Weather Vane
Cardstock: Georgia-Pacific
Patterned Paper: Crate Paper and Studio Calico
Other: Copic Markers; American Crafts black pen; Claudine Hellmuth Studio by Ranger gesso; Stampin' Up! star punch; Scotch dimensional adhesive
Related Posts Plugin for WordPress, Blogger...