Showing posts with label lyrics. Show all posts

Friday, March 21, 2014

Feature Friday- Lyrics Cling Stamp

*****To join our March Challenge: CELEBRATE, CLICK HERE*****
 

 Hello everyone! It's Amber here today to share two cards I created with Paper Wings Productions Lyrics Cling Stamp Set for this weeks Feature Friday post. I used the large cling set that has both of the stamps but you can also find two smaller stamp sets  in the shop HERE, one has the phonograph image and the other has the walking boots. For the first card I used the phonograph image with its matching sentiment. I think this is my favorite one, love the sentiment and I had fun going outside of my comfort zone by using a cheetah patterned paper and matching it with a bright pink.


For the second card I used the walking boots image with its matching sentiment. This one is fun and different because of the leopard printed patterned paper. I didn't go too crazy with this one, I used a neutral colored  ink and ribbon to go along with the patterned paper.


Thanks for visiting today and don't forget we would love to see what you make with Paper Wings Productions Stamps so add your projects to our Flickr Group, to Pinterest, or leave a comment with a link to your project. You can also check out our Facebook Page and You Tube Page for daily inspiration.

Supplies: Cardstock- Cream / Patterned Paper- Crate Papers On Trend Collection / Paper Wings Productions Cling Stamp Set- Lyrics / Versa Color Ink Pads- Charcoal & Umber / Ribbon- Pink & Creme / Favorite Findings Buttons- Pink /  Sulky Thread- Cream & Black / Sewing Machine


Wednesday, May 8, 2013

What's Up Wednesday: Mother's Day Flowers

Happy Wednesday peeps!  Its Shay here and I was so inspired by last weekend's May Flowers blog hop and the awesome design team's projects that I decided to go floral for today What's Up Wednesday!

Please excuse me for a brief public service announcement ;-):

Before I go further though I need to say how flat-out fantastic the design team is and how inspiring I find their projects!  Dana just made this stunning tag.  Norma made any princess swoon with these pretty-as-a-princess projects.  Carrie wowed with this alcohol ink tutorial.  Amber made this adorable card.  Tara tantalized with this terrific crayon resist technique.  AND don't miss out on Nesting Components, May's incredible mixed media kit...see more about it HERE!

Now back to our regularly scheduled programming....

My late grandma was also an avid lover of flowers of all kinds so I like to honor her memory with making Mother's Day cards featuring flowers.  Mother's Day in my mind (and I don't think I am at all alone) is a natural fit with the blooming flowers of May.

I found myself trying to stretch my conception of some of the Paper Wings Productions stamps to create interesting flowers due to the innovative and clever uses of Paper Wings Productions stamps by the design team for our Paper Wings Productions' May Design Team Blog Hop.

Card No. 1


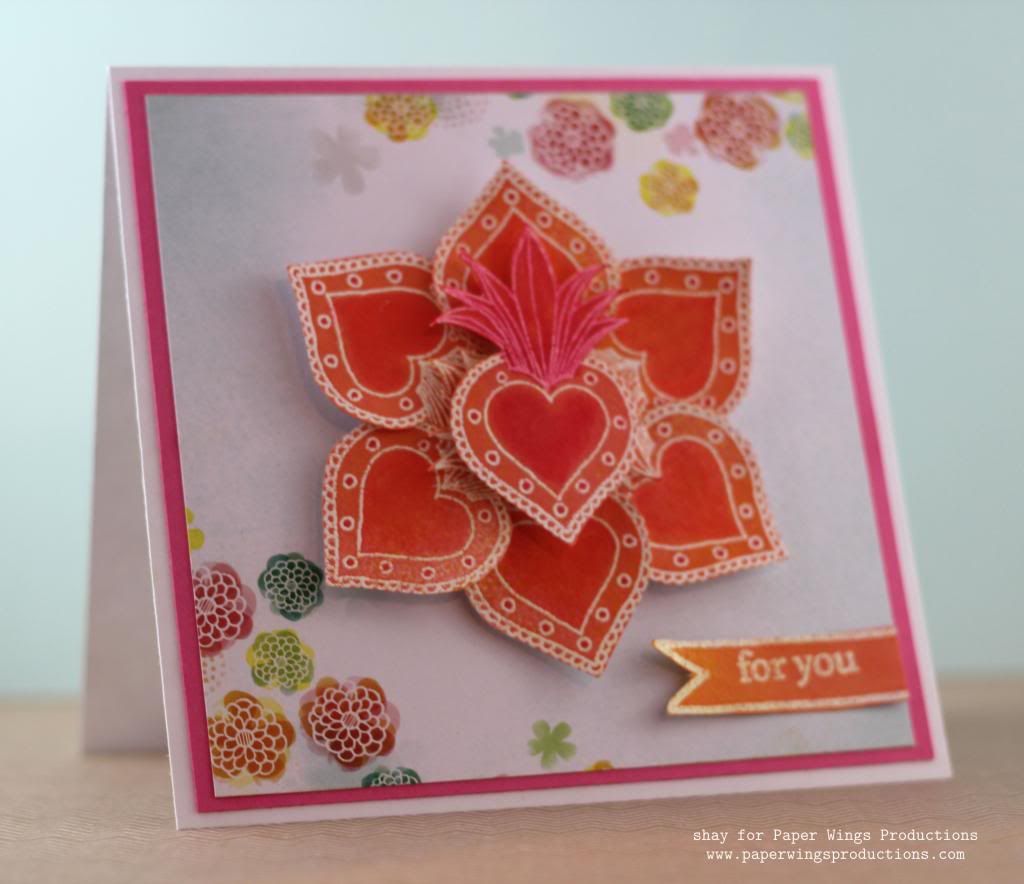
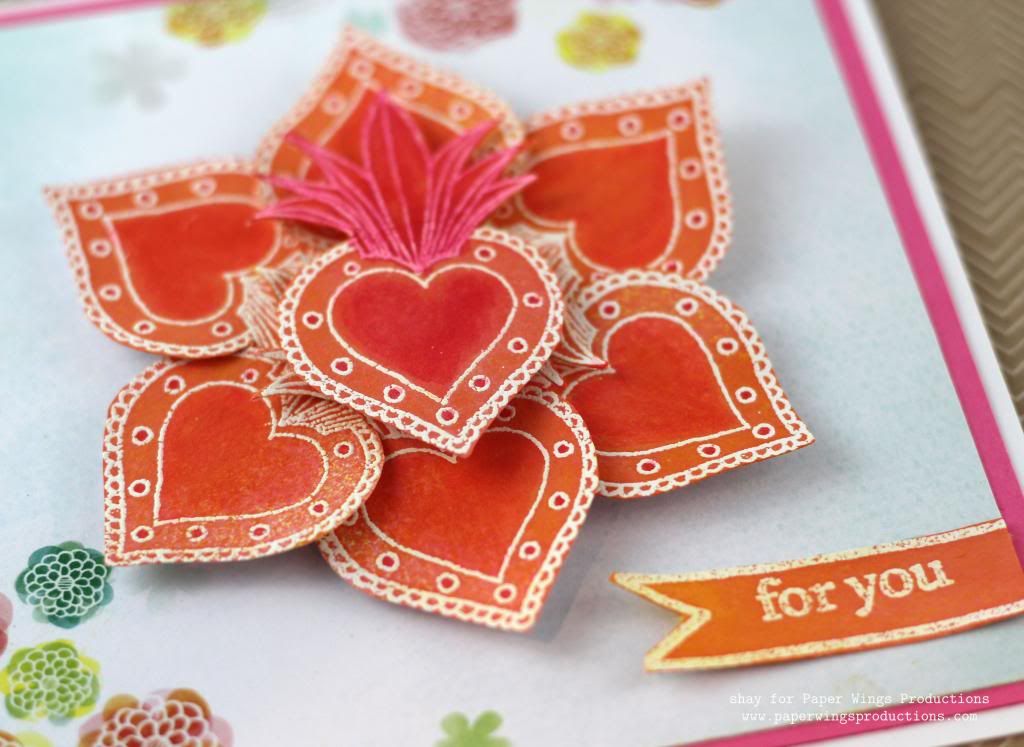
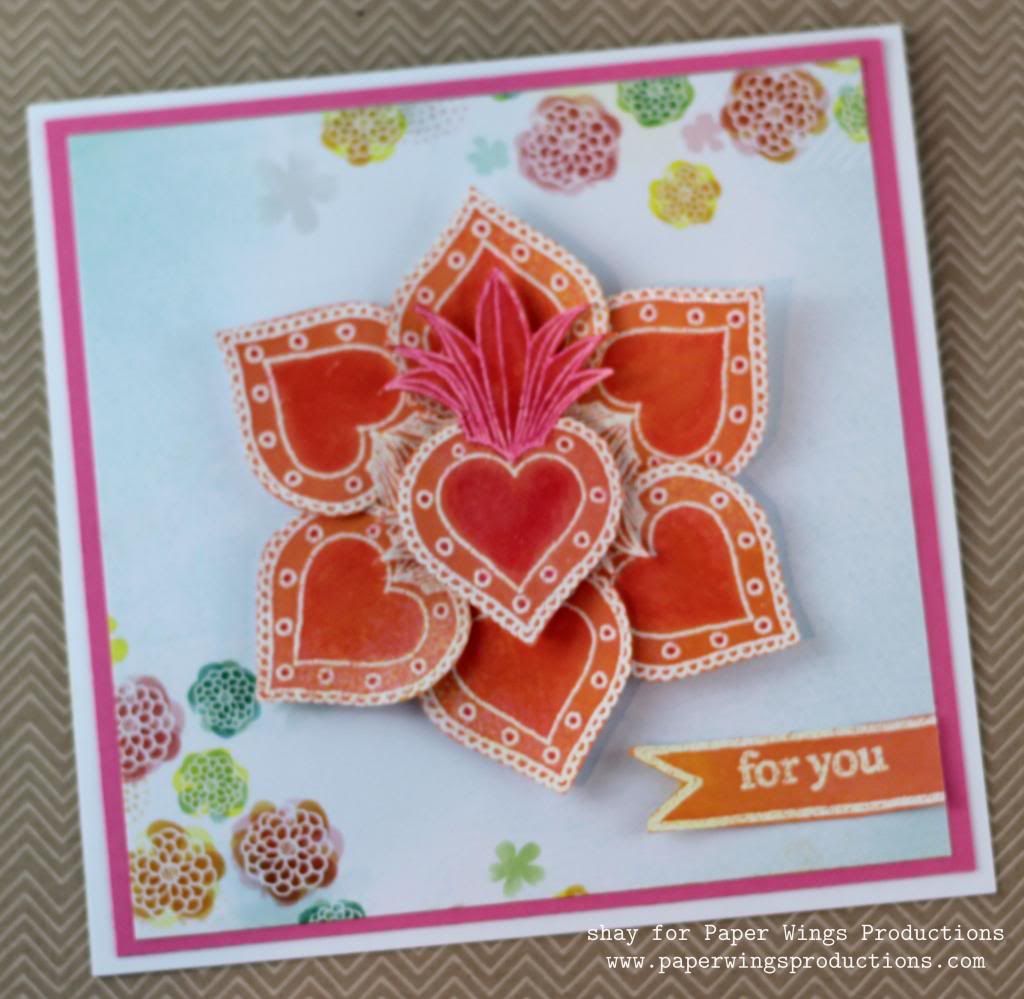
The sacred heart from Milagros put my mind to petals of a flower so I stamped it 7 times with Versamark and heat embossed it with white embossing powder.  I sprayed yellow, orange and pink mists on it and then colored in sections of it with Copic markers.  I cut each heart out.


I nested 6 of the hearts together and added the 7th to the center.  I adhered the flower to a piece of patterned paper that seemed destined for this card and then onto a piece of pink cardstock.  I finished it off on a 5.5" x 5.5" white card base.


For the sentiment I stamped the double ended banner from Tabs and Banners and for you from Thankful with Versamark and heat embossed it with white embossing powder.  I sprayed the same mists over the banner, cut off one end and adhered it to the patterned paper.

Card No. 2


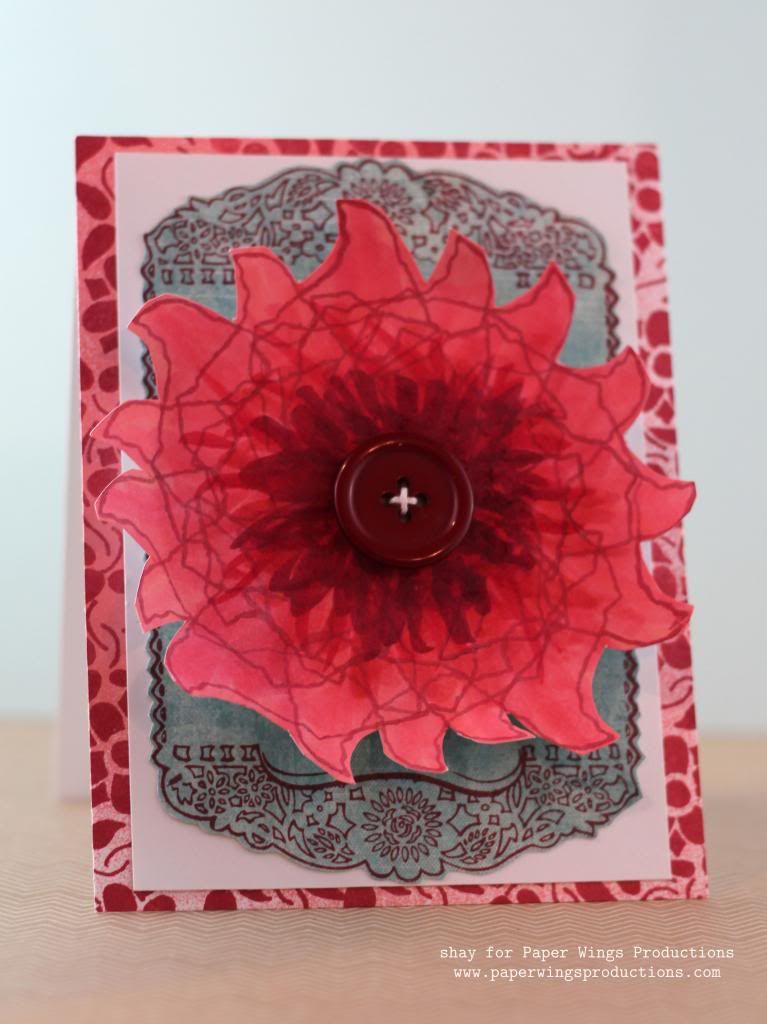
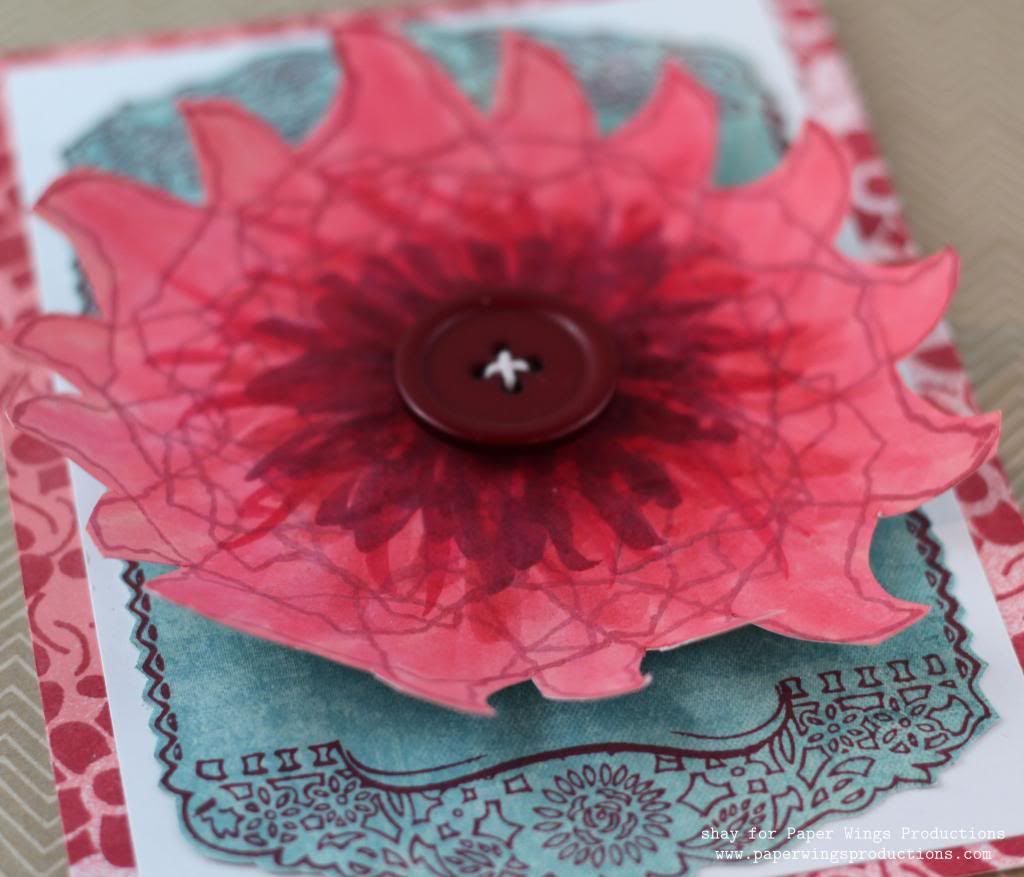
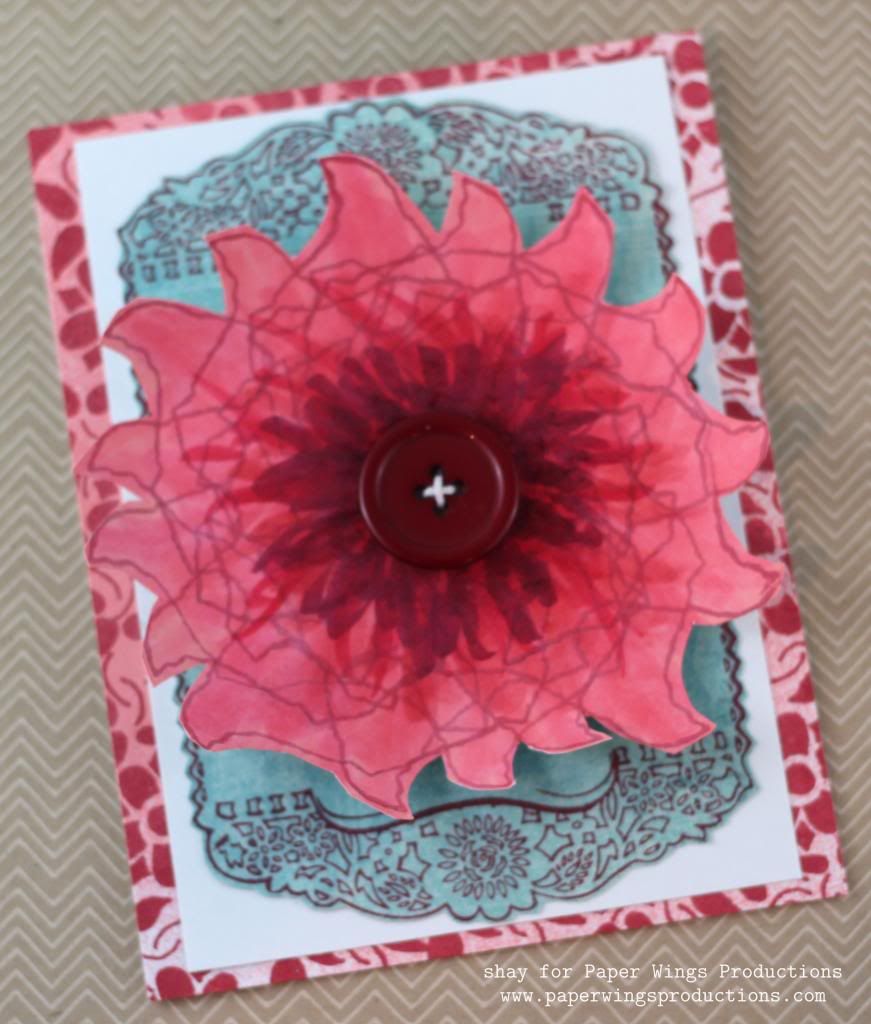
This may be the wildest idea I had for a flower.  I stamped the outline of Texas from Lone Star State in royal red ink with the panhandle facing the middle and then I stamped it over and over rotating it in a circular fashion until it looked more like a flower.  I sprayed pink mist over it and cut out the flower.  To make it more flower-like I colored it with Copics from the center out in a spikey sort of motion with the darker colors in the center.  I added a button to the center of the flower.


Next, I adhered the flower with dimensional adhesive onto the gorgeous floral frame from Dia De Los Muertos Mujer I had stamped onto patterned paper and cut out.  I adhered this all on a white cardstock layer.


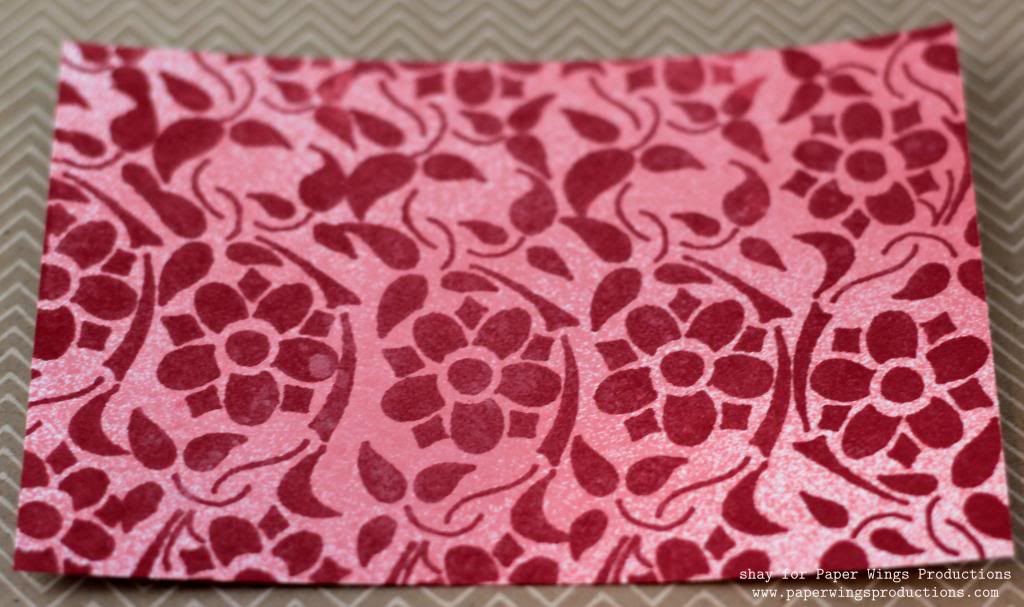
For the card base I created a patterned paper using the lovely stencil like floral border from Muertos using the same royal red ink and pink mist.


Card No. 3


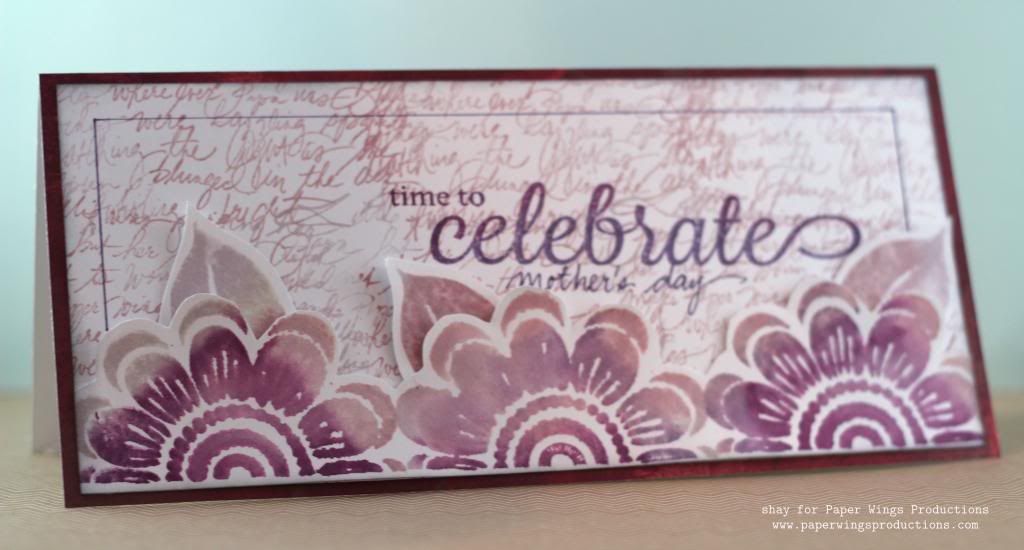
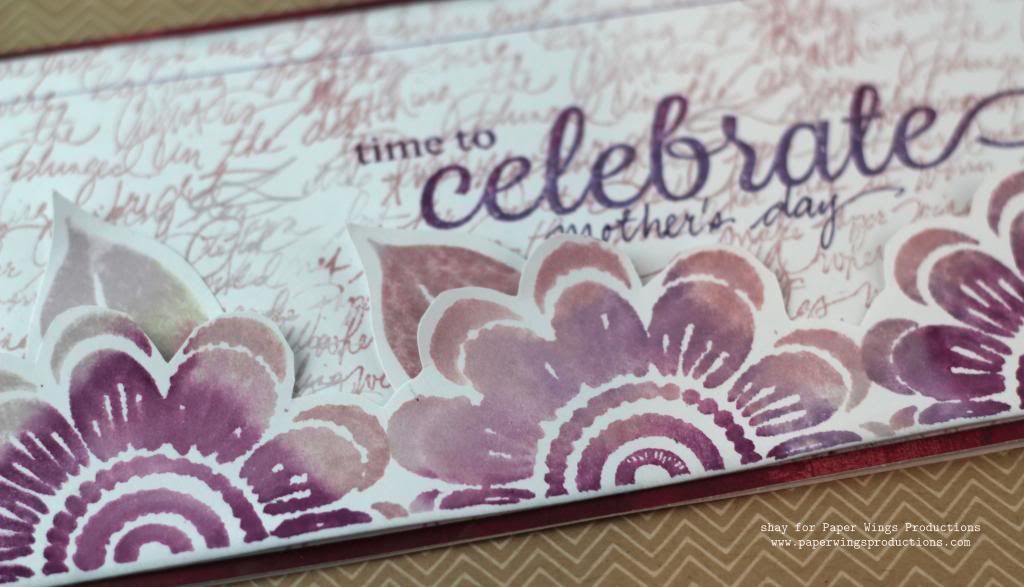
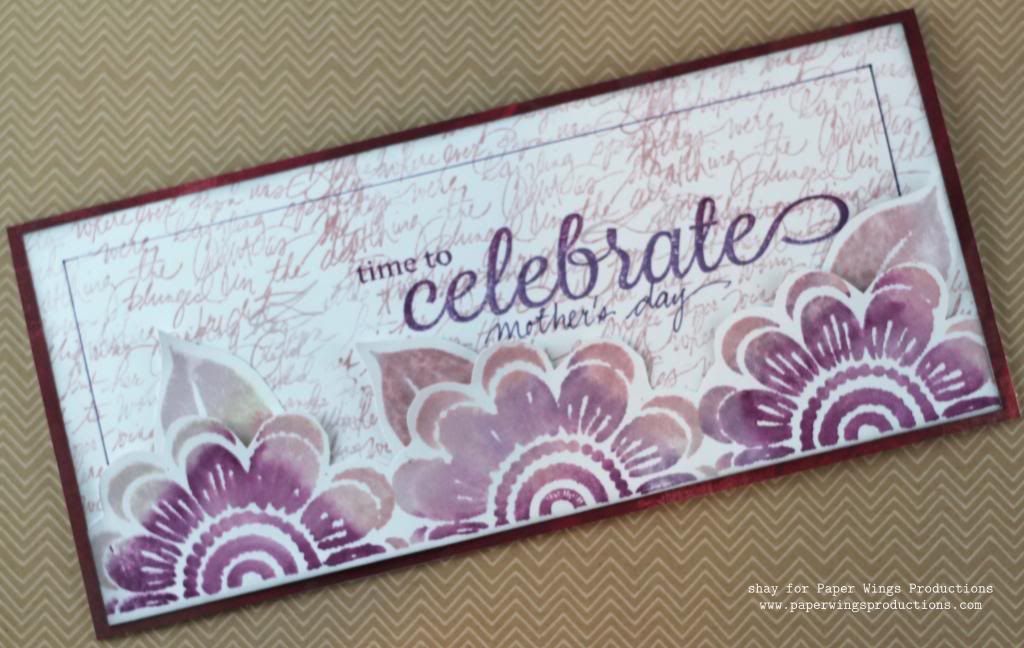
For a more traditional take on flowers I turned to my go-to floral stamp set: Flower Power.  My mom's mom loves purple so I went purplicious with the largest flower from Flower Power or Half Flower by stamping a border of 3 of them using purple Distress Inks that I misted with water before stamping on a piece of white cardstock.  I cut out the flowers and leaves (I later cut off the leaves to put behind the flowers).


On a piece of white cardstock I stamped with lighter purple Distress Inks using the handwriting from Writings Backgrounds or Writing.  With darker purple Distress Inks I stamped celebrate and time to from Celebrate.  I wrote in mother's day using the dusty concord Distress Marker and inked the edges of the panel.  I adhered the floral border to the writing background that was adhered to a patterned paper card base.  I finished this off with a border drawn in with the dusty concord Distress Marker.


Card No. 4


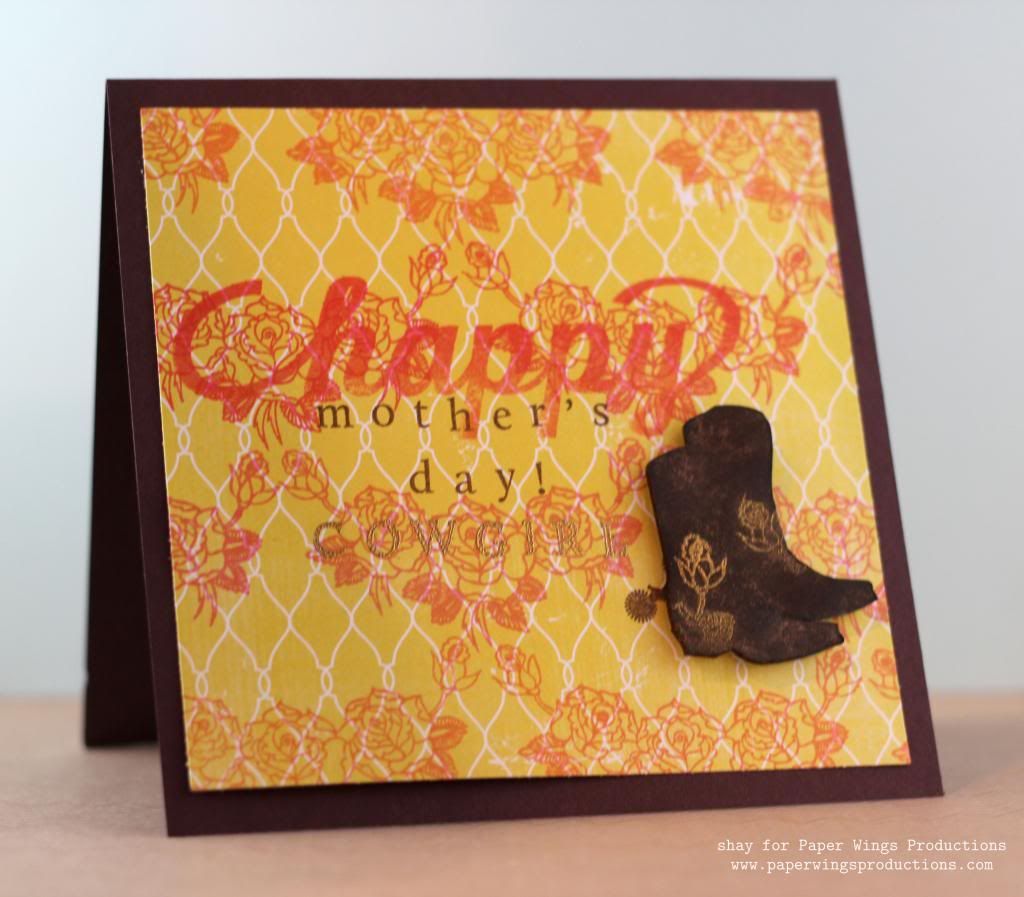
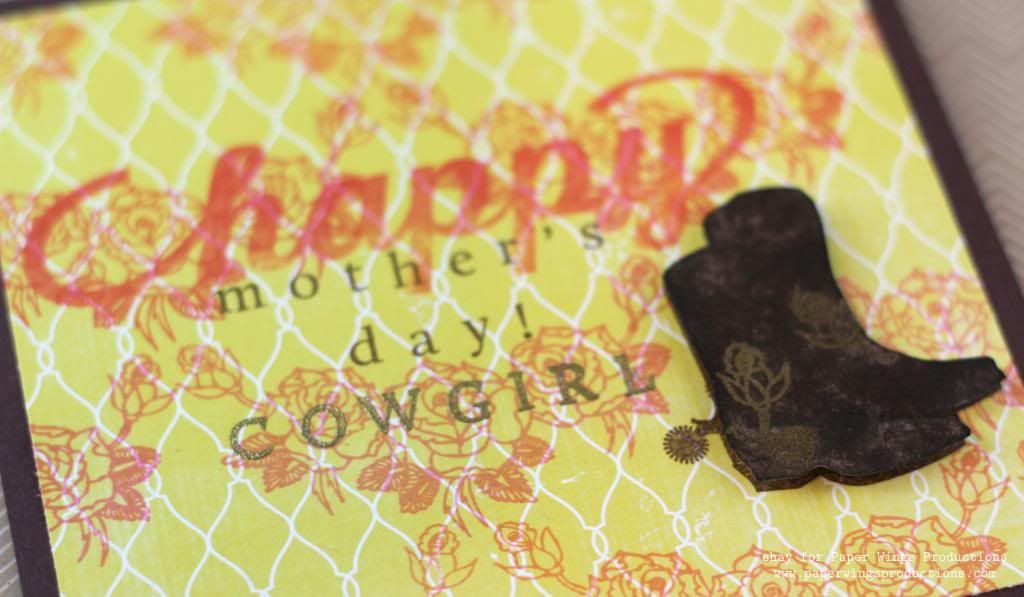
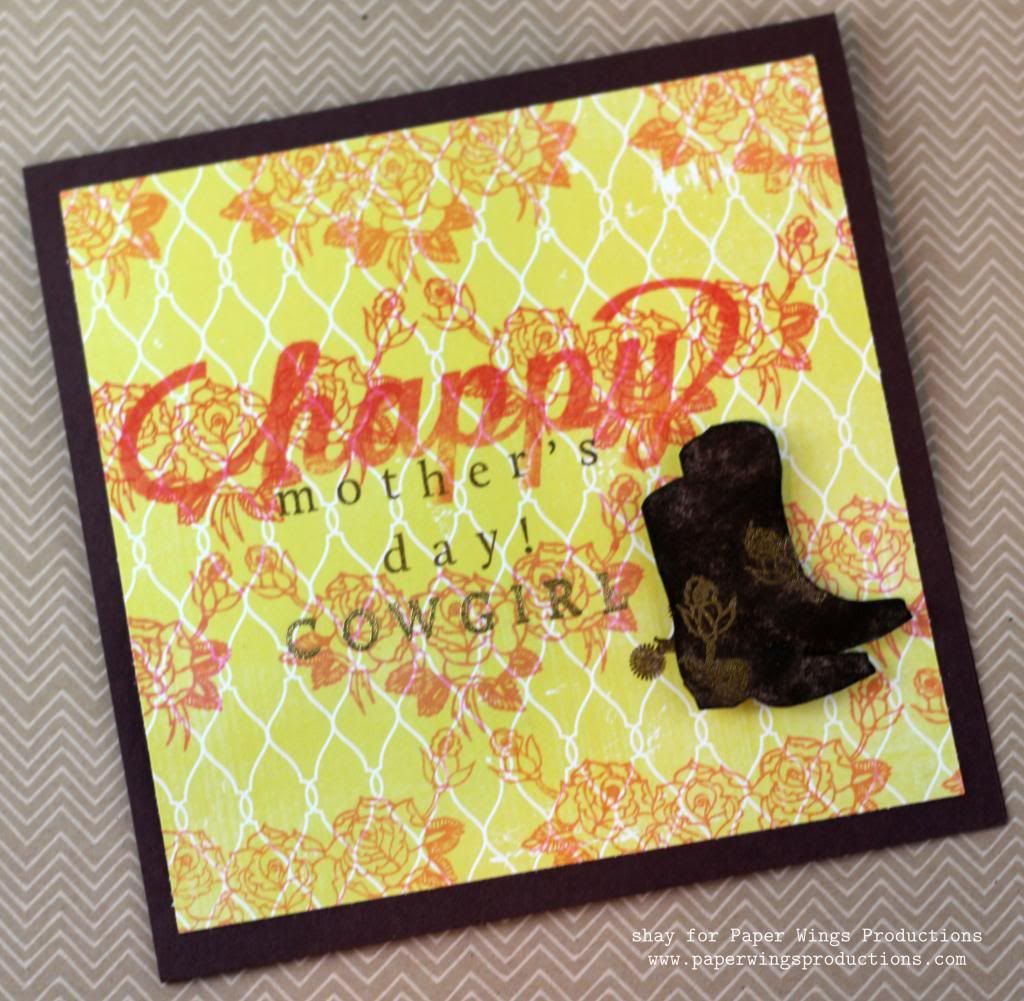
I went with a little honky tonk with my last card.  I stamped the boots from Lyrics or Walking in brown ink on white cardstock and then overstamped with the roses from Dia De Los Muertos Hombre with Versamark.  I then heat embossed in gold.  I cut the boots out.  I pressed the brown ink over the boots image to make the gold stand out more.  I inked the edges. 


On a piece of patterned paper I stamped a pattern using the roses from Dia De Los Muertos Hombre.  I then stamped happy from Happy and spelled out mother's day (stamped in brown ink) and cowgirl (embossed in gold) from Perfect Alphabet.  I stamped the boots again on the yellow panel and placed the embossed boots over that image using dimensional adhesive.  Lastly, I adhered the panel to a dark brown card base. 


I hope you have enjoyed these cards and enjoy a glorious Mother's Day weekend!

We would *love* to see what you make with Paper Wings Productions stamps. Add your projects to Facebook, our flickr group, to Pinterest, comment with a link on this post or even email pictures to us!

Take flight,
Shay.

Supplies:
Stamps:

Stamp not shown: Happy
Inks: Versamark, Tsukineko; royal red, pale tomato, bubble gum and soft cantaloupe shadow inks, Hero Arts; mulled lavender, victorian velvet, dusty concord and seedless preserves, Tim Holtz Distress Ink by Ranger; dark chocolate, Papertrey Ink
Cardstock: white, Georgia Pacific; hibiscus burst, Papertrey Ink; chocolate chip, Stampin' Up!
Patterned Paper: Yes, Please 6x6 paper pad, Amy Tangerine/American Crafts; Love You Madly and Color Me Happy 6x6 paper pads, Glitz; plum wine, Basic Grey
Other: opaque white and detail metallic gold embossing powders, Judi Kins; heat gun; Inkssentials ink blending tool, Ranger; tender pink (RV13), begonia pink (RV14), light prawn (R22), cadmium red (R27), lipstick red (R29) and cardinal (R59) markers, Copic; dusty concord, Tim Holtz Distress Marker by Ranger; pink balloon sprinklers, October Afternoon; buttercup and sherbert Mister Huey's color mists, Studio Calico; button, sassafras

Friday, July 20, 2012

Feature Friday

Hello there peeps!

We added several new designers for our latest release of stamps.  Today we are featuring one of those designers, Erin Edelmann of Rag & Bone Studio.  Erin is Carrie's sister and a very talented freelance graphic artist.  She finds a lot of inspiration from music and lyrics.  Prints of her designs can be purchased on her Etsy shop.  Rag & Bone Studio on Etsy.


Here are some samples using the designs from Rag & Bone:


1. Stamp music from Text Melange over entire card base.
2. Stamp flowers from Flower Power on yellow pattern paper, ink edges and adhere to card base.
3. Stamp sentiment from Kind Words onto coated cardstock.  Ink paper with ink tool, and then flick water to create spots. Add sentiment and flower embellishment to aqua cardstock
4. Stamp phonograph from Lyrics on coated cardstock, cut and add distress ink to edges. Adhere with foam tape.

Stamps: Lyrics, Text Melange, Flower Power and Kind Words
Ink: Tim Holtz Distress Ink by Ranger in Barn Door, Broken China, and Vintage Photo
Cardstock: stash, clay coated paper
Pattern Paper: Basic Grey
Other:  Tim Holtz ink blending tool by Ranger; flower from Sassafrass, and foam tape from Stampin' Up!


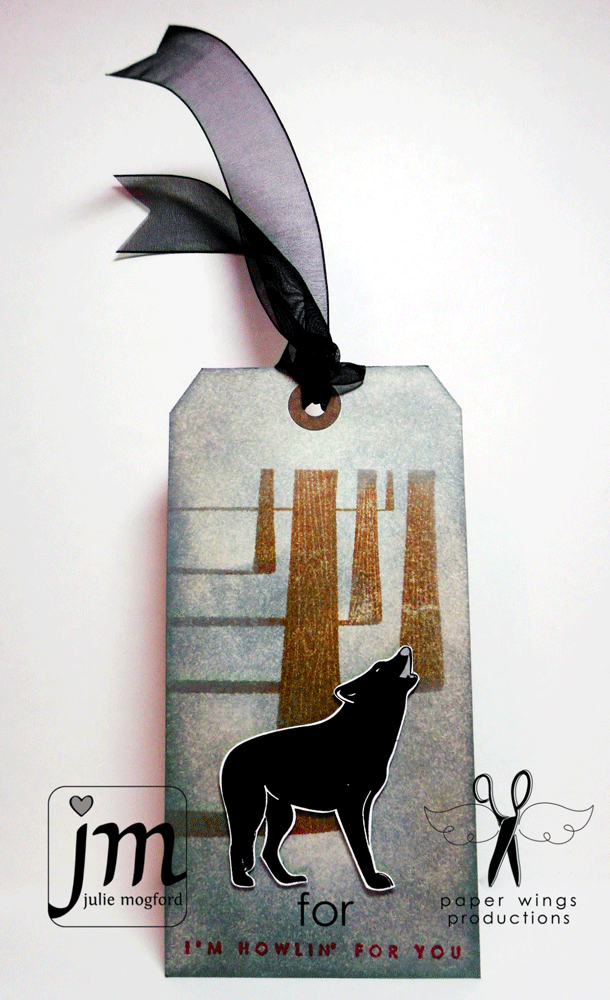
1. Use ink blending tool to add background color to tag.
2. Ink tree stamp from Howlin' For You with browns and greys and stamp on background.
3. Add sentiment to bottom of tag. (I cut my sentiment away from image for more stamping options.)
4. Stamp and cut out wolf from Howlin' For You and adhere with foam tape.
5. Tie on black shear ribbon to finish tag.

Stamps: Howlin' For You
Ink: Memento by Tsukineko in tuxedo black; Tim Holtz Distress Ink by Ranger in Weathered Wood, Vintage Photo, Tea Dye and Festive Berries (winter set)
Cardstock: Mailing Tag, clay coated paper
Other: Tim Holtz ink blending tool by Ranger, ribbon and foam tape from Stampin' Up!


1. White emboss circle background from Backgrounds in white.  Spray with mists.  Cut up piece into horizontal strips.  Attach to white panel.
2. Black emboss boots from Lyrics.  Tear piece.  Spray with mists over star stencil.  Attach onto circle background panel.
3. Stamp sentiment from Lyrics onto white strip using black ink.  Ink edges with black.  Attach onto circle background panel.
4.  Attach circle background panel to black card base.

Stamps: Backgrounds and Lyrics
Ink: Memento by Tsukineko in tuxedo black; Tim Holtz Distress Ink by Ranger in black soot
Cardstock: Neenah Papers in solar white and black
Other: Embossing powers in black and white; various sprays and mists; Tim Holtz ink blending tool by Ranger; stencil from Balzer Designs by Crafter's Workshop

Enjoy the flight!

Friday, July 6, 2012

Feature Friday--Flight Plan: Mission 004 and Mission 003 Winner

Hello Peeps!

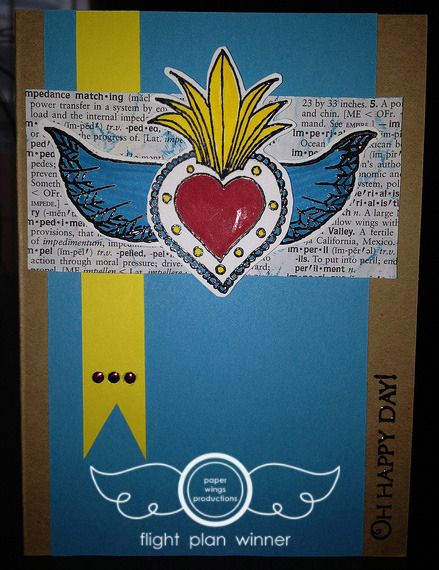
We hope everyone had a great Fourth of July celebration.  As it is the first Friday of the month it is time for a new Flight Plan mission, but first we'd like to announce that Andrea's card "Oh Happy Day!" was chosen as the Flight Plan: Mission 003 winner. 


Not only did Andrea use the Flight Plan, with a few great modifications, but it also looks like her color palette is similar to our May Color Combo.  Things I love about this card: dictionary paper inked and distressed as a backdrop to the heart and wings, the three gems on the yellow banner ribbon, and the sentiment turned on it's side.  Very clever ideas! Stamps used in this project were from the Milagros and Happy Day sets.

Andrea, please contact Shay at shay@paperwingsproductions.com with the name of your choice of stamp set. Congratulations!


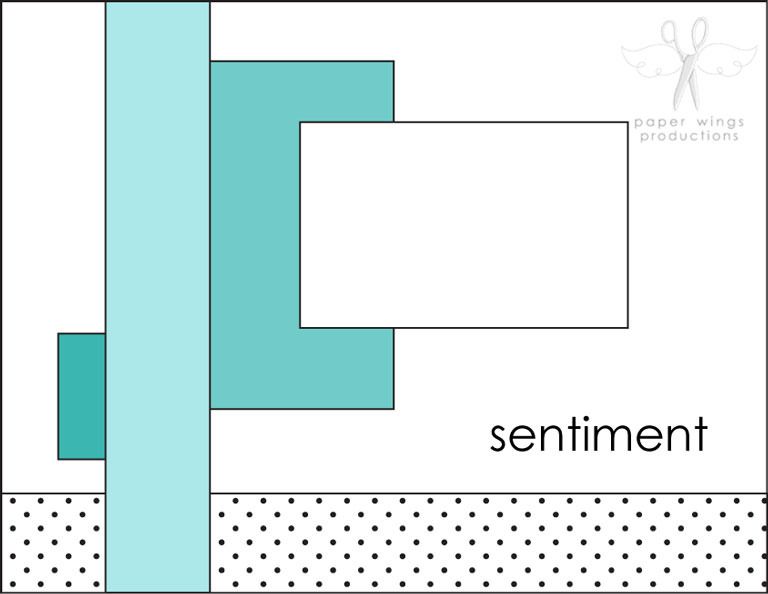
I  like this month's flight plan and I'm looking forward to seeing what you come up with.  The new release stamps are so fun and although you can use any Paper Wings stamps, I'm hoping to see some of the newly released stamps on your designs.  Here is your mission - will you accept the challenge?  We hope you join in!


What is a Flight Plan?
It is a guide of sorts to get your project started by giving you some guidelines to follow, but in our case, we hope your creativity will interpret these plans into amazing and clever new creations. We’d love to see your finished pieces, so we have set up a Flickr gallery where you can share your submissions with us. So, put on those paper wings and get ready to take flight!

Your Mission:
Create a project (card, ATC, tag, scrapbook layout, multi-media piece, etc.) using paper wings productions stamps with the Flight Plan as your guide.
  • Share a picture of your project on our Flickr group and/or pin your a picture of your entry on Pinterest.  Make sure to tag it using this code: #FP004 (make sure to include the #). If your picture is not tagged we will not know it has been entered into the challenge and will be unable to find it.

  • You have until Tuesday, July 31, 2012 at 11:59 p.m. central time to post your entries.

  • Enter as many times as you wish before the deadline.

  • We will choose a winner to receive their wings and a stamp set of their choice.
We do have some samples using the Flight Plan: Mission 004.
Shay:


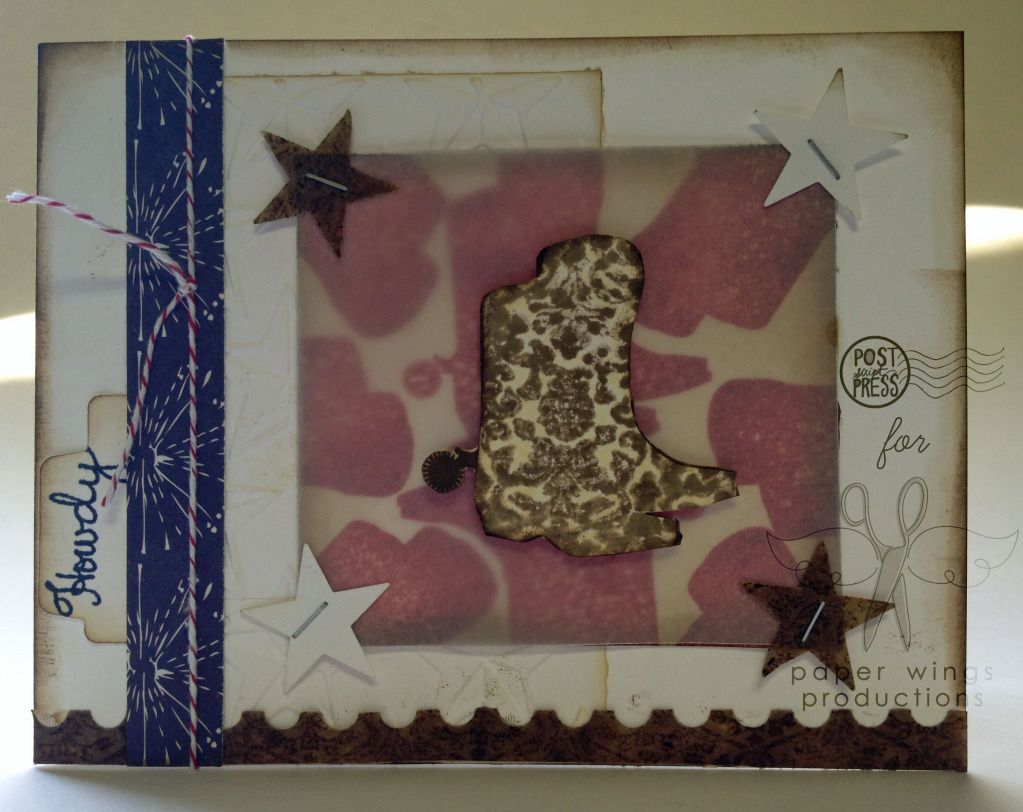
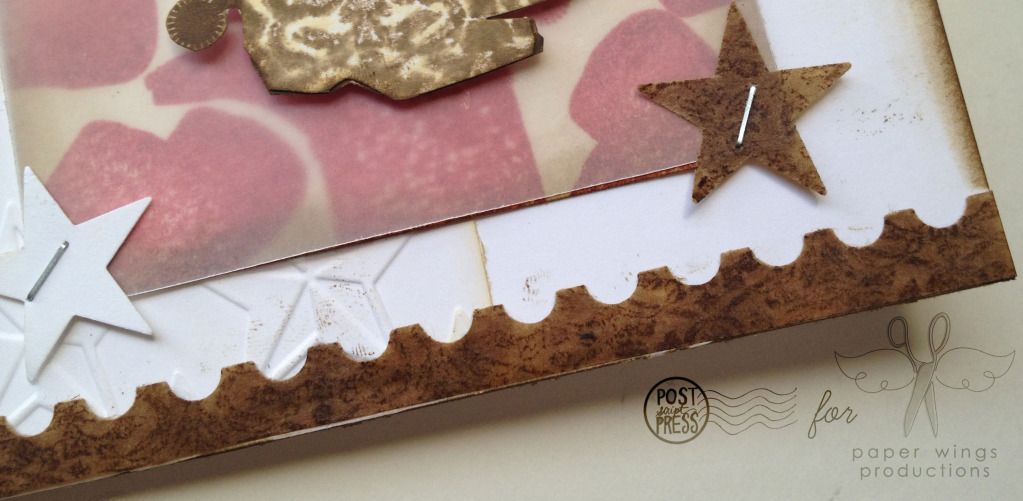
I did a little ode to Texas this time around.  Starting with an A2 white cardstock base (4.25 inches x 5.5 inches or half of a 8.5 inches x 11 inches sheet of paper), I wanted to play around with the boots from Lyrics so I stamped them in a spiral sort of pattern in red ink on a piece of watercolor paper.  I distressed the edges with my handy dandy Tim Holtz distressing tool using some brown ink.

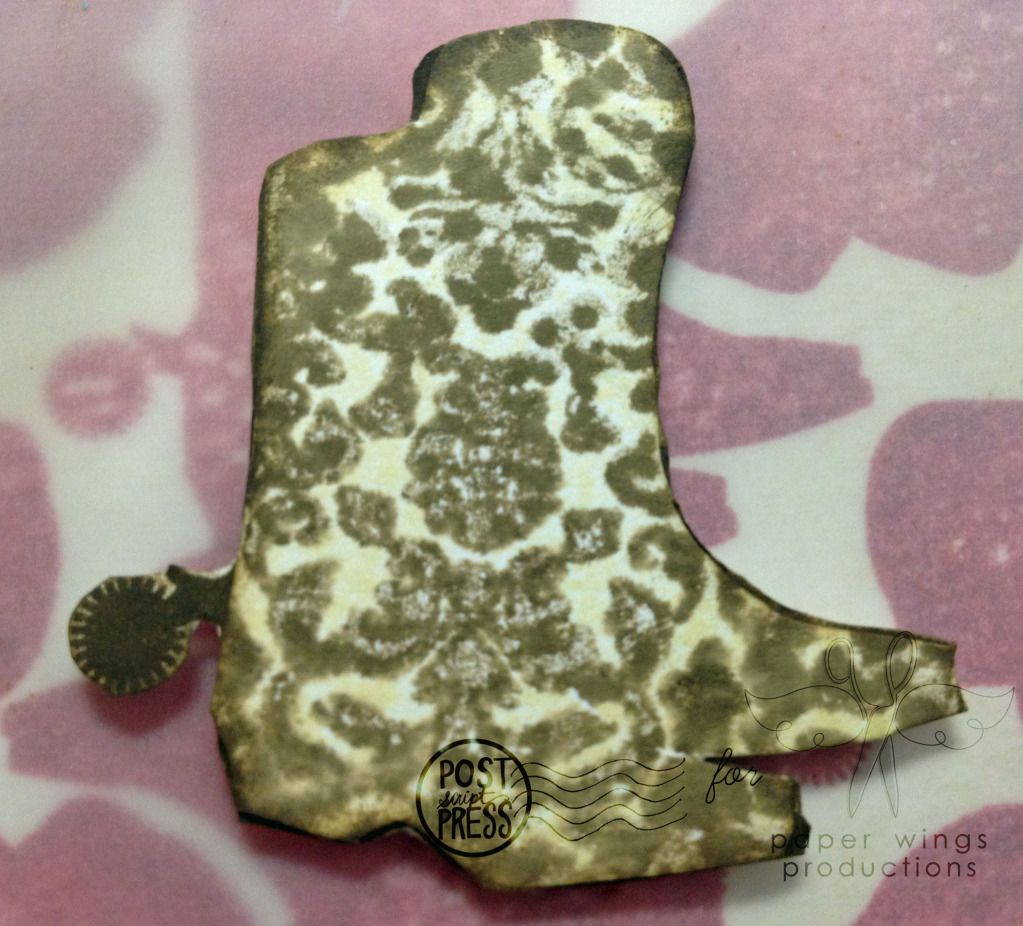
Next I inked up the boot in light brown.  I then inked up the damask design from the Backgrounds stamp set in a dark brown ink and stamped the damask onto the actual boot stamp and then I stamped the boot stamp onto the paper.  The final image turned out really cool I think.  You can do this kissing technique with any solid stamp.  I attached the damasked boots (cutting off the spur) onto a layer of boots I already stamped in dark brown so I could get a solid brown spur.


Because I wanted the brown boot to show up on the red boot background I chose to place a piece of vellum over the red to mute it a bit.  To attach the vellum to the red boot panel I punched out two stars from white cardstock and two stars from kraft glassine from Tim Holtz which I stamped in dark brown with the damask onto each corner using my Tiny Attacher (love that thing to bits).  I adhered the damask boots to the red boot and vellum panel using some dimensional adhesive to let it pop even more.

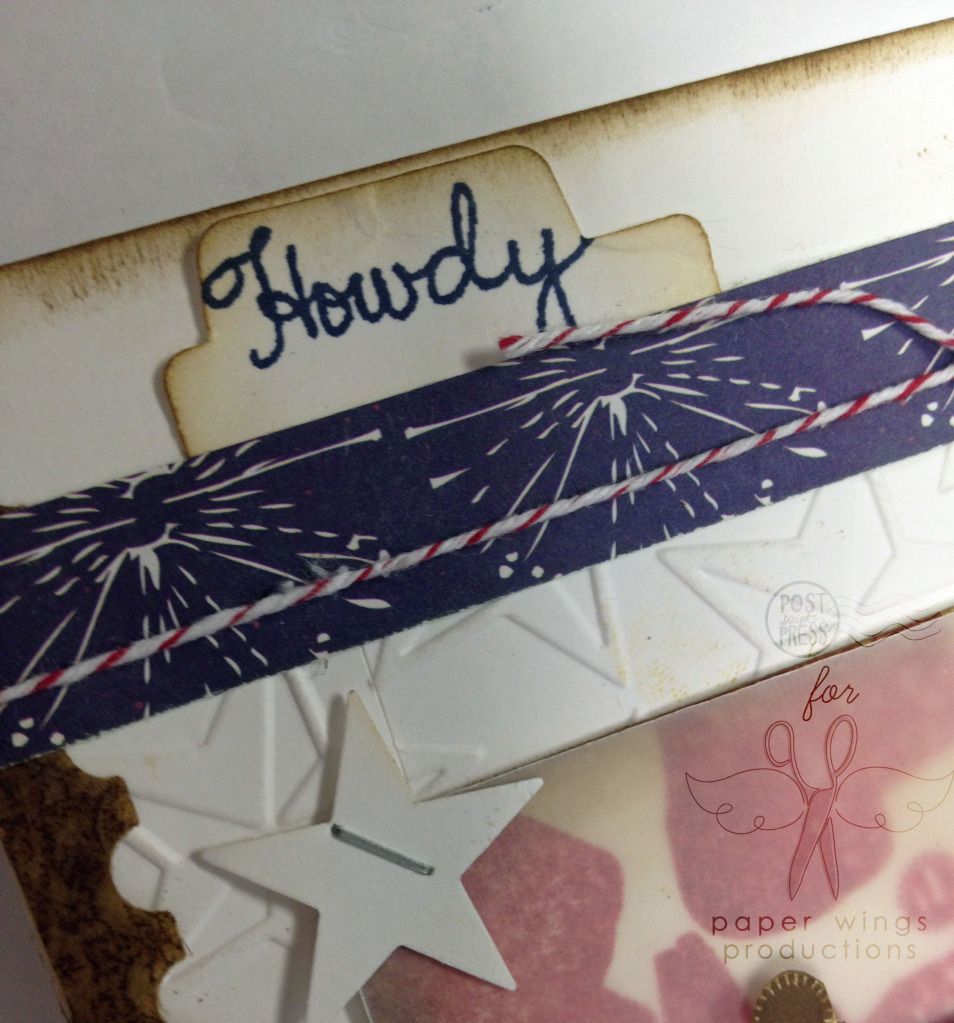
I embossed the stars on white cardstock using my Cuttlebug using a Cuttlebug embossing folder which I adhered under the boot panel onto the card.


From the damask stamped kraft glassine paper I also punched out a postage edge which I adhered to the bottom of the card.


I cut along thiner strip from a dark blue patterned paper.  I punched the tab and stamped "howdy" from Texas Sayings in dark blue, edging it in dark brown ink before adhering it under the blue patterned paper strip.

I tied some red and white baker's twine over the blue patterned paper and finished the whole card with inking the edges with brown ink.

There you have a pretty literal interpretation of this month's Flight Plan.

Stamps: Backgrounds, Lyrics and Texas Sayings
Ink: Jenni Bowlin by Ranger in spice tin, cough syrup, malted milk and brown sugar
Paper: Seasonal-Easy Green by Cherry Arte (older); kraft glassine by Tim Holtz; vellum
Cardstock: Neenah Papers in solar white
Tools: Tiny Attacher by Tim Holtz; Cuttlebug; star embossing folder by Cuttlebug (Provo Craft); Tim Holtz Distressing Tool by Ranger; dimensional adhesive by Scotch; liquid adhesive by Scotch; tab punch by Jenni Bowlin for Fiskars; postage border punch by Fiskars; star punch by Stampin' Up!
Embellishments:  red and white baker's twine by Martha Stewart Crafts 


Julie:
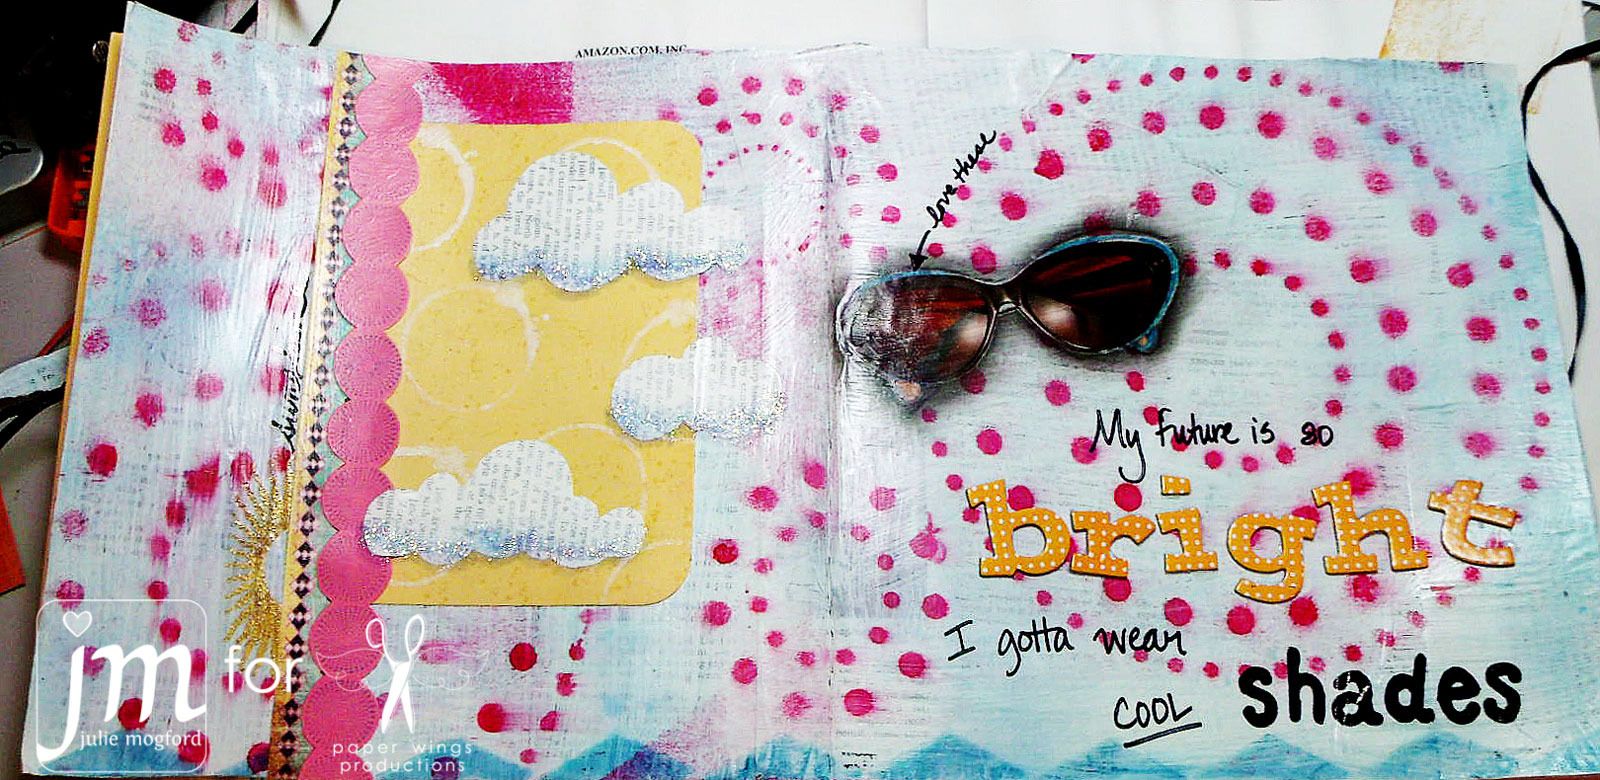
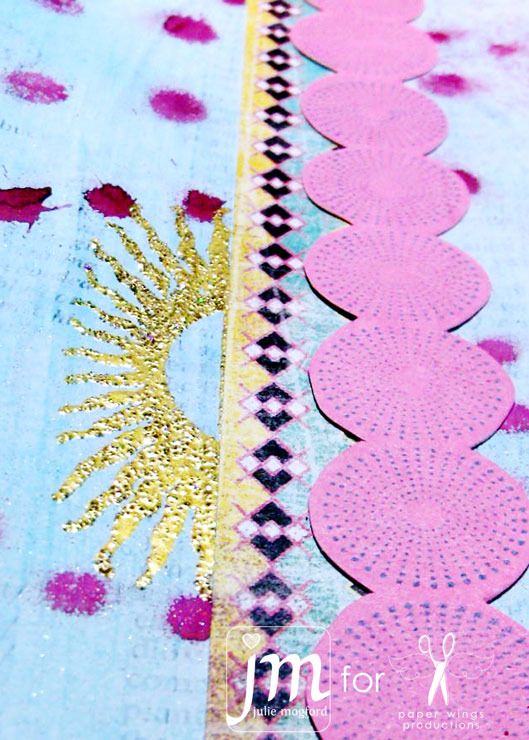
I chose to work in my art journal because I wanted to play a little today.  I tried to think outside the box on this one.  Can you pick out the paper wings stamps?  I was a little sneaky with them this time.  Take a closer look...
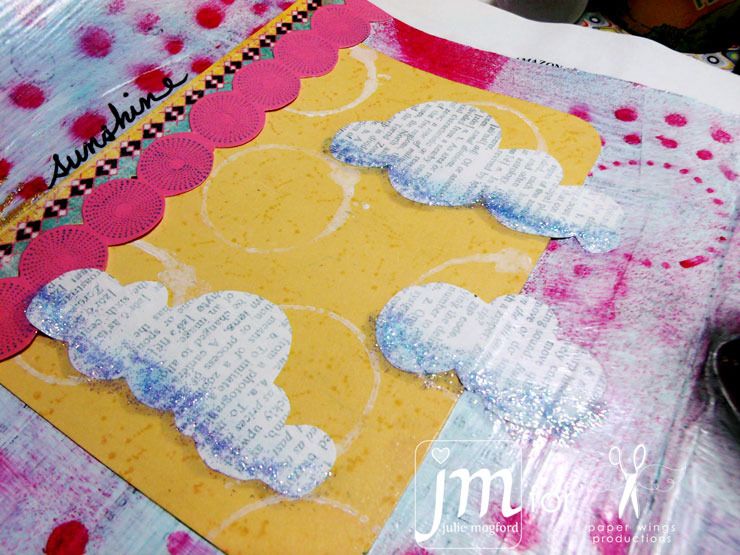
Here I have used the sun stamp from the Earth and Sky set and embossed it using Scattered Straw Distress Ink and JudiKins Egyptian Gold embossing powder. Although this picture doesn't do it justice, the sun looks so sparkly - love it!!  The "circle" strip was created by stamping the Dots background from Backgrounds in Broken China on pink paper, and then cutting around the circles in a scallop shape.

On the yellow paper, I used two stamps from the Art Textures set.  The little dots were stamped in Scattered Straw and the white circles were stamped with gesso that I dabbed on the stamp with a makeup sponge.  As soon as I was finished, I made sure to clean the stamp with soap and water so that the paint would come off quick and easy.  I added a little Waterfall Stickles to the bottom of the clouds, and also shaded beneath with a copic marker.


Did you notice this triangle border at the bottom? I bet you would never guess what stamp I used.  I took the new phonograph stamp from the Lyrics set, and turned it upside down, stamping it in Broken China along the bottom to create a zig zag triangle border.  Finally, I used the Solid Whimsical Alphabet to stamp the word "shades". I also used Thickers and my trusty sharpie to complete the sentiment.

Stamps: Earth and Sky, Backgrounds, Art Textures, Lyrics and Solid Whimsical Alphabet
Ink: Memento in tuxedo black by Tsukineko, Distress Inks by Tim Holtz/Ranger, Sprays by Tattered Angels (Electric Blue and Trunk Bay).  Pink is mixed.
Paper: Basic Grey
Cardstock: Stampin' Up!
Tools: Sharpie, We R Memory Keepers Corner Chomper, Stencil, charcoal pencil, glue stick and Mod Podge
Embellishments:  Thickers, Stickles, sunglasses by Betsy Johnson from Oprah Magazine, Egyptian Gold EP by JudiKins

We hope you try the new Flight Plan and look forward to seeing you creations!

Stay cool,
Paper Wings Gals


Related Posts Plugin for WordPress, Blogger...