Tuesday, April 16, 2013

Tutorial Tuesday - Crayon Resist


Hi everyone!  It's Tara C. here to show you a super easy resist technique that will add interest and dimension to your stamped creations.

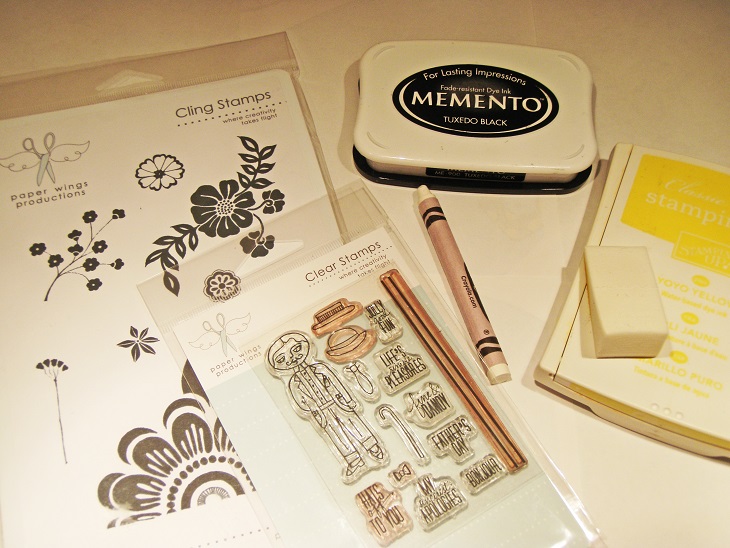
The supplies you will need for this technique:
-Card stock in a light color, white works best
-Black or dark dye ink (I used Memento      Tuxedo Black) and another coordinating ink in a lighter color
-Stamps
-White crayon
-sponges or brayer
-Paper Towel


Step 1:

Stamp your image in dark ink onto the card stock.  

Using the white crayon, color over all of the areas of the image and card stock that you want to remain white.


Step 2:

Using your sponge and the lighter ink, cover the image and card stock completely.


Here is a picture of the area first covered in white crayon and then colored over in ink.


Step 3:

Using a paper towel, rub off the areas of your image and card stock that were covered in crayon.  You will see that those areas remain white!


Here is the finished card and the black image really stands out with that white border!  I added more black details with a simple scalloped frame and a bow.  A couple of cute buttons and a sweet tag complete this colorful creation.


Super easy technique that doesn't require a ton of work!  Show us what you create with Paper Wings Productions stamps!  Post your pictures to our Pinterest page, our Facebook page or our Flickr gallery.  

Thanks for visiting today.  Please visit the Paper Wings Productions store to check out the stamps I used today and much more!

The Paper Wings Productions supplies used:


Friday, April 12, 2013

Feature Friday- Mermaid Hello


Hello Everyone it's Amber here to share another Feature Friday Post. Today I thought I would Feature another Clear Stamp Set that can be found in the shop HERE. This cute little set is fun, cute, and whimsical and I just had to use it again. 


 I thought it would be fun to create a colorful clean and simple card today. I started by cutting two pieces of patterned paper( one piece is 2" x 5 1/2" and the smaller orange piece is 1/4" x 5 1/2" ) and stitched to my card front. After that I stamped my mermaid onto a 2 1/4" x 2 1/4" piece of white cardstock, colored, stitched, and matted with a piece pf yellow patterned paper. Last but not least I cut a  3/4" x 2" piece of orange patterned paper, added my clear sticker sentiment, and then stitched to my card front.  Below you will find my supply list and don't forget we would love to see what you make with Paper Wings Productions Stamps so add your projects to our Flickr Group, to Pinterest, or leave a comment with a link to your project. Thanks for visiting today!


Supplies: Cardstock- White / Patterned Paper- Fancy Pants / Paper Wings Productions Clear Stamp Set- Mermaid / Clear Sentiment Sticker- Hello / Staz-On Ink Pad- Jet Back / CTMH Markers / Sulky Thread- White / Sewing Machine

Wednesday, April 10, 2013

What's Up Wednesday - CAS


Hi everyone! Tara C. here with your What's Up Wednesday post.  I really admire the clean and simple technique.  Those paper artists that truly excel in this area make it look elegant, beautiful and oh so simple.  I thought I would give it a try and create my version of a CAS card.


Turns out this technique is super hard for me.  I made 4 different fronts for this card!  My favorite was the first I created but I kept thinking it was too simple so I kept right on trying. In the end, I used the very first one :) However, I stared and stared at this card thinking I needed to layer more stamps, more paper, more embellishments and had to keep reminding myself that the beauty of these cards is in their simplicity.  I even went to bed and woke up the next day wondering about this card and how I should/could change it!  But as I looked at it again, I realized how I quite liked it and what better way to show off the sweet images in the 'Marcel' stamp set.


A picture of the inside of the card which again is very clean and simple with a printed sentiment. The CAS technique is definitely something I am going to work on and hopefully someday I will be able to whip up one of these cards in less time than a super embellished one!

Please show us your CAS creations using Paper Wings Productions stamps!  You can post them to our Pinterest page, our Facebook page or to our Flickr gallery.  Stay tuned for the rest of the week to see what the other designers have in store for you! 

 Thanks for visiting!

The Paper Wings Productions supplies used:


Tuesday, April 9, 2013

And the winner is...


 The winner of the Blog Hop Giveaway this month is...
What a lovely blog hop! Great retro stamps made great projects!

Irit, please contact us at info@paperwingsproductions.com for details on how to claim your prize.  Congrats and thank you to EVERYONE who hopped with us!  

If you haven't had a chance to "hop" yet, then click here.  

Monday, April 8, 2013

Mixed Media Monday


Hello Peeps-

For Mixed Media Monday, I want to show you a video of the April Mixed Media Kit.

Friday, April 5, 2013

We're Going Retro!!


WELCOME to the April Paper Wings Production Design Team Blog Hop & Giveaway!  This month we're traveling back in time to bring you some "Retro" inspiration and we're sharing some blog candy!


 For a chance to win all you need to do is: be a follower, visit each of the participating designer's blogs and leave them some love.  Then make sure to come back and leave us a comment telling us you completed the hop.  To increase your chances of winning:  like our Facebook page and/or invite your friends to the hop.  Be sure to leave a separate comment for each of your additional entries.  We will announce the winner here at The Aviary on Tuesday, April 9, 2013.

 Joining us in the time machine as this month's featured guest designer is the lovely & super talented Lori Johnson Apgar of Scrappin' My Stess Away.

I am married and have 3 dirty, stinky boys.  I am a baseball mom and spend my spring and summer cleaning dirt stained pants - and love it!!  I have an in-home daycare which allows me to work at home with cute little people as well as be home when my boys are home.  I craft to de-stress and spent most of my craft time scrapbooking.  Lately I have been creating a ton of projects for my son's high school graduation party.

Lori, We're so happy to have you joining us this month!!

Okay buckle your seat belts because it's time to travel back to simpler times, before cell phones, computers and gasp....the internet, lol!!  Your first stop in the hop is at our lovely guest Lori's blog - Scrappin' My Stess Away

***Here is the complete line up just in case you get lost along the way***

Lori Johnson Apgar - http://www.scrappinmystressaway.blogspot.com/
Dana Tatar - http://datatar.blogspot.com/
Norma Gomez - http://lilhoneybeestudios.blogspot.com/
Tara Chaussee - http://secretbeesstudio.blogspot.com/
Amber Rasmussen - http://sew-ink.blogspot.com
Carrie Avery - http://www.carrieavery.com/

***then come back here to leave a comment http://paper-wings-productions.blogspot.com/***


THANK YOU SO MUCH FOR JOINING US, ENJOY THE HOP!!!

Thursday, April 4, 2013

Themed Thursday: So Many Lines

Hello there peeps!

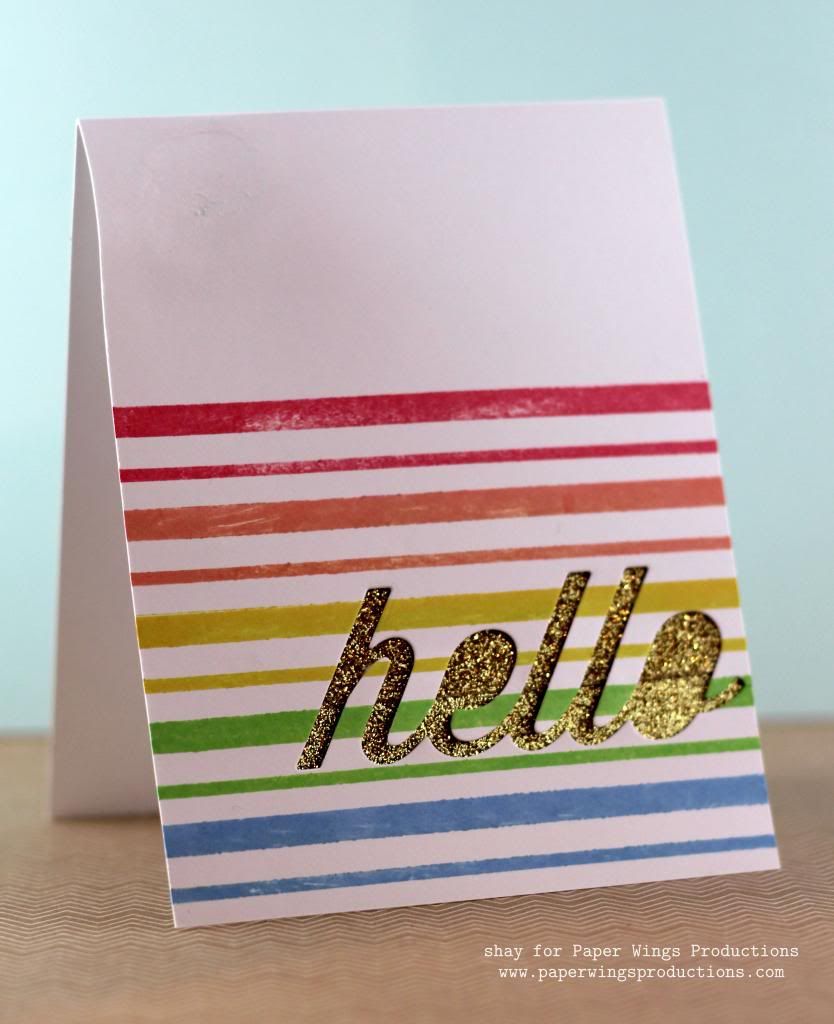
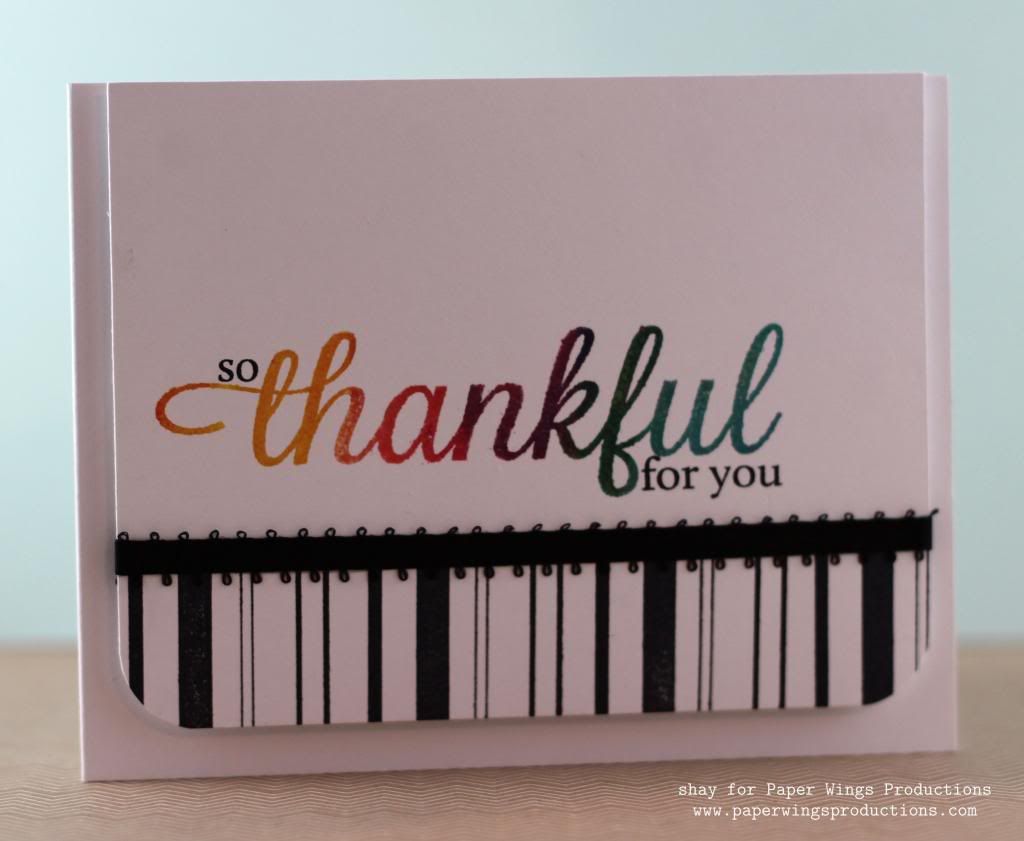
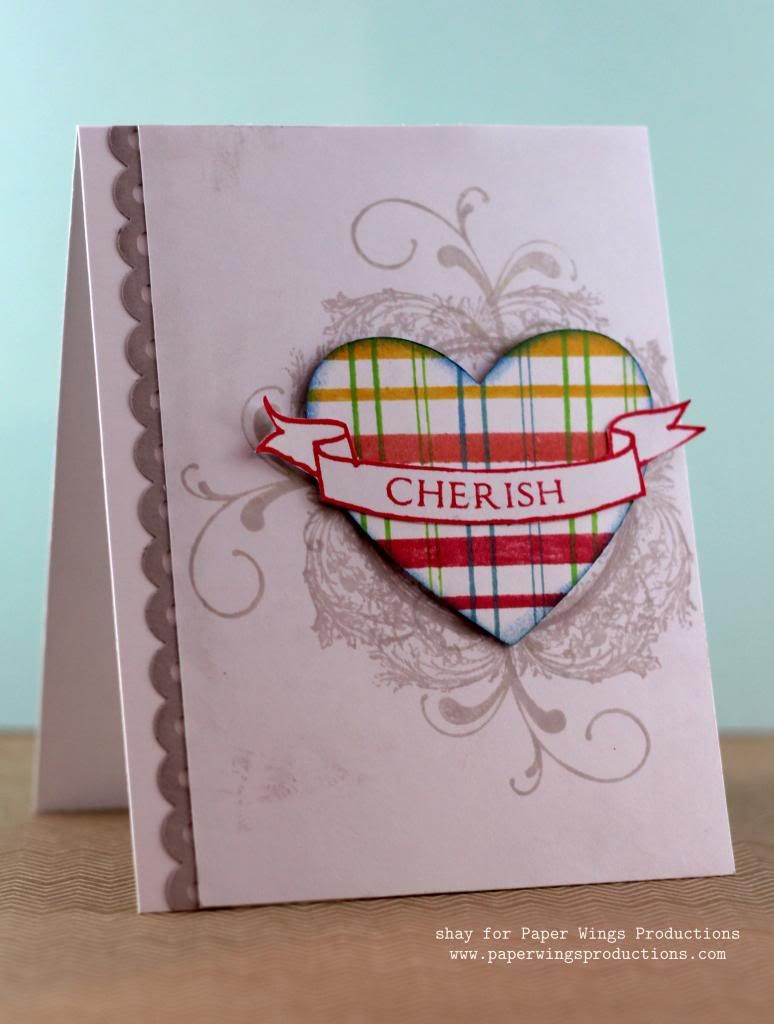
It's Shay here today with a few cards using the Lines Border stamp set and using a rainbow color scheme that I think is appropriate for April. 

Before I share my cards, you dare not miss: Norma's video on how to stamp with Pearl-Ex | April's Mixed Media kit and Norma's amazing creations with the kits featured right here on The Aviary like HERE | Amber's sweet wise card | Tara's fantastic spring wreath and basket | Carrie's gorgeous tag | Dana's beautiful Parisian artist trading cards.  And don't forget that tomorrow is April's Blog Hop!  It should be incredible.

Now that you are back, I wanted to share my colorful medley of cards.


I started with this little number coloring in the envelopes from the Evidence stamp set with Copics.  I stamped the thinner lines from the Lines Border stamp set in black once in the background.  Sending you and laughter & love are both from the Winter Mix It Up stamp set. The envelopes are adhered to the card base with foam adhesive. 


Next I stamped the thicker lines from the Lines Border stamp set in blue, green, yellow, orange and red inks.  I die cut the hello and adhered some gold glitter tape to a piece of white cardstock I taped to the other side of the card front.


My third card began with inking up the thankful from the Thankful stamp set with yellow, orange, red, green and blue inks.  The so and for you are also from the Thankful stamp set.  I then masked off most of the card front so I could stamp a border using both sets of lines from the Lines Border stamp set in black.  This would also be fun if stamped diagonally.  I then adhered a piece of ribbon over the edge of the stamped line border.  I rounded the corners and then adhered the card front with foam adhesive.


Last, I stamped a heart die cut with the thicker lines from the Lines Border stamp set in red, orange and yellow horizontally and then I stamped the thinner lines from the Lines Border stamp set in green, blue and green again vertically for a plaid look.  I inked the edges of the heart in blue ink.  I stamped the banner from Banner Day stamp set in red and then the word cherish within the banner.  I cut out the banner and adhered it to the plaid heart. On the cardbase I stamped the Circle Frame stamp four times turning it each time in grey ink.  I then stamped one of the flourishes from the Flourish Fun 1 stamp set three times in grey ink.  I adhered the heart over the frame.  I added a punched border strip and adhered it all to the white cardbase.

I hope you are inspired to ink up the Lines Border stamp set and use it all sorts of interesting ways. 

We would *love* to see what you make with Paper Wings Productions stamps. Add your projects to Facebook, our flickr group, to Pinterest, comment with a link on this post or even email pictures to us!

Take flight,
Shay.

Supplies:


Inks: Hero Arts Shadow Ink in pale tomato, soft cantaloupe, butter bar, green hills and cornflower; Tsukineko Memento in tuxedo black; Papertrey Ink in soft stone
Cardstock: stamper's select white by Papertrey Ink; sand by Neenah Papers
Dies: wonderful words: hello by Papertrey Ink; nesting hearts by Lifestyle Crafts
Other: Copic markers; black ribbon by Offray; brown sugar glitter tape by American Crafts; border punch by EK Success; Corner Chomper by We R Memory Keepers


Related Posts Plugin for WordPress, Blogger...