Hey Peeps!
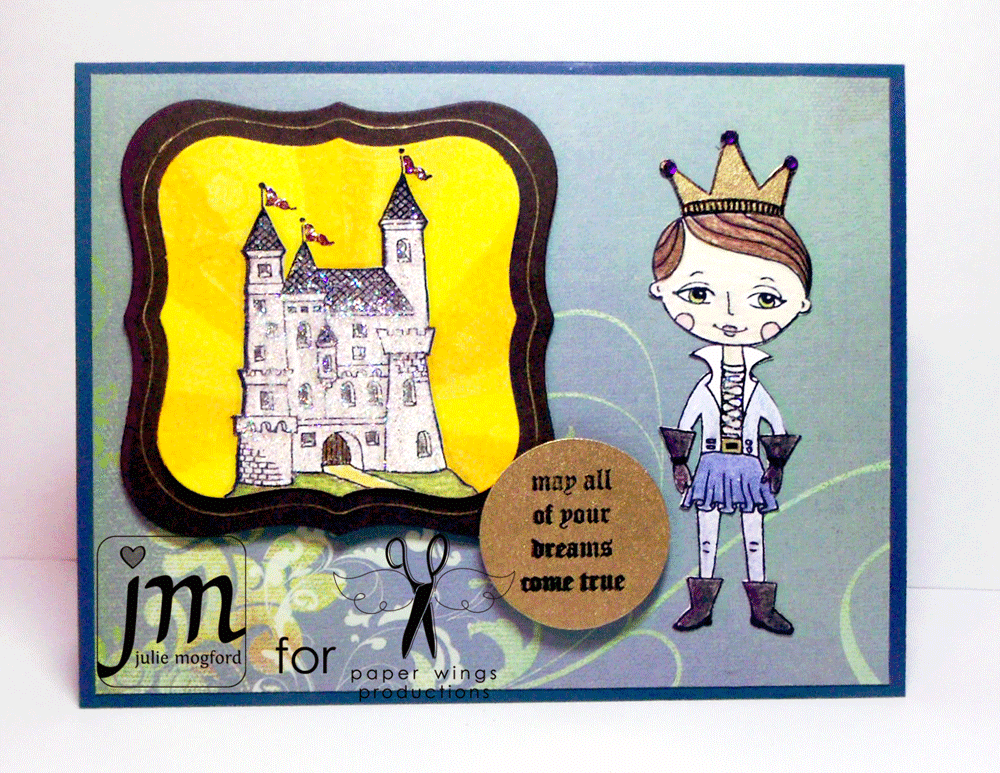
Dropping in to share a couple of cards. The first one is a fairy tale inspired card. This little prince from Handmade by Lizzie Girl is just too cute, and I really love the castle as well. So many details on these stamps. When I saw this castle, I just envisioned it as this gleaming, idyllic place (not unlike the fairytales of our youth) and had to give it some "stickles" treatment.
This would be a cute birthday card for a young boy, or even a "soon to be" bride.
The Details:
1. Adhere background paper to 4.25 x 5.5 inch card base.
2. Stamp prince and castle (twice) on separate pieces of paper.
3. Color prince, paper piece gold crown, and add jewels.
4. Using Eclipse tape, I drew rays from a center point, cut the rays apart and used them as a template on one of the castle pieces for creating the sun ray background. I used 3 different colors - yellow, orange, and a gold irridescent. Die cut this piece and a second larger piece in brown.
5. Color second castle, fussy cut the castle leaving off the flags (they are already stamped on the first layer). Adhere castle, color flags, and add stickles.
6. Stamp sentiment on gold paper and circle punch - adhere with foam tape.
7. Use gold pen to accent prince belt buckle and trace around label die to add detail to die cut.
I have one more card to share with you. There is another paper wings gal with a birthday coming up next week. Can you guess who? Happy Birthday C!
I used the Mission 004 Flight Plan as my inspiration, a few new stamps from the June release and a little creativity and came up with this fun birthday card. I love that this is one of those cards that could be great for just about any sentiment and any color scheme! And, can you believe that the main flower, white flower and orange flower all came from the Flower Power set? Love that!!!
The Details:
1. Adhere strip of paper to bottom of 4.25 x 5.5 inch card.
2. Stamp and cut out Lace Border stamp from yellow paper.
3. Stamp and emboss small flower stamp on textured gold paper. Adhere behind straight edge of border and then adhere both to card base.
4. Cover small tag in dictionary paper, ink paper and edges and stamp flower in orange. Cut small circle for hole and add ribbon.
5. Use markers to color large flower directly on rubber. Spritz with water and stamp. Cut around flower and adhere to tag and flower with foam dots to card base.
6. Stamp sentiment in brown ink. NOTE: I cut my sentiments apart when I want them to fit "just right". This sentiment is from a longer stamp.
7. Add 3 brown pearls.
Thanks for dropping by the Aviary! I hope you enjoyed the projects today and hopefully they have inspired you too. Come back soon for more stamping goodness!
Julie
Supplies for My Prince
Stamps: Prince
Ink: Memento ink by Tsukineko in tuxedo black; Dylusions Sprays by Ranger - Lemon Zest and Squeezed Sunshine
Pattern Paper: Memory Box
Cardstock: Neenah Papers in solar white and pearlized blue cardstock and gold paper from stash
Tools: Spellbinders Nestabilities Dies, gold gel pen, circle punch
Embellishments: Stickles by Ranger - Stardust, Gold Perfect Pearls (with water for spray)
Stamps: Lace Border, Flower Power, Sayings and Sentiments
Ink: Colorbox Chalk Ink - Tangerine and Chestnut Roan, Distress Ink - Shabby Shutters and Peeled Paint, Stampin' Up! Craft Ink - Whisper White, Distress Markers (Wild Honey, Mustard Seed, Spiced Marmalade, Tea Dye, Walnut Stain, Shabby Shutters, Crushed Olive, Peeled Paint)
Pattern Paper: Basic Grey (yellow and green), dictionary paper, textured gold paper from stash
Cardstock: Neenah Papers in solar white
Tools: We R Memory Keepers - Cropadile (hole punch),
Embellishments: pearls and ribbon - stash, SU! Whisper White Embossing Powder


I love that birthday card!!! You know me too well! Love those colors, and of course my favorite flower stamp! Just beautiful!
ReplyDeleteThat birthday card is BEAUTIFUL, love the rich colors you used!
ReplyDelete