Showing posts with label stickles glitter. Show all posts

Tuesday, April 8, 2014

You Are Special- Vellum Dragonfly Wing Tutorial

*****To join our April Challenge: GET INKY, CLICK HERE*****


Before we get to the tutorial, we want to announce the winner of the April Blog Hop:
I've already found 3 projects to add to my to-do list. Thanks :)

Jill contact Carrie at info@paperwingsproductions for instructions on how to claim your prize!  Thanks to everyone for hopping with us!  


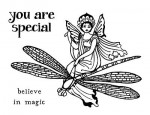
Hello Everyone! It's Amber here sharing a three dimensional card I created with Paper Wings Productions Dragonfly Fairy Clear Stamp Set. I thought it would be fun to share this quick and easy vellum tutorial today for Tutorial Tuesday. This is a really fun tutorial, you can take any flat one dimensional image and turn it into a fun three dimensional image just by adding some vellum.


I started by stamping the Dragonfly Fairy in some Jet Black Staz-On Ink and then I colored her and the dragonfly with some markers that coordinated with the patterned paper I wanted to use.


I set my colored image aside and then stamped the dragonfly's wings onto a scrap piece of vellum paper in the same jet black Staz-On ink that I used for my first image. I only need the wings for the next part of the tutorial so that is why I didn't stamp the whole image.


After I had the wings stamped I cut them out and bent them a little with my fingers. You can see in the picture that the wings are not perfectly stamped, parts are darker while other parts are lightly stamped. Dragonfly wings are paper thin very delicate so I left it like this because I thought they looked more realistic.


After I had my wings cut out and slightly bent I added a small drop of glue to the center of the vellum wings and attached them to my original image. I let the glue dry for a few minutes and then I went back and bent them into place. You can bend them as much or as little as you want, this is what gives the dragonfly a three dimensional look.


Doesn't it look like real dragonfly wings? It's such a simple thing but it really does add a realistic look to the image. I hope you enjoyed my tutorial today and Thanks for visiting! Don't forget we would love to see what you make with Paper Wings Productions Stamps so add your projects to our Flickr Group, to Pinterest, or leave a comment with a link to your project. You can also check out our Facebook Page and You Tube Page for daily inspiration.
Supplies: Cardstock- White & Blue / Patterned Paper- Glitz Designs Carpi Diem Collection / Paper Wings Productions Clear Stamp Set- Dragonfly Fairy / Staz-On Ink Pad- Jet Black / CTMH Markers / Ranger Stickles- Crystal / Vellum / Sulky Thread- Black / Sewing Machine

Wednesday, April 24, 2013

Googly Eyed Fish For A Birthday Boy


Hello everyone it's Amber here with another What's Up Wednesday post. Today I am sharing this cute little Birthday Boy card featuring the Mermaid Clear Stamp Set.


I just love this little fish image that is with the Mermaid Clear Stamp Set. When I seen it I thought the little fish would be really cute repeatedly stamped. So I pulled out some white cardstock and started stamping. Once  I had my fish stamped I colored them, added some glitter, added some mini googly eyes, and  then cut the white cardstock to fit my card base. Since I colored the fish blue and green I thought the colors were perfect for a boys birthday card. You can see a close up below as well as my supply list.


We would love to see what you make with Paper Wings Productions Stamps so add your projects to our Flickr Group, to Pinterest, or leave a comment with a link to your project. Thanks for visiting today!
Supplies: Cardstock- White, Blue, Light Blue, Green / Paper Wings Productions Clear Stamp Set- Mermaid / Staz-On Ink Pad- Jet Black / SRM Clear Sticker- Birthday Boy / CTMH Markers / Rangers Stickles- Lime Green / Mini Googly Eyes / Sulky Thread- Black / Sewing Machine

Tuesday, February 26, 2013

Faux Stitching


Hello Everyone! It's Amber here with a Tutorial Tuesday  post. Today is my Birthday so I thought I would share a Birthday Card and Tag. For this weeks tutorial I'm sharing a quick and simple faux  stitching technique. I'm using the technique to create a banner today.


See those black lines I used for my banner...its faux stitching. Not everyone has the time or the patience to hand stitch or machine stitch so this is an easy way to add stitching to any project.  All you need is an ink pad and a sewing pattern tracing wheel. These come in most sewing kits and can be found at any craft store in the sewing notions aisles. Below you will see the four steps I used to create my Birthday card.


Step 1. Grab an ink pad and repeatedly roll the tracing wheel over the ink pad until the wheel is fully covered.


Step 2. Roll it onto the card front or cardstock you are going to use. I repeated this 3 times.


Step 3.Stamp you sentiment onto your card front below the banner line and then on a scrap piece of cardstock stamp your banner triangles.


Step 4. Color, add glitter, cut, and add your banner triangles to your banner line.

It really is as easy as that. There are many things you can do with this faux stitching technique like make stitching lines over your patterned paper or cardstock, make lined and grid backgrounds, and make hearts or other shapes with the wheel.  I hope you enjoyed my tutorial today and Thanks for visiting!. We would love to see what you make with Paper Wings Productions Stamps so add your projects to our Flickr Group, to Pinterest, or leave a comment with a link to your project. Thanks for visiting today!
Supplies: Cardstock- Cream / Paper Wings Productions Clear Stamp Sets- Happy Day & Lets Eat Cake / Staz-On Ink Pad- Jet Black / CTMH Markers / Sewing Tracing Wheel / Ranger Stickles- Crystal


Related Posts Plugin for WordPress, Blogger...