Showing posts with label Perfect Alphabet. Show all posts

Monday, February 3, 2014

Mixed Media Monday - Fun with Journaling Stamps

*****To join our February Challenge: Anything Goes, CLICK HERE*****


Hi Paper Wings fans! Dana here today sharing a mixed media piece I created with some of my favorite Paper Wings Productions stamps and the second half of my bird nest. If you missed the Reverse Bird Nest Canvas that I created with the first half of my bird nest, you can check out that post HERE.


Once again, I have used the piece of sturdy cardboard that protects the contents of the Nesting Components Kits for the base of my project. This piece of cardboard measures approximately 8.5 x 11 inches. A sentence from a novel written by one of my favorite authors, Megan Hart, stuck with me and I used that passage as inspiration for this piece; "My heart became a bird, my ribs the cage it beat against."


I primed the cardboard with a light coat of gesso before I stamped the background. The gesso helped to cover up some stray color that landed on this piece from another project (ha!), but also added some "tooth" to the otherwise smooth surface, which helped to grab the ink and color I added next. Another benefit to priming with gesso is that it acts as a sealant, so any mediums added to the top of the cardboard will stay on top, rather than soaking into the paper, prolonging the life of my mediums.

I stamped a square boarder using the Graph Journaling Lines Clear Stamp and I used the Ledger Journaling Lines Clear Stamp to create a stand for my nest. I arranged some stamps from the Perfect Alphabet and Perfect Numbers clear stamp sets randomly on a stamping block and pressed them onto my background for some interest. The selection of PWP Journaling Stamps are great for embellishing if you're not big on journaling! I also added some circles to the border with the Art Textures Cling Stamp Set. Note: I used a black Archival Ink for my stamping so that the color would not bleed when encountering water when I applied color in the next step.


I applied streaks of color with Gelatos from the 50s Diner and Tropical packs and then blended with a wet paintbrush to color my background. Tip: To keep the shades of blue and yellow vibrant, I blended those shades first, cleaning my brush after each color.


Next, I stamped some hearts using the NEW Carved Love Cling Stamp Set and colored them in with a Watermelon Gelato. Note: To achieve the subtle pink color I applied a small amount of Gelato to the area and blended the color with a wet finger. I used a Stamper's Big Brush Pen to add some green leaves and added a pop of orange with some homemade mist.


I used the Perfect Alphabet Clear Stamp Set to stamp my quote. There are several copies of each letter in this set so stamping out a full sentence was quick and easy! I also stamped a gorgeous bird using the Bird Melange Cling Stamp Set.


To finish the piece I attached my half bird nest with some hot glue and embellished the base with some moss and colorful ribbon.


Thanks for stopping by today! I hope I have inspired you to use your journaling stamps in a fun new way!

We would love to see what you make with Paper Wings Productions Stamps so add your projects to our Flickr Group or our Facebook page. You can also find Paper Wings Productions on Pinterest, Twitter and YouTube!


Sunday, December 8, 2013

Spotlight Sunday - December Nesting Components


Hi Paper Wings fans! Dana here with you sharing a layout that I created with the December Nesting Components Mixed Media Kit. Carrie has put together a fantastic mix of products that will keep you crafting all month long...and well into next year! This kit is versatile and can be used to create Winter and New Year's projects, not just Christmas, although that is what I am sharing today.


My layout measures approximately 8.5 x 11 inches. I trimmed a page from an old photo calendar down for the large focal point and had a lot of fun adding embellishments from the kit.


The "Days Until Christmas" chipboard piece caught my eye. Rather than write a number in the space, I stamped numbers from the Perfect Numbers Clear Stamp Set randomly onto a piece of patterned paper underneath the chipboard piece.


I added some white rub-ons to my photo and stamped the year this photo was taken with the Perfect Alphabet Clear Stamp Set.


The image of the girl in the red dress from the Vintage Christmas Clip Art Sheet matched the photo of my daughter in her red dress, so I made that image into a charm embellishment for my layout using a clear tile and some Glossy Accents.


I covered one of the laser-cut snowflakes with Antique Silver Vintage Glass Glitter, which adds a fabulous sparkle to my page!

The December Nesting Components Mixed Media Kit is available from the Paper Wings Productions Store while supplies last, so pick one up soon before they're gone for good!

Here's a closer look at the kit and a full list of the contents:


December Nesting Components Kit Contents:
October Afternoon Silent Night 8x8 Paper Pad
October Afternoon Silent Night Chipboard
Tim Holtz Christmas Rub-Ons (1 Sheet of Black and 1 Sheet of White)
Tim Holtz Metal Border Stickers
2 Snowflake Laser Cuts
6 Prima Wood Shapes
Red/Kraft Wired Ribbon
Clip Art Sheet - Vintage Christmas
Stamp Set - Perfect Numbers

The retail value of this kit is over $42, but you can pick it up for just $32!

Thanks for stopping by today! I want to remind you that the PWP Winter Blog Hop is going on now! Hop along with the Paper Wings Design Team and leave a comment by Monday night for your chance to win a $25 Gift Certificate to the Paper Wings Productions Store!

Tuesday, September 3, 2013

Tutorial Tuesday - Fun with Fusible Webbing


Hi! Dana here today sharing a fun tag tutorial that features Lindy's Stamp Gang Fusible Webbing, just one of the fantastic items included in the September Nesting Components Mixed Media Kit.


I have several jars of ribbon, lace and fiber pieces of various length, many of which are smaller pieces that I have trimmed from the ends of bows or other projects that I just can't throw away. I've finally made use of some of them with the help of Fusible Webbing, creating a funky, colorful background for my tag.


Step One: Select ribbon, lace and fibers of different lengths and colors and arrange them over the top of one of the kraft tags included in the September Nesting Components Mixed Media Kit.


Step Two: Take one sheet of Fusible Webbing, fold it in half, and lay it on top of the tag. Gently apply heat with a heat gun until it begins to melt. Press down on the webbing during the heating process to help fuse all of the fibers to the webbing.


This is what my pile of fibers looked like after heating. I didn't melt the webbing completely because I wanted to be sure that my background would hold together.


Step Three: Flip over the pile of fibers, apply glue to the tag and press the fibers onto the tag. Let dry.


Step Four: Embellish the tag to finish. I selected an image from the September Nesting Components Clip Art Sheet. I stamped the word "nest" with the Perfect Alphabet Clear Stamp Set and Memento Rich Cocoa Ink.

I adapted this technique to fit my supplies from a similar tutorial published in Roni Johnson's Collage & Altered Art.

Thanks so much for stopping by today!

Saturday, August 10, 2013

Toujours Paris!

I just love the vintage image sheets they carry at Paper Wings Productions. I decided to do a vintage Parisian themed layout using the gorgeous April in Paris Clip Art Sheet. I had a lot of fun arranging the gorgeous Parisian images into a collage. I love that my paper has a hot air balloon on it tying in with the vintage image!!


I added the title "Toujours Paris" using the Perfect Alphabet Clear Stamp Set  For the background of the layout I used the Royal Melange Cling Stamp Set repeating the fleur de lys and script stamps throughout the background using Walnut Stain Distress Ink. I used the dots mask from the April Nesting Components Kit as well as the gorgeous velvet ribbon and some die cuts from Pink Paislee Cottage Farms from the May Nesting Components Kit.


These kits come in very limited supply, there is only one left of each of them and after that they are gone, so grab them while you can! I love the fact that there is always a stamp set, and image sheet, some sort of art medium or tool and great embellishments, you shouldn't miss them, I always make a point to buy mine early before they run out!!!!


I got out the sewing machine and did a black stitched frame around the central collage to add some texture and interest.To finish off the layout, from my own stash I added the flowers and the chipboard Eiffel Tower and the tags.


Wednesday, May 8, 2013

What's Up Wednesday: Mother's Day Flowers

Happy Wednesday peeps!  Its Shay here and I was so inspired by last weekend's May Flowers blog hop and the awesome design team's projects that I decided to go floral for today What's Up Wednesday!

Please excuse me for a brief public service announcement ;-):

Before I go further though I need to say how flat-out fantastic the design team is and how inspiring I find their projects!  Dana just made this stunning tag.  Norma made any princess swoon with these pretty-as-a-princess projects.  Carrie wowed with this alcohol ink tutorial.  Amber made this adorable card.  Tara tantalized with this terrific crayon resist technique.  AND don't miss out on Nesting Components, May's incredible mixed media kit...see more about it HERE!

Now back to our regularly scheduled programming....

My late grandma was also an avid lover of flowers of all kinds so I like to honor her memory with making Mother's Day cards featuring flowers.  Mother's Day in my mind (and I don't think I am at all alone) is a natural fit with the blooming flowers of May.

I found myself trying to stretch my conception of some of the Paper Wings Productions stamps to create interesting flowers due to the innovative and clever uses of Paper Wings Productions stamps by the design team for our Paper Wings Productions' May Design Team Blog Hop.

Card No. 1


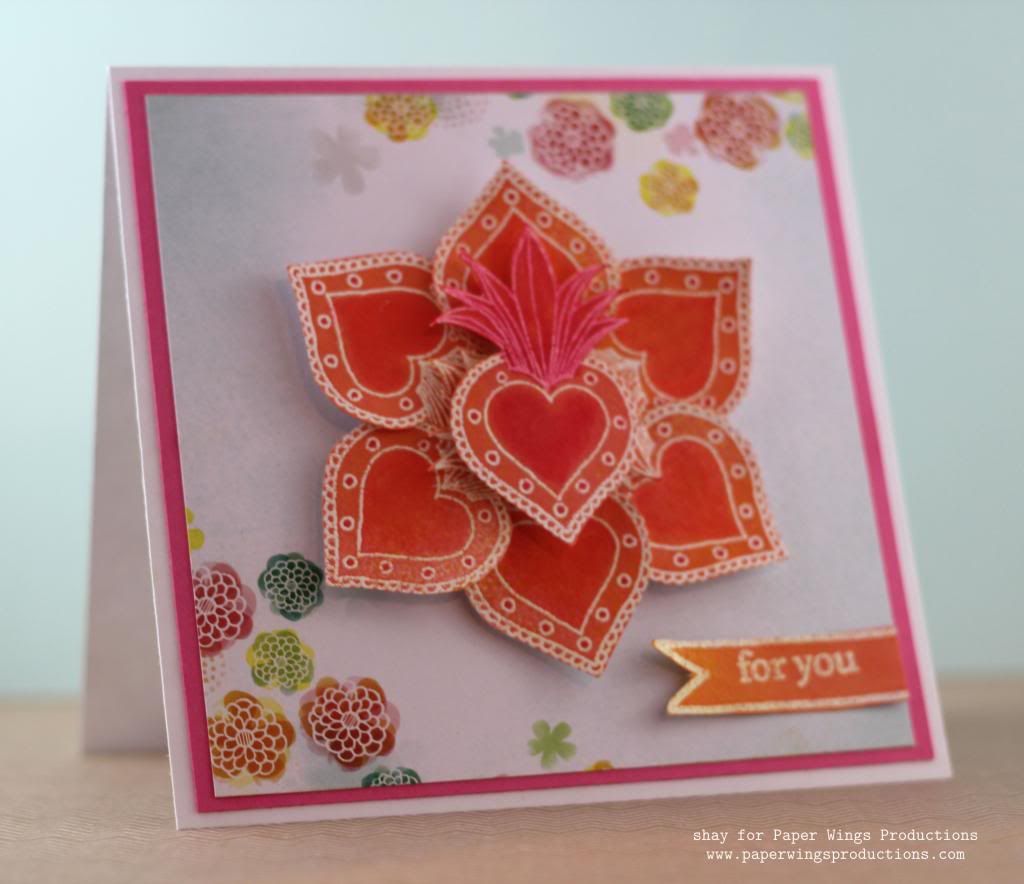
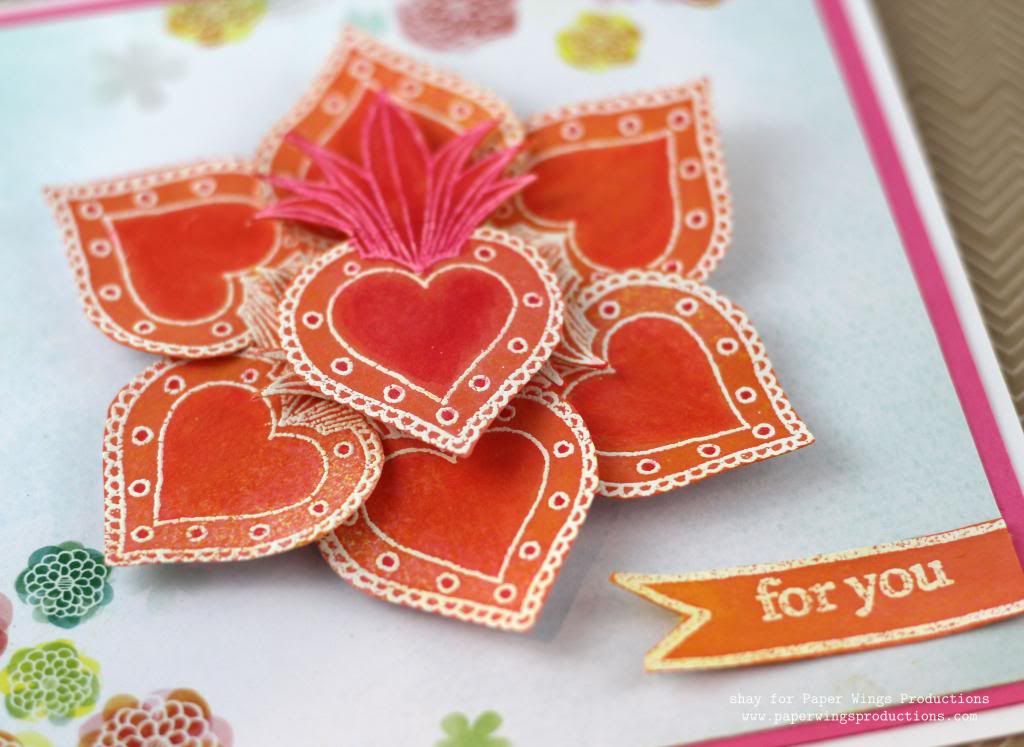
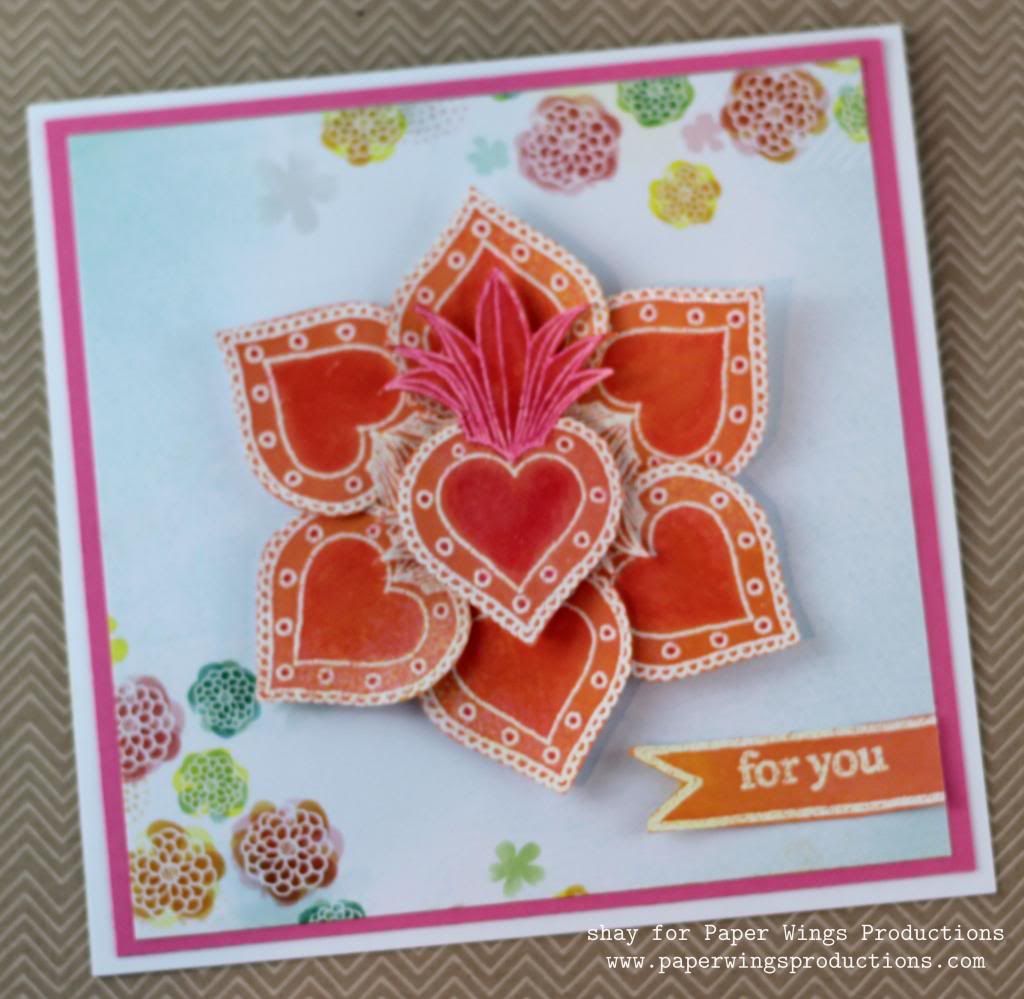
The sacred heart from Milagros put my mind to petals of a flower so I stamped it 7 times with Versamark and heat embossed it with white embossing powder.  I sprayed yellow, orange and pink mists on it and then colored in sections of it with Copic markers.  I cut each heart out.


I nested 6 of the hearts together and added the 7th to the center.  I adhered the flower to a piece of patterned paper that seemed destined for this card and then onto a piece of pink cardstock.  I finished it off on a 5.5" x 5.5" white card base.


For the sentiment I stamped the double ended banner from Tabs and Banners and for you from Thankful with Versamark and heat embossed it with white embossing powder.  I sprayed the same mists over the banner, cut off one end and adhered it to the patterned paper.

Card No. 2


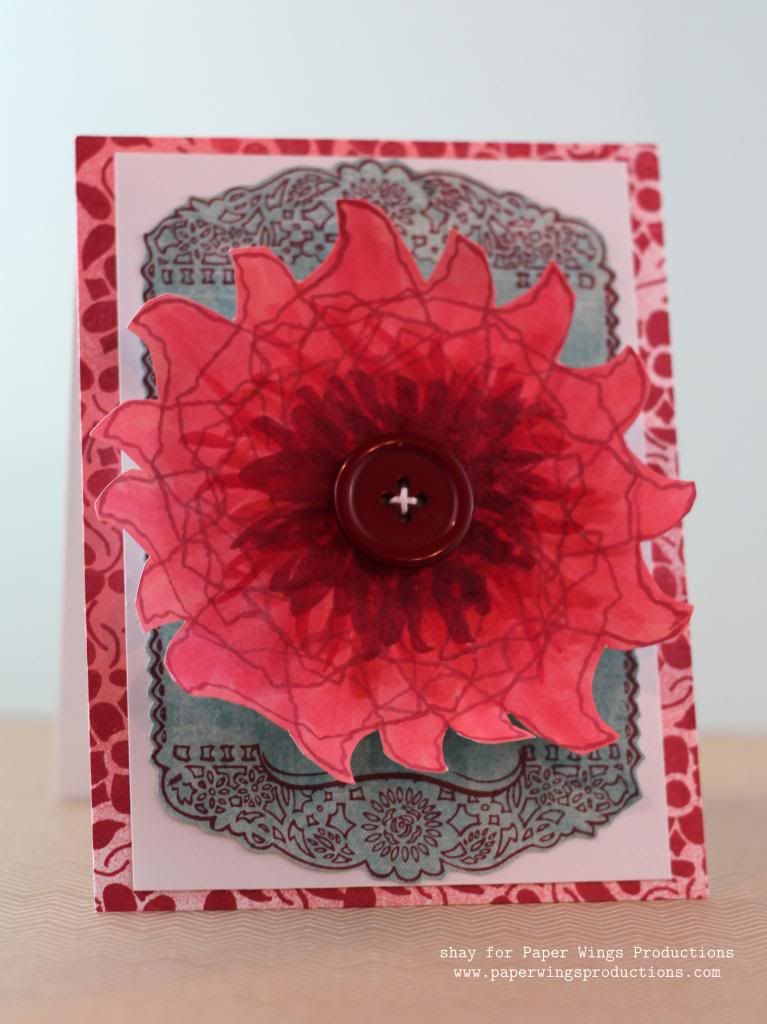
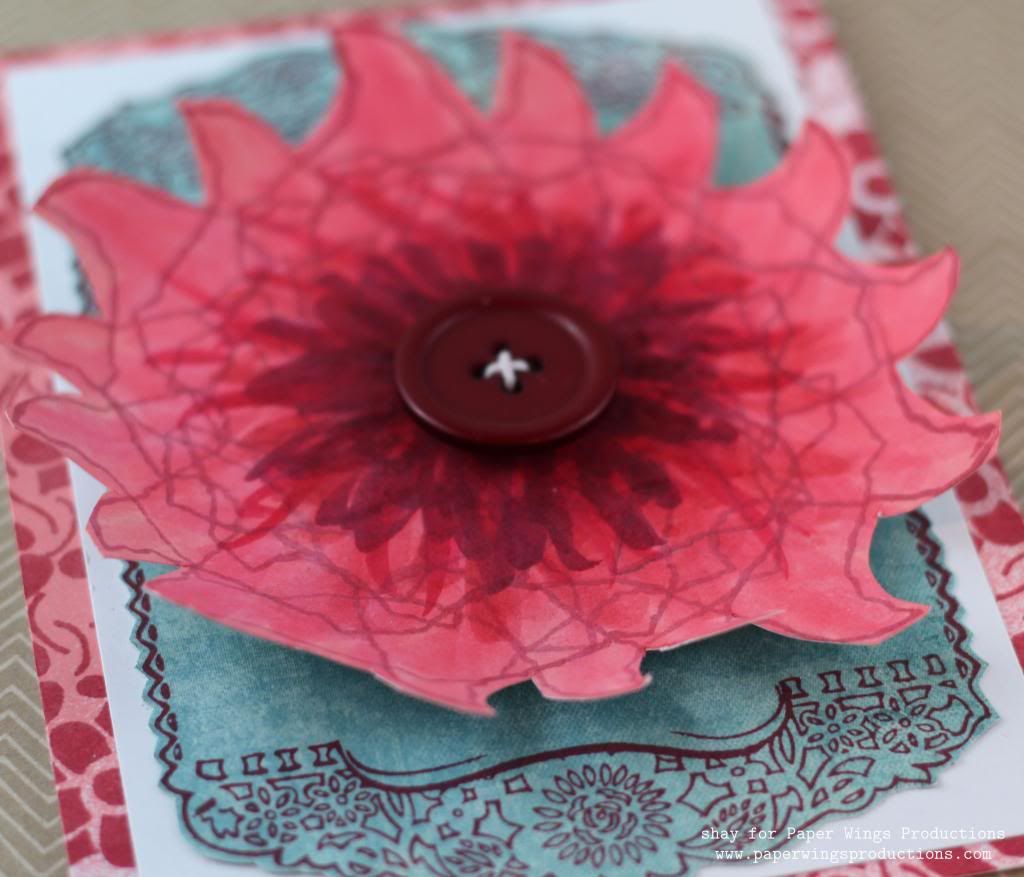
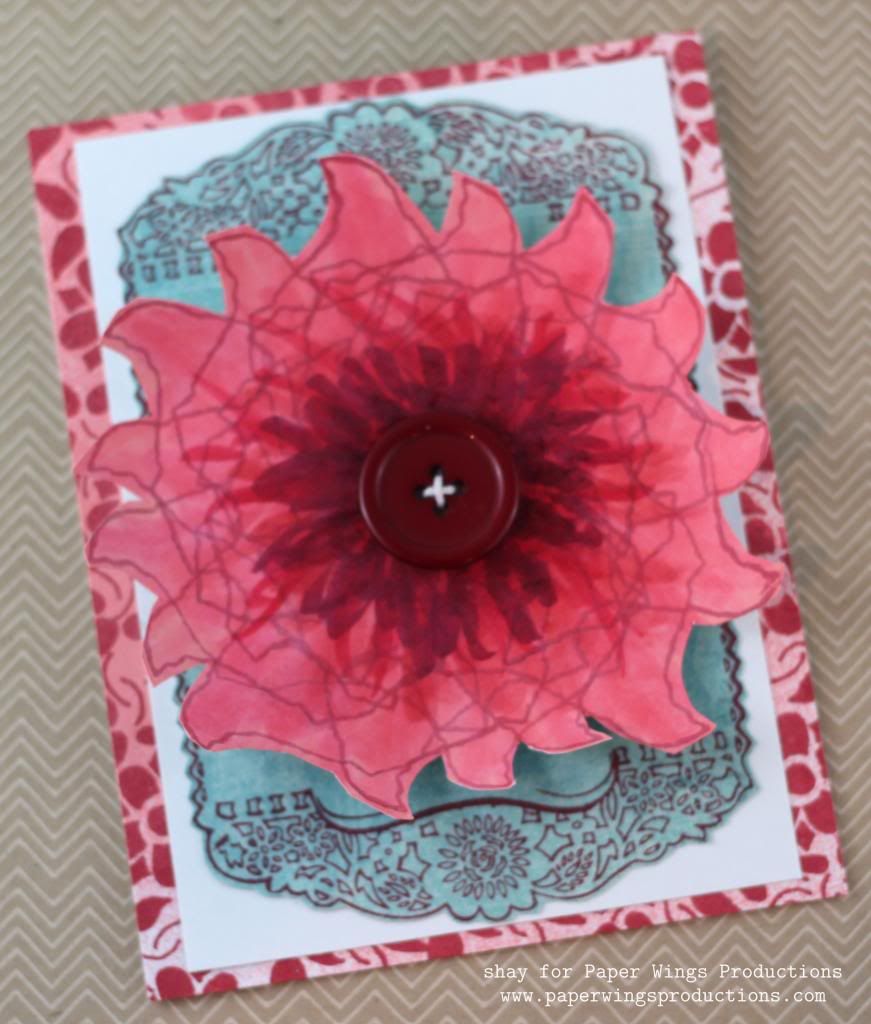
This may be the wildest idea I had for a flower.  I stamped the outline of Texas from Lone Star State in royal red ink with the panhandle facing the middle and then I stamped it over and over rotating it in a circular fashion until it looked more like a flower.  I sprayed pink mist over it and cut out the flower.  To make it more flower-like I colored it with Copics from the center out in a spikey sort of motion with the darker colors in the center.  I added a button to the center of the flower.


Next, I adhered the flower with dimensional adhesive onto the gorgeous floral frame from Dia De Los Muertos Mujer I had stamped onto patterned paper and cut out.  I adhered this all on a white cardstock layer.


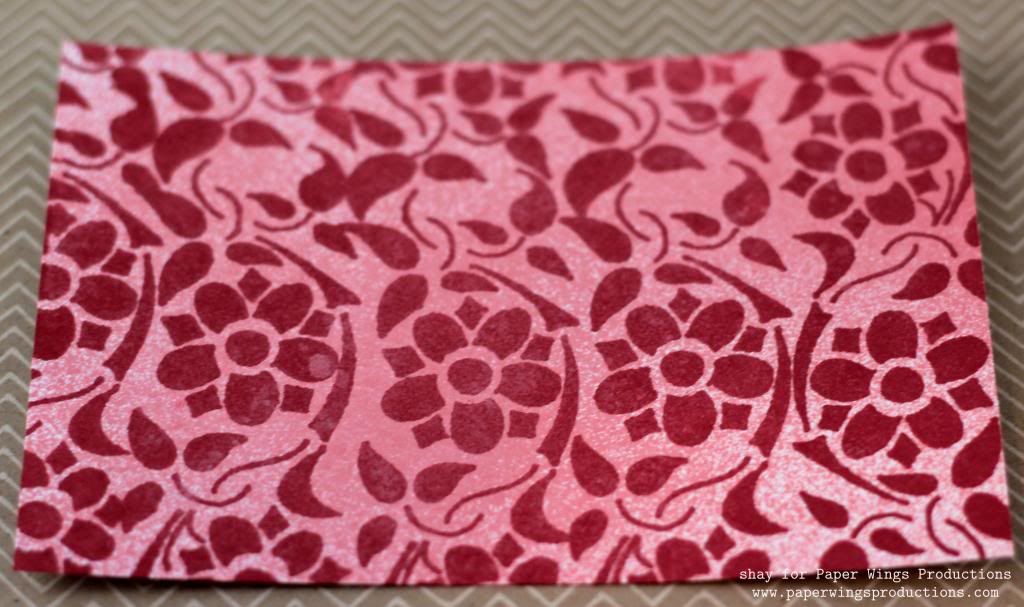
For the card base I created a patterned paper using the lovely stencil like floral border from Muertos using the same royal red ink and pink mist.


Card No. 3


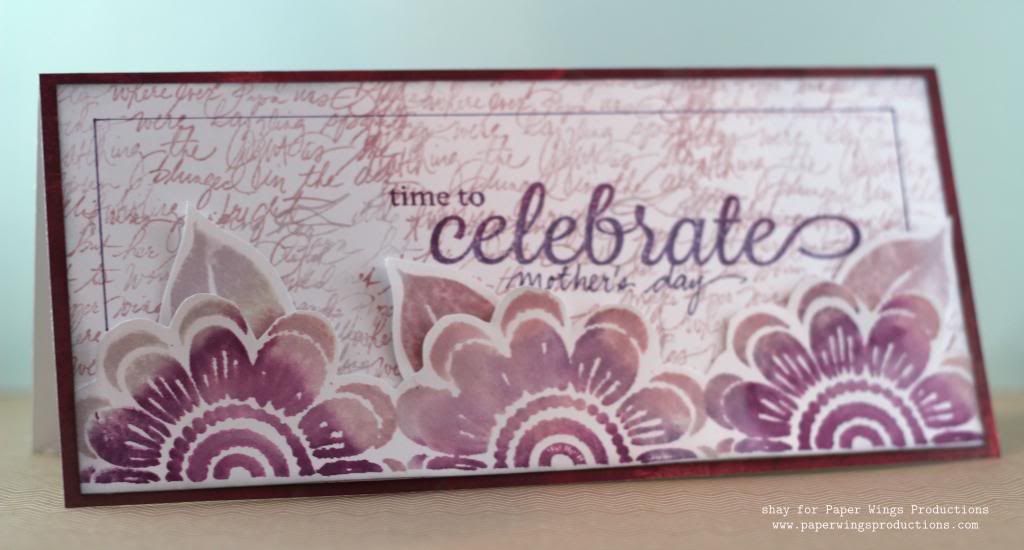
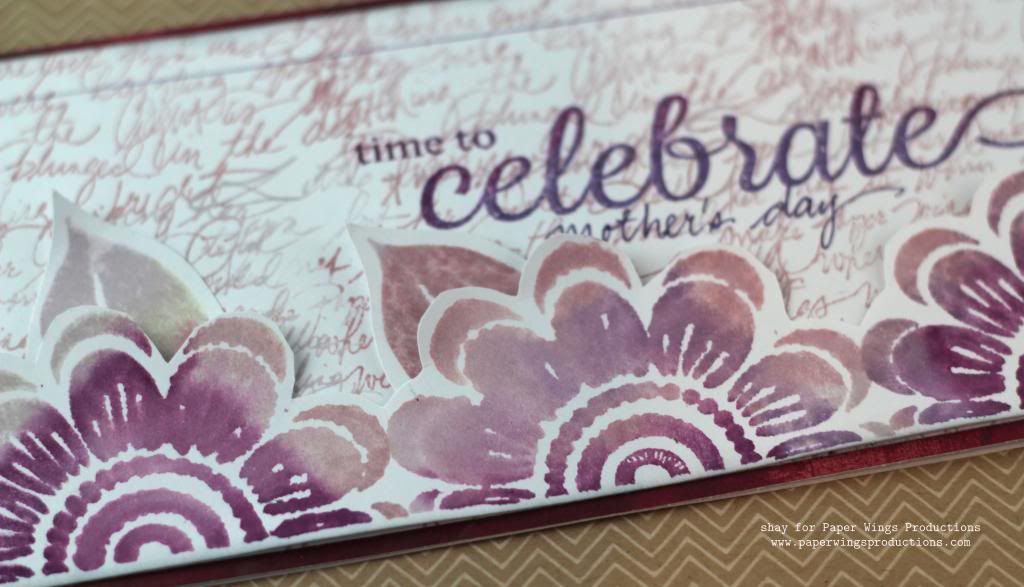
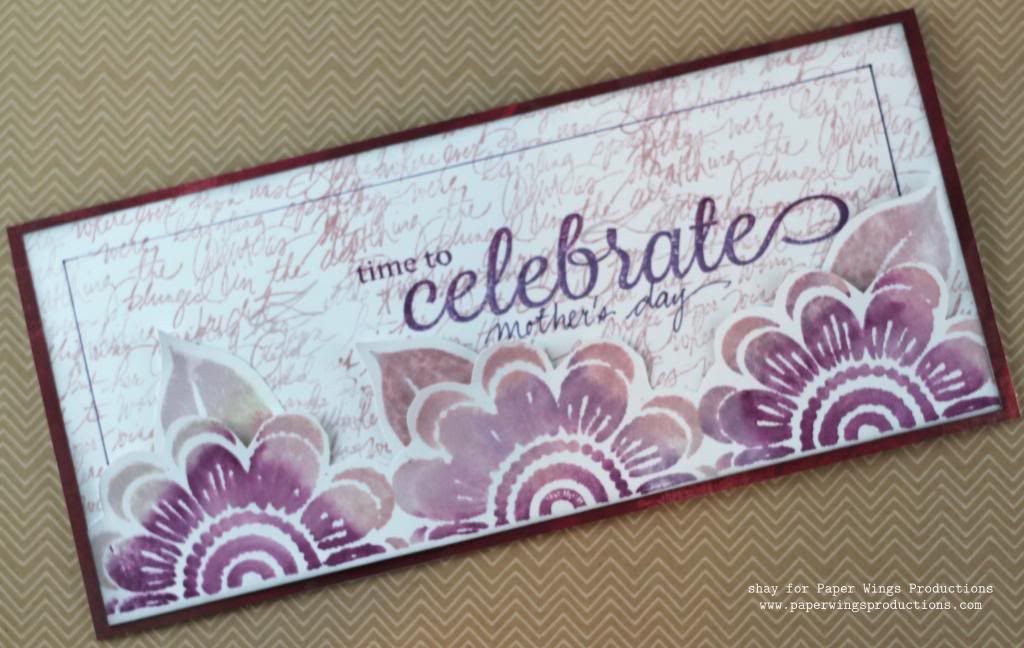
For a more traditional take on flowers I turned to my go-to floral stamp set: Flower Power.  My mom's mom loves purple so I went purplicious with the largest flower from Flower Power or Half Flower by stamping a border of 3 of them using purple Distress Inks that I misted with water before stamping on a piece of white cardstock.  I cut out the flowers and leaves (I later cut off the leaves to put behind the flowers).


On a piece of white cardstock I stamped with lighter purple Distress Inks using the handwriting from Writings Backgrounds or Writing.  With darker purple Distress Inks I stamped celebrate and time to from Celebrate.  I wrote in mother's day using the dusty concord Distress Marker and inked the edges of the panel.  I adhered the floral border to the writing background that was adhered to a patterned paper card base.  I finished this off with a border drawn in with the dusty concord Distress Marker.


Card No. 4


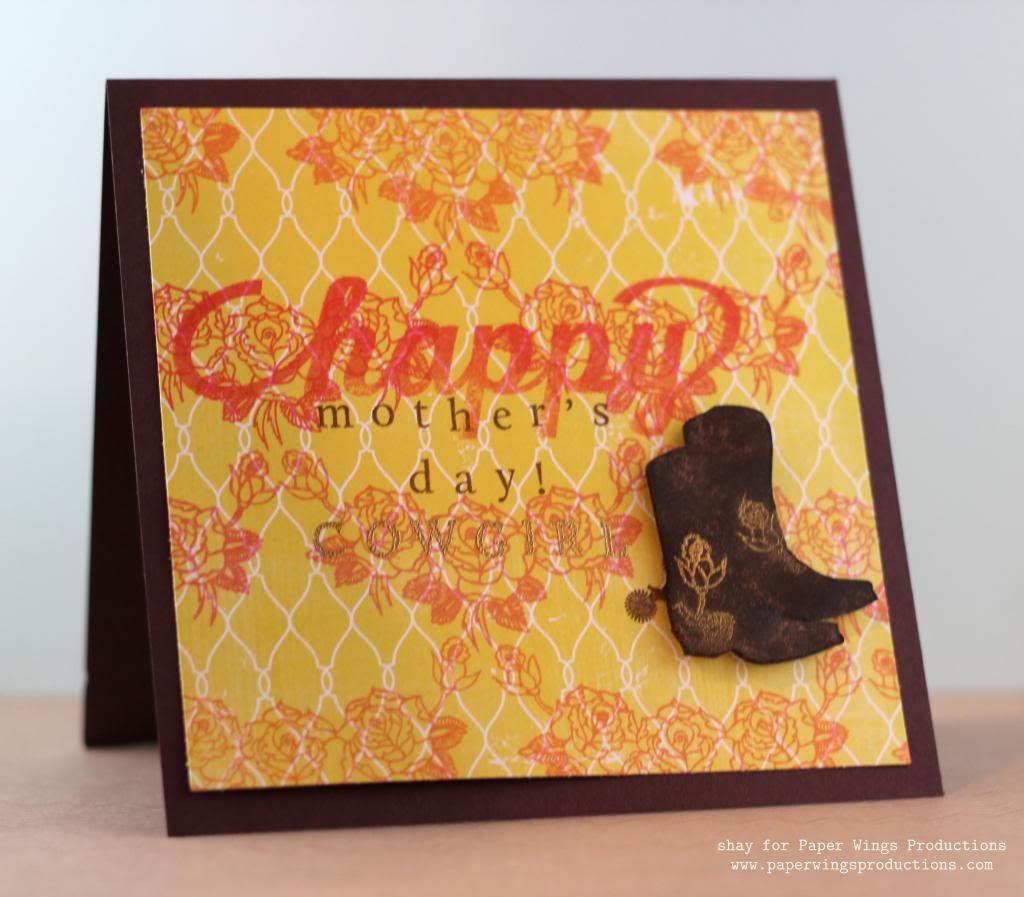
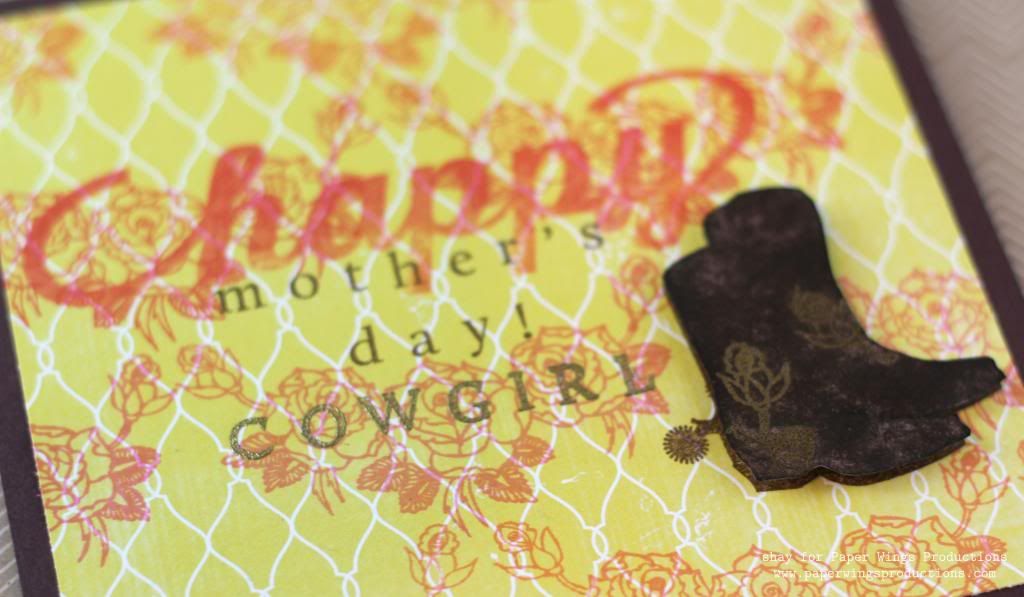
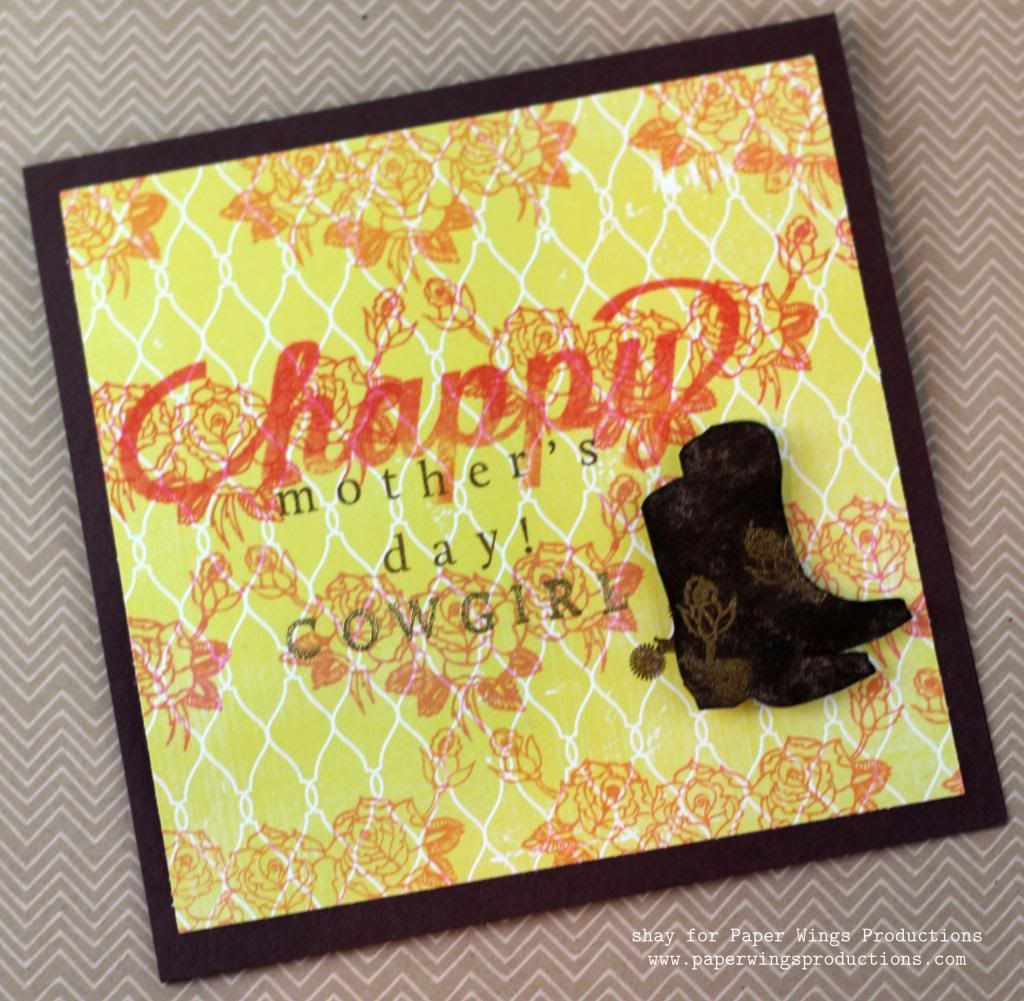
I went with a little honky tonk with my last card.  I stamped the boots from Lyrics or Walking in brown ink on white cardstock and then overstamped with the roses from Dia De Los Muertos Hombre with Versamark.  I then heat embossed in gold.  I cut the boots out.  I pressed the brown ink over the boots image to make the gold stand out more.  I inked the edges. 


On a piece of patterned paper I stamped a pattern using the roses from Dia De Los Muertos Hombre.  I then stamped happy from Happy and spelled out mother's day (stamped in brown ink) and cowgirl (embossed in gold) from Perfect Alphabet.  I stamped the boots again on the yellow panel and placed the embossed boots over that image using dimensional adhesive.  Lastly, I adhered the panel to a dark brown card base. 


I hope you have enjoyed these cards and enjoy a glorious Mother's Day weekend!

We would *love* to see what you make with Paper Wings Productions stamps. Add your projects to Facebook, our flickr group, to Pinterest, comment with a link on this post or even email pictures to us!

Take flight,
Shay.

Supplies:
Stamps:

Stamp not shown: Happy
Inks: Versamark, Tsukineko; royal red, pale tomato, bubble gum and soft cantaloupe shadow inks, Hero Arts; mulled lavender, victorian velvet, dusty concord and seedless preserves, Tim Holtz Distress Ink by Ranger; dark chocolate, Papertrey Ink
Cardstock: white, Georgia Pacific; hibiscus burst, Papertrey Ink; chocolate chip, Stampin' Up!
Patterned Paper: Yes, Please 6x6 paper pad, Amy Tangerine/American Crafts; Love You Madly and Color Me Happy 6x6 paper pads, Glitz; plum wine, Basic Grey
Other: opaque white and detail metallic gold embossing powders, Judi Kins; heat gun; Inkssentials ink blending tool, Ranger; tender pink (RV13), begonia pink (RV14), light prawn (R22), cadmium red (R27), lipstick red (R29) and cardinal (R59) markers, Copic; dusty concord, Tim Holtz Distress Marker by Ranger; pink balloon sprinklers, October Afternoon; buttercup and sherbert Mister Huey's color mists, Studio Calico; button, sassafras
Related Posts Plugin for WordPress, Blogger...