Showing posts with label background. Show all posts

Thursday, November 27, 2014

Themed Thursday - Fathers Day Cards


Marie here and todayy theme is Fader´s Day cards. In Sweden we celebrate Fathers Day on November 9 so these cards was made for that occation. I used the same stamps, techniques and material on all four cards. I took photos trough the whole process so you get an idea on how to do quite similar cards that turn out totally different in the end.


 First of all I prepped my card bases with white gesso.

 I used different crayons for each card. Drawing a random pattern over the dried gesso.

 Looks like something my kid would have drawn.....

 To blend the creyons together i sprayed on water.

 After drying I couldn´t resist a bit of ink splattering....

After some more drying time I started to stamp with my Paper Wings Background stamps.
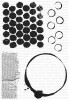
First I placed my cards side by side. Then I staped on two cards at the same time. The finishing toush was to stamp on the coffe ring and the grid pattern.

And this is what the cards look like after a bit of decorating.


Thank you for stepping by today!


Marie Johansson


Saturday, March 15, 2014

Scrapbook Saturday- Text Background

*****To join our March Challenge: CELEBRATE, CLICK HERE*****


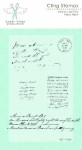
Hello everyone! It's Amber here with a layout to share for this weeks Scrapbook Saturday Post. I started with a white12x12 piece of cardstock for my background, two sheets of pattered paper, two black borders, some white alphabet stickers, and Paper Wings Productions Text Cling Stamp Set. If your a fan of the blog then you know I use this stamp set a lot to create backgrounds. It's so fun to create your own one of a kind background. The Paper Wings Productions Shop has a few different stamps sets like the Text Cling Stamp Set that are great for creating backgrounds. You can check them out HERE. A few weeks ago Erica shared how she created a fun background for her 12x12 layout using the Art Textures Cling Stamp, you can check it out HERE.


Below you can see a close up of how I used two different stamps from the set. I used one of the large text stamps and the small postage stamp. I stamped the text in black and the little postage stamp in a juniper color. As you can see some of the text is lighter then some of the other text, that's because I used a second generation stamp technique. It's a pretty simple technique you just ink up your stamp set then stamp it onto your cardstock and then stamp it again with out re-inking your stamp.
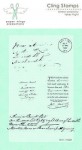

Thanks for visiting today and don't forget we would love to see what you make with Paper Wings Productions Stamps so add your projects to our Flickr Group, to Pinterest, or leave a comment with a link to your project. You can also check out our Facebook Page and You Tube Page for daily inspiration. 

Supplies: Cardstock- White & Black / Patterned Paper- Lillybee Designs / Paper Wings Productions Stamp Set- Text Cling / CTMH Ink Pads- Black & Juniper / White Alphabet Stickers- Lillybee Designs / Sulky Thread- White & Black / Sewing Machine


Tuesday, February 11, 2014

Tutorial Tuesday- Masking To Create A Background


*****The winner of our February Blog Hop contest is...
Lisa, please contact carrie at paperwingsproductions@hotmail.com for instructions on how to claim your prize. Congratulations and THANK YOU to everyone who participated!

Hello everyone! It's Amber here with another fun technique to share for this weeks Tutorial Tuesday! I thought it would be fun to share a quick and easy masking technique to create a background.


To get started all you need is some white cardstock, some ink, two stamps (one for your main image and one for the background ), a few sticky notes, and some watercolored pencils or markers to color your image at the end. You can see how I masked off my image and added my background below.

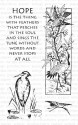
Choose your image and stamp it onto a white piece of cardstock and then stamp the same image onto a sticky note. I used the wonderful Crane from the Crane Panel Stamp Set.


Next cut around your image. I left the the bottom half attached because its water and I only want my background to show behind the upper half of my image.


I placed my masked over the crane and then used a few more sticky notes to mask off the edges.


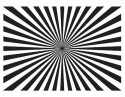
Next ink up the image you want to use as your background and stamp it directly over your masked image. I used this fabulous Sunburst Pattern Stamp Set for my background along with two different colored inks.


This is what my background looked like when I removed the masking from my image and the other sticky notes from the edges.  As you can see I have a nice clean border all the way around.


After I let the background dry for a few I pulled out some watercolor pencils and started coloring my image.


Here is what my finished panel looked like after I finished coloring it. I just love the way the Sunburst background stands out behind the crane. It really makes him stand out. All that was left to do was add it to my card.  I hope you enjoyed my quick and easy masking technique today! Thanks for visiting!

Supplies: Cardstock -White / Patterned Paper- Glitz Design's Finnley Collection / Paper Wings Productions Clear Stamp Sets- Sunburst Pattern & Crane Panel / Staz-On Ink Pad- Jet Black / Versa Color Ink Pads- Canary & Yellow /  Watercolor Pencils

Tuesday, January 7, 2014

Wet Stamping Tutorial


Hello everyone! It's Amber here with another fun tutorial. Before I share my project, I want to announce the winner of our blog hop givewaway!

Sweet blog hop! Loved the mix of projects and the various treatment of white... Silver, white and black, neutrals, white on white... Beautiful!

Congratulations Beatrice, please contact Carrie at paperwingsproductions@hotmail.com for instructions on how to claim your prize.

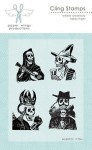
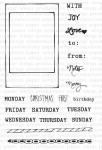
Today I'm sharing a quick and easy water stamping tutorial. I created four different colorful tags with this fun technique. Every tag features Paper Wings Productions Snapshot Framer Clear Stamp Set, Muertos Cling Stamp set, and Text Cling Stamp Set.
                                                                       

Below are the six steps I used to create these fun little tags.


Step: 1 & 2
Start with a white tag and mist it with some water. I lightly misted mine here but you can mist it as much as you want. The amount of water you add will determine how much of a watercolored effect it will have in the end. This also depends on the type of cardstock and ink pads you use. All inks are different so you might want to try it out on a scrap piece of paper and see how it turns out.


Step: 3 & 4
After you have you tag misted take a large background stamp, ink it up with a light shade of ink, and stamp it onto your  tag. Then after you have you background stamped take a smaller detailed stamp and stamp it over your background. I used one of the little stamps from the Muertos Stamp Set. Note: This is done with the same color of ink while the tag is still wet. You will also notice that the tag has curled up a little from the water but it will flatten back out in the next step.


Step: 5 & 6
Now grab your heat gun and dry the tag completely. You could just let it sit in dry but I use the heat gun to flatten the tag back out and it makes the steps go a lot faster. Now that the tag is dry apply a darker shade of ink to your stamp and stamp it directly over the  first image. This will make the image really stand out. You will be able to see the image below it but it will be light and give the image more dimension.


Here is a close up of my finished tags. I added some string , a smaller tag with my "Joy" sentiment, and some colorful sequins. Hope you enjoy and Thanks for visiting!
Supplies:  4 Tags- Paperbilities / Paper Wings Productions Cling Stamp Sets- Muertos & Text / Paper Wings Productions Clear Stamp Set- Snapshot Framer / CTMH Ink Pads- Breeze, Ocean, Baby Pink, Bubblegum, Petal, Smokey Plum, Sweet Leaf, Topiary / Colored Sequins / Heat Gun / Spray Bottle


Thursday, October 17, 2013

Flying By To Say Hi & Some Halloween Inspiration


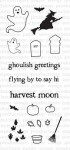
Hello everyone, it's Amber here! Today I have a Witchy Halloween card to share for this weeks Themed Thursday Post. Before I get to my card I thought it would be fun to share some other Halloween themed cards/projects from the other DT members to get your Halloween mojo flowing! First up check out these two fabulous placeholders Shay created last week using Paper Wings Productions Little Halloween clear stamp set, Halloween Mix It Up clear stamp set, School Journaling Lines clear stamp set, and Funky Lower Case Alphabet clear stamp set!


It's a fun post you don't want to miss, she shares how to transform a Witches hat into a Pilgrims hat. How cute is that! You can check out Shay's original post HERE.  Second up is Erica's three fabulous projects! 


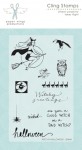
Erica created a cute little gift bag, an adorable card, and a fabulous tag last week using Paper Wings Productions Little Halloween Clear Stamp Set. You can check out Erica's original post HERE and if your still in need of some Halloween inspiration you can check out this months Wicked Blog Hop by starting HERE. Now that you have been tricked and treated I have another card for you to check out. Today I am featuring Paper Wings Productions Witchy Halloween cling stamp set, Fall Add Ons clear stamp set, and Text cling stamp set.


For this card I started by stamping the text background in carney yellow onto my white card base. After I had my card base stamped I layered a square piece of patterned paper over my card base, edged it with some black stitching, and added a small square of yellow cardstock towards the top. I then stamped my witch in black onto a piece of orange patterned paper and stamped my sentiment in black onto a yellow strip of cardstock. After I had my image and sentiment stamped I circle punched the witch, matted it to the yellow cardstock,  trimed and cut the ends of my sentiment and added it to the card front.


We would love to see what you create with Paper Wings Productions stamps.... Show us on our Pinterest page, our Facebook page or our Flickr gallery or leave us a comment with a link to your project. Thanks for visiting!
Supplies: Cardstock- White & Yellow / Patterned Paper- Fancy Pants / Paper Wings Productions Clear Stamp Sets- Fall Ad Ons / Paper Wings Productions Cling Stamp Set- Witchy Halloween & Text / Versa Color Ink Pad- Carney/ CTHM Ink Pad- Black / Sulky Thread- Black / Circle Punch- Sizzix


Saturday, September 21, 2013

Scrapbook Saturday : By the Sea


Hello my dear crafty friends and welcome to my Scrapbooking Saturday!


Irit is here and this is my first scrapbooking page made with our gorgeous PWP stamps and sure not the last!
So this is my so called " Clean and Simple" page: a lot of white space with light Mixed Media coverage and not too much patterned paper after all.


I used my dear grandsons photo cut out (the background was not a good fit for the colors , so you can cut the image out and to arrange it as you wish over the background cluster.
I used some, not much, LYB paper, stickers and die cuts and mostly made then random background strips. I also added some old and forgotten plastic self adhesive mesh in two colors.Then I added three cut outs form PWP gorgeous By the Sea  clip art sheets: Post card, Boats and even some shells, but those are  not much seen after the title added over.
And then stamped the rest of the background. And I stamped a lot.
You can see background stamping all over the centre of my page made with Punchinella set and Textures set.
Then I added kind of waves using Journaling  set scalloped border . More spots   were stamped down to the lower left corner with  Textures set. And some faux stitching in red with another stamp from Journaling set.
Next I stamped some birds using Bird Panel set on the upper part. And even added a sun from Build a Scene set.

Here is a closer look to the cluster center and our lovely clip art.


Now is was journaling time and I used this Journaling set to make my stamped journaling over LYB spots.
Then I added  some more word stamps on the lower corner cluster, using THIS AND THAT  and MEMORIES stamps.
 And as I always try to add some  never used products, I added a lot of gold micro beads to simulate to sand.
I really like the outcome of this page and hope you like it too.
See you soon with more PWP  inspiration!


Related Posts Plugin for WordPress, Blogger...