
Hello everyone! It's Amber here with another fun tutorial. Before I share my project, I want to announce the winner of our blog hop givewaway!
Sweet blog hop! Loved the mix of projects and the various treatment of white... Silver, white and black, neutrals, white on white... Beautiful!
Congratulations Beatrice, please contact Carrie at paperwingsproductions@hotmail.com for instructions on how to claim your prize.
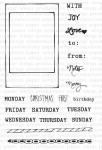
Today I'm sharing a quick and easy water stamping tutorial. I created four different colorful tags with this fun technique. Every tag features Paper Wings Productions Snapshot Framer Clear Stamp Set, Muertos Cling Stamp set, and Text Cling Stamp Set.

Below are the six steps I used to create these fun little tags.

Step: 1 & 2
Start with a white tag and mist it with some water. I lightly misted mine here but you can mist it as much as you want. The amount of water you add will determine how much of a watercolored effect it will have in the end. This also depends on the type of cardstock and ink pads you use. All inks are different so you might want to try it out on a scrap piece of paper and see how it turns out.

Step: 3 & 4
After you have you tag misted take a large background stamp, ink it up with a light shade of ink, and stamp it onto your tag. Then after you have you background stamped take a smaller detailed stamp and stamp it over your background. I used one of the little stamps from the Muertos Stamp Set. Note: This is done with the same color of ink while the tag is still wet. You will also notice that the tag has curled up a little from the water but it will flatten back out in the next step.

Step: 5 & 6
Now grab your heat gun and dry the tag completely. You could just let it sit in dry but I use the heat gun to flatten the tag back out and it makes the steps go a lot faster. Now that the tag is dry apply a darker shade of ink to your stamp and stamp it directly over the first image. This will make the image really stand out. You will be able to see the image below it but it will be light and give the image more dimension.

Here is a close up of my finished tags. I added some string , a smaller tag with my "Joy" sentiment, and some colorful sequins. Hope you enjoy and Thanks for visiting!
Supplies: 4 Tags- Paperbilities / Paper Wings Productions Cling Stamp Sets- Muertos & Text / Paper Wings Productions Clear Stamp Set- Snapshot Framer / CTMH Ink Pads- Breeze, Ocean, Baby Pink, Bubblegum, Petal, Smokey Plum, Sweet Leaf, Topiary / Colored Sequins / Heat Gun / Spray Bottle


Cool technique Amber! I love your tags!
ReplyDeleteGreat Tags, Amber! I want to try this technique, looks wonderful. TFS
ReplyDeleteMindy
http://mulberrymindy.blogspot.com
Wow, this is an awesome technique, Amber! Love the tags you made. :)
ReplyDeleteThese are so festive! I love the bright colors, great work Amber :D
ReplyDelete