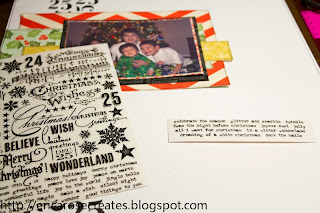
It is packed full of amazing products and as I sit here typing up my post I am realizing in my creative process (and extremely messy desk) I did not even dig into the wood veneer shapes or snowflakes! But not to worry they will go to great use in my next projects! Today I have started with a plain white 12x12 and pulled some papers from the October Afternoon Silent Night 8x8 paper pad that comes in the kit to build up some layers.
Next I used the stamp set Perfect Numbers that also comes in the kit to stamp out the number 25 along the left side of my layout in black ink.
I then matted my photo with one of the red and white striped papers from the kit and adhered it to a piece of black scrap paper from my stash that I stamped the word December all over in white ink! Next I cut up a few other pieces from the paper pad in different lengths and outlined them with my black pen. Once I had the papers outlined I decided to add an outline all around my layout.
I then started to adhere my papers down and added some of the Tim Holtz rub ones from the December Kit to my layout and cut a piece of the red & kraft ribbon in half and added it to my layout with my xyron sticker maker!
I love adding ribbon or trims to my layouts for just a little added texture! This ribbon is so pretty I made sure not to run it all across my layout but cut small sections and tucked it just under the photo! This is a great way to save your ribbon and trims! After my ribbon was adhered I added a few more embellishments and rub ons and my layout was complete!!
My layout was inspired by Dana's post on Sunday using the December Nesting Components Kit. I love how she stamped out the numbers on the bottom of her layout and I knew I had to use these numbers in my layout as well! You can see her full post and beautiful layout HERE. The December Kits are still available in the Paper Wings Productions Shop so head on over and get your today! Also head on over to our FACEBOOK page and make sure to LIKE our page because you never know when we are going to post a discount code for the shop!! For a quick look at the contents of the kit you can also head on over to the PWP YouTube channel HERE. Thanks so much for stopping today and I hope you enjoyed my layout! Have a great rest of your weekend and remember Let Your Creativity Take Flight!


This is beautiful, Erica!
ReplyDeleteThank you Katie!!!
ReplyDeleteI LOVE this layout Erica! The stamping you did on the background is fantastic! I really love the contrast between the black ink and the white paper. Super fun design! Thanks for the inspiration! :)
ReplyDeleteThank you for inspiring me Dana!! I loved your layout using this kit and how you stamped out the numbers!!
DeleteLove your clean style and how you used the number stamp as a graphic element for the layout. Cutting up the yummy May Arts ribbon as a part of the layers looks great too, can't wait to get my kit!!
ReplyDeleteThank you Cathie!! I LOVE this kit!! I was so excited to dig into it!! I can not wait to see what you create with it!!
ReplyDeleteYou make this look so easy & it's such a fantastic layout! I really need to use my stamps more in my Scrapbooking!!!
ReplyDelete:) I just have fun with it Jody, I was so happy this stamp set came in the kit!! I love the numbers!
DeleteThis is awesome. All the elements lead your eye right to the wonderful photo. Love the "25" border background. I'll be lifting that idea! TFS
ReplyDeleteThank you Lynn!! I think it would be cute on a birthday card as well!! Thanks for stopping!!
DeleteOutstanding page! I looove that layout!!!!
ReplyDeleteThank you so much Val!!
Deleteso cute. the cascading 25's are adorable. that really caught my eye. simple yet attractive.
ReplyDeleteThank you Christi!!!
DeleteVery cute, love the way you stamped the 25 multiple times!
ReplyDeleteThank you Amber!
DeleteBeautiful layout Erica! I really love they way you used the numbers and the contrast of the orange, black and white. I love everything about your design :D
ReplyDeleteThanks so much Norma!! I had a lot of fun with this kit!!
Delete