Monday, July 16, 2012

Mixed Media Monday: Once Upon a Time....


Good Monday peeps!

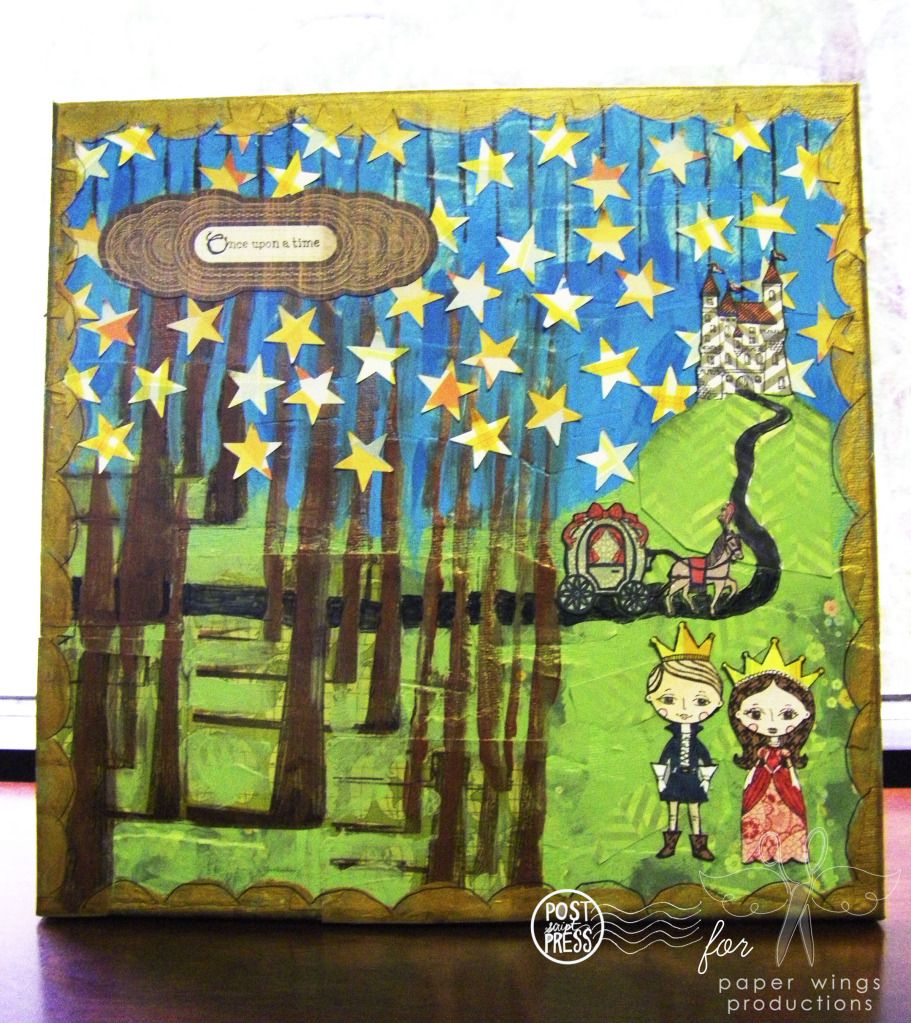
It's Shay here bringing you a fairy tale of a project for that little prince or princess in your life or the older prince and princess as everyone could use some magic in their lives.

Using the adorable Prince and Princess stamp sets by Liz B. of handmade by Lissie girl, the really cool trees from Howlin' For You by Erin Edelmann of Rag & Bone Studio and Hanging Stars by Liz A. of Fine & Fancy, I came up with a canvas with the quintessential castle and forest for my prince and princess.

Here are some basic directions of what I did:
  1. Paint a 12x12 canvas (or paper) with green and blue acrylic paints.
  2. Attach random bits of torn pattern paper to the green and blue sections and paint over edges with appropriate paint.
  3. Stamp in black and paper piece castle, prince, princess and horse drawn carriage using various pattern papers.  Color in with various markers.  Edge with black pen.
  4. Stamp trees in brown ink on pattern paper 4 times and attach to canvas.  Paint over pattern paper with green and blue where appropriate.  Paint over trees with brown paint to elongate trees.  Stamp over bits of the painted trees with tree stamp.
  5. Stamp lines from Hanging Stars in black ink along the top of the canvas.  Stamp over the lines to make longer lines in different areas.  Punch out lots of stars from pattern paper.  Attach to sky over lines sporadically.
  6. Attach castle, horse drawn carriage, prince and princess.  Draw a road from the castle stamp road onto the rest of the canvas where the horse and carriage are using dark grey Copic marker.  Edge it with black pen. 
  7. Paint a free handed scallop edge around canvas with gold paint.  Use a black pen/marker to loosely outline scallop edge.
  8. Stamp "Once upon a time" onto a label.  Attach to top left of canvas.
More embellishment: Adding Stickles on to the stars and/or shimmer spray over canvas which I may do later.  You could also use punches to punch out leaves for the trees.

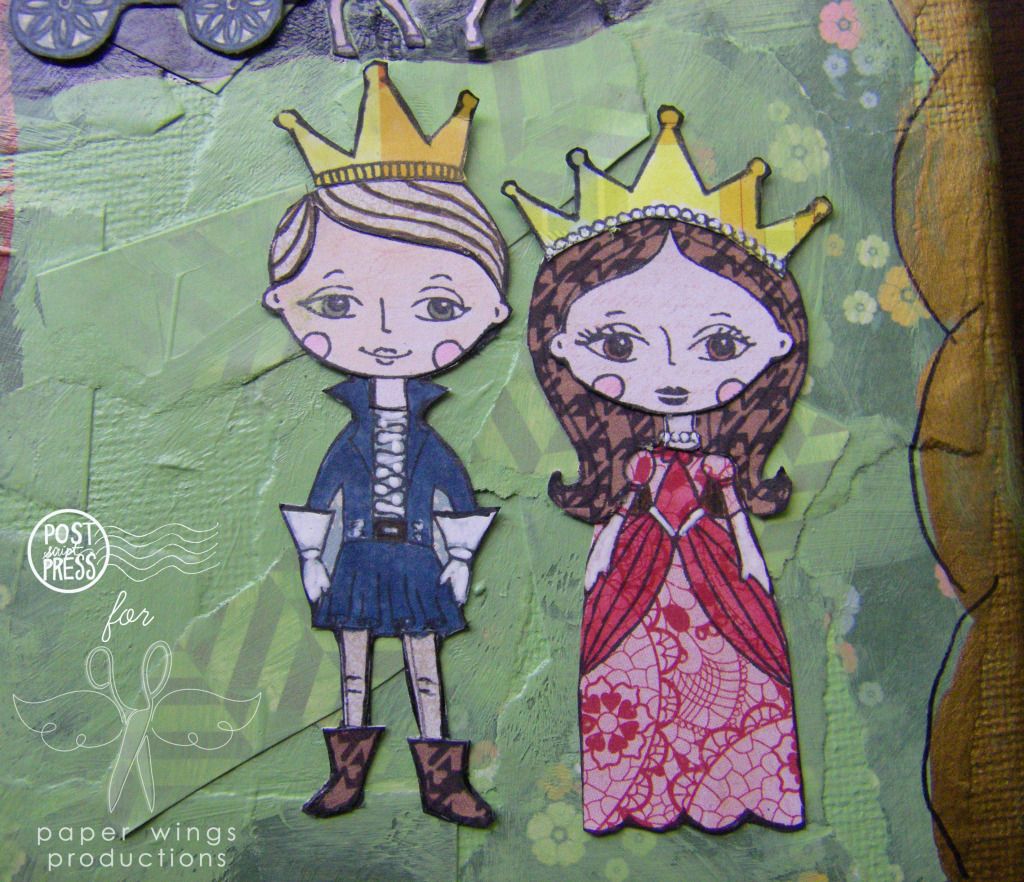
The adorable prince and princess:


Fancy horse drawn carriage:


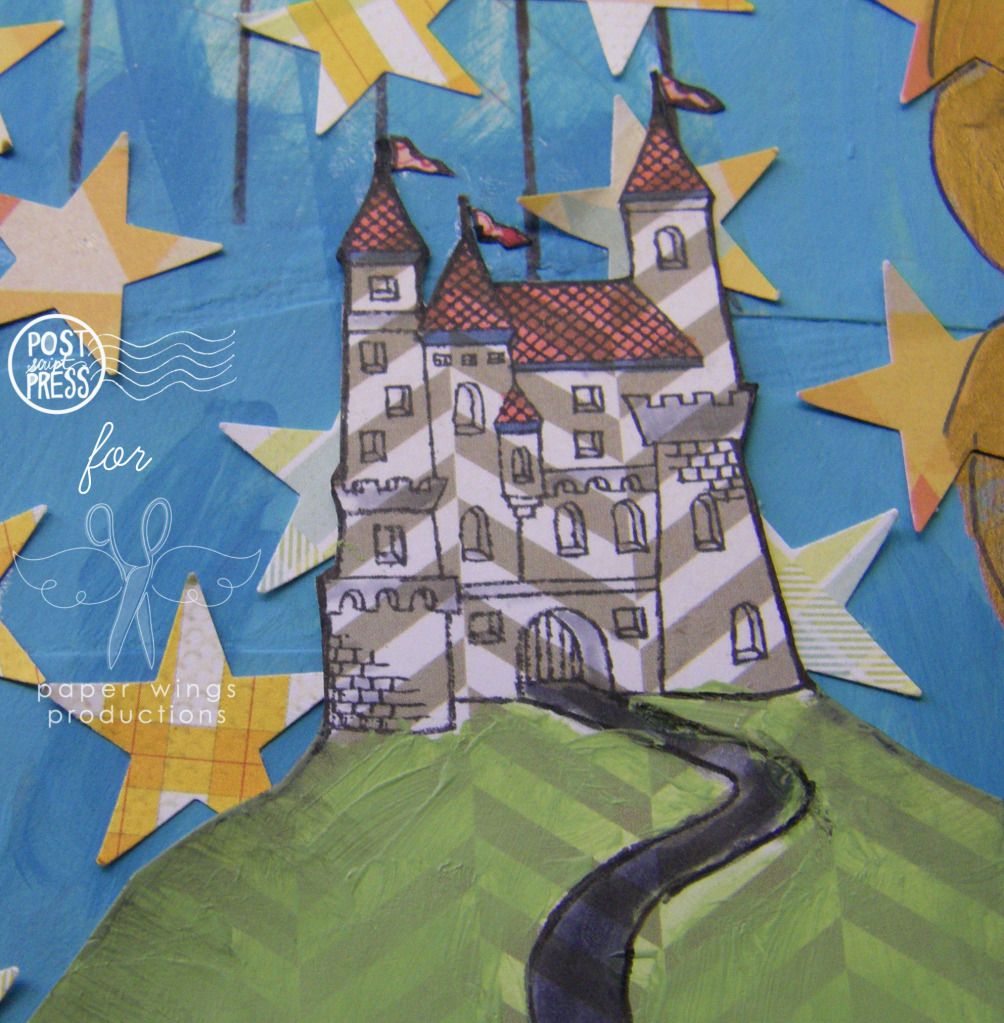
Banner waving castle:

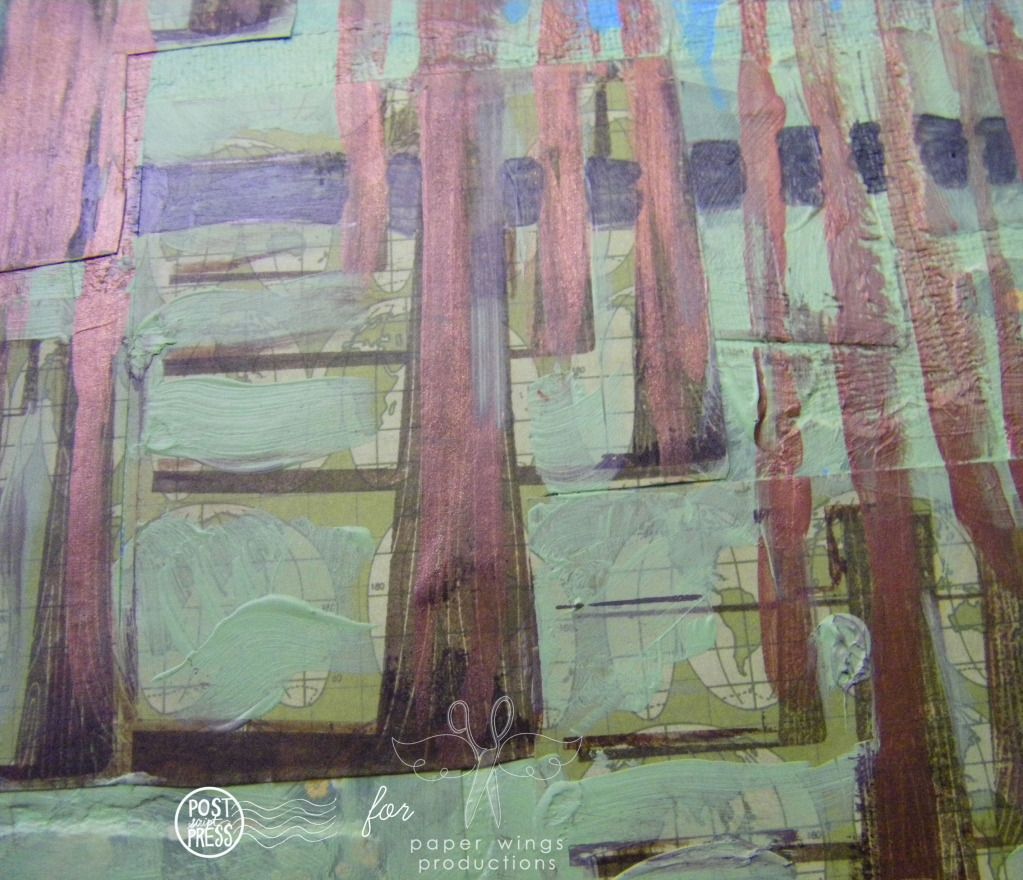
Enchanted shadowed forest:


Another view:


Stamps: Hanging Stars, Howlin' For You, Prince and Princess
Ink: Memento ink by Tsukineko in tuxedo black; Jenni Bowlin by Ranger in brown sugar
Pattern Paper: Kissing Booth 6x6 paper pad by Basic Grey; Paper Heart 6x6 paper pad by Crate Paper; Madison Avenue Lost and Found 6x6 paper pad by My Mind's Eye; Destination, Geographic, Great Scot, Harvest and Telegraph by Studio Calico
Cardstock: Neenah Papers in solar white
Tools: Signo gel pen in white by Uni-ballPrecision Pen by American Crafts in black; Memory Marker by American Crafts in chestnutCopic markers; Glossy Accents by Ranger; Matte Multi-Medium by Claudine Hellmuth Studio by Ranger; craft smart acrylic paint in pool blue; Americana acrylic paint in turquoise blue; Claudine Hellmuth Studio by Ranger in landscape green; Folk Art acrylic paint in Metallic Antique Copper, Metallic Antique Gold
Embellishments: die cut label from K & Company's Julianne Vintage Label Die-cute Cardstock

I hope you have a fairy tale of a week!

Take flight,
Shay.

Friday, July 13, 2012

Spotlight on Penny Miner


Today we are featuring a spotlight on Penny Miner.  Penny has designed the Funky Alphabet set.  We look for more great things from Penny in the future.


Hi, I’m Penny Allen-Miner. I have an amazing husband and two VERY handsome boys….well okay they are young men (21 and 20…as of today). My husband is a retired United States Marine pilot, and currently flies for an airline, and my boys are currently in college. I am a wife and a stay at home mom who goes where I am needed!!! It’s a great job…and I am glad that I am that “someone” who has to do it!!! I thank the Lord EVERYDAY for His amazing provisions!!


I love to doodle!! I love to emboss on metal!! I love to decoupage!! I love doing personalized name art for friends!! It is fun to just sit and put pen to paper to see what I come up with. My sister, Liz is a big part of my art…..I’m not going to say she “makes” me do it…BUT…..she makes me do it ….and I am glad!! Haha!! She inspires me to be creative, and to think outside of the box!!! I am very carefree….and I live my life by faith. Having the opportunity to doodle and having it seen by Carrie has been gratifying. I am thankful to be a part of the Paper Wings team!!!


Ten Things Questionnaire:


       One of your favorite books from childhood?
          I must confess….as a child…I didn’t like to read!! I loved being outside and being active. However, when I had kids the book that I loved to read in their childhood was Willie Waiakula and the Three Mongooses!!! (A Hawaiian version of Goldie Locks and the Three Bears…complete with the pigeon dialect of the Hawaiian Islands!!!)


Two trends that you will never stop loving no matter how wrong?

Hmmmm…. I guess being a native texas girl…I will always love “big hair” and leggings or sweat pants (they are sooooo comfortable!!!).


Three of your roles in life?

First and foremost, follower of Jesus Christ.
Wife, mother and CEO of Miner Manor
Daughter, sister and friend


Four of your favorite art tools?

Pencil (for sketching the design).
Eraser (for erasing the pencil marks).
Uni-ball Vision Fade and Water-resistant pen (for the final project).
Tim Holtz red handled scissors (A DEFINITE MUST!!!).


Five Places you want to visit?

New York City
Greece
Italy…this time the Amalfi Coast
Hong Kong
Switzerland


Six sources of inspiration?

God’s beautiful earth
HGTV (hahaha…I’m addicted!!)
My family (never a dull moment there!!!)
Liz (my sister….just watching her…gives me ideas!!)
Magazines
Other artists….pinterest, blogs, internet

Seven People that you wish to thank?

God, for giving me His unconditional love and life
My parents, for raising me in a Christian home
My husband and kids, for loving me for who I am
My sisters, for being there for me in the good times and in the bad
My friends, for encouraging me in many ways
BK…for giving of her time so unselfishly to share her talent

Eight totally random bits of information:

              Do you like silence, listen to music or watch something as you create?
Well…I never know when I am going to create, so I would have to say that there has to be some kind of sound….sometimes it is Christian music…but mostly it is HGTV….

Do you cook?
Yes, I do cook. Not my favorite thing to do in the kitchen, but I do cook. I would rather be baking!!! Yummmmmmm!!!
Velma, Fred, Daphne, Shaggy or Scooby?
Scooby, of course!!! He’s got the personality!!!

If you could have a superpower, what would it be?
My superpower would have to be the ability to make people happy 24/7!!!

A book you would like to live in?
An architecture homes book or Better Homes and Gardens book…..one day your home could be in the mountains…the next you could be living Coastal!!! Think of all the possibilities….

How many pets?
One…just Jake…because there is only one Jake…J!!!

What talent do you wish you had?
I think that if I could have a talent, I would want to be a musician, singer/songwriter!!

Who do you wish would decorate your house?
I would want Sarah Richardson of Sarah’s house….HGTV!!! She uses classic design with a hint of unpredictable!! Love, love her style!! If she wasn’t available, I wouldn’t object to Candice Olson or Genevieve Gorder or David Bromstad (mostly for his painting….I’m not a fan of the fake animal heads….).

Nine Items on or in your desk/worktable?

Pencils
Sharpeners
Pad of paper
Color pencils
Light
Ruler
Scissors
Metal emboss tools/metal
Light box

Ten colors you could not live without?
          Just 10??? My favorite 4 are blue, red, green and yellow…and of course all shades of those!!! Delft blue, Indigo blue, crimson, ochre, lime peel, and pink(s).

Wednesday, July 11, 2012

What's Up Wednesday: Happy Birthday!!


Hello there peeps,

What's Up?  It seems to be birthday month here at paper wings productions.  This past weekend dear Ms. Liz Allen (fine and fancy) celebrated her birthday and today is Julie's birthday!   Happy belated birthday, Lizzie!  Happy birthday, Julie!

Lately, I have been downright awful about getting out cards to my friends, but I am of the mind that later is better than never (how surprising is it to get a card 6 months after your birthday?  Makes for a long birthday celebration).

Today I am sharing with you the cards I made for Liz and Julie which I haven't given to them yet (Liz and Julie, if you don't want to see your cards here then look away).

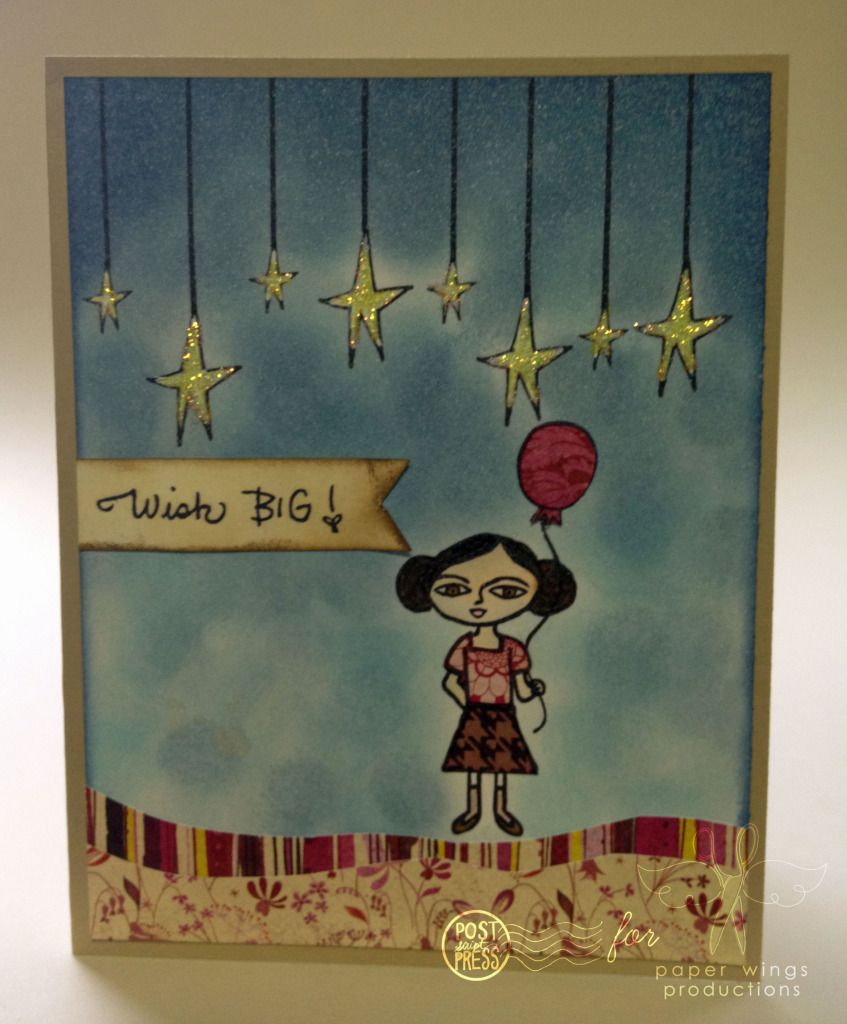
Liz's birthday card:


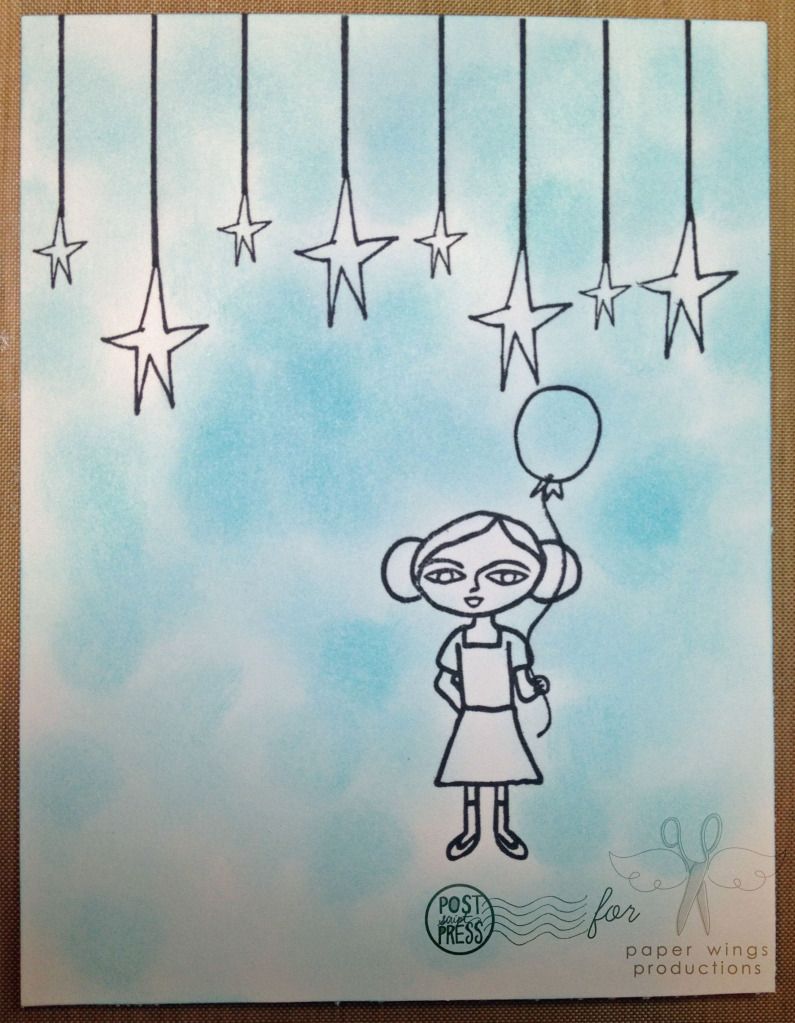
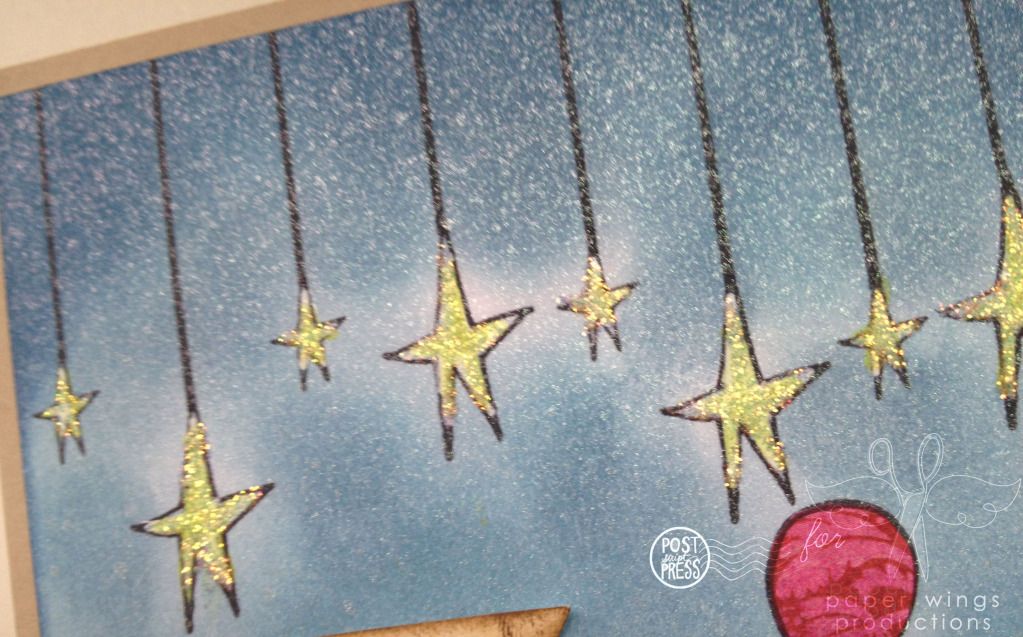
For a starting off point, I wanted to use Liz's Hanging Stars stamp set.  On a 4.5 inch x 5.5 inch piece of white cardstock, I stamped the main curving line image and then alternated between stamping the large folk star and the small folk star onto the bottom of each line with Memento ink by Tsukineko in tuxedo black.

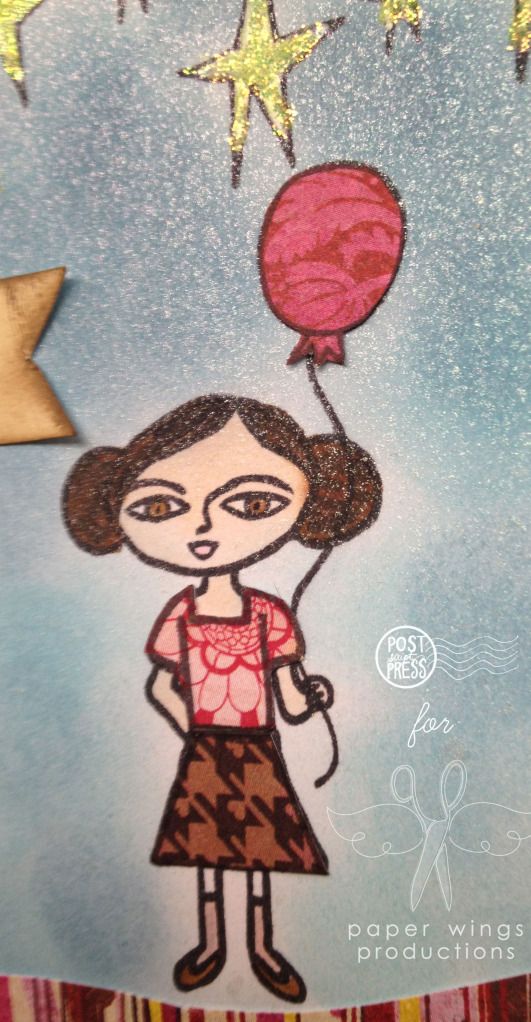
Because the card needed something or someone under the stars, I stamped little Sophie from the Sophie stamp set and added the curvy string and balloon from that set to add some birthday fun again in Memento ink.  I knew I was going to do some paper piecing over some parts of Sophie so I stamped her twice on 2 different pattern papers from Basic Grey's Kissing Booth 6x6 paper pad and Crate Paper's Paper Heart 6x6 paper pad and stamped the balloon once on another paper from the same paper pad.


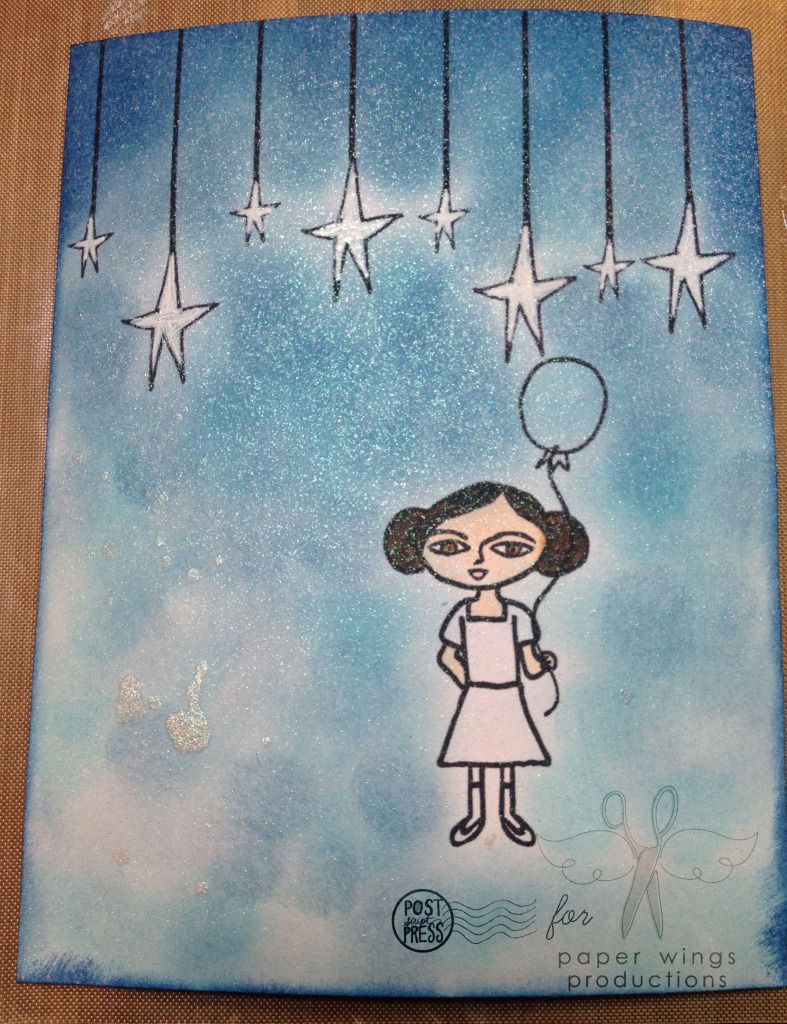
Before adhering the paper pieces I took out a sponge dauber from Tsukineko and 3 colors of Tim Holtz Distress Ink: tumbled glass, stormy sky and faded jeans.  I began with tumbled glass going over the panel in a circular motion trying to avoid the stars and most of Sophie. Next I came in with stormy sky concentrating the color to the top of the panel and adding some sporadically onto the rest of the panel.  Then I finished up with faded jeans just at the top and around the edges of the panel.  


Then I sprayed iridescent spray over the entire panel.  And I colored in Sophie's skin, hair and mouth with Copic markers.  I also colored in the stars using a white Uni-ball Signo gel pen. 


I then adhered the paper pieced elements to the ballon and Sophie and finished up Sophie by coloring in her socks/tights and shoes with Copic markers again.  To the bottom of the card I added some free hand cut wavy pieces of patterned paper from the Basic Grey Kissing Booth paper pad.


I wanted to add yellow stickles to the stars (stickles are a most for anything for Ms. Liz), but oh no! I have no yellow stickles.  What to do?  I colored in the white stars with a yellow Copic marker and then used Diamond stickles over it.  Problem solved.

I added a little banner stamped from a sweet sentiment handwritten by Liz on a piece of white cardstock and then because the white was too stark I inked up the banner with another sponge dauber using Jenni Bowlin ink in malted milk and inking the edges in brown sugar.  Lastly, I adhered the panel to a kraft colored card base.  Pretty cute!

Wish big this birthday, Ms. Liz!


Stamps: Hanging Stars and Sophie
Ink: Memento ink by Tsukineko in tuxedo black; Tim Holtz Distress Ink by Ranger in tumbled glass, stormy sky and faded jeans; Jenni Bowlin by Ranger in malted milk and brown sugar
Paper: Kissing Booth 6x6 paper pad by Basic Grey; Paper Heart 6x6 paper pad by Crate Paper
Cardstock: Neenah Papers in solar white and sand
Tools: Signo gel pen in white by Uni-ball; Precision Pen by American Crafts in blackSponge dauber by Tsukineko; MONO permanent adhesive by Tombowliquid adhesive by Scotch; Copic markers
Embellishments: Stickles by Ranger in diamond; Memories Mist in iridescent


Julie's birthday card


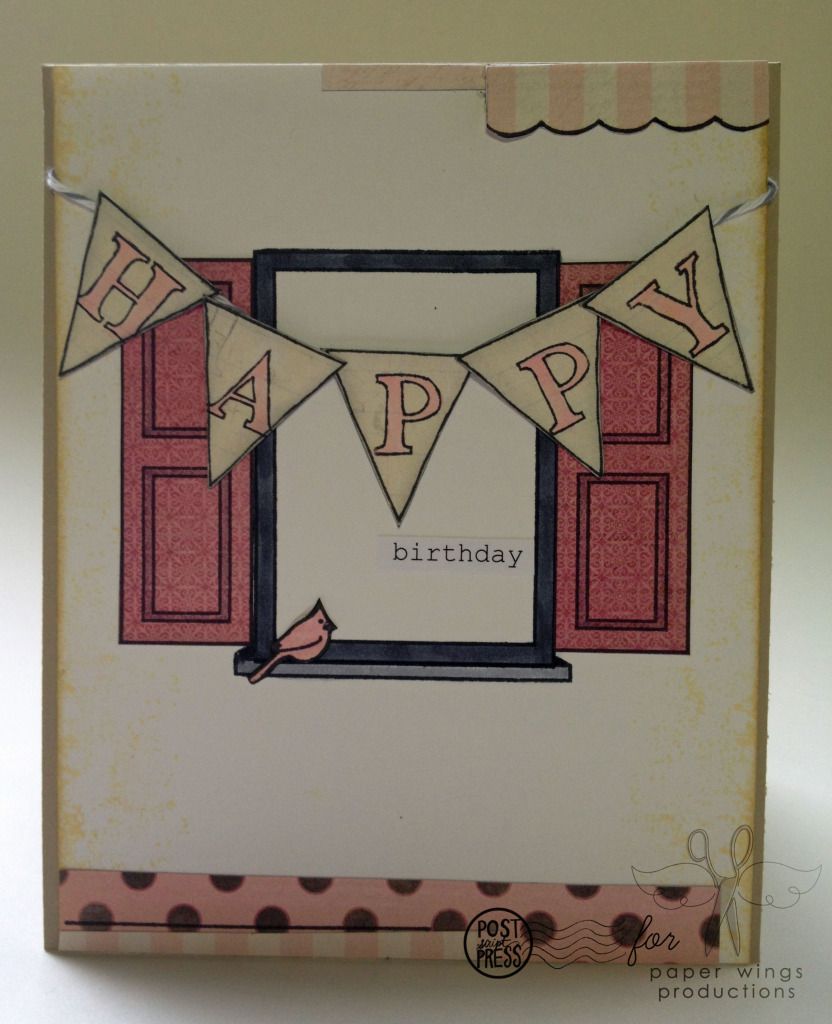
My starting off point for Julie's card was her Window set (have you seen Julie using this stamp set in her video?  If not, check it out HERE) and I had an idea to pair it with the Happy Day set.


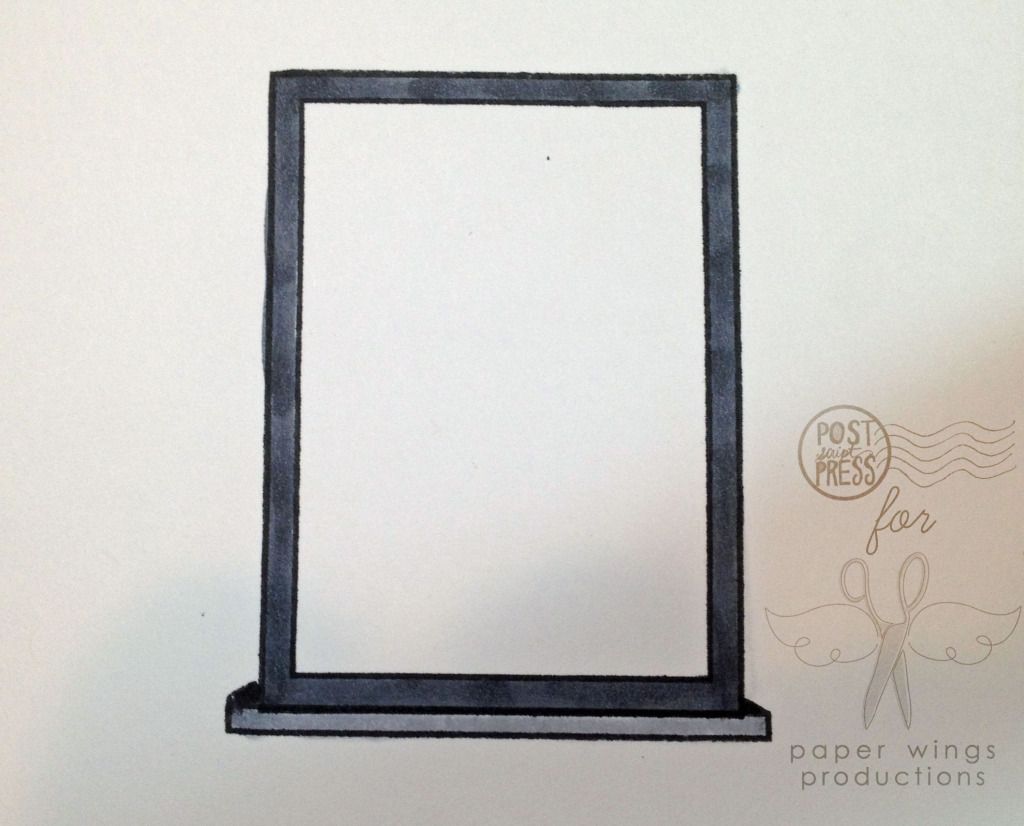
First on a 4.25 inch x 5.5 inch piece of white cardstock I stamped the main window image in upper middle part of the panel in Memento ink in tuxedo black.  I stamped the ledge image at the bottom the window and then colored it in with Copic markers.


Next using some patterned paper from Crate Paper's Paper Heart 6x6 paper pad I stamped the larger pennant from Happy Day 5 times using Memento ink in tuxedo black and cutting them each out.  On each pennant I stamped a letter from the "happy" image and colored them in with a pink Copic marker.  I did ink up the edges.
 
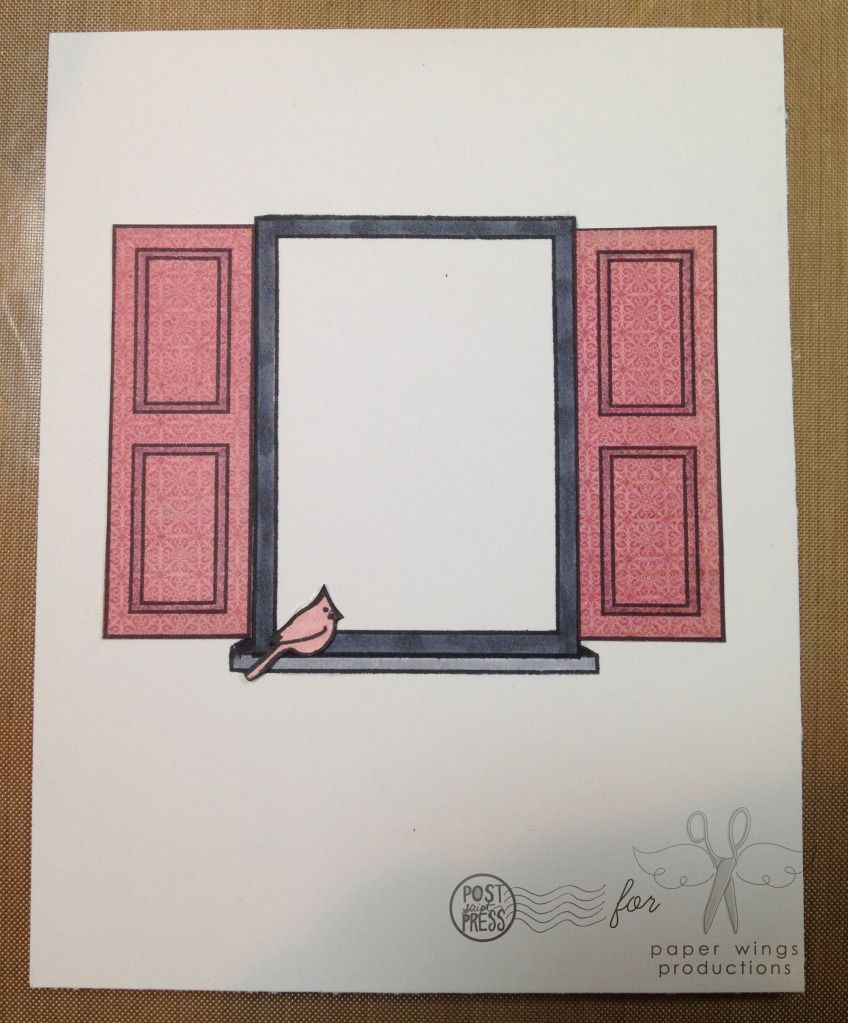
Using the My Mind's Eye Lost and Found Madison Avenue 6x6 paper pad that I received as a present for my birthday this year (thanks, Jane!),  I stamped out the shutters from Window twice and stamped the bird from the set (what a cutie!).  I cut them all out.  To cover up some of my wonky cutting on the bird I used a Precision Pen from American Crafts to edge my birdie friend and I colored him in a bit more with a pink Copic marker.  He was adhered to the ledge.  Isn't he so sweet there?


I adhered the shutters outside the window frame (I colored in part of the image with a Copic marker).  I also did some subtle stamping on the right and left edges of the panel to mimic the texture of stucco using one of the stamps from Julie's Art Textures stamp set using Jenni Bowlin's ink in malted milk.  I also edged the panel with the same ink.


Next I adhered the pennants to a piece of Divine Twine in oyster (gray and white) and adhered it all on top of the window to create a little banner.

I added a little computer generated "birthday" inside the window under the banner.


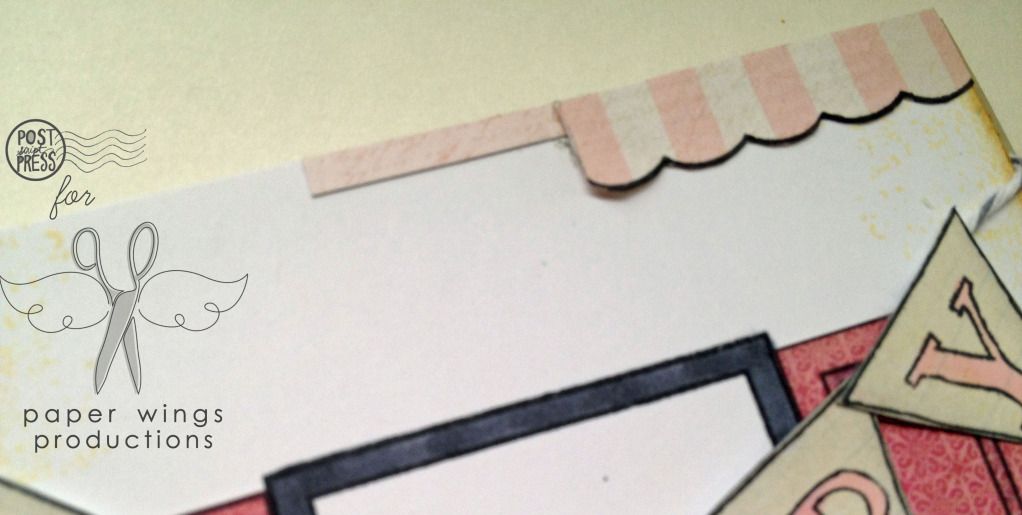
For a bit more interest I added hand cut stripes of patterned paper from the same Madison Avenue paper pad and also stamped out onto the Madison Avenue paper pad the scallop edged curtain from the Window set using Memento ink and used part of it on the top right hand corner of the card.


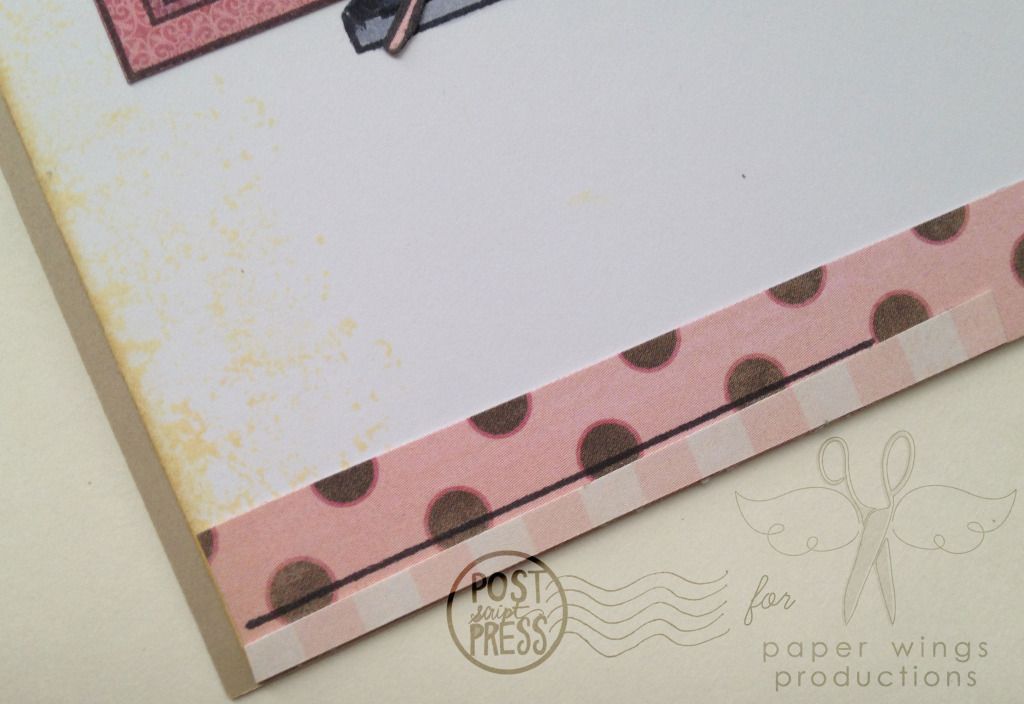
My last bit of stamping was to add the longer line from the Window set onto the bottom strips of pattern paper.  Lastly I adhered the panel to a kraft colored card base.

There you have it.  A semi-clean and pretty card for Julie.  Happy birthday, Julie!


Stamps: Art TexturesWindow and Happy Day
Ink: Memento ink by Tsukineko in tuxedo black; Tim Holtz Distress Ink by Ranger in soot black; Jenni Bowlin by Ranger in malted milk and brown sugar
Paper: Lost and Found Madison Avenue 6x6 paper pad by My Mind's Eye; Paper Heart 6x6 paper pad by Crate Paper
Cardstock: Neenah Papers in solar white and sand
Tools: Tim Holtz Ink Blending Tool by RangerMONO permanent adhesive by Tombowliquid adhesive by Scotch; Copic markers
Embellishments: Divine Twine in oyster by Whisker Graphics 


I hope you will join in us in wishing both Liz & Julie the happiest of birthdays and a fabulous year to come!

Take flight,
Shay.

P.S. Mark your calendars because Carrie's birthday is July 24th!

Monday, July 9, 2012

Mixed Media Monday


Hey there peeps!
Today I have a fun and fast project for you.  For this project, I have stamped onto an adhesive backed sheet of metal foil.  Ranger packages it a couple of different ways.  It can be found at your local craft store, but better yet, get it from an independent store such as Stamp Antonio.  I made the centerpiece for this card with the metal foil and mounted it onto a card.


 Here's how I made the centerpiece:
I started off mounting a square of the metal foil sheets onto a square of chipboard (thick cardboard).  I stamped the bird from the Bird Melange set and a crown from Royal Melange set using the Staz On ink pad.


I also stamped around the edges of the metal foil piece with some swirls from the Flourish Fun set.  After letting the ink dry, I took an awl (lots of things could be used...a stylus, old ball point pen, anything with a pointed edge) and drew over the stamped swirl images.


I continued to doodle and embellish the metal with the awl, creating hatch marks and creating small dots.


I glued Tim Holtz's tissue paper to the card after first crumpling it up and then smoothing it out before adhering.  

I used the words "come fly with me" from the Bird Melange set and edged the bottom of the card with the Scallop border set.  The solid scallop border was inked with a silver dabber and the outline was stamped using Staz On ink.  


I hope you have enjoyed our mixed media Monday project!

Enjoy the flight!
Carrie


Stamps: Bird Melange, Royal Melange
Ink: Black Staz On from Tsukineko
Cardstock: white square 6" card
Other: 
Tim Holtz Tissue Wrap
Silver Paint Dabber
Metal Foil Sheet
Chipboard
awl

Friday, July 6, 2012

Feature Friday--Flight Plan: Mission 004 and Mission 003 Winner

Hello Peeps!

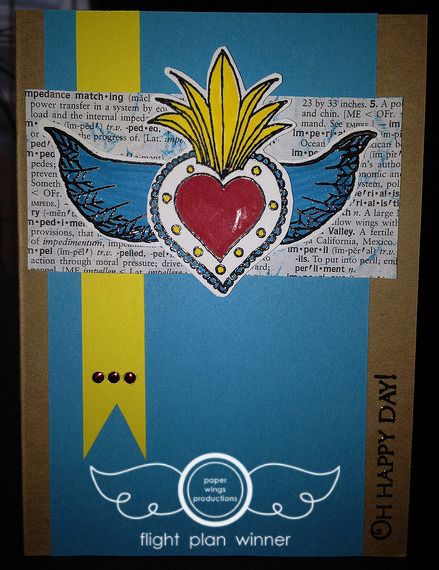
We hope everyone had a great Fourth of July celebration.  As it is the first Friday of the month it is time for a new Flight Plan mission, but first we'd like to announce that Andrea's card "Oh Happy Day!" was chosen as the Flight Plan: Mission 003 winner. 


Not only did Andrea use the Flight Plan, with a few great modifications, but it also looks like her color palette is similar to our May Color Combo.  Things I love about this card: dictionary paper inked and distressed as a backdrop to the heart and wings, the three gems on the yellow banner ribbon, and the sentiment turned on it's side.  Very clever ideas! Stamps used in this project were from the Milagros and Happy Day sets.

Andrea, please contact Shay at shay@paperwingsproductions.com with the name of your choice of stamp set. Congratulations!


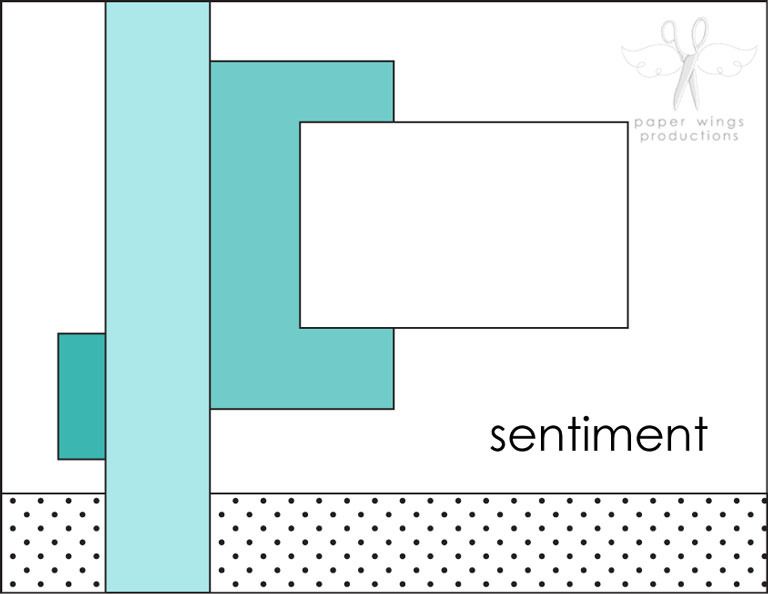
I  like this month's flight plan and I'm looking forward to seeing what you come up with.  The new release stamps are so fun and although you can use any Paper Wings stamps, I'm hoping to see some of the newly released stamps on your designs.  Here is your mission - will you accept the challenge?  We hope you join in!


What is a Flight Plan?
It is a guide of sorts to get your project started by giving you some guidelines to follow, but in our case, we hope your creativity will interpret these plans into amazing and clever new creations. We’d love to see your finished pieces, so we have set up a Flickr gallery where you can share your submissions with us. So, put on those paper wings and get ready to take flight!

Your Mission:
Create a project (card, ATC, tag, scrapbook layout, multi-media piece, etc.) using paper wings productions stamps with the Flight Plan as your guide.
  • Share a picture of your project on our Flickr group and/or pin your a picture of your entry on Pinterest.  Make sure to tag it using this code: #FP004 (make sure to include the #). If your picture is not tagged we will not know it has been entered into the challenge and will be unable to find it.

  • You have until Tuesday, July 31, 2012 at 11:59 p.m. central time to post your entries.

  • Enter as many times as you wish before the deadline.

  • We will choose a winner to receive their wings and a stamp set of their choice.
We do have some samples using the Flight Plan: Mission 004.
Shay:


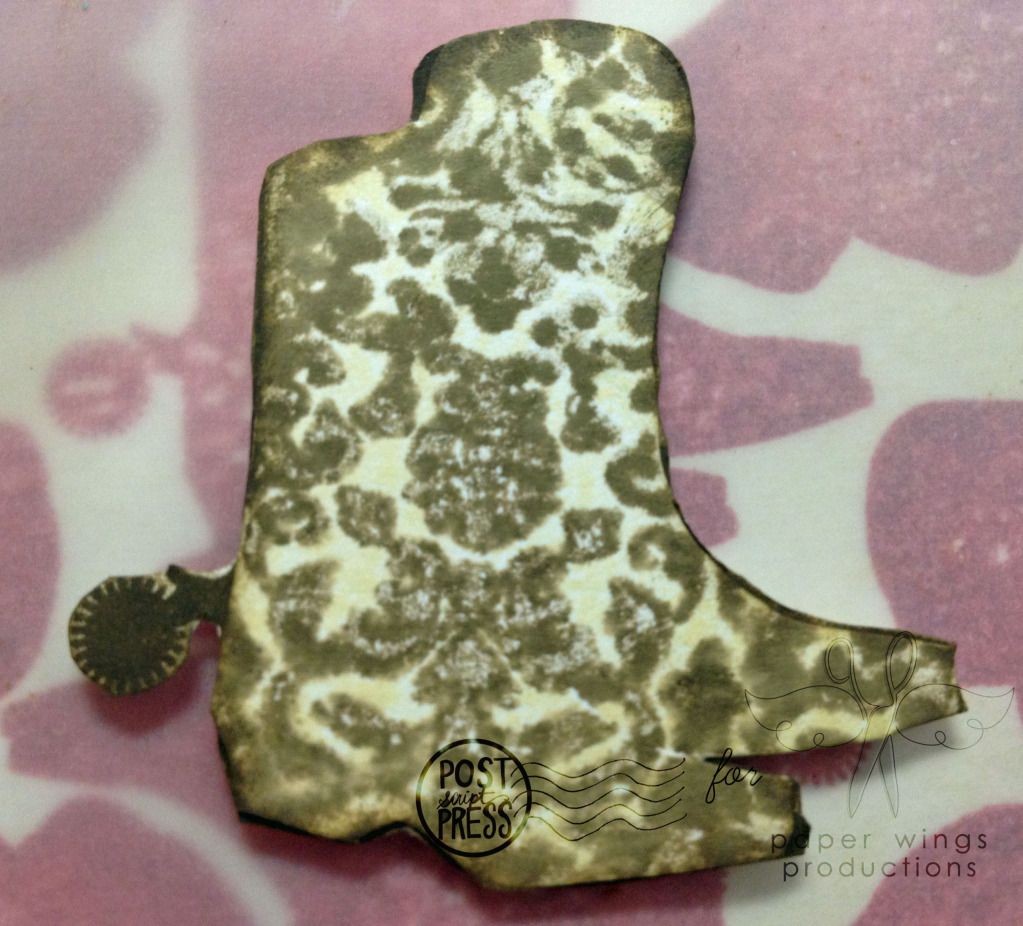
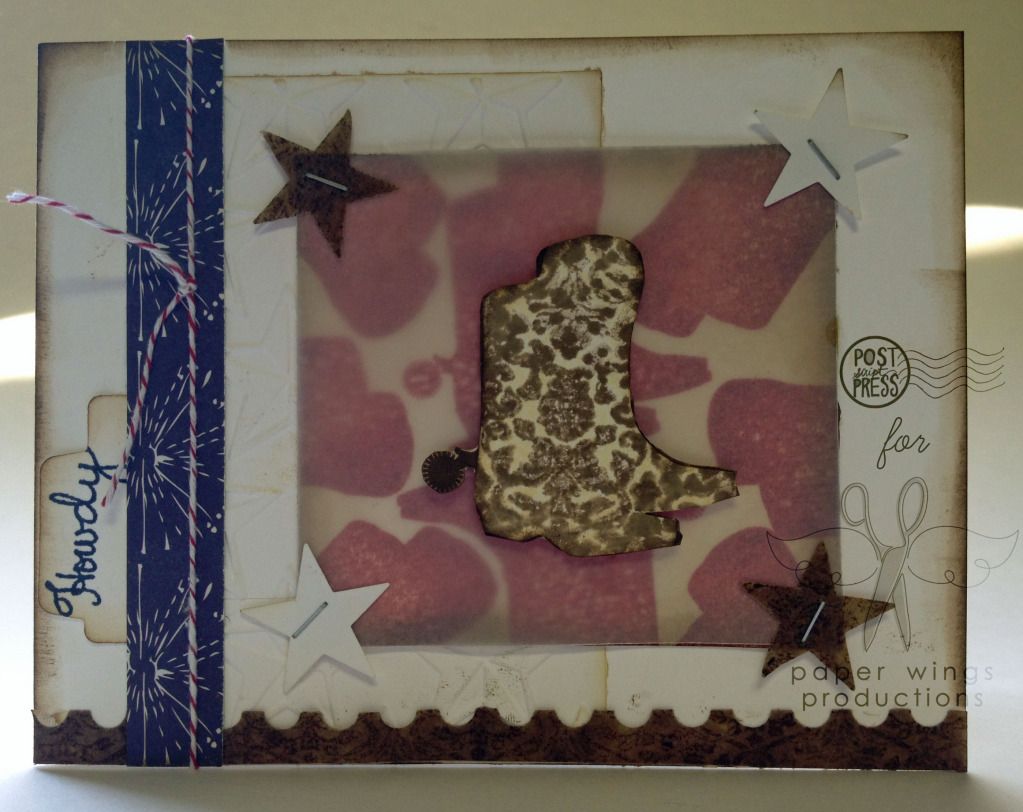
I did a little ode to Texas this time around.  Starting with an A2 white cardstock base (4.25 inches x 5.5 inches or half of a 8.5 inches x 11 inches sheet of paper), I wanted to play around with the boots from Lyrics so I stamped them in a spiral sort of pattern in red ink on a piece of watercolor paper.  I distressed the edges with my handy dandy Tim Holtz distressing tool using some brown ink.

Next I inked up the boot in light brown.  I then inked up the damask design from the Backgrounds stamp set in a dark brown ink and stamped the damask onto the actual boot stamp and then I stamped the boot stamp onto the paper.  The final image turned out really cool I think.  You can do this kissing technique with any solid stamp.  I attached the damasked boots (cutting off the spur) onto a layer of boots I already stamped in dark brown so I could get a solid brown spur.


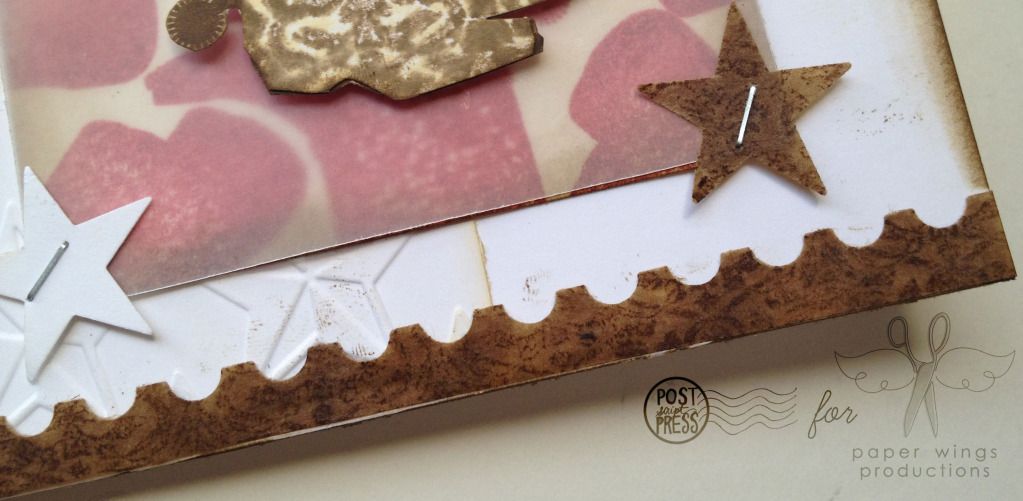
Because I wanted the brown boot to show up on the red boot background I chose to place a piece of vellum over the red to mute it a bit.  To attach the vellum to the red boot panel I punched out two stars from white cardstock and two stars from kraft glassine from Tim Holtz which I stamped in dark brown with the damask onto each corner using my Tiny Attacher (love that thing to bits).  I adhered the damask boots to the red boot and vellum panel using some dimensional adhesive to let it pop even more.

I embossed the stars on white cardstock using my Cuttlebug using a Cuttlebug embossing folder which I adhered under the boot panel onto the card.


From the damask stamped kraft glassine paper I also punched out a postage edge which I adhered to the bottom of the card.


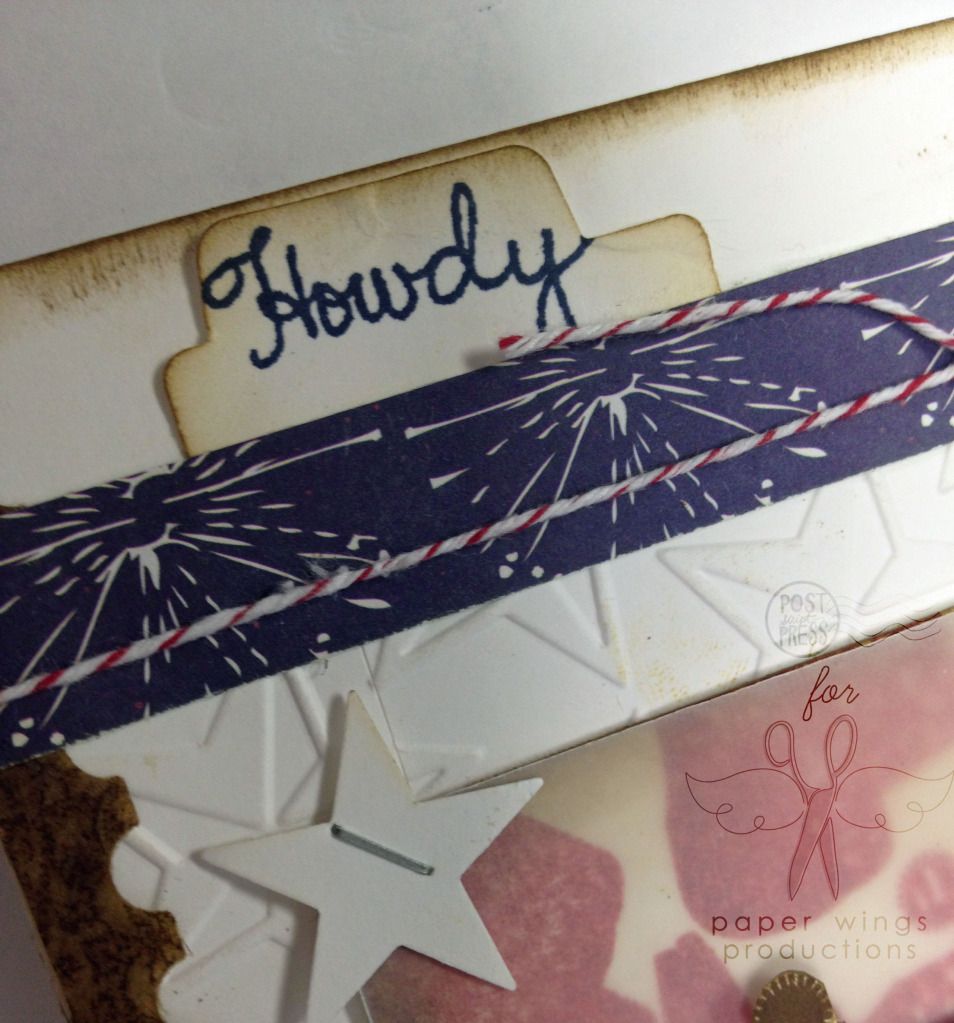
I cut along thiner strip from a dark blue patterned paper.  I punched the tab and stamped "howdy" from Texas Sayings in dark blue, edging it in dark brown ink before adhering it under the blue patterned paper strip.

I tied some red and white baker's twine over the blue patterned paper and finished the whole card with inking the edges with brown ink.

There you have a pretty literal interpretation of this month's Flight Plan.

Stamps: Backgrounds, Lyrics and Texas Sayings
Ink: Jenni Bowlin by Ranger in spice tin, cough syrup, malted milk and brown sugar
Paper: Seasonal-Easy Green by Cherry Arte (older); kraft glassine by Tim Holtz; vellum
Cardstock: Neenah Papers in solar white
Tools: Tiny Attacher by Tim Holtz; Cuttlebug; star embossing folder by Cuttlebug (Provo Craft); Tim Holtz Distressing Tool by Ranger; dimensional adhesive by Scotch; liquid adhesive by Scotch; tab punch by Jenni Bowlin for Fiskars; postage border punch by Fiskars; star punch by Stampin' Up!
Embellishments:  red and white baker's twine by Martha Stewart Crafts 


Julie:
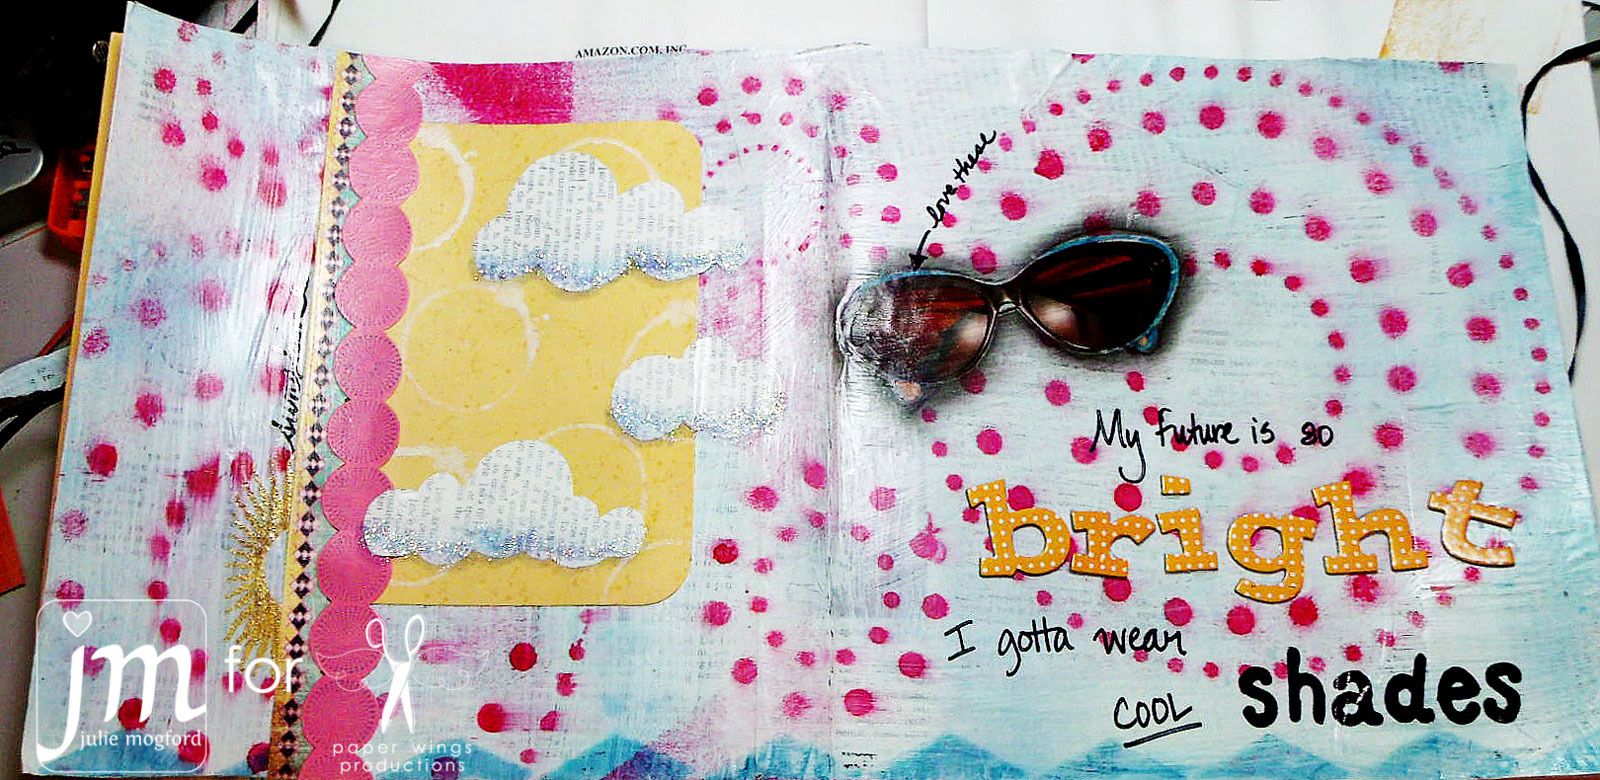
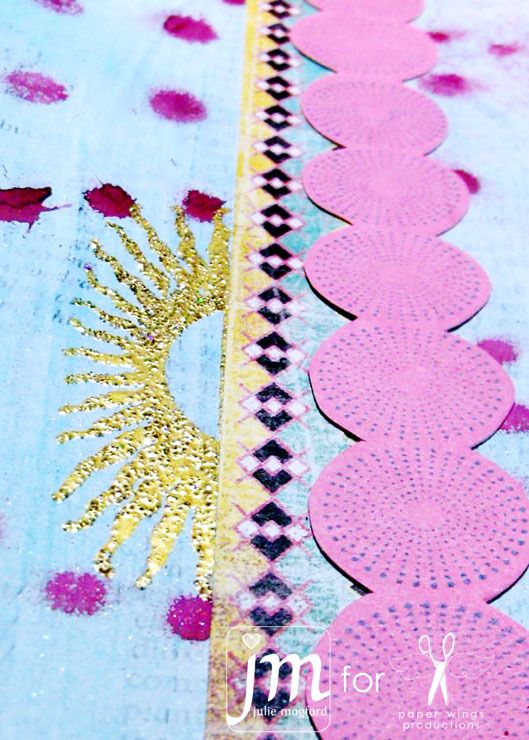
I chose to work in my art journal because I wanted to play a little today.  I tried to think outside the box on this one.  Can you pick out the paper wings stamps?  I was a little sneaky with them this time.  Take a closer look...
Here I have used the sun stamp from the Earth and Sky set and embossed it using Scattered Straw Distress Ink and JudiKins Egyptian Gold embossing powder. Although this picture doesn't do it justice, the sun looks so sparkly - love it!!  The "circle" strip was created by stamping the Dots background from Backgrounds in Broken China on pink paper, and then cutting around the circles in a scallop shape.

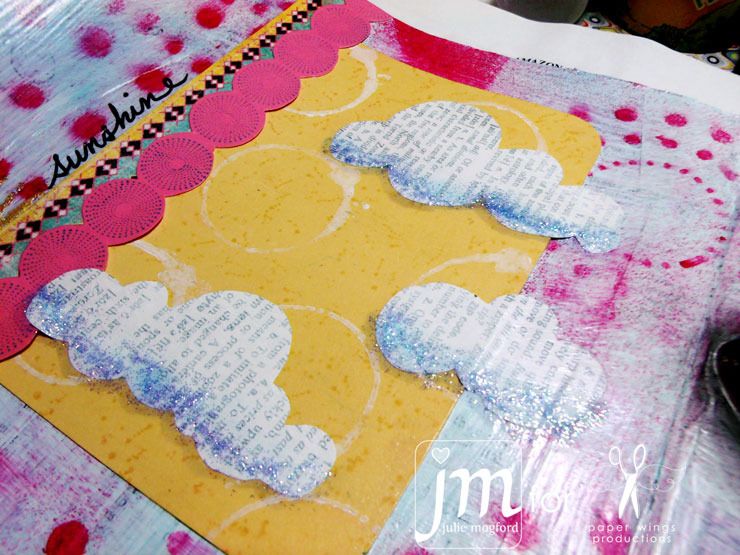
On the yellow paper, I used two stamps from the Art Textures set.  The little dots were stamped in Scattered Straw and the white circles were stamped with gesso that I dabbed on the stamp with a makeup sponge.  As soon as I was finished, I made sure to clean the stamp with soap and water so that the paint would come off quick and easy.  I added a little Waterfall Stickles to the bottom of the clouds, and also shaded beneath with a copic marker.


Did you notice this triangle border at the bottom? I bet you would never guess what stamp I used.  I took the new phonograph stamp from the Lyrics set, and turned it upside down, stamping it in Broken China along the bottom to create a zig zag triangle border.  Finally, I used the Solid Whimsical Alphabet to stamp the word "shades". I also used Thickers and my trusty sharpie to complete the sentiment.

Stamps: Earth and Sky, Backgrounds, Art Textures, Lyrics and Solid Whimsical Alphabet
Ink: Memento in tuxedo black by Tsukineko, Distress Inks by Tim Holtz/Ranger, Sprays by Tattered Angels (Electric Blue and Trunk Bay).  Pink is mixed.
Paper: Basic Grey
Cardstock: Stampin' Up!
Tools: Sharpie, We R Memory Keepers Corner Chomper, Stencil, charcoal pencil, glue stick and Mod Podge
Embellishments:  Thickers, Stickles, sunglasses by Betsy Johnson from Oprah Magazine, Egyptian Gold EP by JudiKins

We hope you try the new Flight Plan and look forward to seeing you creations!

Stay cool,
Paper Wings Gals


Wednesday, July 4, 2012

What's Up Wednesday! - Happy Independence Day!

Hey Peeps!

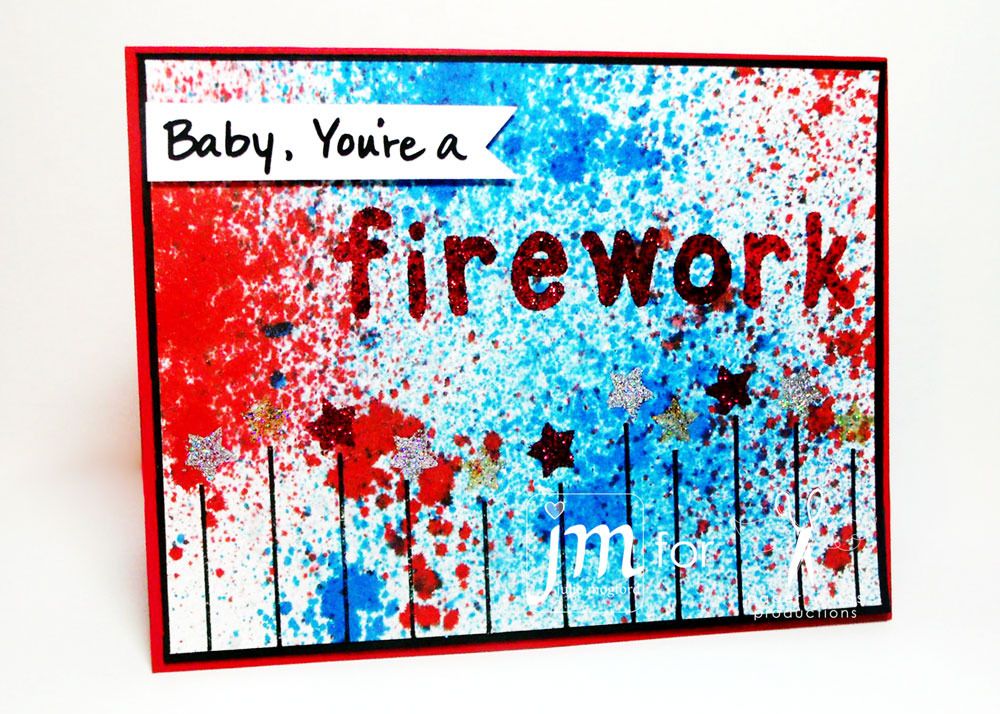
Happy Independence Day everyone!  Today on What's Up Wednesday, I thought I'd share some fun techniques that I used on this sparkly card.  Embossing with specialty embossing powders and using sprays for fun backgrounds. I couldn't resist borrowing this sentiment from Ms. Katy Perry.


The background was spritzed with some of my ink sprays.  I was careful to keep the red to the outer edges so my sentiment would stand out better. I wanted to use the lines and stars from the Hanging Stars set by Liz Allen, to create the look of sparklers. I stamped the lines in black, lining them up along the bottom edge of the card, and I used the line stamp twice to continue the sparklers the length of the card.


I knew I wanted this card to be sparkly and I wanted to use glitter, but then I remembered that I had these great sparkle embossing powders in my stash in red, gold and silver.  Glitter would also be a great choice.  You could stamp the stars in a colored ink, and then trace the stars with glue and add glitter.  Another option would be to use the star stamp with a glue ink pad, or an embossing ink with a heat and stick powder (then heat with a heat tool), and finally add the glitter.


I used red distress ink with a red sparkly embossing powder for the letters, stamped with the Solid Whimsical Alphabet set.  I like how clean the letters in this stamp set come out.  They would be great to use on so many projects.  I wanted to intensify the red of the letters and since distress ink is "embossable", I was able to use it with the red and gold sparkle embossing powder.

Lastly, I hand cut a banner strip in white and used my own writing to add the beginning of my sentiment.  This is a great card to send not only on Independence Day, but it could also be used for New Year's Day or even for a Graduation card. It would work well with a variety of color combos too.

I hope this quick card ignites your desire to create something awesome of your own.  Have a fantastic 4th of July!

Julie

Stamps: Hanging Stars and Solid Whimsical Alphabet
Ink: Memento in tuxedo black by Tsukineko, Distress Inks by Tim Holtz/Ranger
Cardstock: Stampin' Up!
Other:
Dylusions Sprays - London Blue and Postbox Red by Ranger
Embossing Powders - Aegean Silver, Egyptian Gold and Rockin' Red from Judikens
Pen - Stampin' Up! Journaling Pen

Tuesday, July 3, 2012

dropped the ball

Hey there peeps!

It looks like I dropped the ball here at the Aviary.  It was my turn to post yesterday and I totally forgot!  In case we have given the illusion of being a big, professional business (ha!  not likely!), then we have certainly misled you.  I mostly work from home, which means I have to kick out the hubby and two small children to get anything done.  Stamps get packaged and ready for shipping out of my very small studio, which is now so cramped with product you can barely move.  My awesome design team members work incredibly hard too, finding little bits of time here and there, mostly late at night, to help this small business out.  We are real people, folks, just like all of you out there.  Working in spare minutes instead of full work days to make our dreams come true.  I just want you to know how much we value you as blog readers, customers, friends, and support team.  YOU are what keeps us moving and motivated.

When I am dead tired and wondering what in the world I'm doing, the universe will usually throw me a bone.  This happened last night when I received a comment on Friday's blog post.

"Great tags, they're all beautiful! I recently purchased some of your stamps and I'm having so much fun playing with them. So far I've used a stamp from Melnage 3 Gypsy and Melange 1 Women. I'm a new follower and would love to show you what I did with your products :D

Norma G.
www.lilhoneybeestudios.blogspot.com"


Today I checked out Norma's blog and literally gasped when I saw her amazing art.

This post on Norma's blog, Little Honey Bee Studios, features a mixed media canvas collage featuring a stamp from our Women Melange set.  It's sooo gorgeous, I can't stop looking at it!


Then I found another amazing collage using the Melange 3 set.  Please take the time to go check out Norma's blog.  There are lots of goodies on there, scrapbooking layouts, mixed media collage, art journal pages, cards, and photography.  


Norma, you have truly made my day.  I realize that people are starting to "find" us and that you guys actually GET us.  We are artist who make products because we want to USE them!  I know that you have lots of choices with rubber stamps.  There are tons of companies and you can get them dirt cheap at the hobby stores, but you are choosing to buy OUR stamps.  Stamps made completely in the USA with the finest materials.  Made by people with families they are trying to support.  You choose to buy our stamps and that makes me proud, and understood, and so ready to go make some more stamps!

Seriously, we are currently working on our next release of new designs that will come be available in September.  Our design team members are already having to think fall, winter, and Christmas.  Actually to me that seems a lot more appealing that admitting that it's 100 degrees outside.

A couple of more things before I fly the coop, I want to let you know about some upcoming events.  Here's what paper wings productions has on the horizon, I hope we will see you at one of these events!

Saturday July 7 at Stamp Antonio.
Paper Wings Productions Monthly Workshop- Making Cards with Unique Materials:
This month in the Paper Wings Productions sponsored workshop, students will create cards and tags using materials that you might not think of for cardmaking.  This includes Sticky Back Canvas, Metal Foil Tape, and Resin Paper.  These products can be used for so much more than greeting cards too!  Come and learn some fantastic techniques that you can use in any of your mixed media projects!   Please bring a craft mat, distress inks, adhesive (such as 3 in 1), X-acto knife and cutting mat, scissors, and a bone folder if you have them.  

I am also teaching this class on Saturday at Stamp Antonio.  It features a LOT of PWP stamps!


Up-cycled Altered Book-
We continue the series of taking an existing book and creating a new artful book/album/journal.  This month we will replace the book's binding with a ring binder and the pages with a variety of decorative papers.  We will also hand dye and create our own bookcloth.  There will be non-Christmas options available.  Please bring a craft mat, distress inks, adhesive (such as 3 in 1), X-acto knife and cutting mat, scissors, and a bone folder if you have them.  


Call 210-764-7900 to register.

Saturday July 28 at Scrapbooks N' More
Paper Wings Productions Trunk Show and FREE Make & Takes!
Come by and see us at this great scrapbook store in New Braunfels!  Shop, visit, make something for FREE!  We would love to see you there!

September 21-22 CKC San Marcos
We will have a booth at the Creating Keepsakes show in San Marcos.  Visit their site for more details.


Enjoy the flight!
Carrie


Related Posts Plugin for WordPress, Blogger...