Showing posts with label jolly old st. nick. Show all posts

Wednesday, December 18, 2013

Merry & Bright & Two Christmas Tags


Hello Everyone! It's Amber here with this weeks What's Up Wednesday Post! Today I am sharing this Merry and Bright Christmas card featuring Paper Wings Productions Jolly Old St. Nick Cling Stamp and some wonderful patterned paper from ChicTags Good Tidings collection!


  I really wanted to play along with all the gold accents that are in the patterned paper so I stamped my Jolly Santa in gold. Check out the close up below!


I think this is one of my all time favorite stamp sets, there are so many fun and different images to play with. So I thought it would also be fun to share these two Christmas tags I created with the same image.


I wanted to have fun creating these so I used a double stamping technique to create these. Its pretty simple, you just stamp your image in one ink color and then stamp the same image in a different ink color slightly off to the side of the first image. This gives the image and sentiment a fun holographic look .


Thanks for visiting today and don't forget we would love to see what you make with Paper Wings Productions Stamps so add your projects to our Flickr Group, to Pinterest, or leave a comment with a link to your project.
Card Supplies: Cardstock- White and Blue / Patterned Paper- Chic Tags Good Tidings Collection / Paper Wings Productions Cling Stamp- Jolly Old St. Nick / Versa Color Ink Pad- Gold / Sulky Thread- Gold / Sewing Machine
Tag Supplies: Cardstock- White / Patterned Paper & Flair Buttons- Pretty Little Studio / Paper Wings Productions Cling Stamp Set- Jolly Old St. Nick / Versa Color Ink Pads- Khaki, Bamboo, Chateau Gray, Misty Mauve / Sulky Thread- Mauve & Light Green /  Large Sliver Snowflake / Sewing machine


Sunday, November 24, 2013

Jolly St. Nick


Hello everyone and Happy Sunday! It's Amber here with this weeks Spotlight Sunday Post. I hope you’ve had a fun and relaxing weekend so far!  I love this time of the year, it's such a great time to get creative and there is so much inspiration to be found!


Today I used Paper Wings Productions Jolly St. Nick Cling Stamp Set and Paper Wings Productions Snapshot Framer Clear Stamp Set. Isn't he cute! I love his Jolly face and all the adorable children's toys he is holding in his hand!


If your stopping by the blog for the first time this week you might want to scroll down and check out Norma's fabulous Christmas themed project HERE and Katie's Wonderful Christmas card HERE. Thanks for visiting today and don't forget we would love to see what you make with Paper Wings Productions Stamps so add your projects to our Flickr Group, to Pinterest, or leave a comment with a link to your project.
Supplies: Cardstock- Cream, Green, Barn Red / Patterned Paper- Daisy D's / Paper Wings Productions Cling Stamp- Jolly St. Nick / Paper Wings Productions Clear Stamp Set- Snapshot Framer / Versa Color Ink Pad- Brown / Barn Red Ribbon- Jo-Ann Craft Essentials / Sulky Thread- Green


Wednesday, December 12, 2012

What's Up Wednesday - One Layer Cards


Hey peeps! 

I've been on Pinterest a lot lately and I'm SO addicted to looking at pins and searching for ideas. Are you?  [have you pinned your favorite PaperWings stamps yet?] I have been seeing so many great ideas for Christmas cards, and I thought I would try a few ideas using our new and previously released stamps, but I gave myself a challenge.....ONE LAYER CARDS!  I have to say, it was definitely a challenge at first, but when I started thinking about a few card layouts I had seen, plus some techniques I know (but sometimes forget to use), then putting these cards together was easy!


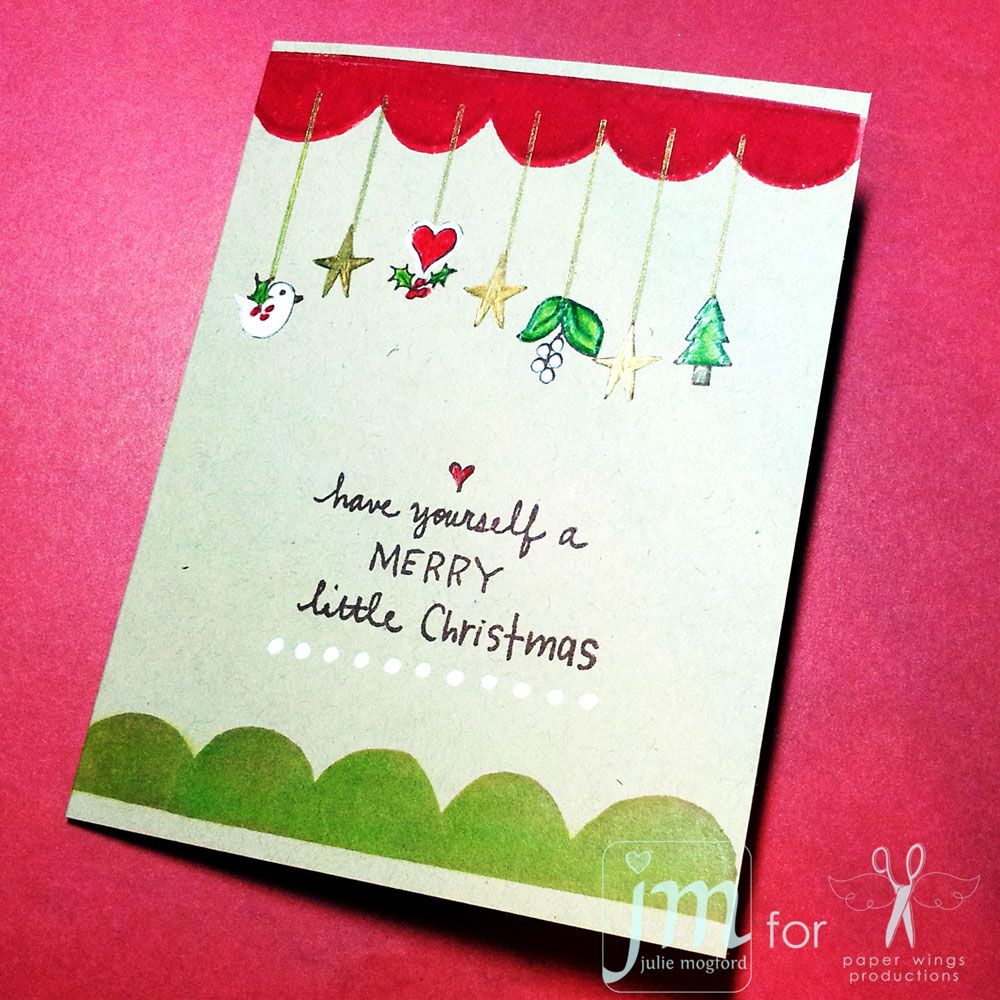
Krafty Christmas - This idea came from to me when I remembered how much I like colored pencil on kraft paper.  I used to do these types of cards with Ms. Liz Allen all the time.  This card reminds me of her!  First I started with the Scallop Border to set my color scheme.  When I started this I made some ink choices that let me down.  I was able to restamp these clear stamp images using chalk inks and line them up perfectly! The green one was not as bright as I wanted, so I went in with a green prisma pencil to bring it up to the perfect shade I wanted to use. Next I stamped the hanger from the Hanging Stars set using gold pigment ink. Then I added the cute elements stamped in Memories Artprint Brown, from the Christmas Mix it Up and Holiday Tags sets. I colored all of the images with prisma pencils and the stars were using a gold prisma pencil - it is a really nice metallic!  Finally, I added the sentiment from the Little Christmas set and added the white dot border from the Louise set, inking only the dots I needed. I could have drawn the dots, but I like using the border so they are lined up and evenly spaced. It takes the guess work out of the equation. Cute, right???  I thought so!


Christmas Collage -  I came across a collage card that had a red Christmas sentiment in the middle of a collage card with green music in the background.  I started thinking, how could I recreate this look with our stamps?  Here is my rendition!  Images from Music Cling, Flourish Fun 2Holiday Greetings  Holiday Greenery Jolly Old St. Nick  /  St. Nick Cling and the Merry clear sentiment. I accented some of the images with prisma pencil, and the sentiment is stamped in Versamark with Festive Berries ink before embossing in red embossing powder.  The Christmas is added with Chestnut Roan chalk ink.  This came out better than I thought.  I am intimidated by collages like this sometimes, but I think it turned out well.  What do you think???


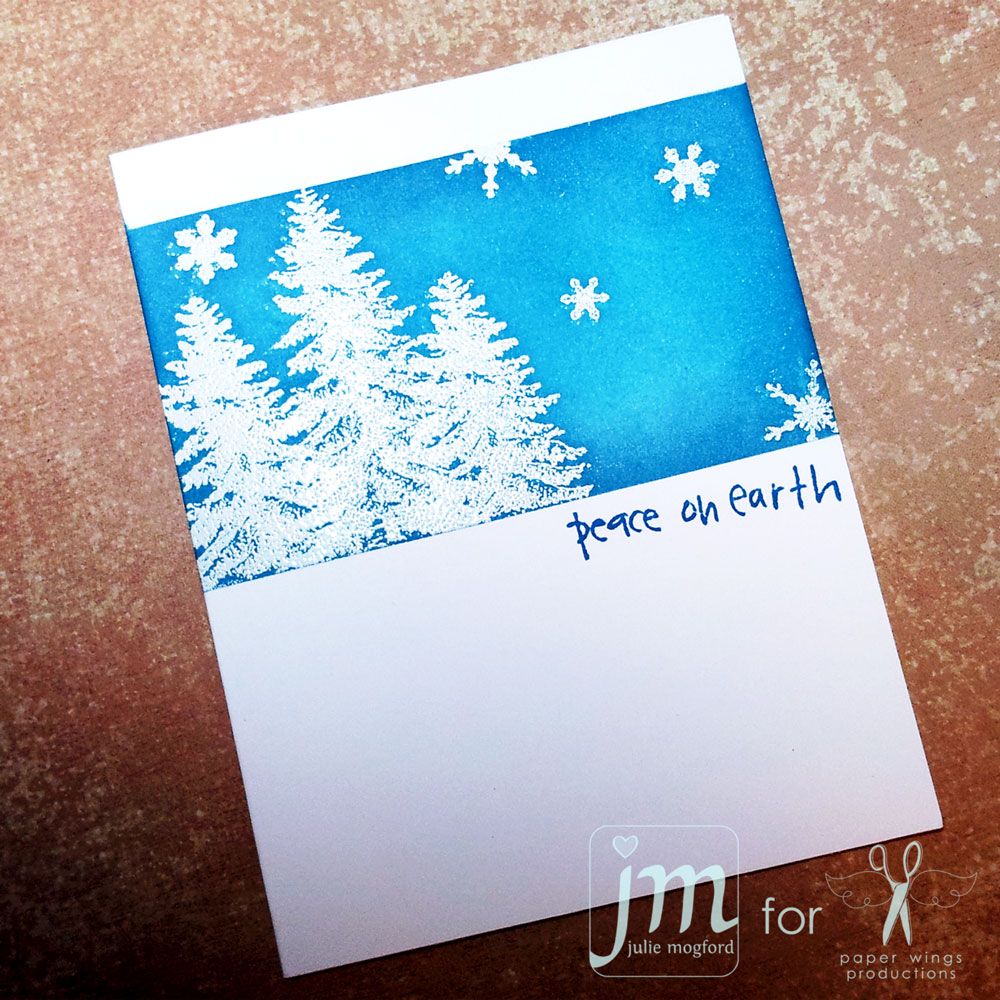
Winter Peace - This one is inspired by a few things.  The new cold weather that we are finally getting down here in Texas, and all of the cute cards I've been seeing that are masked off, stamped and embossed in white and then inked with rich colors.  First, I used some low tack masking paper to mark off the sky scene.  Using Stampin' Up! Whisper White craft ink and embossing powder, my trees from the Pines set and snowflakes from the Winter Mix It Up set come to life in the blue twilight sky.  I used Tumbled Glass, Broken China, Stormy Sky and a little bit of Faded Jeans.  After all of the inking, I wiped the embossed images off to remove any remaining ink and then removed the masking paper.  The handwritten "peace on earth" sentiment from the Little Christmas set is stamped in Faded Jeans and I think it is the perfect way to finish off this card.  I'm pleased at the effect and will be trying this again with other Christmas stamps  - it's really fun when you see the images pop off the card!

So that's my take on One Layer Cards.  I hope you give these techniques a try.  Even though Christmas is going to be here in a blink of an eye, these cards could be put together really quick for a last minute gift, or mass produced in a jiffy!

Hope you have a wonderful holiday season!

Peace

Julie

Friday, December 7, 2012

Jolly Old St. Nick

Hi Peeps! 
Are you all in full swing with Christmas projects?  I know that I am!  I was looking through our seasonal stamps and found a few that I had not used on the Advent Tags that I created last month. I was inspired by yesterday being the Feast of St. Nicholas.   I decided to put a couple of these together to create a traditional looking Christmas card. This is how it all started...


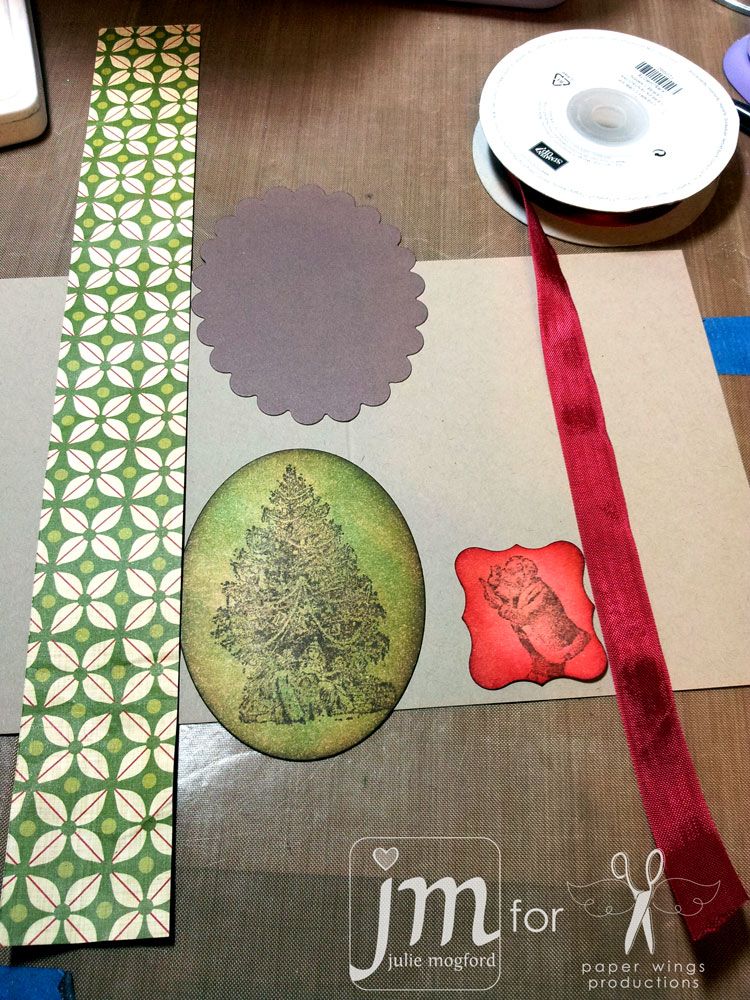
The stamps I used are from the Jolly Old St. Nick cling set. I used walnut stain distress ink to stamp the images on some blank manila tags, and then proceeded to ink them with my ink blending tool and shades of red and green distress inks, plus a touch of vintage photo and a little more walnut stain. As I was inking the little Santa, I thought the ink was getting too intense, so I used a damp paper towel, and dabbed at the center of the image.  Since water reacts with distress inks, I was able to lift some of the color, and in turn, I really like the effect. I will definitely remember this one in the future. The images were cut with a Spellbinders oval and scallop oval die, and a Stampin' Up punch. I found the dark brown solid (Echo Park) and the green pattern paper in my stash and thought they would be a nice contrast to the images and the Crumb Cake cardstock. My Cherry Cobbler ribbon (SU!) is darker, but my other red ribbons seemed too bright, and this one had a better width and makes pretty bows. And you know, it's all about the bow!


I added the two images to the card with some foam dimensionals (SU!) and as you can see here, I double stacked them on the Santa so it would sit taller than the tree image.  Then, its just a matter of assembling the pieces and tying a sweet little bow.


Don't you love it when a card comes together that easily??  I know I do.  This layout is one that I know I will be using again.  It is easy to replicate which makes it good for creating multiple Christmas cards. Even though the ribbon is darker, I think it works since the images are stamped in a darker ink and the color is more intense around the edges. This card makes me happy!

Have a great weekend!


Julie


Wednesday, November 7, 2012

What's Up Wednesday - Advent Calendar: Part 1

Hi Peeps!
It's good to be back here on the blog today.  I hope you have been keeping up with all of the recent posts for fall, Halloween, and Day of the Dead from our talented ladies here at the Aviary - Carrie, Norma and Shay!
I'm going to change gears here from fall, to the upcoming winter holidays, and share with you a project I'm working on.  For years I've been intrigued with Advent calendars creadted by other crafters using various papercrafting supplies, and I decided that this would be my year to make my first Advent Calendar and showcase the wide variety of stamps that Paper Wings carries.  Today, I'm highlighting days 1-8.


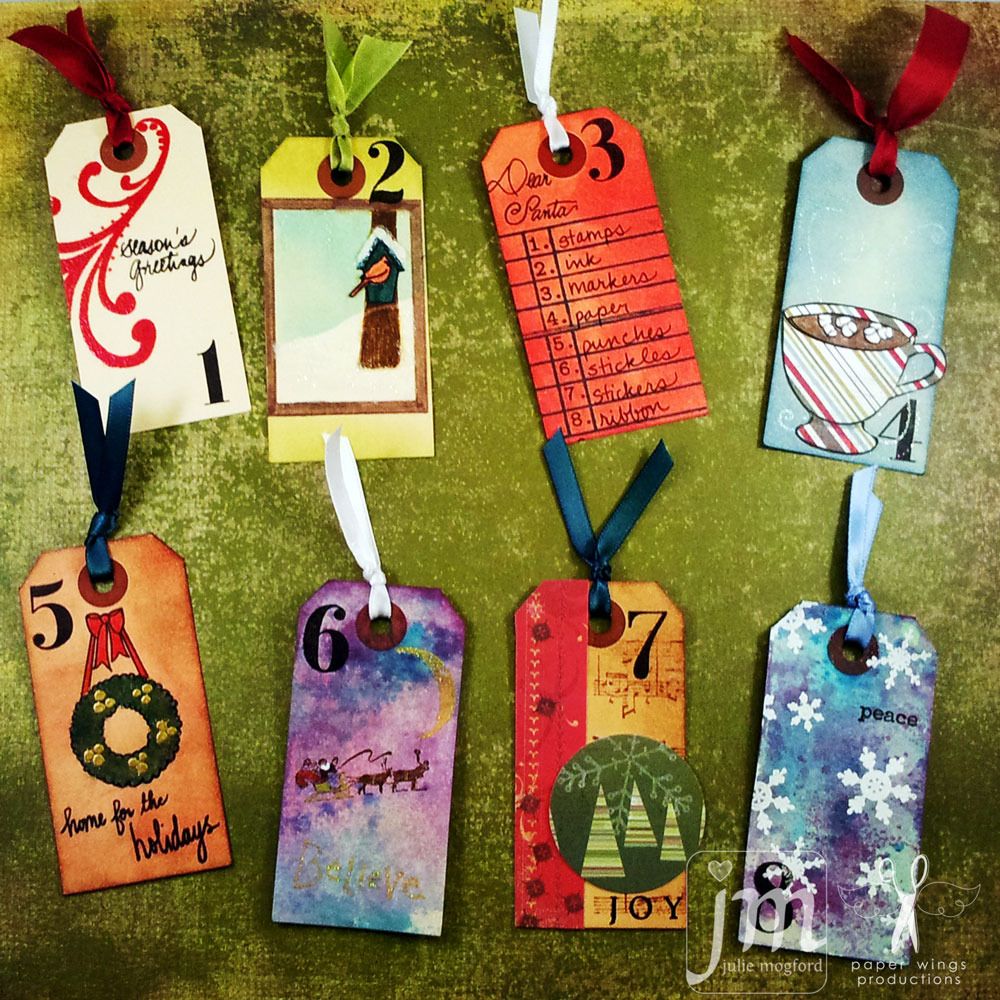
Aren't these fun?  Let's get a close up look to see more of the details. Just a note:  All of the numbers are stamped in Versa Fine Black Onyx and are from the Perfect Number Clear Set.


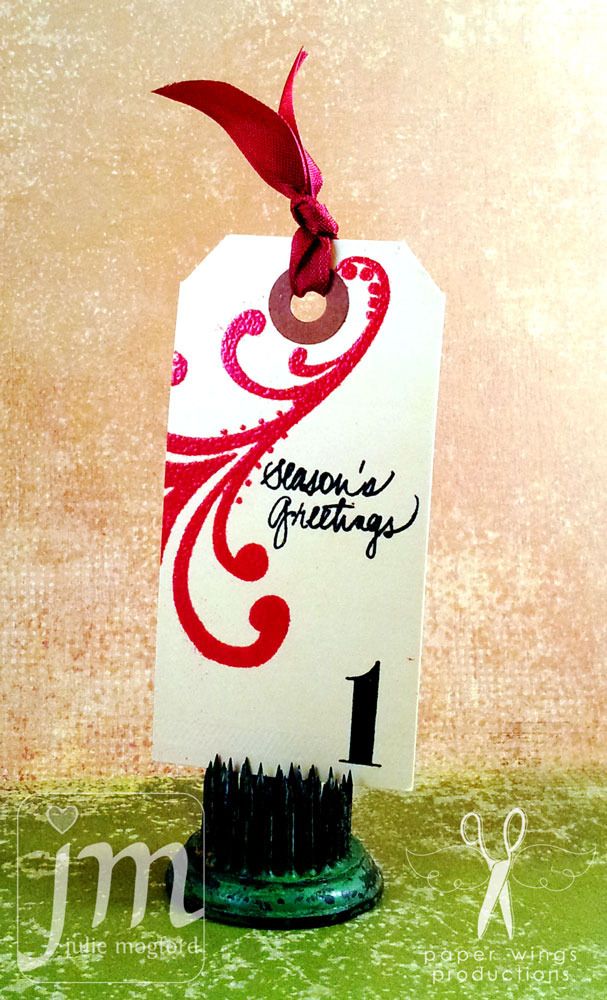
Details: Flourish Fun 1 large stamp embossed in Lindy's Gang embossing powder. Winter Mix it Up sentiment stamped in Versa Fine Black Onyx.


Details: The window, bird house and cardinal set up the scene along with one tree trunk from the Howlin' For You set. Distress inks and Distress markers and a Stampin' Up! Chocolate Chip marker add pretty colors and all is finished off with Picket Fence stickles for snow and ice cicles. And, I found a little Liquid Applique and heated it up to make snow on the birdhouse. 


Details: Does this wish list look like yours??  This was too fun to pass up.  The background is inked with Festive Berries distress ink and the ledger is stamped in Pine Needles distress ink. I then added the Top 10 number list and Dear Santa from the Christmas Mix It Up set.


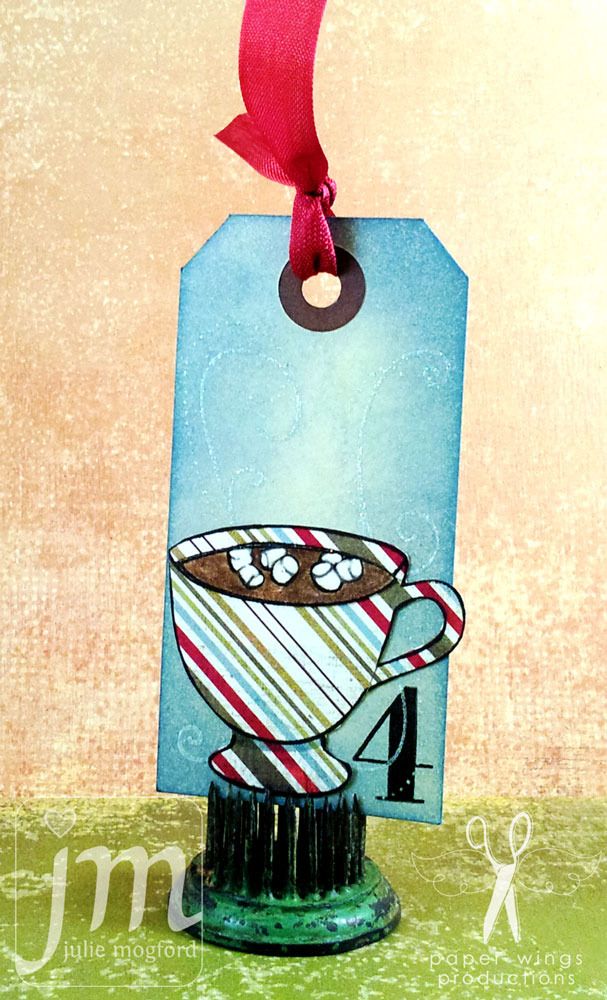
Details: MMM..Marshmallows!  The tag is inked with Tumbled Glass and stamped with flourishes from Flourish Fun 2 and embossed with Irridescent Ice EP from Stampin" Up! The cup from Play with your Coffee is paper pieced on Basic Grey "Figgy" paper.  The cocoa is Chocolate Chip marker again, and the marshmallows are so white from a Souffle pen.


Details: More distress ink on background (love how quick that is) and stamps from the Door set to create the wreath, colored with prisma pencils, and the little gold embossed dots are from Flourish Fun 2 set.  The sentiment is actually from two sets: Christmas Mix It Up and Holiday Mix It Up.


Details: Of course I had to get some sprays out and this one looked a little like a sky to me.  The scene unfolded before my eyes.  A crescent moon from the Build a Scene set, colored in with a VersaMark marker and embossed with Egyptian Gold EP (and the Believe sentiment too from the Dear Santa Cling set).  And the little santa from the Jolly Old St. Nick cling set looks so cute flying in the sky.


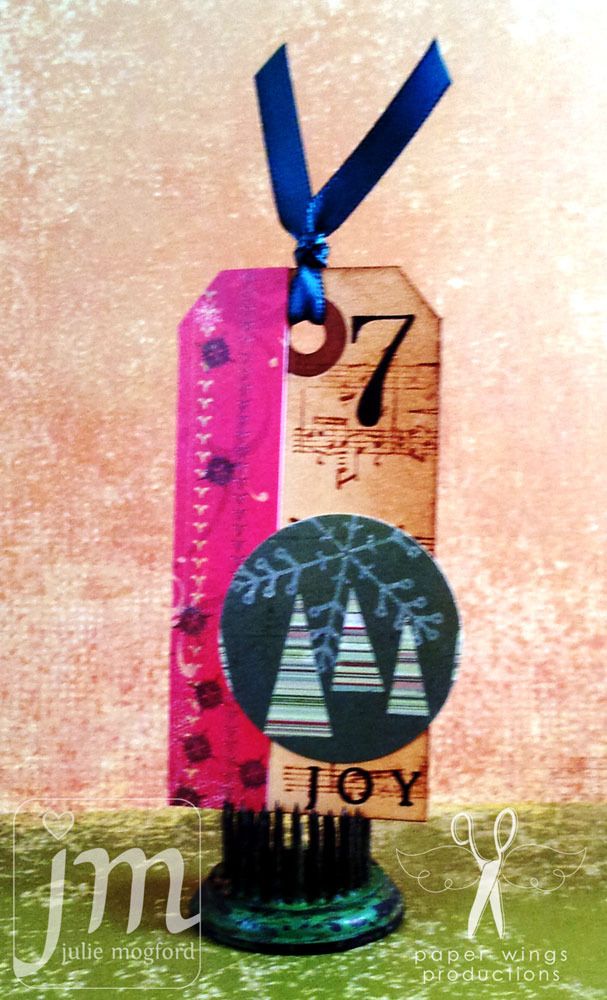
Details: I used a little more paper piecing with "vintage" Memory Box Christmas papers, but I accented the papers with the music background and letters from the Perfect Alphabet set to spell out JOY!


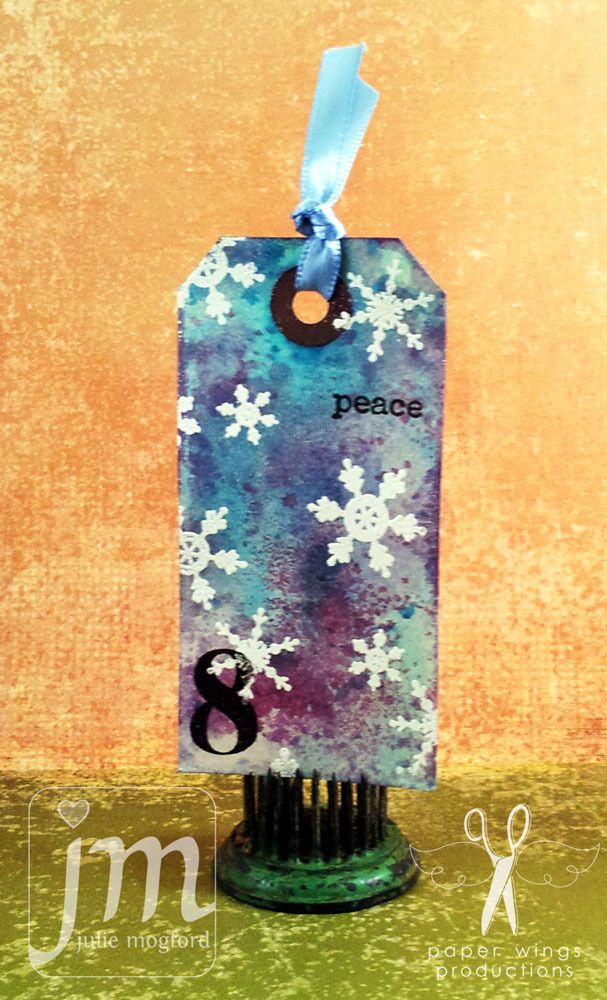
Details: This was another tag that I used sprays to create a background.  I thought it was just begging for Whisper White (Stampin' UP!) embossed snowflakes from the Winter Mix It Up set.  I used just a portion of the "peace on earth" from the Typed Wishes to add a simple sentiment.


So, what do you think???  This is only the beginning!  There will be two more installments of the remaining tags.  I've really enjoyed pouring over my Paper Wings stamps and looking for great images to create these fun tags.  I hope you are inspired in some way for your own upcoming holiday projects and we would love to see what you make with these and other Paper Wings Productions stamps.  Add your projects to our flickr group, to Pinterest, comment with a link on this post or even email pictures to us!


"It's beginning to look a lot like Christmas......"
Happy Stamping!

Julie


Related Posts Plugin for WordPress, Blogger...