Hi, it's Ashley here today and I'm sharing a Christmas shaker card that I think is super cute! To start, I used a polka dot stencil and
distress inks for my card base. Next, I used a circle die to cut out the
center of my card.
Then I started working on my sentiment for the inside of the card. I used the Fall Mix It Up stamp set to stamp 'wishing you' and Say It Winter Greetings stamp set for 'merry Christmas.' I heat embossed 'merry' with green embossing powder and I love the font for 'Christmas.'
My
final step was to finish the shaker card. Using the Fuse tool makes
shaker cards super easy! I added some sequins, a little resin piece, and then I stamped an ornament and some stars from the Winter Wood Cuts stamp set, fussy cut those, and threw them in there too. Here's my finished card:
Thanks for looking! :)
Showing posts with label holiday. Show all posts
Tuesday, December 8, 2015
Tuesday, September 22, 2015
happy Halloween!
Hello everyone! Ashley here with a Halloween card to share today!
I cut this with my Cricut and then cut a piece of white paper for the background, which I colored with distress ink. I used the Little Halloween clear stamp set from Paper Wings Productions. I think the little pumpkins and the bat are so cute (not scary!) and I love the font too. There's also a similar stamp set - Halloween Mix It Up - that's got a witch hat and spiders!
I colored my bat with Copic markers and adhered only his body to the card base so that his little wings are dimensional. Then I stamped my sentiment with Memento ink. Pretty simple, but really cute for Halloween! For more Halloween inspiration, be sure to check out Pam's Halloween card.
I cut this with my Cricut and then cut a piece of white paper for the background, which I colored with distress ink. I used the Little Halloween clear stamp set from Paper Wings Productions. I think the little pumpkins and the bat are so cute (not scary!) and I love the font too. There's also a similar stamp set - Halloween Mix It Up - that's got a witch hat and spiders!
I colored my bat with Copic markers and adhered only his body to the card base so that his little wings are dimensional. Then I stamped my sentiment with Memento ink. Pretty simple, but really cute for Halloween! For more Halloween inspiration, be sure to check out Pam's Halloween card.
Labels:
autumn,
bat,
card,
cardmaking,
cards,
fall,
halloween,
holiday,
little halloween
Saturday, December 27, 2014
Scrapbook Saturday-Holiday Cutie
Happy Saturday Paper Wings Fans! Erica here with you today sharing holiday layout I created using product from the Paper Wings Productions shop!
I pulled out one of my past Holiday Nesting Components kits, some stamps, gelatos and ink and began to create! I started with a plain white piece of 12x12 cardstock. I pulled out a silver colored gelato and added some to a big clear block. I also added some water to create a nice light watercolor and then applied a piece of clear packaging to the block and picked up some of the color. I dabbed it all over my white cardstock just to add a little something extra. Most of it ended up getting covered up but I am ok with that. I do like the bits and pieces that you can see. The photo I am scrapbooking is of our daughter last year in front of the Christmas tree. This is one of my favorite photos of her from last Christmas. I love the bokeh in the background!
I used the Tim Holtz rub-ons that came in the kit all around my layers and added one of the background texture stamps from the Art Textures stamp set. I added a few of the chipboard pieces from October Afternoon that also were included in this kit and the cute JOY wood veneer. For my title Holiday Cutie I used the Holiday Clear stamp set and used the word Holidays. I masked off the letter S so it would just stamp out Holiday. I used some red stickers from my stash to spell out cutie! I love how it turned out and I hope you enjoy it as well! The items I used today are still available in the Paper Wings Productions shop and some of them are even on sale! You will find them linked below! I hope you all have had a wonderful holiday season and I wish you a very blessed New Year! Thanks so much for stopping today and remember to let your creativity take flight!
Friday, December 14, 2012
Feature Friday: Peace on Earth
Good day peeps,
It's Shay here today and thank goodness it is Friday! I don't know what it is about the end of the year, but life gets a bit crazy. Why not take a little break and check out the latest offerings from the oh so talented gals this week? Norma's piece of art is stunning (either version is delightful) and Julie's one beautiful layer cards are anything but flat!
I have a little something sparkly (more so in real life) to share with you.
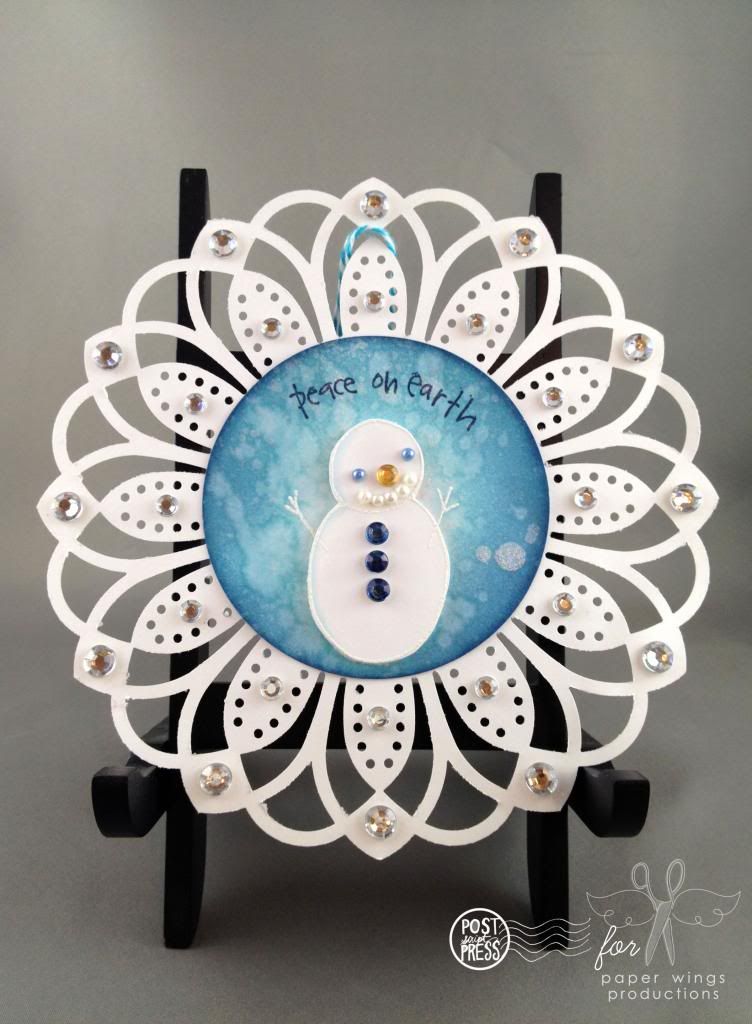
Using the adorable snowman from the Snowman Love stamp set illustrated by Liz Allen:
1. Heat embossed the snowman using white embossing powder on a circle and again on a scrap of white cardstock.
2. Use three shades of blue Distress Inks and ink blending tool to color in the circle. The white embossing resists ink so wipe off any ink from the edges of the snowman.
3. Sprinkle water and then spray iridescent spray on the circle. Allow to dry. Stamp "peace on earth" from Little Christmas (another sweet sentiment set by Liz Allen) in dark blue ink curving the stamp on your block to mimic the curve of the circle. Clear stamp are quite flexible. In a darker blue ink edge the circle.
4. Cut out snowman from white cardstock cutting off arms. Color and decorate snowman as desired. I added a little pale blue marker and white gel pen to the left edge of the snowman to make the white pop a bit more. I decorated the snowman with jewels and pearls. Some of the jewels I colored in with Copic markers to change the color.
5. Adhere decorated snowman on the circle right over the stamped image of the snowman using dimensional adhesive. Now your snowman has arms without fussy cutting! Whew.
6. Adhere circle to a bought doily or a die cut or punched doily. Liberally decorate with jewels (and/or glitter, stickles or anything else to make it shine). Tie bakers twine to top (or any ribbon of your choice).
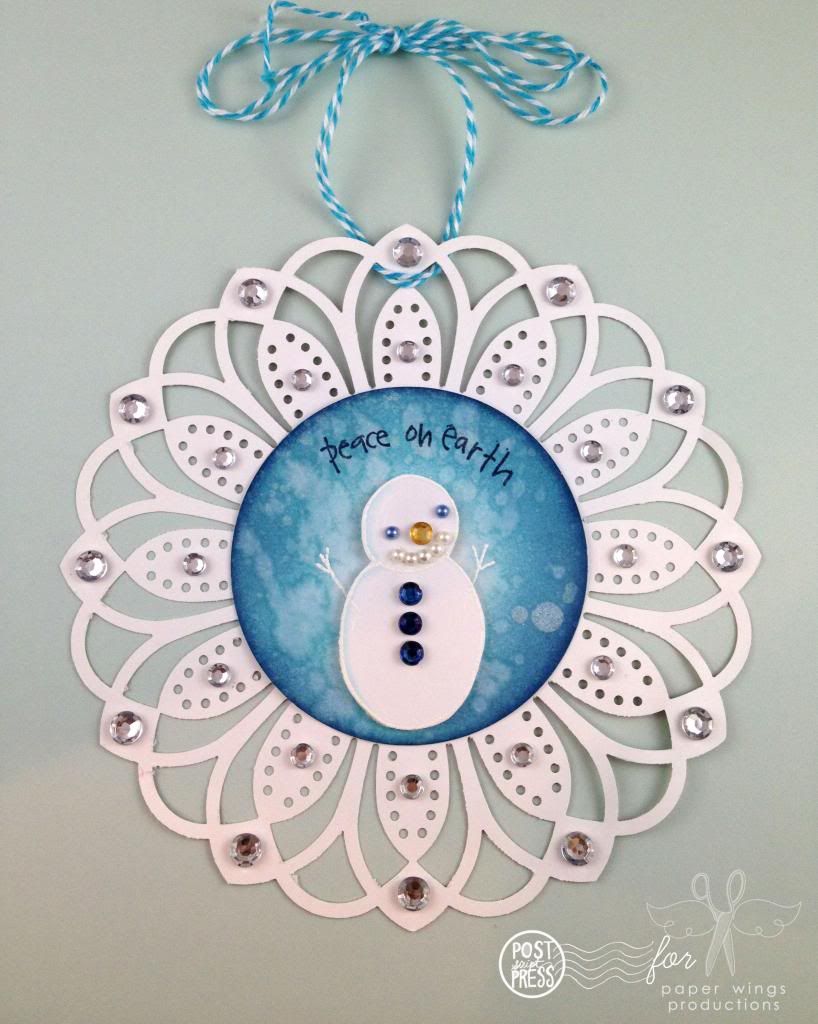
And here is another image for your viewing pleasure:
This little snowman would add some holiday sparkle on a tree, around the house (or office) or on a present (perhaps add the name of the recipient on the back). It is sure to create smiles. Make a few of them to make a knock-out garland. Another great thing about this snowman ornament/tag is that you can give it to anyone whether they celebrate Christmas or not.
I hope you ink up some Paper Wings Productions stamps and create some holiday sparkle! We would love to see what you make with Paper Wings Productions stamps. Add your projects to our flickr group, to Pinterest, comment with a link on this post or even email pictures to us!
AND don't forget to enter to the pin it to win it contest to get free Paper Wing Production stamp goodness!
Supplies:
Stamps: Snowman Love and Little Christmas
Cardstock: Georgia-Pacific
Ink: Tim Holtz Distress Ink by Ranger in tumbled glass, broken china and faded jeans; Jenni Bowlin for Ranger in spice tin
Other: ink blending tool by Ranger; pearls and jewels by The Paper Studio; blue pearls by Kaiser Craft; white embossing by Judikins; bakers twine by Doodlebug Design, white gel pen by Signo Uniball; punch by Martha Stewart Crafts; iridescent spray by Memory Mists
It's Shay here today and thank goodness it is Friday! I don't know what it is about the end of the year, but life gets a bit crazy. Why not take a little break and check out the latest offerings from the oh so talented gals this week? Norma's piece of art is stunning (either version is delightful) and Julie's one beautiful layer cards are anything but flat!
I have a little something sparkly (more so in real life) to share with you.
Using the adorable snowman from the Snowman Love stamp set illustrated by Liz Allen:
1. Heat embossed the snowman using white embossing powder on a circle and again on a scrap of white cardstock.
2. Use three shades of blue Distress Inks and ink blending tool to color in the circle. The white embossing resists ink so wipe off any ink from the edges of the snowman.
3. Sprinkle water and then spray iridescent spray on the circle. Allow to dry. Stamp "peace on earth" from Little Christmas (another sweet sentiment set by Liz Allen) in dark blue ink curving the stamp on your block to mimic the curve of the circle. Clear stamp are quite flexible. In a darker blue ink edge the circle.
4. Cut out snowman from white cardstock cutting off arms. Color and decorate snowman as desired. I added a little pale blue marker and white gel pen to the left edge of the snowman to make the white pop a bit more. I decorated the snowman with jewels and pearls. Some of the jewels I colored in with Copic markers to change the color.
5. Adhere decorated snowman on the circle right over the stamped image of the snowman using dimensional adhesive. Now your snowman has arms without fussy cutting! Whew.
6. Adhere circle to a bought doily or a die cut or punched doily. Liberally decorate with jewels (and/or glitter, stickles or anything else to make it shine). Tie bakers twine to top (or any ribbon of your choice).
And here is another image for your viewing pleasure:
This little snowman would add some holiday sparkle on a tree, around the house (or office) or on a present (perhaps add the name of the recipient on the back). It is sure to create smiles. Make a few of them to make a knock-out garland. Another great thing about this snowman ornament/tag is that you can give it to anyone whether they celebrate Christmas or not.
I hope you ink up some Paper Wings Productions stamps and create some holiday sparkle! We would love to see what you make with Paper Wings Productions stamps. Add your projects to our flickr group, to Pinterest, comment with a link on this post or even email pictures to us!
AND don't forget to enter to the pin it to win it contest to get free Paper Wing Production stamp goodness!
Take flight,
Shay.
Supplies:
Stamps: Snowman Love and Little Christmas
Cardstock: Georgia-Pacific
Ink: Tim Holtz Distress Ink by Ranger in tumbled glass, broken china and faded jeans; Jenni Bowlin for Ranger in spice tin
Other: ink blending tool by Ranger; pearls and jewels by The Paper Studio; blue pearls by Kaiser Craft; white embossing by Judikins; bakers twine by Doodlebug Design, white gel pen by Signo Uniball; punch by Martha Stewart Crafts; iridescent spray by Memory Mists
Wednesday, December 5, 2012
What's Up Wednesday: Easy Mass Production Christmas Cards
Hello there peeps!
It's Shay here today. First, did you see our cool new contest: pin it to win it? You could be one of three to win! And if you need some inspiration on which stamps to pin, did you see Norma's ornament HERE or Julie's canvas HERE? Keep on checking back all month for more amazing holiday projects from Norma and Julie!
I know that the holidays are almost upon us. Perhaps you need a little help with getting some pretty cards out pronto? With a single stamp, ink, patterned paper, a punch and a little bling you can mass produce several cards and have them ready to mail or give out in no time.
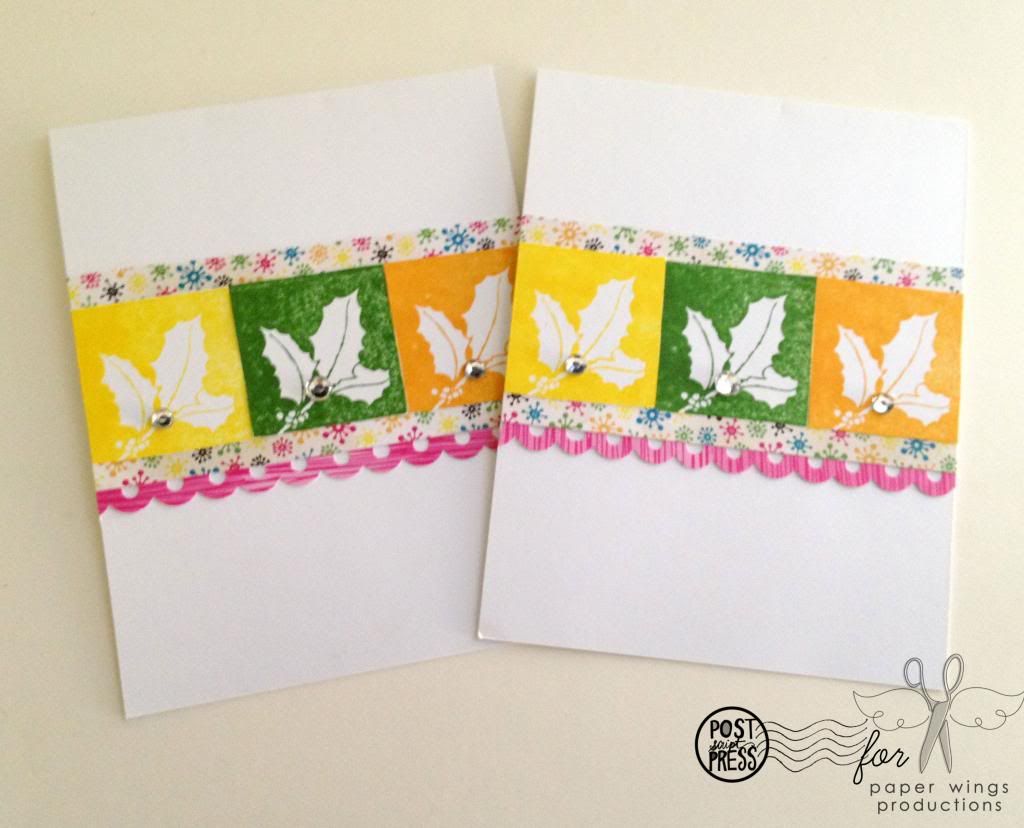
I chose solid block type images: the snowflake block from Holiday Greetings cling stamp set or Snowy cling stamp set; the holly block from Holiday Greetings cling stamp set or Holiday Greenery cling stamp set; and wise men block from Wise Men cling stamp set to stamp in three colors which coordinated with the patterned paper I picked out.
For these cards I wanted to play with non-holiday patterned paper in non-traditional colors. We all have beautiful patterned paper that with a holiday stamp can be transformed for the holidays. I went with a white cardbase to make these cards even more streamlined and inexpensive.
I found with the snowflake and holly stamps I could cut a strip of 2" height from the patterned paper and still have plenty of the patterned showing. I adhered three blocks onto my strip of patterned paper and then adhered a strip of coordinating punched paper to the bottom. Next, I adhered the whole strip to the cardbase and cut off any overhang. Last I added some jewels to the blocks for that holiday sparkle (a slightly larger jewel was placed on the center block).
The Wise Men card is a bit different in that the stamp is taller than the snowflake and holly block stamps and has more negative space. Because of the differences, I cut a strip of 3" from patterned paper and also added a banner style sentiment strip cut from white cardstock to place over some of that negative space. The sentiment comes from Holiday Greetings or Holiday Script--excellent stamp sets for this time of year!
Snowflake card (bonus: could be used for any winter holiday):
Holly card:
Wise Men card:
Without a doubt you could stamp the cardbase for more color and interest, but this design is so easy and quick that you could crank out a ton of cards without much trouble and then add your own touches and embellishments as you desire. Buttons, sequins, sprays/mists, pearls and brads are just a few things you could use. If you love to sew, sew your layers with matching thread or be even more bold by using metallic thread! You can also add a sentiment of your choice or put the sentiment inside. Merely change up the colors and patterned paper each time for a unique card each and every time!
I hope you ink up some Paper Wings Productions stamps and create your holiday cards! We would love to see what you make with Paper Wings Productions stamps. Add your projects to our flickr group, to Pinterest, comment with a link on this post or even email pictures to us!
Take flight,
Shay.
Supplies:
Snowflake card
Stamps: Holiday Greetings or Snowy
Ink: Jenni Bowlin for Ranger in lemon drops, stick candy and chewing gum
Cardstock: Georgia-Pacific in white
Patterned Paper: Neapolitan 6x6 paper pad from Dear Lizzy by American Crafts
Other: border punch by EK Success; clear jewels
Holly card
Stamps: Holiday Greetings or Holiday Greenery
Ink: Jenni Bowlin for Ranger in lemon drops, seed packet and chicken feed
Cardstock: Georgia-Pacific in white
Patterned Paper: Sketchpad 6x6 paper pad from Amy Tangerine by American Crafts
Other: border punch by EK Success; clear jewels
Wise Men card
Ink: Jenni Bowlin for Ranger in seed packet, chicken feed and cough syrup; Tim Holtz Distress Ink by Ranger in broken china
Cardstock: Georgia-Pacific in white
Patterned Paper: Memoir 6x6 paper pad by Studio Calico
Other: border punch by EK Success; clear jewels
Monday, December 3, 2012
Mixed Media Monday - Snowman Canvas
Hello Peeps!
Can you believe it is December already? Wow - this year has just flown by! Now that Thanksgiving has passed, we hare getting into the Christmas spirit at my house. My husband has been getting out our decorations, and we decided to get a small table top tree which is really great. Down here in San Antonio, however, it isn't really very cold outside. To try to enhance the idea of Christmas and cold weather, I have made a little Snowman canvas to put out as a new decoration.
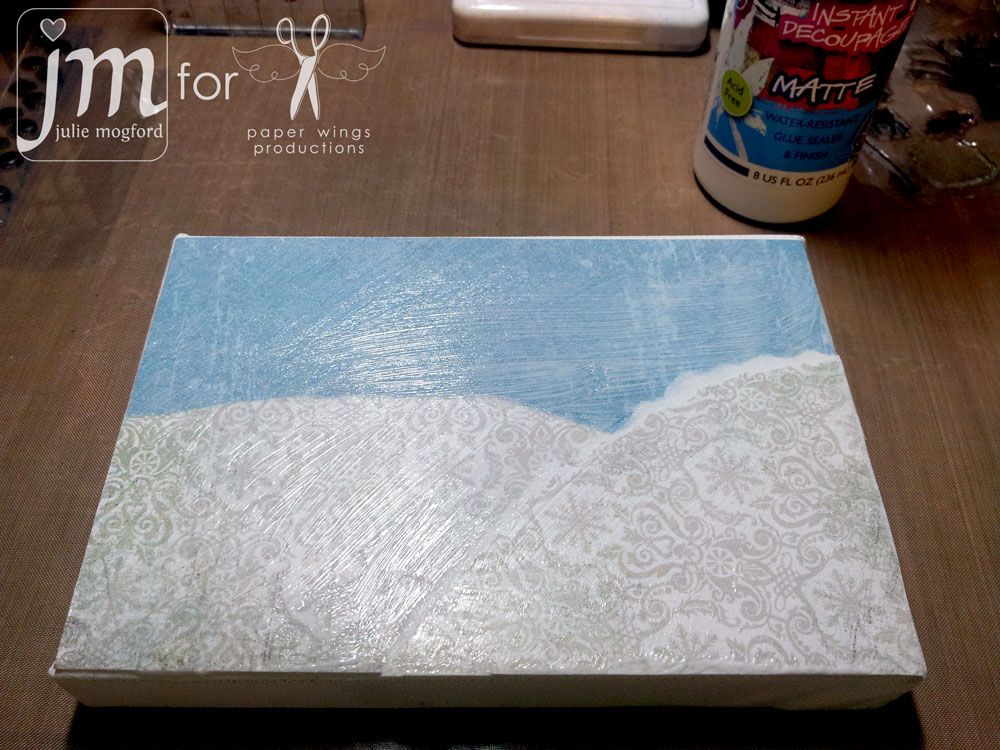
First I started with a 5x7 canvas and used Collage Pauge Matte to glue some papers from my stash to create a winter scene.
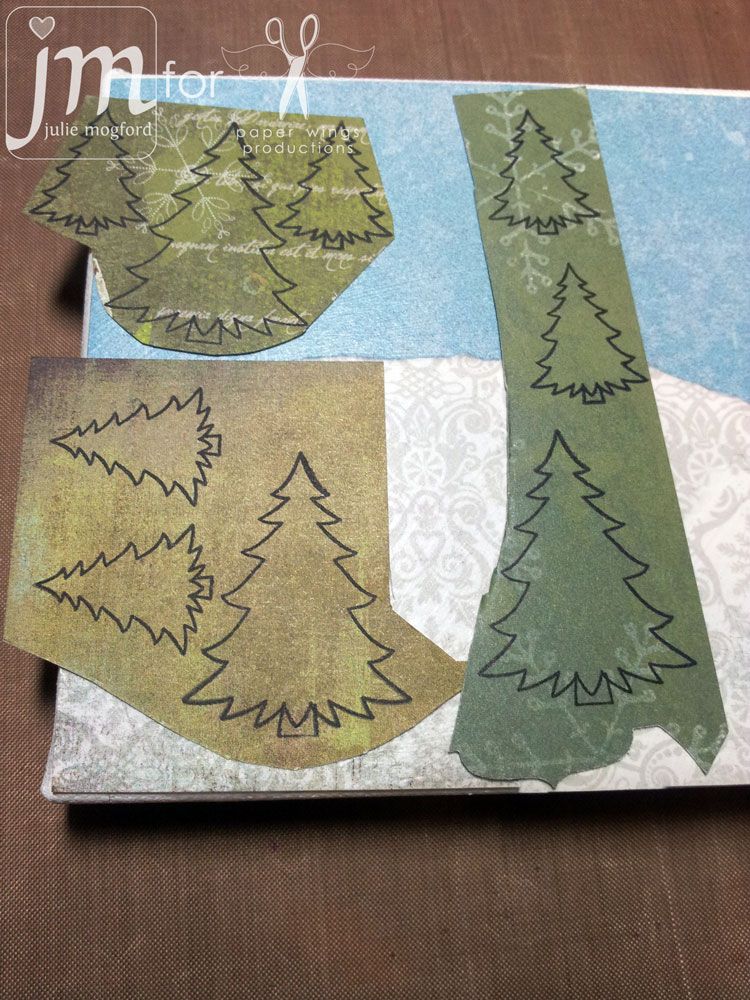
Next I stamped the trees from the Build a Scene stamp set on various green paper for some quick paper piecing. These are really not too tough to cut and the different green papers add a nice touch.
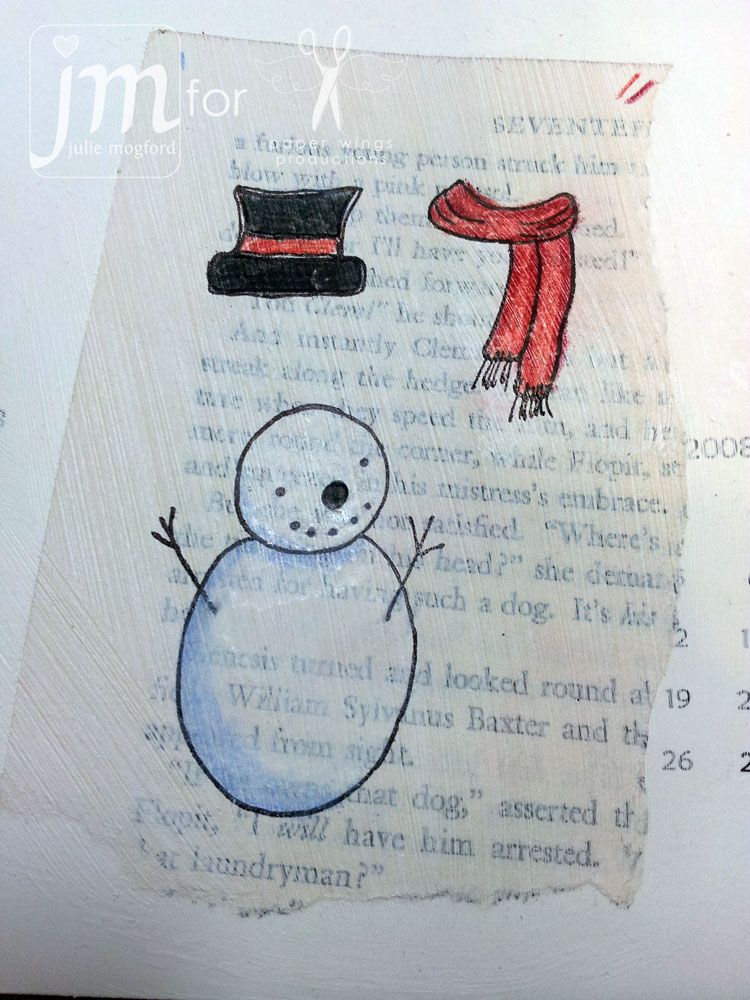
I chose to use the "oh so cute" snowman from the Snowman Love set. Here I have glued text to some cardstock and covered it with a light coat of gesso. Then I stamped the images in Archival ink. I colored them with prisma pencils. I also added some gesso around the edges to give it a bit of a frosty look.
Once all of the images were cut out, I glued them onto the canvas and added a few more details. I decided that this sweet snowman needed a cardinal on his hat so I used the bird from the Window set. After much deliberation, I finally chose the sentiment "holiday wishes". I was nervous I wouldn't stamp it straight so I stamped it on a separate piece of paper and then cut around the words. I added a few snowflakes from the Winter Mix It Up set to the blue sky using Stampin' Up! Whisper White craft ink. My two big finish items were adding Martha Stewart glitter to anything white and after shaking off any excess glitter, I put some shine on the hat and sentiment using Glossy Accents.
He's so cute!!! Let me tell you something - this thing really sparkles! I'm really going to enjoy having this in my Christmas decor collection! And, this project came together pretty quick! This would be a fun project to make for yourself, or as a gift to a friend! Now, if only we could have a little colder weather - dare I ask for a few snowflakes closer to Christmas? Well, I can dream, can't I??
Happy Stamping!!!
Julie
Wednesday, November 28, 2012
What's Up Wednesday: Golden Christmas
Hello peeps!
It's Shay here. I hope everyone had a wonderful Thanksgiving. Before I get onto today's post I wanted to draw your attention to Julie's series of Advent Calendar tags: Part 1, Part 2, & Part 3. They are each unique and delightful.
Now that December is nearing it is a perfect time to get those Christmas and holiday cards done.
I think gold is perfect for the holidays so I pulled out my gold embossing powder, some older Paper Wings Productions stamps along with newer stamps to create a couple Christmas cards. I really love how I was able to incorporate the older non-Christmas themed stamps with newer Christmas themed stamps to create very Christmasy cards.
For the first card I wanted to use the Madonna and baby Jesus image from Melange Women 2-Worldly Women set. After gold embossing the Madonna, I adhered the white cardstock panel to the white cardbase which I adhered a piece of decorative gold tissue paper and wrapped around with twine. I added a few gold embossed stars from Hanging Stars for added interest around the the Madonna and on the cardbase. The sentiment is from Christmas Mix It Up which I gold embossed yet again and cut into banner shapes.
The inspiration for this card was the three Magi who are sometimes portrayed as kings. There are great crown images found in the Royal Melange or Crowns sets. I chose to use the two larger crowns. On red cardstock I stamped in red the postcard image (such an awesome background) from Writing Backgrounds or Postcard. I then embossed each crown with a different embossing powder: silver, gold and copper. The sentiment is the same as the first card from Christmas Mix It Up which I stamped inside the banner from Banner Day--all gold embossed. The words fit rather well and because they are clear you can bend them slightly to fit the curve of the banner. I adhered this panel to a gold panel. The card base is red which I stamped in red using the big bold flourish from Flourish Fun 1 and the trio of dots from Flourish Fun 2. All of the red layers are distressed using the red ink and my ink blending tool.
I hope you ink up some Paper Wings Productions stamps and create festive holiday cards. We would love to see what you make with Paper Wings Productions stamps. Add your projects to our flickr group, to Pinterest, comment with a link on this post or even email pictures to us!
Take flight,
Shay.
Supplies:
Golden Mother and Child
Stamps: Melange Women 2-Worldly Women, Hanging Stars, Christmas Mix It Up
Ink: Versamark by Tsukineko
Cardstock: Georgia Pacific in white
Other: gold embossing powder by Judikins; brown and white twine by Divine Twine; decorative gold tissue paper
Three Kings
Stamps: Royal Melange or Crowns, Christmas Mix It Up, Banner Day, Writing Backgrounds or Postcard, Flourish Fun 1, Flourish Fun 2
Ink: Versamark by Tsukineko; Jenni Bowlin for Ranger in chili powder
Cardstock: gold and red
Other: gold, copper and silver embossing powder by Judikins and Ranger; ink blending tool by Ranger
Wednesday, November 7, 2012
What's Up Wednesday - Advent Calendar: Part 1
Hi Peeps!
It's good to be back here on the blog today. I hope you have been keeping up with all of the recent posts for fall, Halloween, and Day of the Dead from our talented ladies here at the Aviary - Carrie, Norma and Shay!
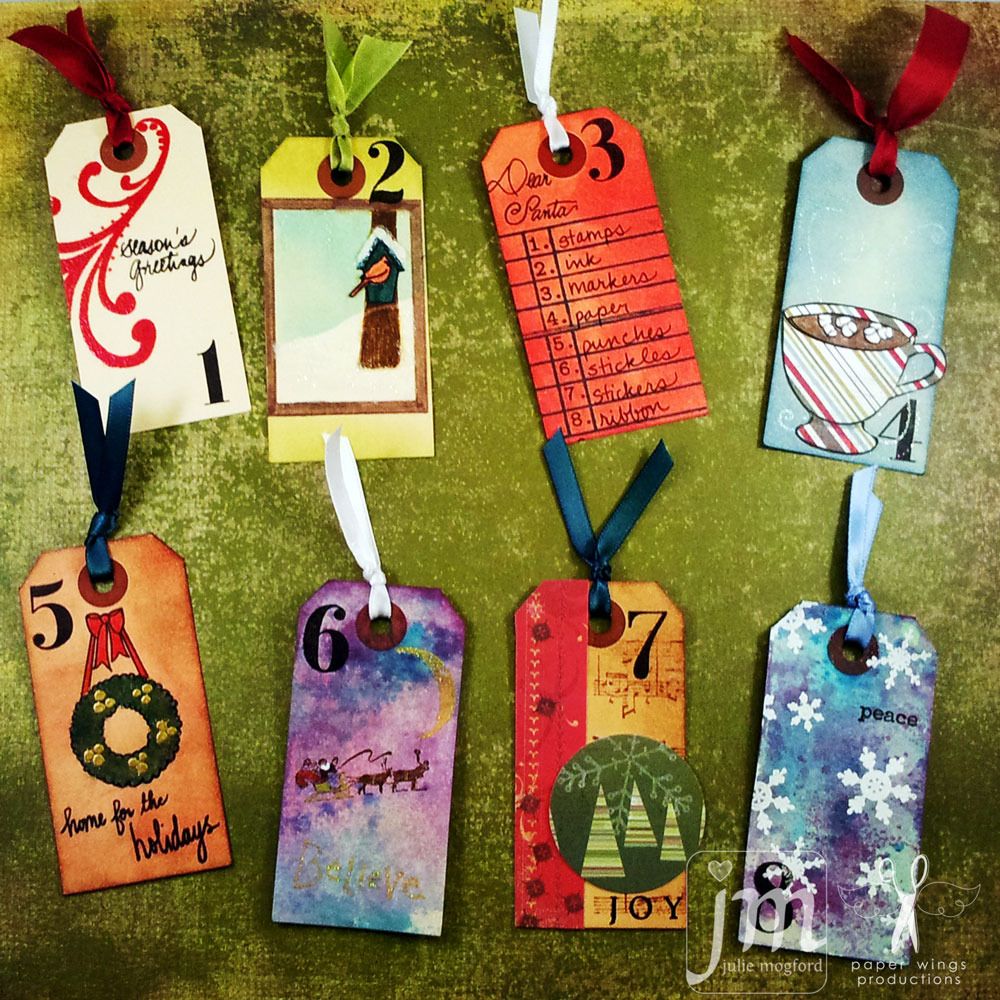
I'm going to change gears here from fall, to the upcoming winter holidays, and share with you a project I'm working on. For years I've been intrigued with Advent calendars creadted by other crafters using various papercrafting supplies, and I decided that this would be my year to make my first Advent Calendar and showcase the wide variety of stamps that Paper Wings carries. Today, I'm highlighting days 1-8.
Aren't these fun? Let's get a close up look to see more of the details. Just a note: All of the numbers are stamped in Versa Fine Black Onyx and are from the Perfect Number Clear Set.
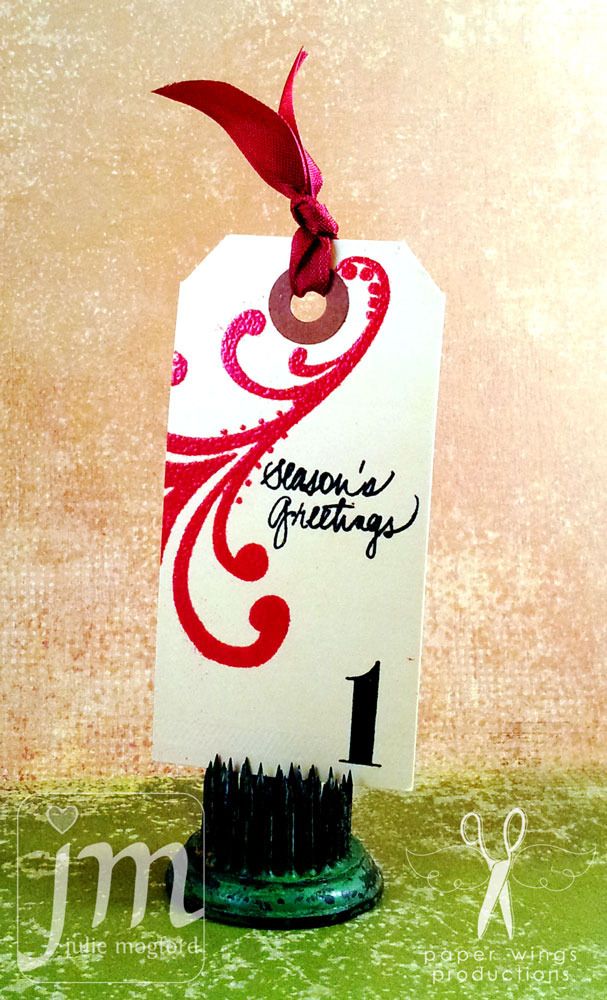
Details: Flourish Fun 1 large stamp embossed in Lindy's Gang embossing powder. Winter Mix it Up sentiment stamped in Versa Fine Black Onyx.
Details: The window, bird house and cardinal set up the scene along with one tree trunk from the Howlin' For You set. Distress inks and Distress markers and a Stampin' Up! Chocolate Chip marker add pretty colors and all is finished off with Picket Fence stickles for snow and ice cicles. And, I found a little Liquid Applique and heated it up to make snow on the birdhouse.
Details: Does this wish list look like yours?? This was too fun to pass up. The background is inked with Festive Berries distress ink and the ledger is stamped in Pine Needles distress ink. I then added the Top 10 number list and Dear Santa from the Christmas Mix It Up set.
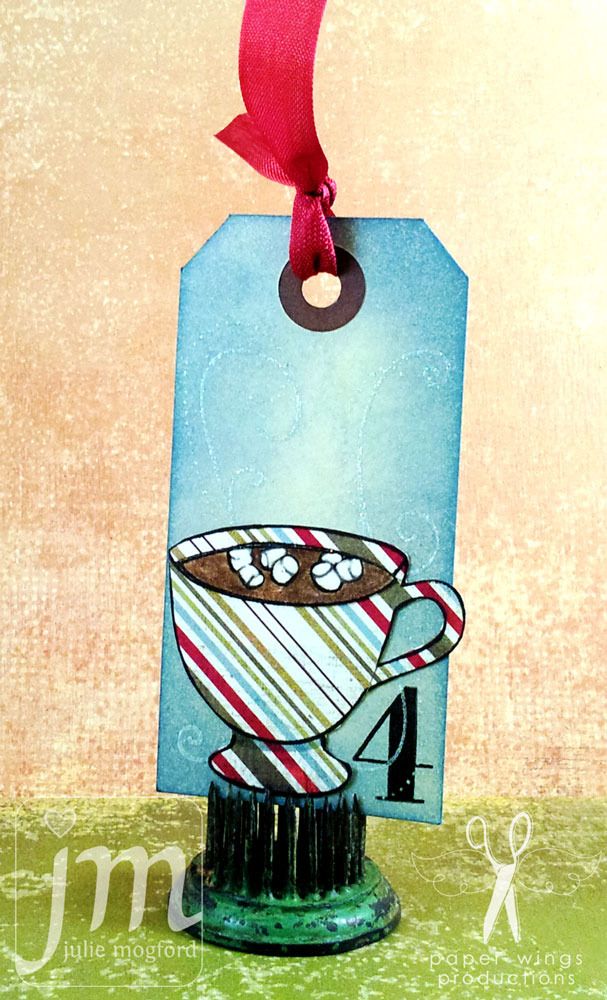
Details: MMM..Marshmallows! The tag is inked with Tumbled Glass and stamped with flourishes from Flourish Fun 2 and embossed with Irridescent Ice EP from Stampin" Up! The cup from Play with your Coffee is paper pieced on Basic Grey "Figgy" paper. The cocoa is Chocolate Chip marker again, and the marshmallows are so white from a Souffle pen.
Details: More distress ink on background (love how quick that is) and stamps from the Door set to create the wreath, colored with prisma pencils, and the little gold embossed dots are from Flourish Fun 2 set. The sentiment is actually from two sets: Christmas Mix It Up and Holiday Mix It Up.
Details: Of course I had to get some sprays out and this one looked a little like a sky to me. The scene unfolded before my eyes. A crescent moon from the Build a Scene set, colored in with a VersaMark marker and embossed with Egyptian Gold EP (and the Believe sentiment too from the Dear Santa Cling set). And the little santa from the Jolly Old St. Nick cling set looks so cute flying in the sky.
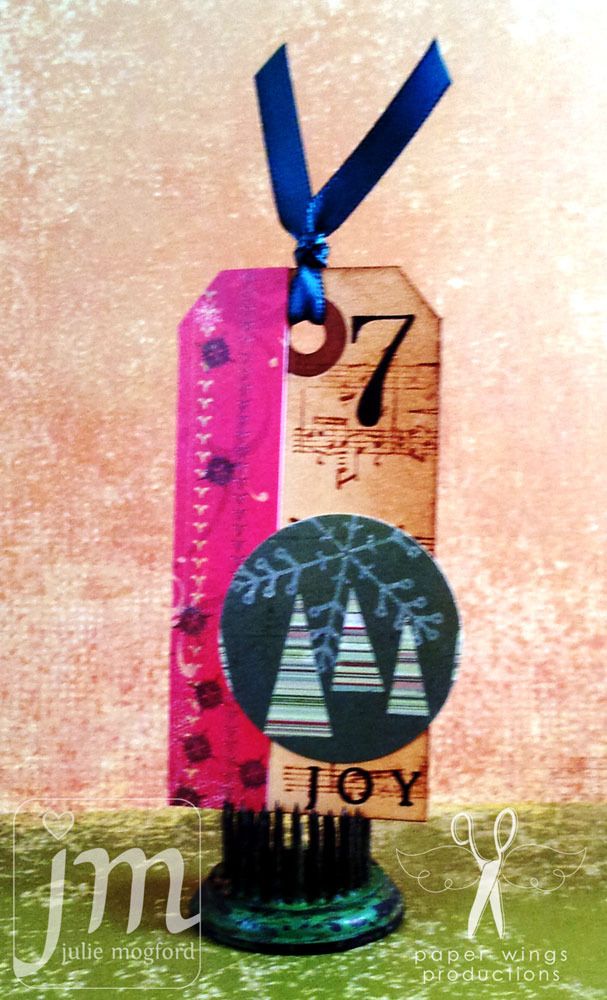
Details: I used a little more paper piecing with "vintage" Memory Box Christmas papers, but I accented the papers with the music background and letters from the Perfect Alphabet set to spell out JOY!
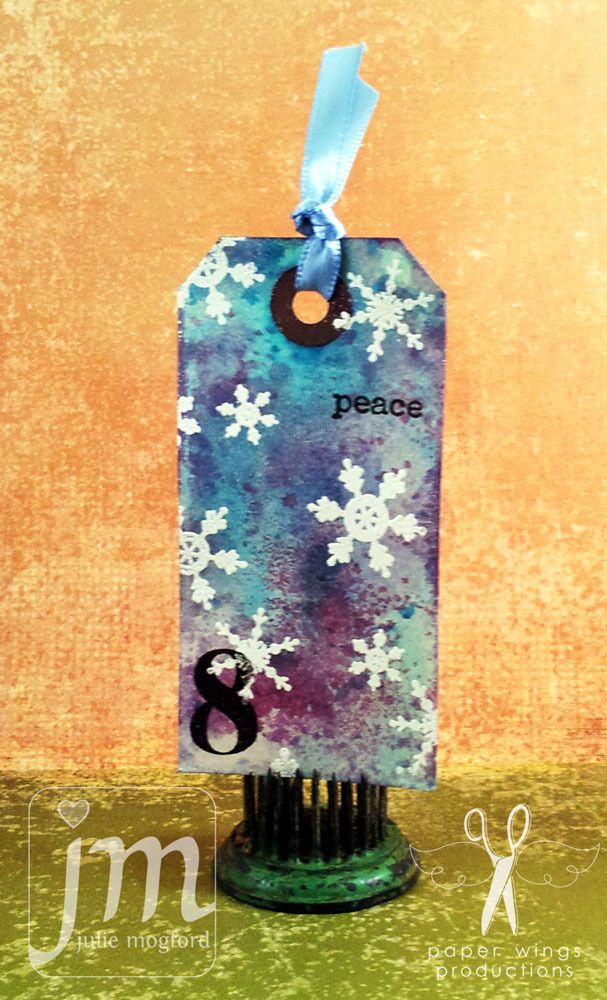
Details: This was another tag that I used sprays to create a background. I thought it was just begging for Whisper White (Stampin' UP!) embossed snowflakes from the Winter Mix It Up set. I used just a portion of the "peace on earth" from the Typed Wishes to add a simple sentiment.
So, what do you think??? This is only the beginning! There will be two more installments of the remaining tags. I've really enjoyed pouring over my Paper Wings stamps and looking for great images to create these fun tags. I hope you are inspired in some way for your own upcoming holiday projects and we would love to see what you make with these and other Paper Wings Productions stamps. Add your projects to our flickr group, to Pinterest, comment with a link on this post or even email pictures to us!
"It's beginning to look a lot like Christmas......"
Happy Stamping!
Julie
Subscribe to:
Posts (Atom)